Now that the annual ICAST tackle show is complete and the brand new for ‘19 products are filling local shelves, it’s time to shop for a new toy! Selection of your new reel is all about what size and type of line you intend to use this new rig for. Whether a spinning or a revolving spool reel, proper set up is the key for it to perform as you hope it will.
The use of braided line has caused a complete reinvention in the fishing tackle industry. Gone are the days of heavy, clunky reels and broom stick poles. That said, my normal inshore reels are spooled with around 150 yards of braid, either 10-, 15-, 20-, 30-, or 50-pound outfits depending on their use. For the most part, around 450 feet of line has proven itself to me as being more than enough line for most of my inshore work.
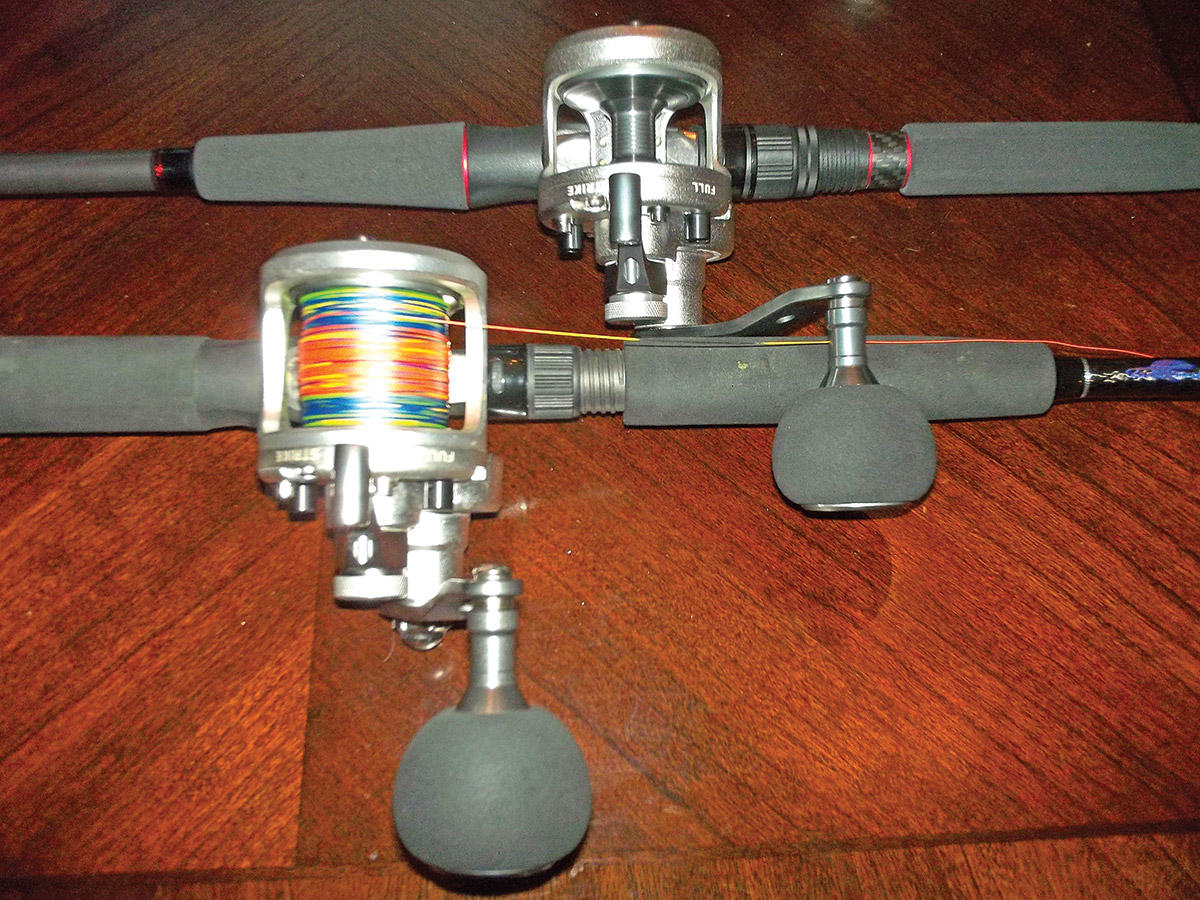
A modern, smaller reel that looks smaller than you would think is more than up to the task of fighting a fish while storing 150 yards of braided line. But a line capacity of 280 yards of 10-pound line is so much more than I need on this reel; I don’t want to waste the braid on line that will never see water! If you add the proper amount of backing under the braid, your spool will be the proper diameter when filled, and line pick up per revolution will be as designed.
Once you have the reel set up with the proper amount of backing, you shouldn’t need to take the backing off the reel ever again. If you do remove all the backing, make a line on the spool with a sharpie to show you the correct amount of filler line to spool before tying to your braid. I prefer to use Dacron line as backing, but mono is okay as well. Size is irrelevant, just fill to the line and you’re ready to spool your braid.
Every so often with a new reel, you won’t really have a good idea of how much backing to use. In this case, tie the braid on first to the spool. Wind on all the braid, then tie off to the backing. Continue filling the spool with backing until the spool is full. At this point you could tie it off and walk all line and braid off the reel. Untie the braid from the spool and walk to the other end of the line. Tie an Arbor knot with your backing to the spool and refill the spool. This is where you need to be sure to put the line on tightly, because loosely packed line will dig into itself and will need to be corrected while out on the water, so do it right. Take a damp washcloth in your rod hand ahead of the spool. Let the line pass through it on the way onto the spool. Create a good amount of tension on the backing as well as the braid so it packs on smoothly, evenly, and tight.
Braided line has a much longer usable life than other types of line. I get twi years out of my braided line by flipping it over at the end of the season. As winter maintenance, I clean and lube each reel and rod. When done I take a walk to the park and walk off all the braid. I clip it and tie off the previously used end of the braid and respool it back onto the reel backwards. This way the old line is against the backing, and new braid is on top and ready to go. Certain lines are so good, and they may be tough to find. No need to spend time and money buying line that still has another year of life in it.
Proper set up of your new reel is paramount if you expect it to perform well on your next personal best fish! Set it up correctly. Take proper care of it. You will have quality fish catching tools for many years to come.