A needlefish with a unique shape that was designed by one of surfcasting’s brightest.
This past year seems to have been the year of Steve Campo’s resurrection—at least in the minds of East Coast surfcasters. It seemed that everyone was fixated on his plug bags, his ‘toxic’ Red Fins and the mystique that followed one of the top surfcasters that ever fished the waters between Cape Cod and Breezy Point. I can’t say that I haven’t found myself swept up in the hysteria; his attention to detail and organization would make Sheldon Cooper sweat with lustful admiration and the guy lived the life we all wish we could live; plus, the guy could fish.
The details about Trophy Tackle and how it was formed are foggy at best, but I was lucky enough to catch the ear of one the Campo Crew, Alfred Anuszewski and he had all the details. The plugs were turned and assembled by a guy named Dee Seabury. He was a business partner of Marty McMillen, a member of the Campo Crew. Dee wanted to take a crack at building and selling plugs and, knowing Steve’s history, he wanted to include him in the design process.
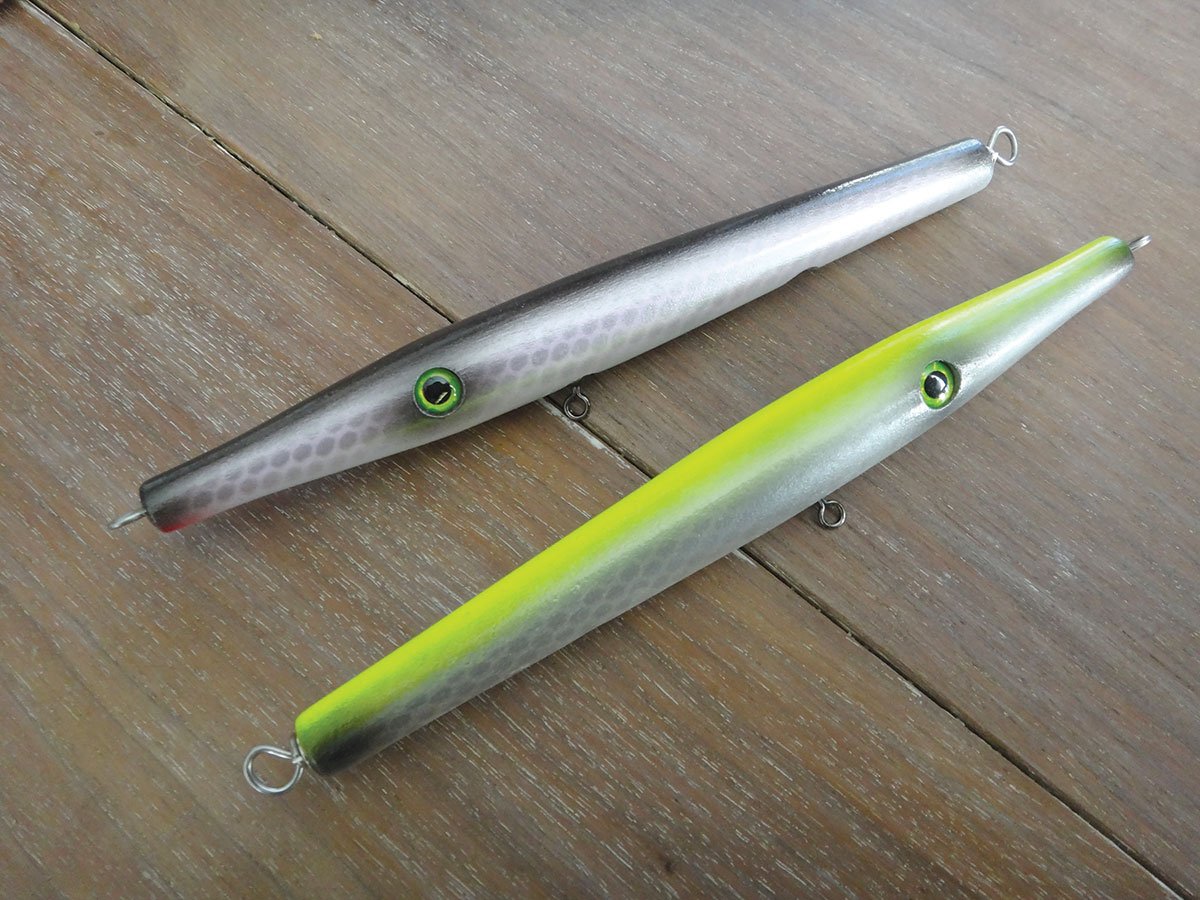
Steve worked on this Needlefish for more than six months, tweaking the shape and the weighting to achieve a specific action. Alfred told me that the shape of the plug was designed to do two things. The narrow tail was designed to cut through the wind, which it does very well. And the wide shoulders give the plug added buoyancy, planning the plug to the surface, even on the slowest retrieve. The Campo Crew called it their “change of pace plug.” And, particularly on flat nights, that super-slow-swim would catch when most other needles would not. Very few of these needles were ever sold and they are not easy to come by on the secondary market. One of its defining features is a custom scent chamber that is countersunk into the rear third of the plug. It’s designed to hold a few drops of scent and dispense it slowly over the course of several casts.
The Design
There are quite a few unknowns in this design because there are so few in existence. I couldn’t get my hands on one that I would be allowed to get wet (I was lucky to get one that I could take apart!). The other big question mark is the type of wood used. Without taking some 80 grit to the finish I can’t be sure—but given the trends of the time it was most likely maple or birch and if I had to guess I’d say they were made from a 7/8-inch birch dowel. With that said I used maple—the differences in average density between the two species are negligible.
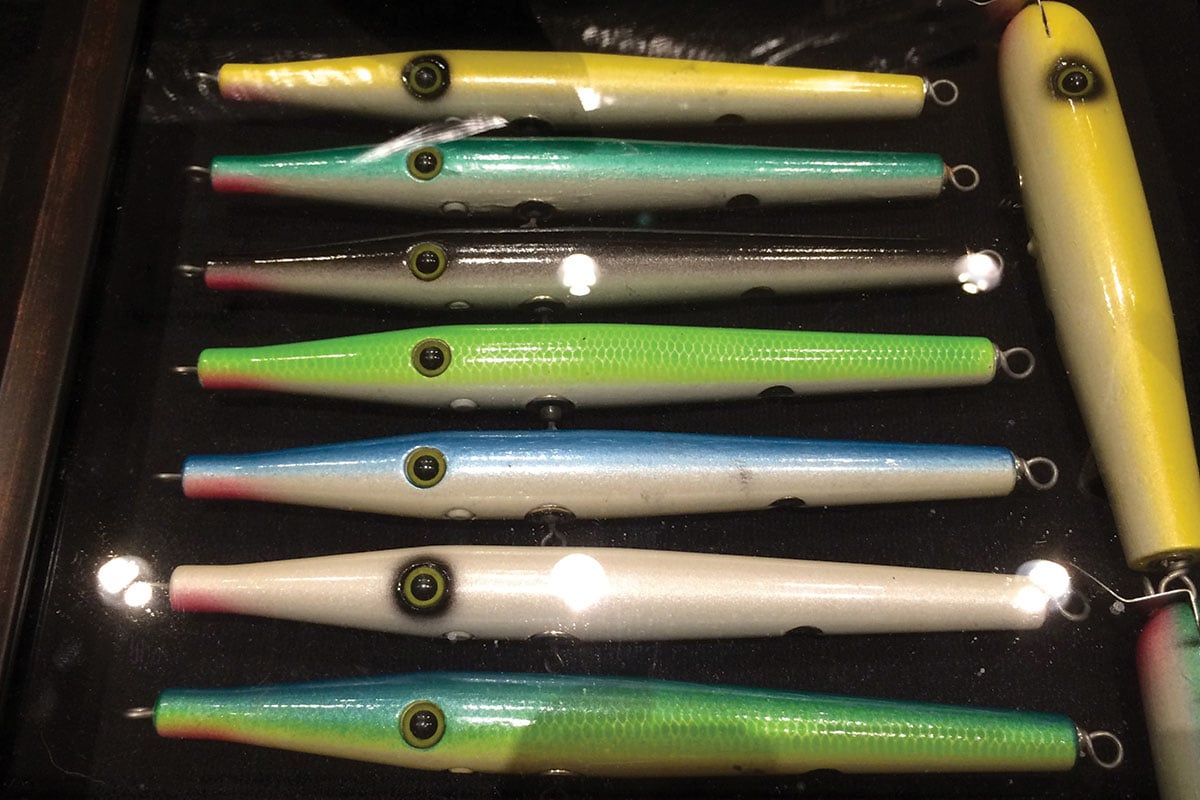
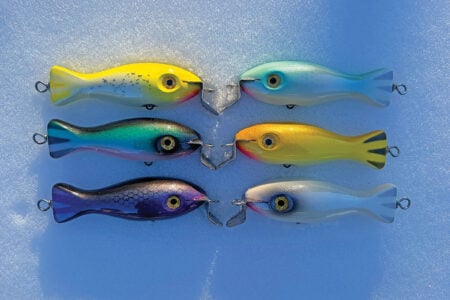
Alfred Anuszewski’s collection.
The Trophy Needle measures out at 7-5/8 inches in length with a maximum diameter of 7/8 inch. When examined closely this plug appears to have been designed using a ruler and graph paper, all of the lines that make up the body are straight—I suppose that might be typical of something designed by a metal worker who was approaching this with an analytical eye for making the job easy and not trying to mimic the delicate curvatures of nature.
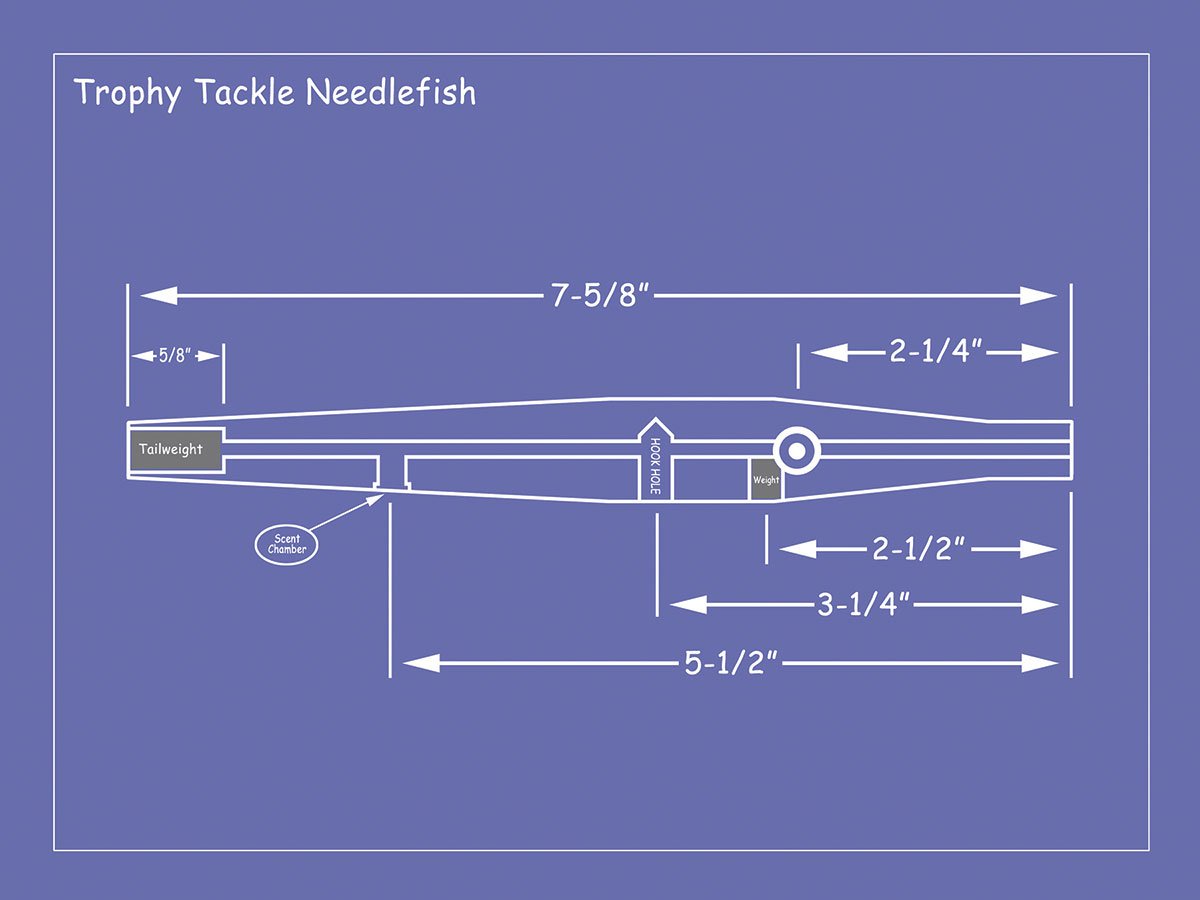
Knowing this, there are only five points of reference required when turning the body. I used 1×1 squares of soft maple cut into 8-1/2 inch lengths. I always begin by rounding the corners off of the block (leaving a short segment of each end square) before I set my marks. Shut off the lathe and lay out these five marks with a pencil and a ruler. Start by marking the nose and tail; these marks should be 7-5/8 inches apart. Then make marks at 1/2-inch back from the nose, another at 2-1/4 inches and one more at 4 inches. These are your reference marks and they should be refreshed as needed. Turn the lathe back on and touch each mark with your pencil to make them easier to see. Your target diameters are as follows:
| Nose: | 7/16-inch |
| 1/2-inch Mark: | 7/16-inch |
| 2-1/4 Mark: | 7/8-inch |
| 4-inch Mark: | 7/8-inch |
| Tail: | 1/2-inch |
The whole plug can be rouged out with a small or medium skew chisel and when you have these coordinates laid out, use a strip of 150-grit sandpaper to smooth it down and to feather the transitions between changes in diameter—because of the hardness of the wood, I recommend finish sanding the plug with 220, just a quick once-over to make it look extra slick.
Weights & Measures
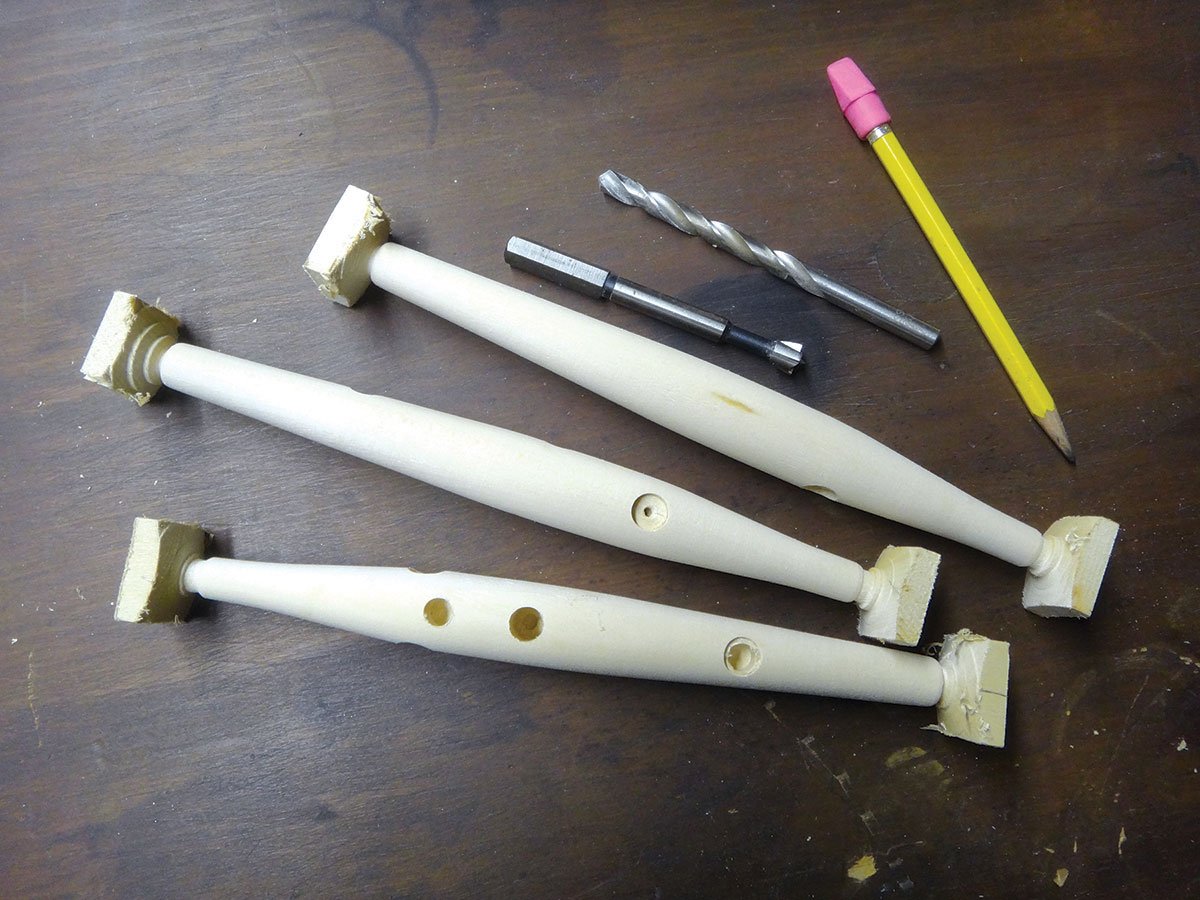
The next step is to drill the hook hole; this should be located at 3-1/4 inches and drilled a little past halfway using an 11/32-inch bit. Next swap in a 5/16-inch bit and drill a hole at 2-1/2 inches—just about halfway through—this hole will house the belly weight. If you decide to add the scent chamber (see sidebar) it should be located at 5-1/2 inches. Now use a 3/8-inch forstner to drill the eye sockets located at 2-1/4 inches; if you elect to use the plastic doll eyes like the original, drill them about 1/8-inch deep. If you’re going to use the typical ‘sticker’ 3D eyes, drill them about 1/16-inch deep. It should go without saying that all of these holes should be centered.
When you have all those holes drilled, you’ll need to thru-drill the whole deal using a 7-inch long, 5/32-inch bit. You can watch a video of me demonstrating this process on TheFisherman.com. Then cut the square off the tail only and use a drill press to drill a 5/16-inch hole about 5/8-inch deep coming in from the tail, following the thru-wire hole; this will house the tail weight. Once this is done, you can cut the square off the nose and give the whole plug a light sand with 220 to knock down all of the rough edges.
There is no perfect commercially available belly weight for this plug. It should weigh about 5 grams and the easiest way to achieve that is to use a NJTackle .39-ounce tail weight cut in half (You can cut the weights with a band saw.). Epoxy the weight into the hole and then cover it with an exterior wood filler such as Plastic Wood and sand it smooth.
Now seal the plug in a bath of 60 percent high gloss interior polyurethane and 40 percent mineral spirits. Let them soak for three or four minutes and then wipe them down and hang them to dry for at least 48 hours. When sanding produces a fine, white dust, they are ready to prime and paint. Give the whole plug another light sand and then prime with Painter’s Touch All Purpose Primer and paint using the paints of your choice.
Paint & Assembly
I have seen the originals in several colors ranging from solid black, to fluorescent green, to a bright sand eel to green mackerel. For my money I’d stick to simple colors like parrot, black, sand eel and black over silver, but you can get as crazy as you’d like. When the plug has been painted, Super Glue the eyes in and then cover the whole plug with the clear coat of your choice. I like to use bar top epoxy.
When the epoxy has cured (36 hours minimum), you’ll need to assemble the plug. Start by sliding a nose grommet over the doubled ends of the wire, drop the swivel into the belly hole and slide the wire through, threading the swivel on the way. Then fit the tailweight over the wire and into the hole, finishing with the tail grommet. The last step is to wrap the tail loop (see video on TheFisherman.com). And if you decided to add the scent chamber, epoxy the screen into place now. Then toss a pair of 4/0 VMCs on there and dream about fishing for a few months. At this point, you have a needlefish that was designed according to the needs of one of the most particular surfcasters on the planet—that doesn’t sound like a bad thing to me.
| THE SCENT CHAMBER |
|---|
|
As mentioned, these plugs were made with the help of a master metalworker and it’s likely that he fabricated the original scent chambers onsite. However, there is an easy way to get a similar result. You need to drill a 1/4-inch hole 1/2-inch deep with a 3/8-inch shallow recess (see photo). Cut some 3/8-inch circles out of a faucet screen with a pair of shears, punch a small hole in the center with an awl and—once the plug has been painted and cleared—epoxy the screen into the recess. The small hole will allow the scent to seep into the chamber faster. 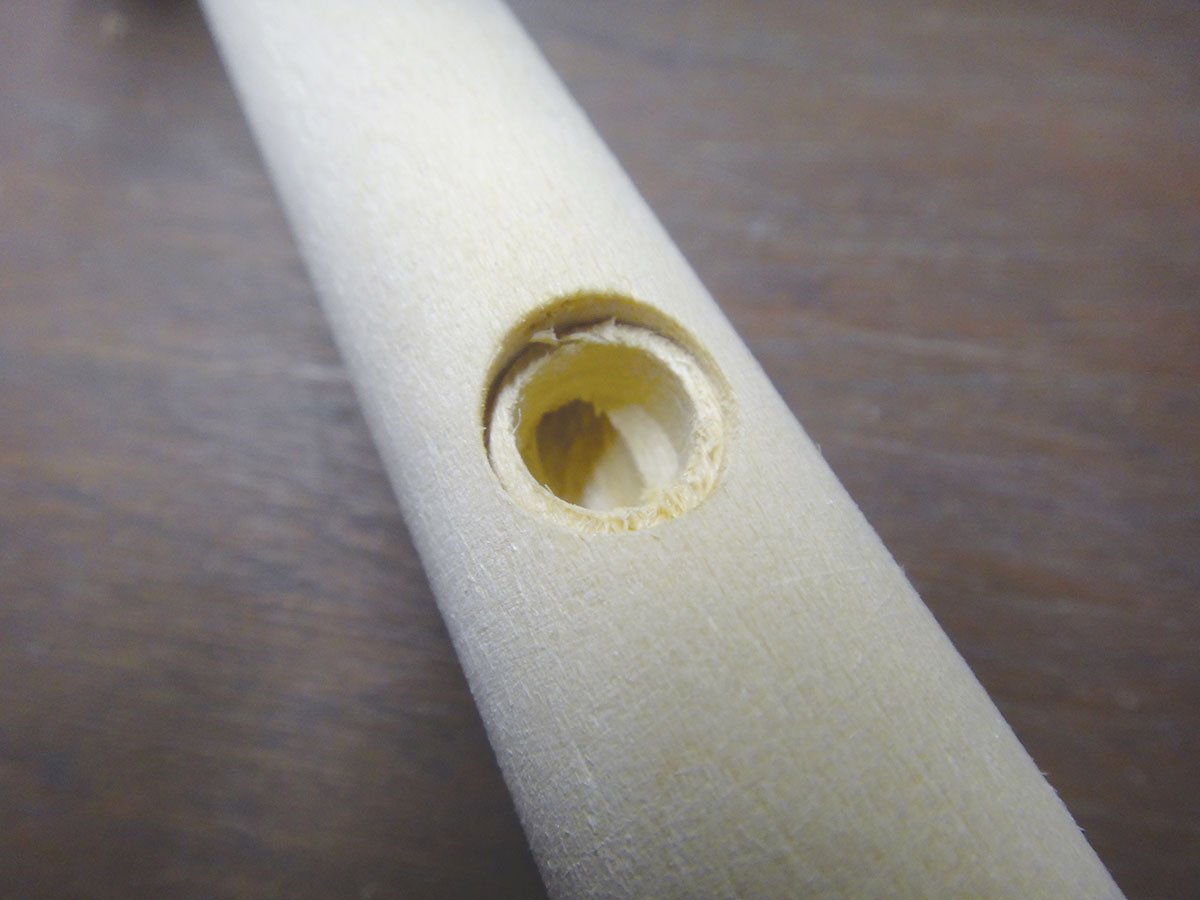 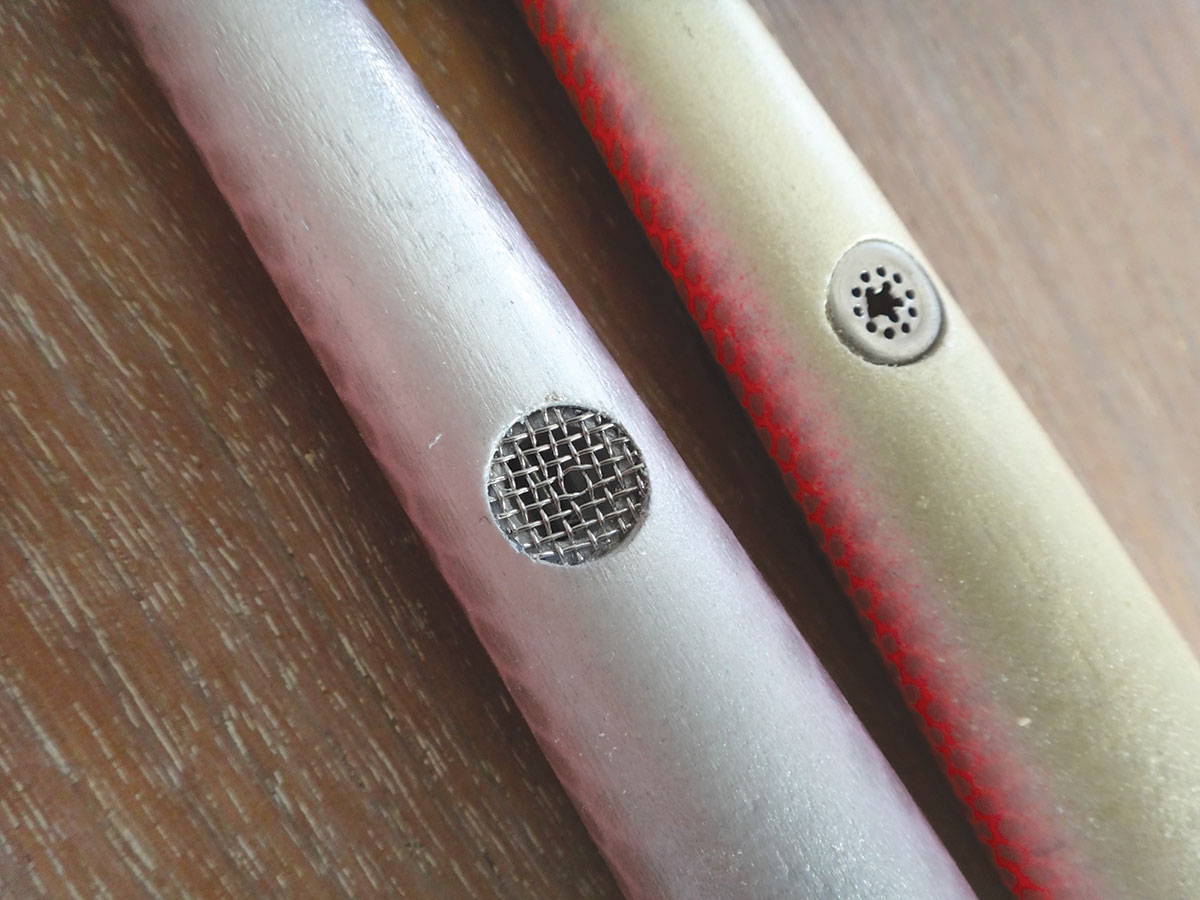 |