

Add another thrill to albie fishing by hooking speedsters on your own creations!
I am an admitted albie fanatic; I was ruined after my first albie in 2014. The hiss of my line slicing through the water as the fish streaked around the bow on a screaming run is seared into my memory. Even though albie season is so short, barely eight weeks in my home state of Connecticut, the rest of the year is spent counting down the days until the speedsters return.
In the depths of a recent winter, I decided to try making my own albie jigs. It quickly became clear that the holographic finishes of the commercially-made tins would be tough to duplicate in my basement, but the thought of catching an albie on a lure I made was just too alluring and there was no turning back.
I have always enjoyed making my own tackle, as a hobby it represents the confluence of some of my favorite things: fishing, tinkering, and saving money. As a kid I remember pouring sinkers in the driveway with my dad and brothers. In recent years I have gotten into pouring and powder coating homespun blackfish jigs, bucktails, and jigheads; simple things compared to the flashy finishes of commercial albie jigs. But, after some research I was delighted to find that applying holographic foil finishes to jigs is actually very doable in a home workshop.
The technique is called hot foil stamping and is commonly used in stationary shops to achieve a classy metallic print. The foiling technique has been adapted by crafty anglers and is perfectly suited for applying a factory grade finish to home poured jigs. I believe the best way to get good at something is to be bad at it first; this was definitely my experience with albie jigs. Eventually I ran out of mistakes to make and was able to produce great results. Hopefully, by sharing these lessons, I can help some folks get into a new and satisfying hobby that helps keep albie fever at bay in the offseason.

The Mold
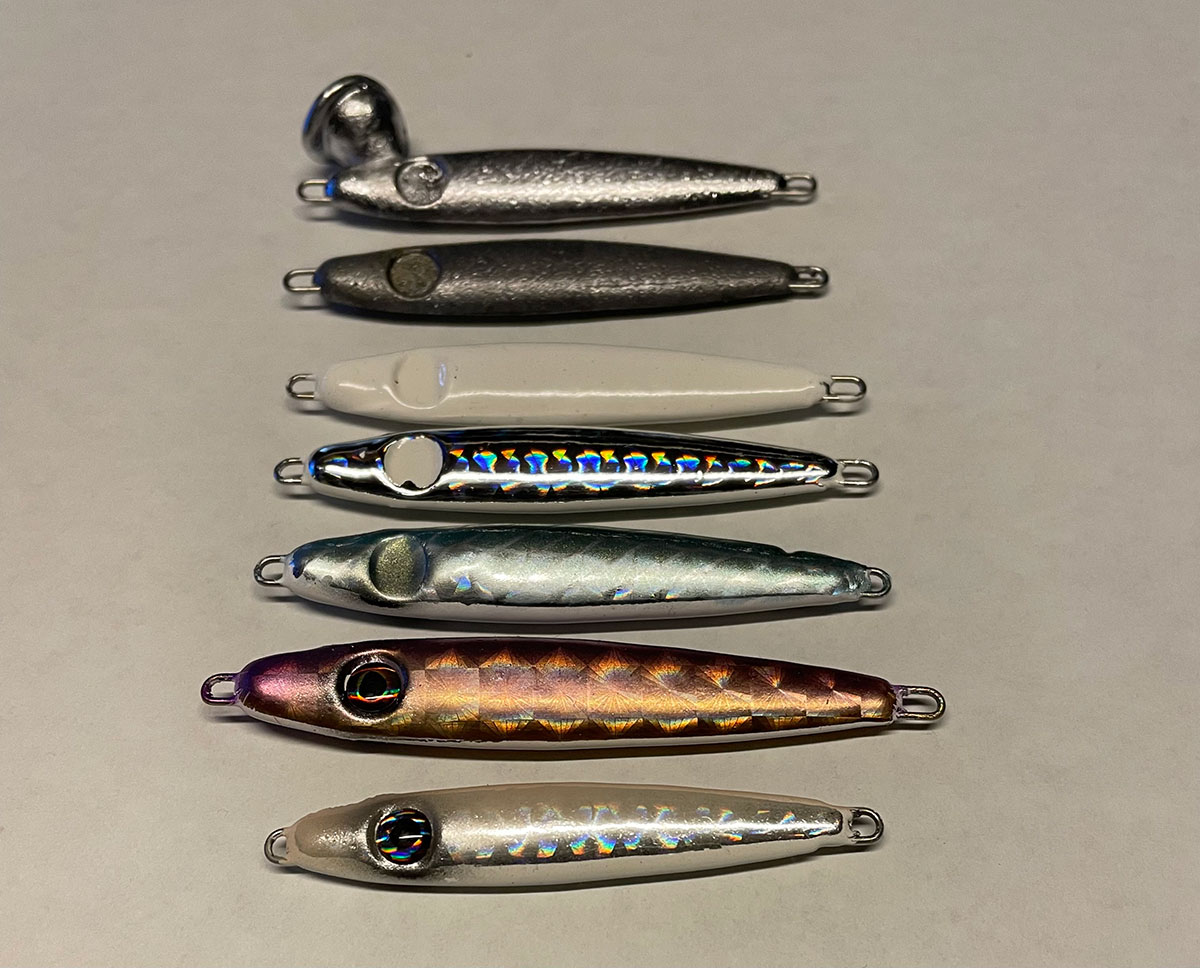
The first step on the assembly line is producing or procuring some bare lead jig bodies with a suitable baitfish profile. For albies, the jigs will be relatively small and weigh between 3/4 and 1-1/2 ounces. If you are not interested in pouring lead, there are a variety of unfinished lead jigs that can be purchased online.
To make your own jigs you will need a mold. Do-it Molds is by far the biggest producer of molds for DIY tackle makers, and produces two styles that I found very useful for making albie jigs. The Do-it Minnow Spoon mold has an elongate narrow baitfish profile that can be used to imitate forage like silversides and anchovies. Their Shad Spoon offers a deeper bodied profile and produces a jig that perfectly imitates peanut bunker. Each mold features three cavities 3/4, 1 and 1-1/2 ounces.
My favorite part about these molds is that Do-it also produces preformed thru-wire inserts designed for these jigs, the mold holds the wires while you pour and the lead encapsulates the wire, creating a finished jig. Take my advice and buy the wires, trying bend them yourself is a nightmare.
Pouring Lead
For albie jigs I prefer using “hard lead”, which is actually a blend of lead and small amounts of other metals such as tin or antimony. Pure lead is very soft, which means that thin-bodied albie jig can easily bend out of shape when fighting a fish or after banging off rocks. Pre-heating the molds before pouring helps to produce better and more consistent castings. Hot molds allow more time for the molten lead to completely fill the cavity before cooling and solidifying. Preheating is particularly important when working with hard lead which tends to set up faster.
When pouring the small albie jigs, I use a 10-pound capacity bottom pour Lee Pot. With this pot, molten lead flows from a small spout on the bottom of the melting pot when the lever is lifted. This is much easier, cleaner and more accurate than trying to pour by hand with a ladle. Once the jigs have cooled enough to hold their shape, they can be removed from the mold, each jig will have a sprue, a ‘knob’ left by the pour spout, these can be removed using diagonal pliers.
Finally, I powder coat my jigs with white powder paint before applying the foil; this gives me a smooth finish that is free of imperfections. If you haven’t powder painted jigs before, there are hundreds of tutorials on YouTube.
Foil Time
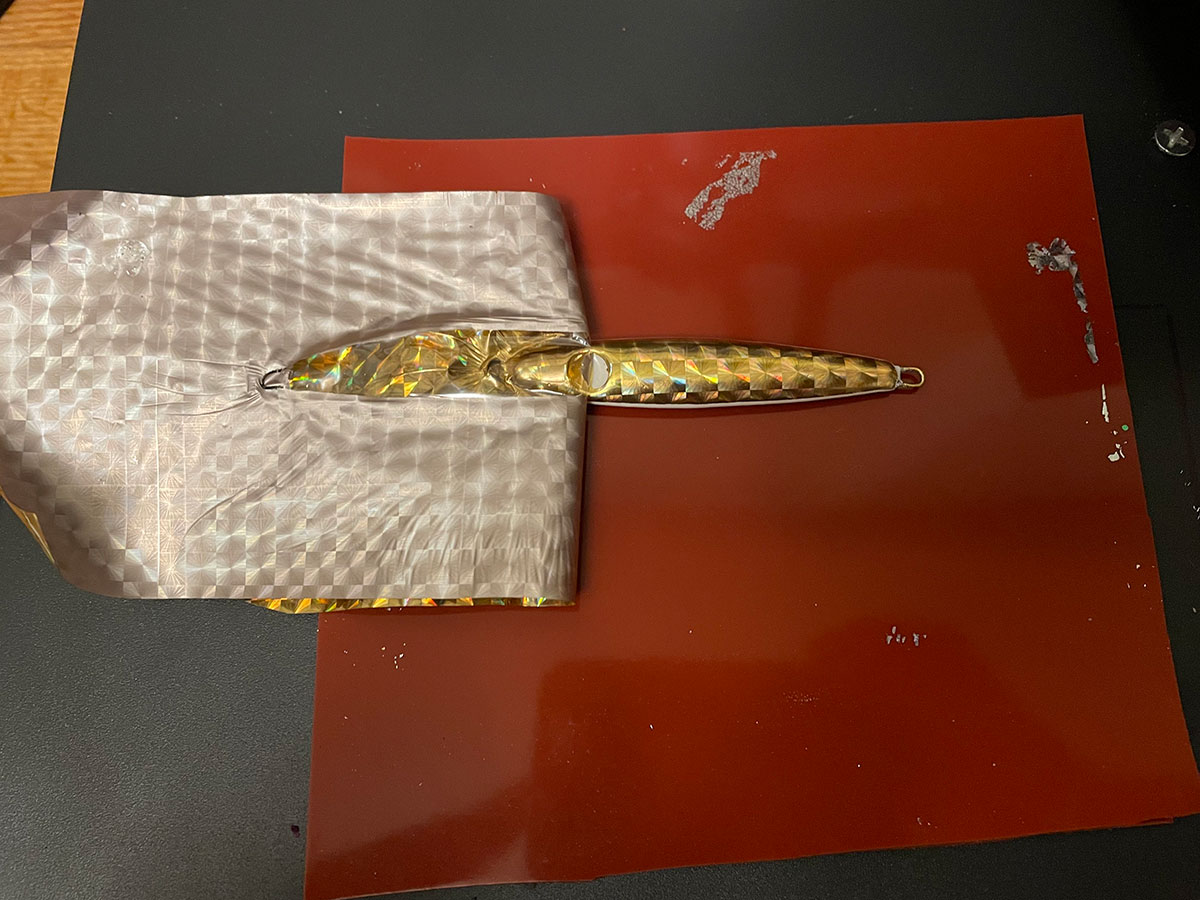
Applying the hot stamp foil is the step of the process where things get exciting, but also requires learning new skills. The hot stamp foil comes in 30-foot rolls of 3-inch wide material, the holographic foil is matched with a crinkly plastic backing. Heat is used to fuse the foil to the jig, no adhesives. A smooth silicone pad heated in a panini or t-shirt press will provide the heat and also conform to the shape of the jig as you press the foil onto the lead. The pad I use was ordered from Varna Fishing, a small Bulgarian company on eBay. To complete the transfer, you will need to use even pressure to press the foil onto the jig. I greatly prefer the t-shirt press because it provides more even pressure to the pad and does not require physical effort to maintain the pressure like the panini press.
The first step is to place the silicone pad onto the heating element of the press, and preheat it to 300-325 degrees; measured using a meat thermometer poked into the side of the pad. A powder coated jig is then placed onto a smooth soft heat resistant mat and a strip of foil is placed on top of the jig. The foil, jig and matt are then loaded onto the bottom plate of the press. The hot silicone pad is gently placed over the foil and jig, and then the press is closed squashing the silicone pad down over the foil and jig. Even pressure must be maintained for 15 to 30 seconds before opening the press and gently removing the pad. The foil will look like it has been vacuum sealed around the lead. Pick up a corner of the foil strip and gently peel it back from the jig, this will lift the backing material off and expose the now beautifully foiled result. Flip the jig and repeat the process for the other side.
Be warned, the foil finish is secured to the jig but is delicate, and may scuff if it is not protected. I apply a thin layer of Rustoleum clear coat before painting the jigs. I have learned the hard way that skipping this intermediate clear coat results in a less durable finish. Inevitable chips to the outer clear coat can pull the foil off the jig if it is not sealed before painting.
Devil’s In The Details
Things get kicked up another notch when the paint hits the foil and the final product comes into focus. An airbrush is used to apply smooth color accents over the foil. Most of my jigs feature a simple band of color along the back. With some practice though, you can add more detail with scale patterns and accent colors. The mesh bags from onions or garlic make great scale patterns. Painting tiny lures with an airbrush can be frustrating, I suggest practicing on paper or old, beat up lures first to get the feel for it.
I would also recommend learning to break down and clean your airbrush, even high-end brushes will clog without regular cleaning. I have had great luck with Createx paints, and using their reducer will really help you dial in a thin line and even coat. I use fleshtone, white, olive, pink, chartreuse and silver to cover a wide variety of baitfish patterns. When your paintjob is complete, carefully secure your stick-on eyes, but try to be precise, because attempts to reposition the eyes will often result in paint lifting away from the jig, ruining your paintjob.
Now it’s time to add a coat of protective clear finish. There are tons of options out there, I have had great luck with Alumilite UV Resin, which sets in about 30 minutes when exposed to UV light. To apply, simply hook the painted jig onto a bent wire and lower it into the can of resin until it’s completely submerged. Then lift the jig out and allow the excess to drip back into the can until there’s just a thin even layer of resin left. Now hang the jig in between two ultraviolet lamps for 30 minutes or until the finish no longer feels tacky. I place the UV lamps inside a cardboard box, and then hang the jigs from a dowel secured above the lights. The clear coat really makes everything pop; it’s really gratifying to look at the end result and think back to that bare chunk of lead that’s been transformed into a jig capable of fooling keen-eyed albies.
This past fall I was able to put my jigs to the test. I fished them the same way I would any other albie jig, long casts, fast retrieves, and a few prayers that the fish felt like eating! They casted well, had nice action and on were appealing enough to fool a few albies which was an extremely gratifying experience and one that I hope other albie nuts get to share.


