Step-by-step instructions for repairing a broken guide at home.
Thinking back to my beginnings of rod building and repair back in my old tackle shop days, I have to remember why I started in the first place. Aside from building my own fishing rods, which I thought was pretty cool, I got involved in simple rod repair because of the frequency of my fishing and the need to learned quick repair in order to catch that next tide. I always had my favorite rods back then and using a backup – or something different – didn’t quite do it for me. I knew what setup I needed night after night when working in a specific area, and I had to have a quick turnaround to get it functioning again.
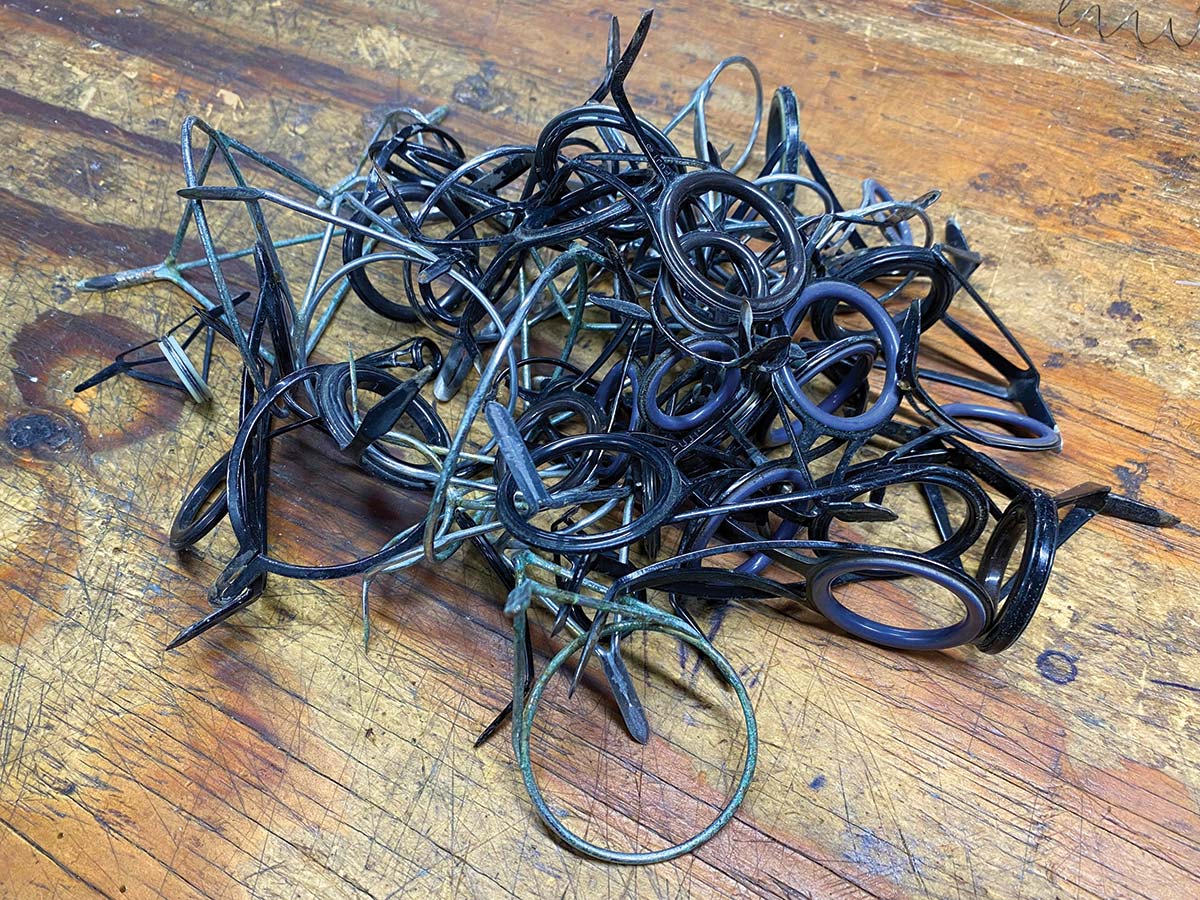
Being a frequent surfcaster, guides on rods were more prone to breakage due to the harshness of the terrain, especially when working the rocks. Learning a quick and easy guide replacement was a lifesaver for me and kept me in the game when it counted most.

The Essentials
When it comes to the essentials for a rod repair, you can either go the quick and straightforward way if you don’t care much about aesthetics, or if you want to match the guide wrap to perfection with a great-looking finish, you can throw in a few extras to give you that ‘factory look’ after drying.
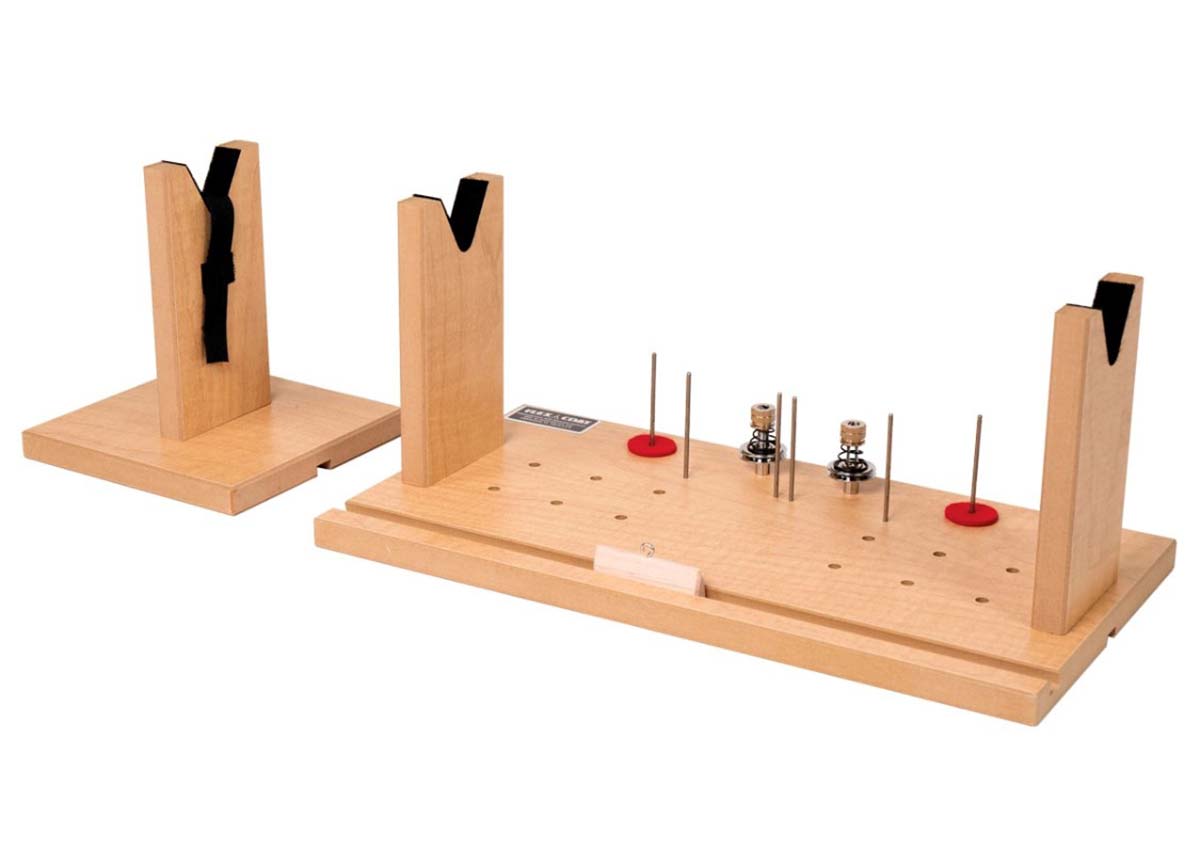
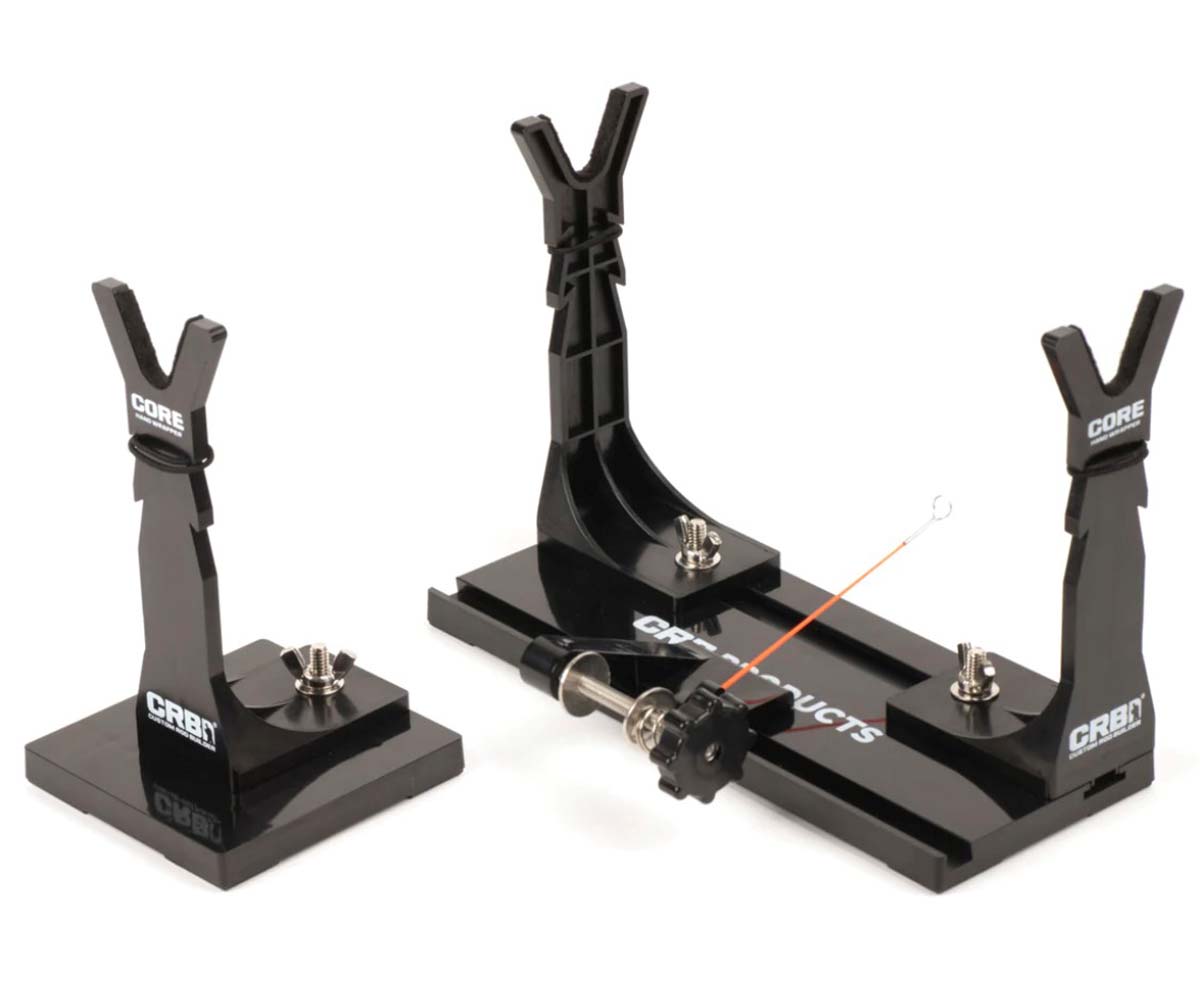
Let’s start with the actual wrapper to support the rod; I’m going to take a sure guess and say that not everyone reading this is a rod builder, so you won’t have a power wrapper handy. So let’s just start with the scenario that you don’t. In that case, you have a couple of options. The one that makes sense and is most comfortable to use is to make or buy a simple hand wrapper. If you consider yourself handy at all with access to minimal power tools, you can fabricate one in a short amount of time. A manual hand wrapper support is just two pieces of wood vertically on a wooden base with a third movable support for the longer surf rods. V-notches are cut into the wood with felt glued into the notch for the rod to lay on. You can also use hand-wrapper options from Mud Hole if you don’t want to get crafty. Their newer Core Hand Wrapper is worth checking out for the price.
Staying along the lines of quick and simple, we’ll keep the thread color the most popular and basic there is, black. Any spool of black thread you can purchase in a local tackle shop that sells rod building components or an online supplier will suffice for a simple repair. I personally like the nylon PROWRAP, or Fuji brand of thread in size D. Size A will work too, but I find that the D size is much easier to work with, especially if you’re new to guide repair. Plus, the larger diameter of the D thread will require fewer wraps to get the job done, resulting in less time wrapping.
Masking tape is another repair essential. The tape is undoubtedly a must between holding the new guide in place and holding down your thread. My standard for rod repair is always the 3M brand for reliability.
For cutting tools, a simple razor blade removes a guide and cuts the thread when needed. Being an angler already, you might have a favorite pair of braid snips that also do a great job at cutting thread in a pinch.
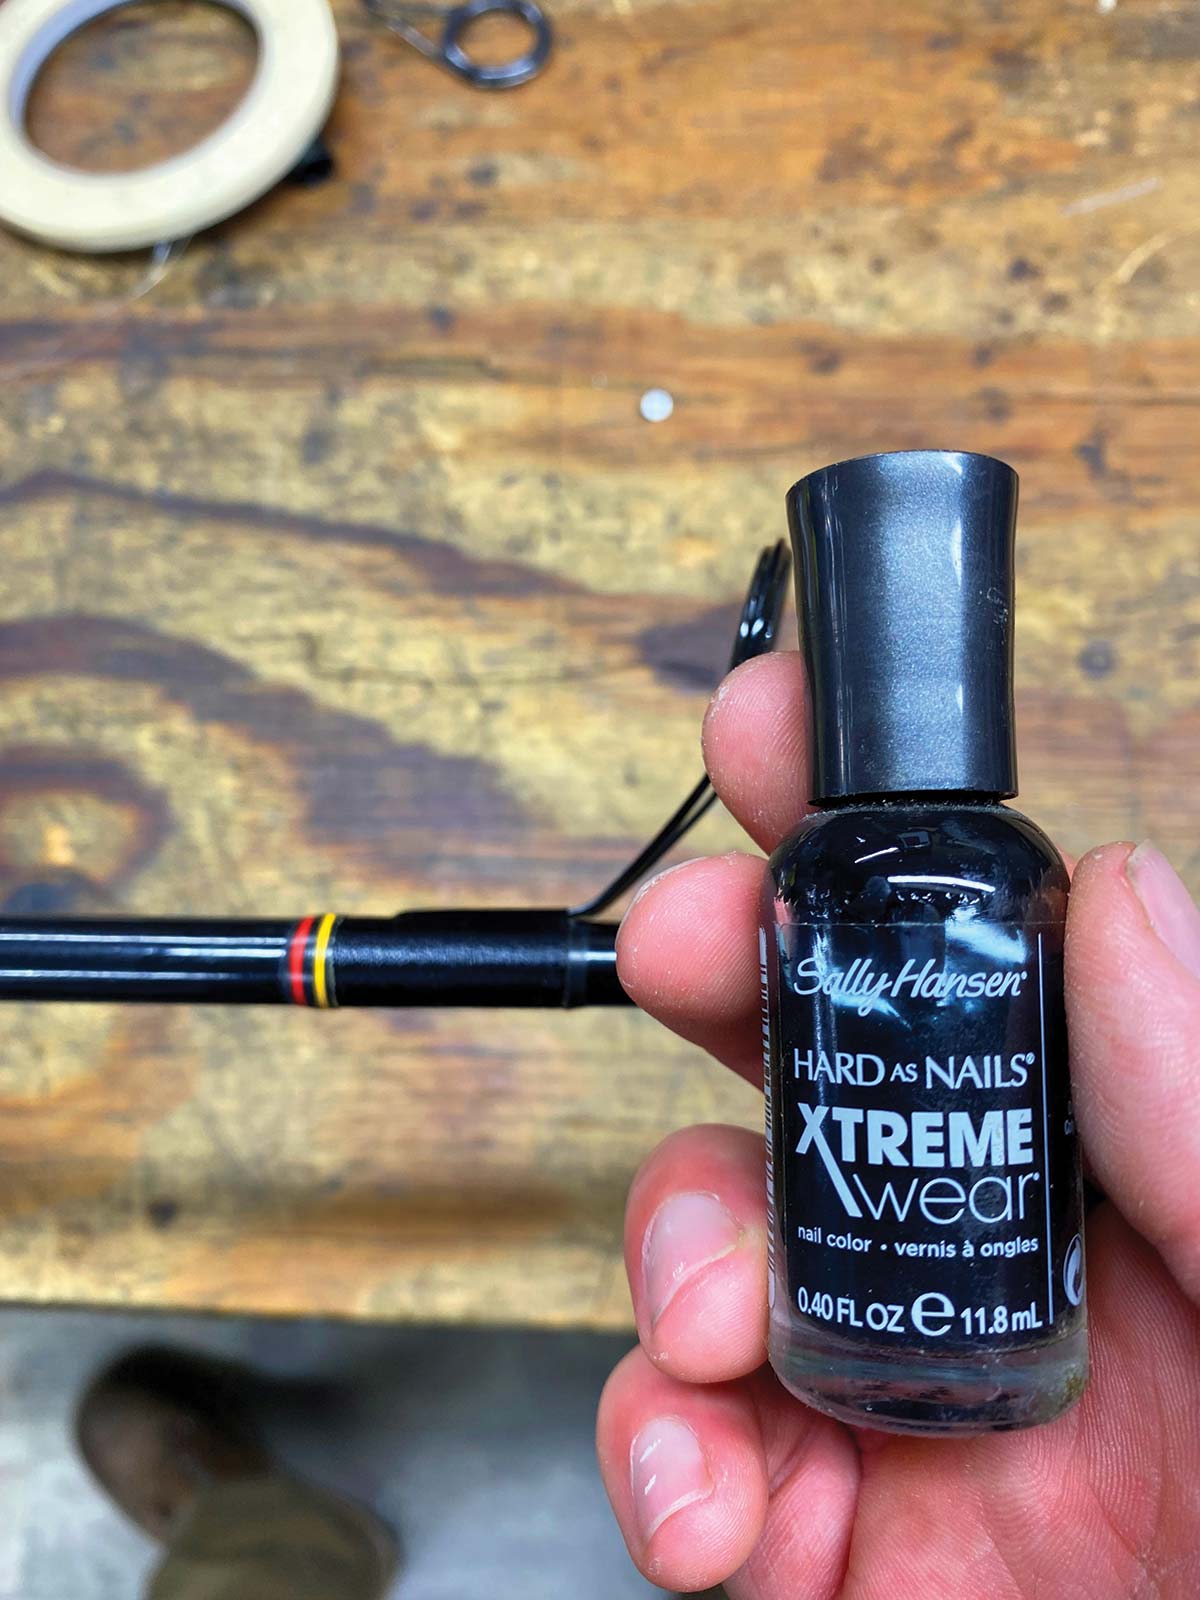
The type of finish you use depends on what type of results you’re looking for and how much time you have. If you are short on time and can’t wait for a slow cure (have to hit that tide), you can use a couple of coats of black nail polish. I can assure you it won’t be the prettiest finish, but it will get the job done. If you’re looking for a closer finish to new, then buying a small finish kit would be the way to go. Usually, most finish kits include a two-part finish, brushes, stir sticks, and cups to measure the proper amount.
Lets Get Fixin’
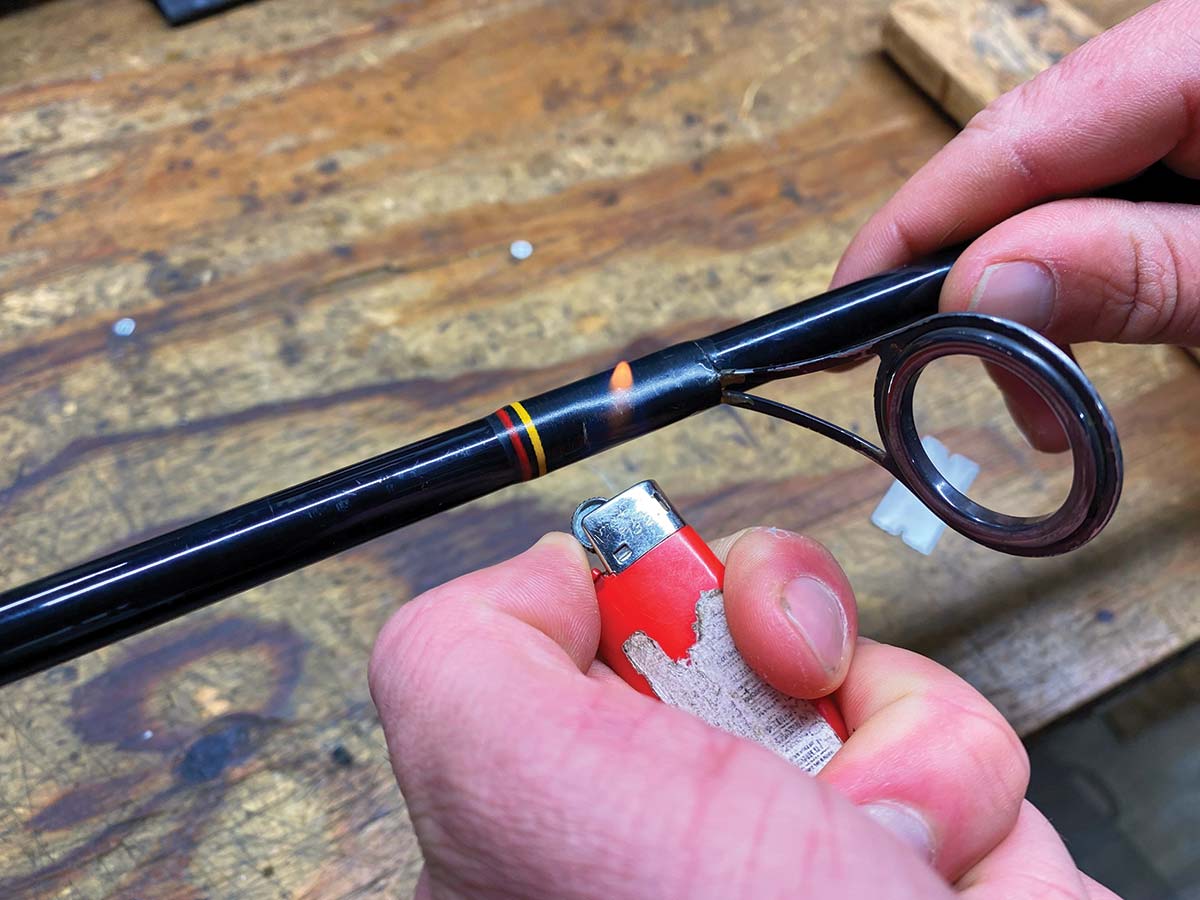
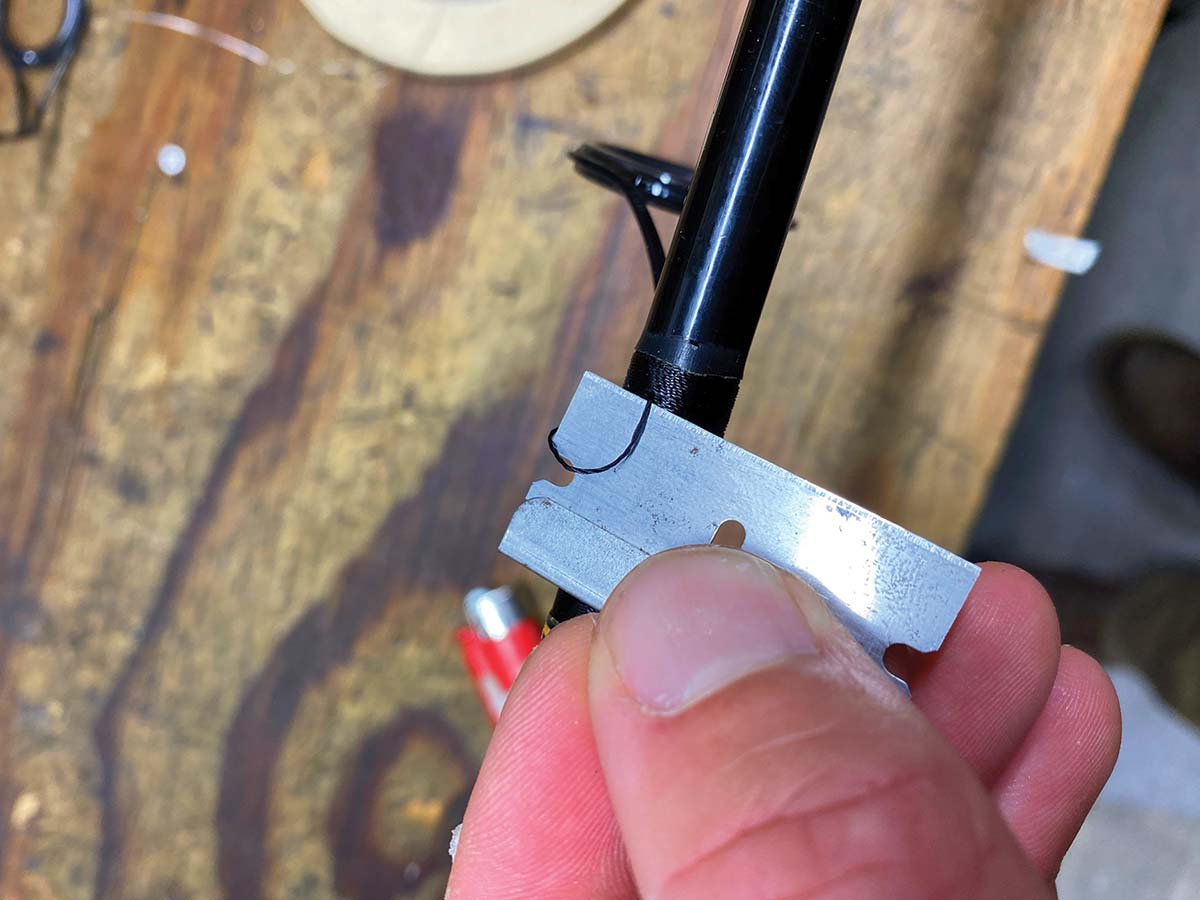
After you have your tools and workspace set up and you’re comfortable, it’s time to start the actual process of the repair. The first thing you want to do is remove that old, broken guide off the rod blank. You can do this with just a razor blade by cutting from the foot of the guide towards the base of it and scraping off the thread and epoxy that was holding it in place. It always helps to have a fresh blade to ensure that you don’t struggle to remove this thread. The last thing you want is a slip and cut a finger. If you find the epoxy tough to remove, softening it up quickly with a lighter always helps the process. Don’t apply too much heat though; you don’t want to damage the blank.
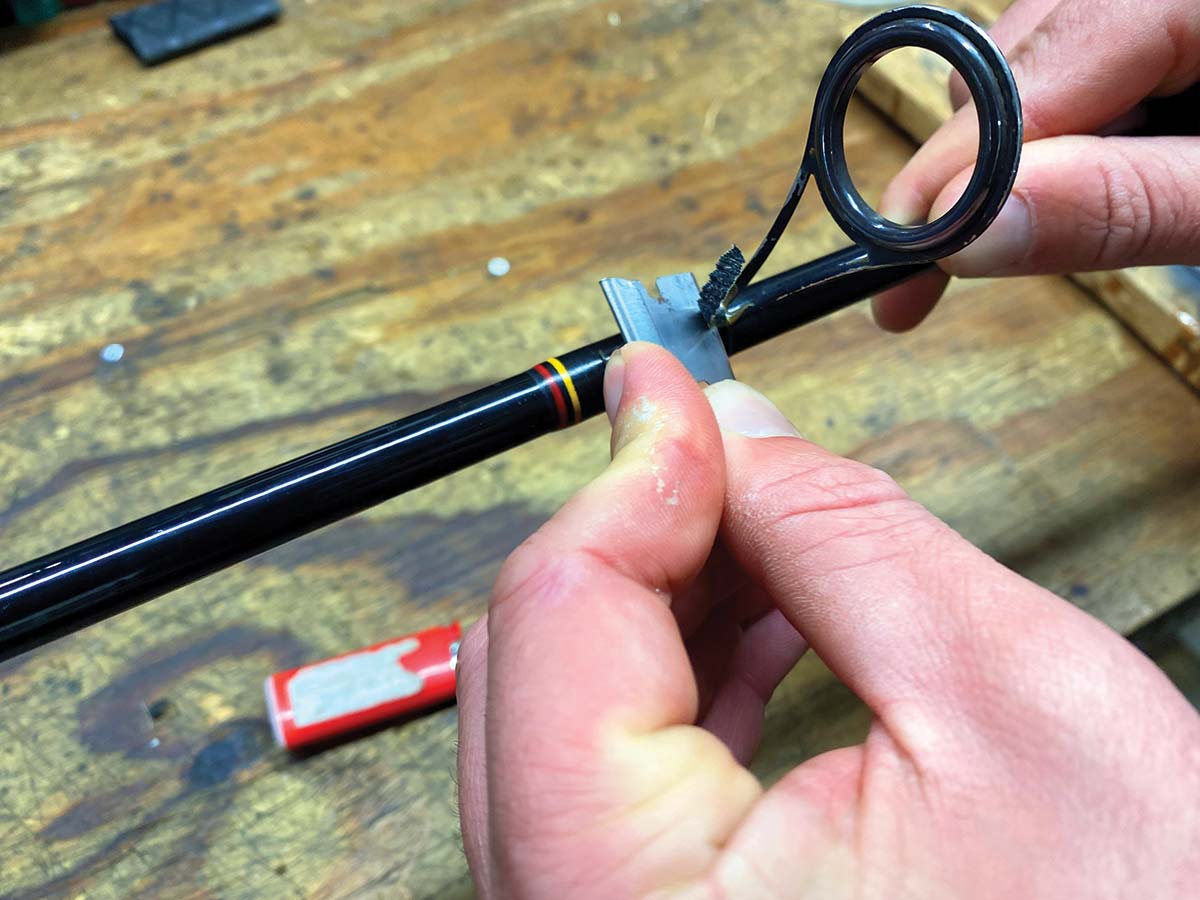
Once the guide is removed, you’ll be left with some extra thread and epoxy on the blank. Sometimes I’ll work the last bits of thread off with my finger, and most of the time, the last portion will unwind the opposite way it went on. Use the razor as a scraper and get off as much excess epoxy as possible so that the new guide and thread will lay correctly.
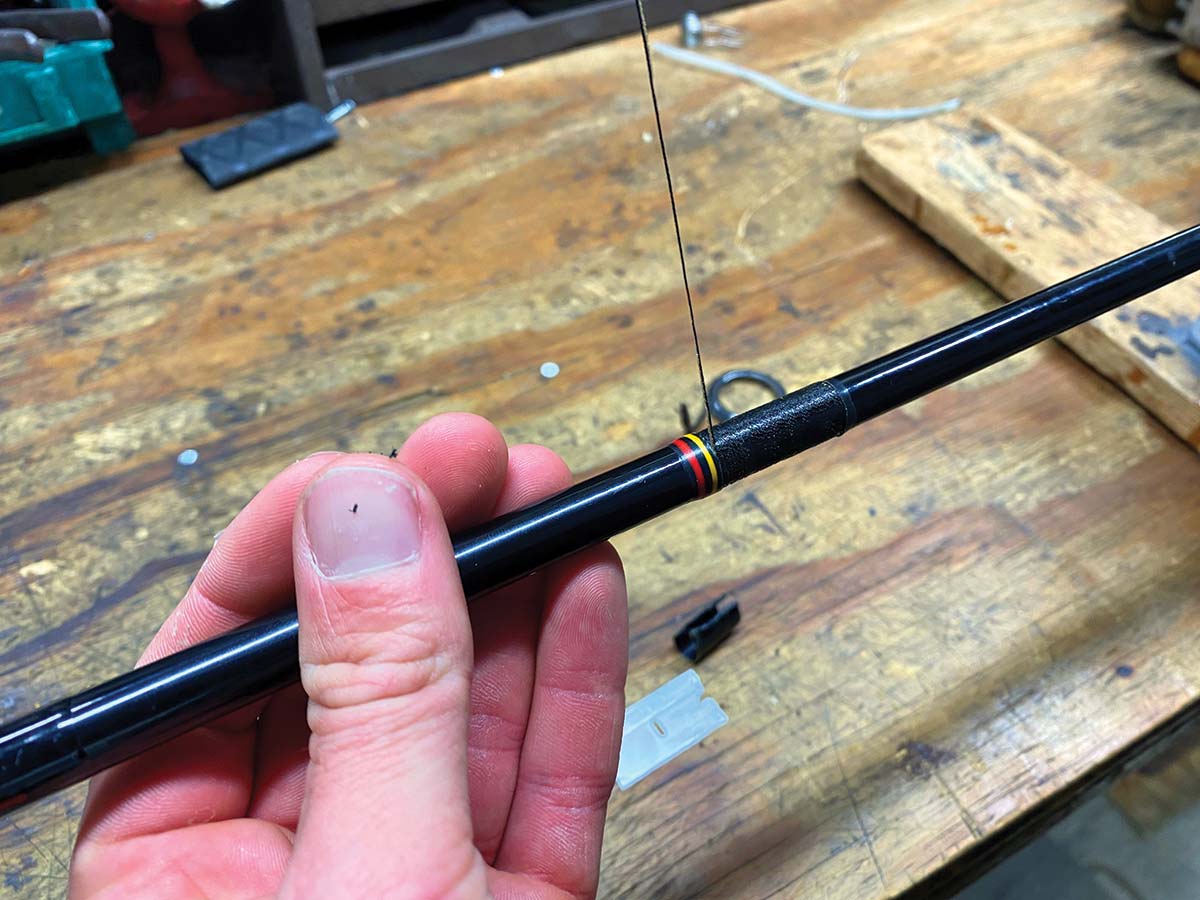
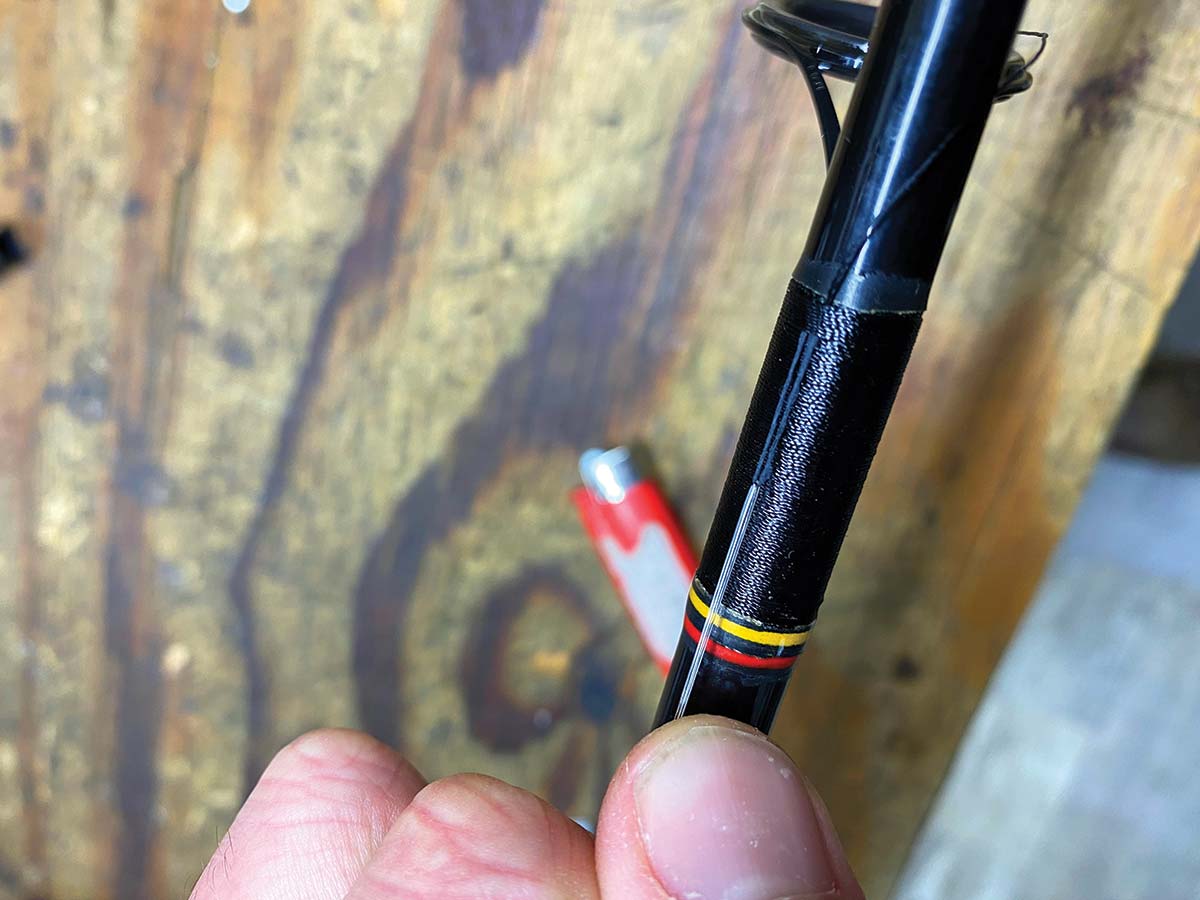
After you find the right guide match for a replacement, use your masking tape to tape the foot of the guide in line with the reel seat and the other guides. Don’t worry if it’s not straight when you wrap it on; you can adjust the guide before the finish is added.
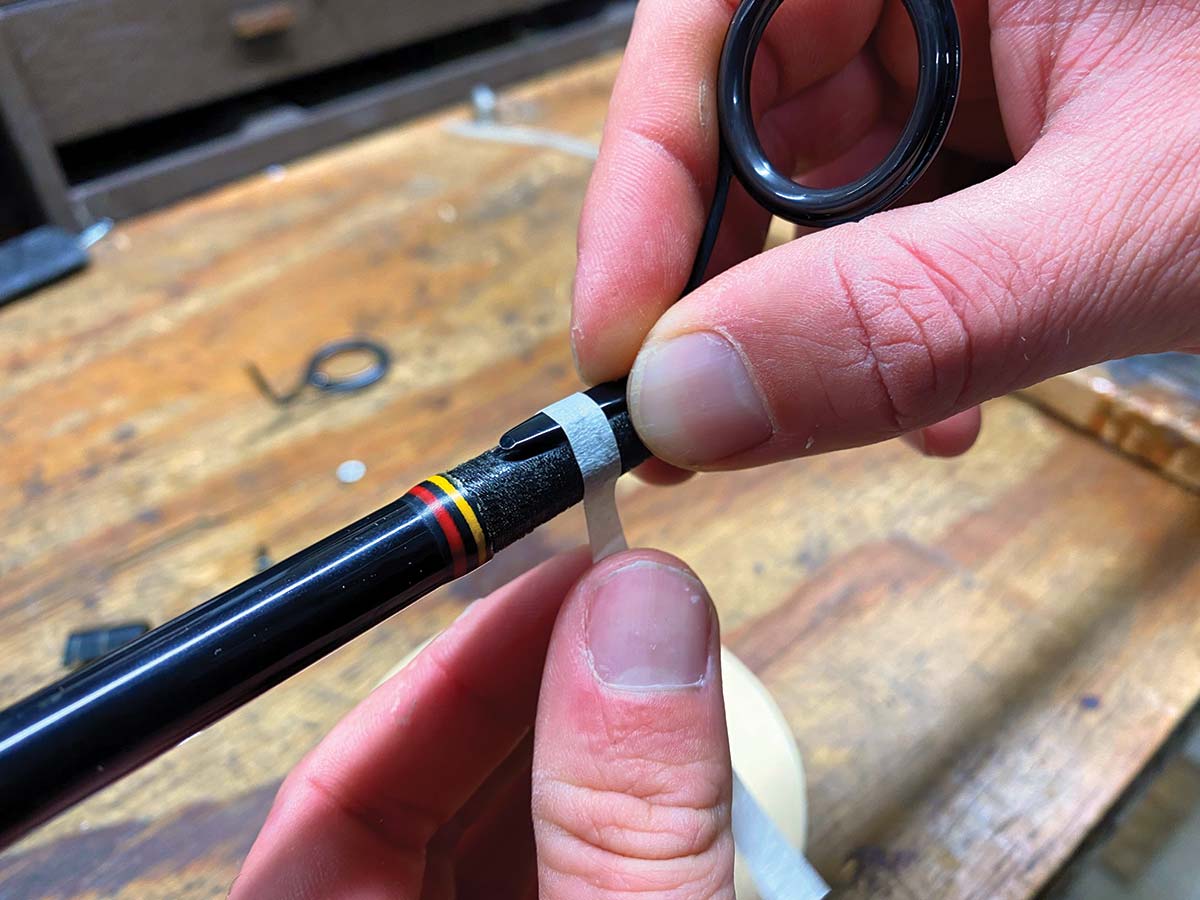
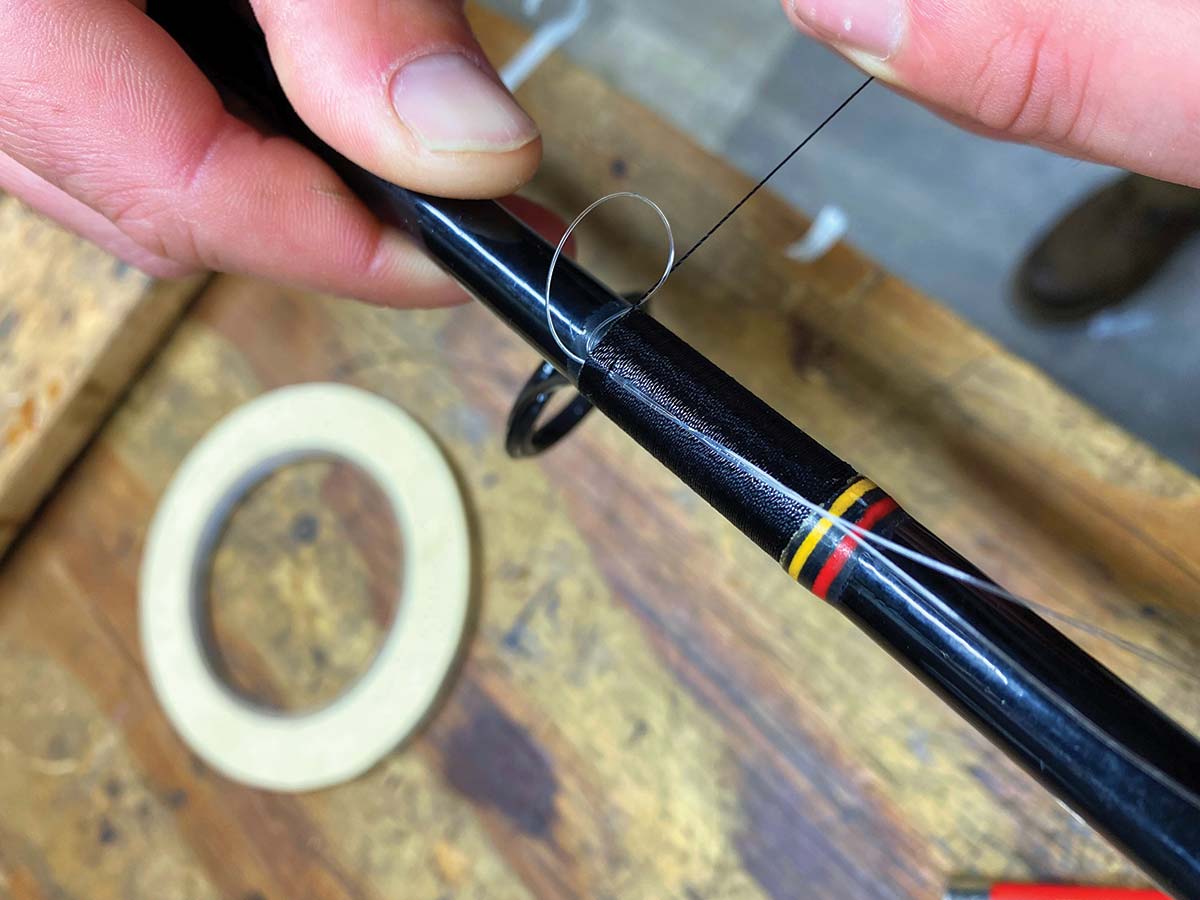
Once the guide is securely taped, take your thread and tape it down behind the guide, and twist the thread over the foot of the guide to where you want the beginning of the wrap to be. Now cross the thread back over itself and proceed to do five or six wraps back towards the foot of the guide with good pressure. After the wrap is locked in, you can remove the tape holding down the piece of thread behind the guide, all while keeping pressure on the thread wrap. Cut the tag piece tight to the wrap and proceed to wrap along the blank and up the foot of the guide slowly, ensuring the thread is packed tightly with each revolution of the blank.
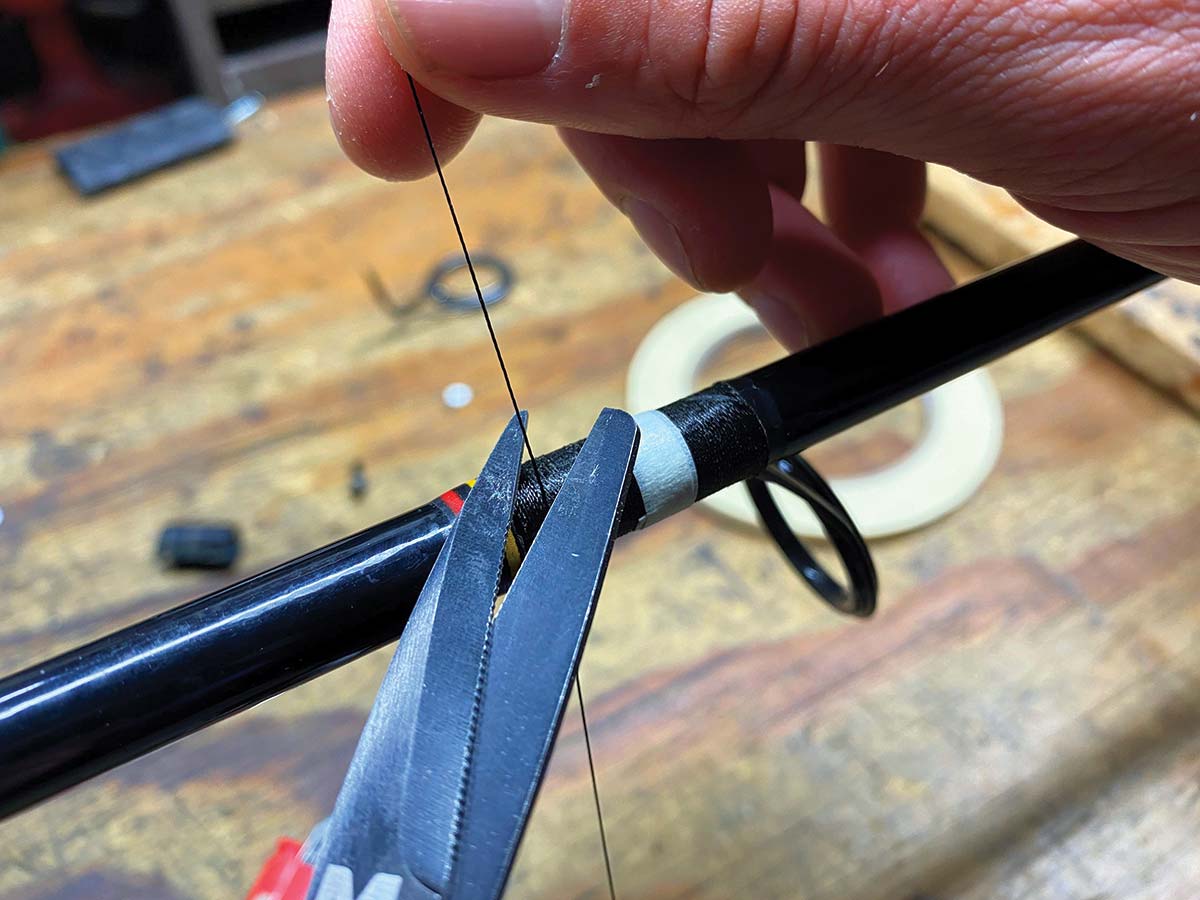
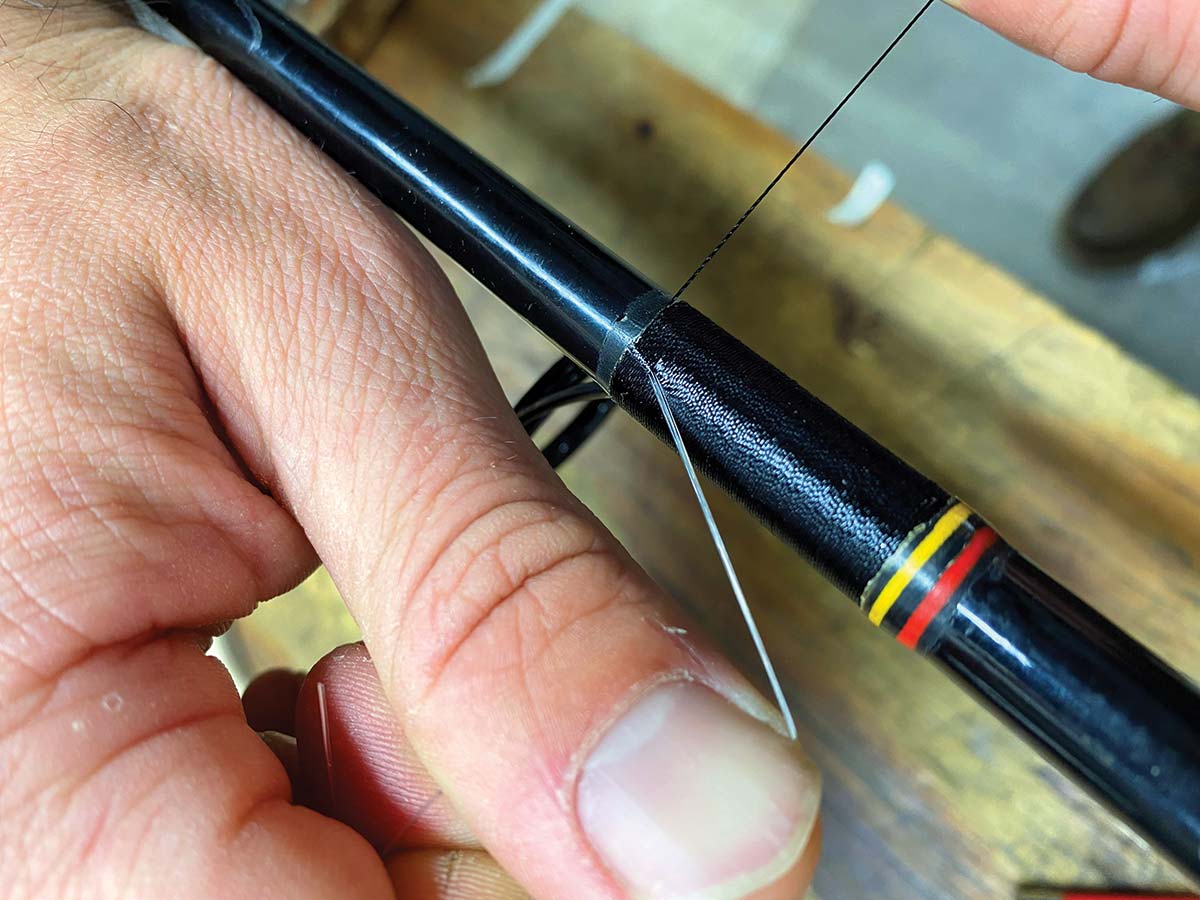
When you come about a quarter-inch away from the base of the guide, stop wrapping and slip in either a piece of halved thread or monofilament under the wrap as a finisher, opposite the base of the guide with the formed loop facing in the direction of the wrap. At this point, you will want to do the last quarter-inch of wraps over the finishing thread. Once you get to the end, use your thumb and press on the last wrap to secure it in place and cut the thread about three inches from the blank. Then take the end of the thread from the wrap and slip it through the loop, all while keeping pressure on the wrap.
Next, take the halved finishing thread and pull it underneath the quarter-inch of wraps until all the excess thread is pulled through, locking the whole wrap in place. The last step of finishing your wrap is using a razor blade and cutting the pulled-through thread as close as possible to the wrap. If you have a tiny burr, apply flame from a lighter to burn it away.

Finishing Touches
For this next part, you can either go the long way or the short way, depending on your time and how much you care about the finished look. If you want to go for the short method and are looking to get back out that fishing the same day or night, a couple of coats of black nail polish will do a decent job at locking in those threads and providing them with some sort of protection. When I’ve gone this route, I’ve waited a few minutes between coats to allow for better coverage.
The longer method requires some consistent attention and rotation of the rod to ensure that the epoxy finish does not sag all in one spot. Long-drying epoxy finishes usually require a few hours of this attention until they are firm enough to leave, and even after that, they will still be tacky for some time. Always ensure your measurements are exactly half and half when using these two-part finishes. Even if they’re off the slightest bit, this can cause them to never dry, resulting in redoing all the work again. Thorough mixing for at least a couple of minutes ensures the two parts combine correctly.
Don’t mix too fast either, or a lot of bubbles will form. I like to mix the two parts at a slow to moderate speed. One last thing to remember when using an epoxy finish is never to have the room too cold or humid. The finish will have trouble drying in those conditions. Brush your combined mix on and spin the rod as you do so. Some of the epoxy will drip, so be sure to put a piece of scrap paper under the wrap to keep things tidy. If you have any bubbles forming in your finish, one way to pop them without the use of a butane torch is by breathing your breath on them. The heat is enough to pop any surface bubbles without messing up the finish.
Assuming this is your first time repairing, remember the number one rule: to go slowly! You’re prone to make fewer mistakes, and you’ll only get better as you do more repairs.