Switch it up and do a little clamming this summer
We all need a little change of pace once in a while when it comes to fishing and recreational activities on the water. One excellent way to switch gears this summer is to partake in some recreational clamming in your local bay on a warm summer day with family, friends or even by yourself.
Technically called the Northern quahog, what we all know as ‘quahogs’ are a species of hard-shelled clam that can be found in intertidal and subtidal areas from Nova Scotia, Canada to Florida. Not to be confused with steamer clams (Ipswich clams) which also are a tasty treat or the Atlantic surfclam that are typically what you would use for bait when fishing clam bellies for stripers.
Clams are included in the shellfish family. Like oysters, mussels, and scallops they are bivalve mollusks which live inside a hinged shell. The lifespan of a clam is anywhere from 12 to 20 years but in some cases they can live up to 40. Most of their life clams stay in only one location unless they are moved due to current and/or turbulence. At times, you might find a good grouping of clams along a drop-off where they may have tumbled to due to current. Also, when clamming, keep in mind hard clams prefer saline water and cannot survive if the salt content is too low so inside rivers is usually not them best place to go clamming.
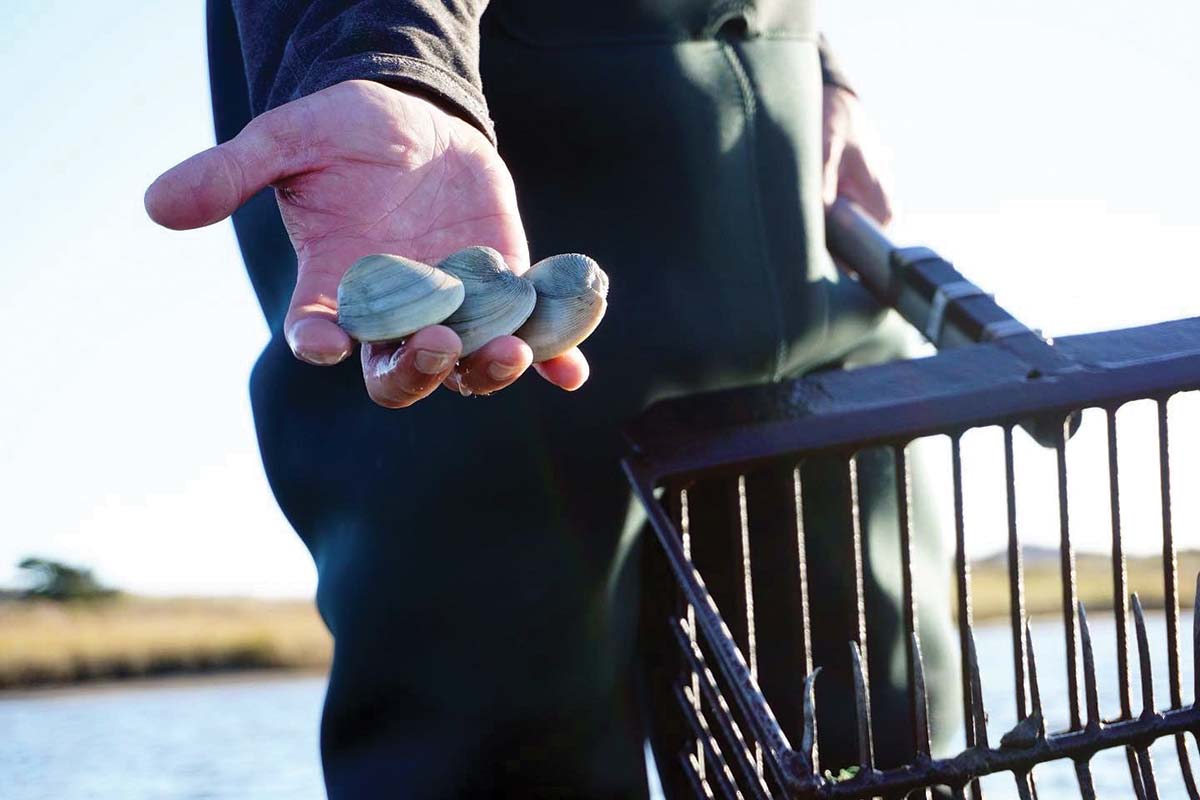
The largest of the hard clams, typically around 3 inches across but some individuals can get a bit bigger to about 5 inches. Hard clams possess thick shells that are gray to white in color and show visible growth rings. Sometimes if you pick up a clam, you will notice how spread apart the growth rings are which a sign of what their growth rate is. In ideal environments, clams will grow rather fast during their growing season, typically when the water temperatures are between 60 and 80 degrees.
Digging Methods
For the recreational clammer there are a few different ways to go about catching your own clams. Some of the methods require the use of additional tools while others simply require nothing at all. It’s all about personal preference and sometimes it depends on the type of bottom you’re digging them out of.
Treading – By far the simplest way to go about harvesting clams from the bottom of a bay is what’s known as treading. While treading water usually means to stay vertically in the water in one spot with your head above the water, treading for clams has a different meaning. When it comes to clamming, to tread means to use your feet to feel for clams in the sandy bottom of the bay. This way of gathering clams is probably the oldest and requires no tools.
| STATE RULES & REGS |
| Each coastal state has its own set of regulations when it comes to hard clamming. This can include equipment you’re allowed to use, areas in which you’re allowed to clam and how many clams you can actually harvest. It’s extremely important to follow these rules to maintain a healthy stock and not consume clams that could have harmful bacteria in them due to where they might live. Some other rules might prohibit you from even clamming certain times of the day or days of the week. You may also need a recreational clamming license; be sure to visit your state’s fish and wildlife website before you head out clamming. |
Usually this method is done in water depths shallower than the height of the person treading. Everyone who has treaded before has their own variation of doing so but generally the way to get it done is to shimmy the heels and toes of your feet back in forth in the sandy bay bottom until you feel something that might feel like a rock. Of course, if you’re working sandy bottom, know that most of the time what you might be feeling is not a rock and is actually a clam! If you’re really good, you’ll be able to grab a smaller clam with your toes and bring it up to your hands. Most of the time once you feel that clam, you’ll either have to reach down or swim down to grab it, depending on the depth of the water.
My advice to using this method is to be careful for sharp objects along the bay bottom such as rocks and glass. Also, during the summer months watch out for those blue claws walking along the bottom — they’ll give you a pinch if you step on one but most of the time they scurry away before you can get too close to them. New Jersey edition managing editor Jim Hutchinson, Jr. spent much of his teenage years treading clams in the Barnegat Bay region using a wire basket suspended in an old tire inner tube to hold his catch. “This was my earliest introduction to sewing actually, as old inner tubes which could no longer be patched were cut into pieces to fashion as footwear to protect against shells on the bay bottom,” Hutchinson said, adding that a rubber dish glove would suffice for his pick-up hand.
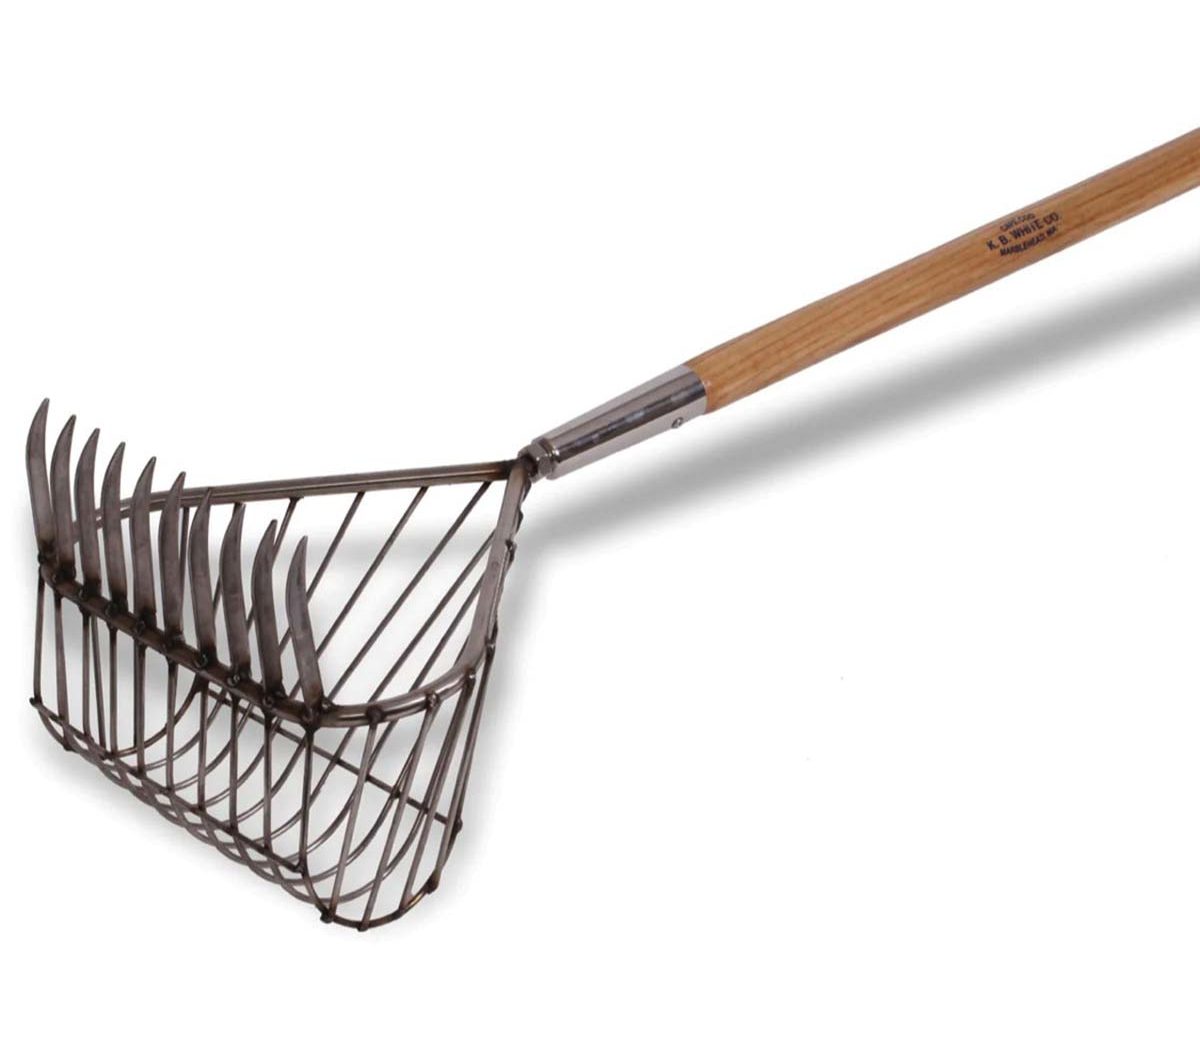
Scratch Raking – This next method is essentially in the name itself. Scratch raking clams is all about listening for something that sounds like nails scratching on a chalkboard. If you go this way you will need to purchase a scratch rake from a local supplier. Most bait and tackle shops carry a selection of rakes during the summer months for clamming this way. Rakes come in different shapes and sizes. Some have a larger basket on the back for carrying several clams while others have a smaller carrying capacity. Also, some have longer teeth for digging deeper into the bottom to extract the clams. The final determination could be made based upon user preference. Longer teeth would be harder to work but could get to those clams a little deeper down. Carrying capacity would only make a difference depending on how sparse the grouping of clams is in a certain area. Sparse grounds would require less capacity of course.
Using a scratch rake is straightforward. Essentially it’s just like raking leaves but in the water. Dig the teeth into the bottom and drag them through until you hit into something. If you pass it, back up on it and dig down a little deeper. You should hear a scratching noise which is the teeth of the rake prying the clam out of the bottom. You should be able to physically feel the clam come out and jingle around in the basket of the rake. It’s up to you to empty it into a basket or not depending on how full it is.
Digging Flats- Usually not my choice method for where I clam, but preferred by others who see extreme tidal changes, is digging the high and dry, exposed flats for clams. This type of clamming is done when the tide in a certain area recedes all the way out, exposing flats where quahogs live. The key to this type of clamming is more visual that anything. This means that you can visually see the holes that clams essentially ‘breath’ through along the exposed bottom, signifying that a clam is there under the surface. Not every hole will hold a clam due to other types of creatures that create them too but theirs’s a good chance that if you do see one, the size of a pinhead or so, a hard clam might be a few inches below.
Scratch rakes with curved tines are made to dig these clams out of the exposed bottom. If you can’t find yourself a rake intended for this type of clamming, a trip to your local hardware store, shed or garage might have what you’re looking for. A regular gardening rake, handheld or with a longer handle could be used to turn over the bottom to find what you’re looking for. Even the use of a shovel might do the job for you. Just be aware this might be a messier way of clamming due the exposed mud which won’t wash off right away since there will be a lack of water until the tide comes back.
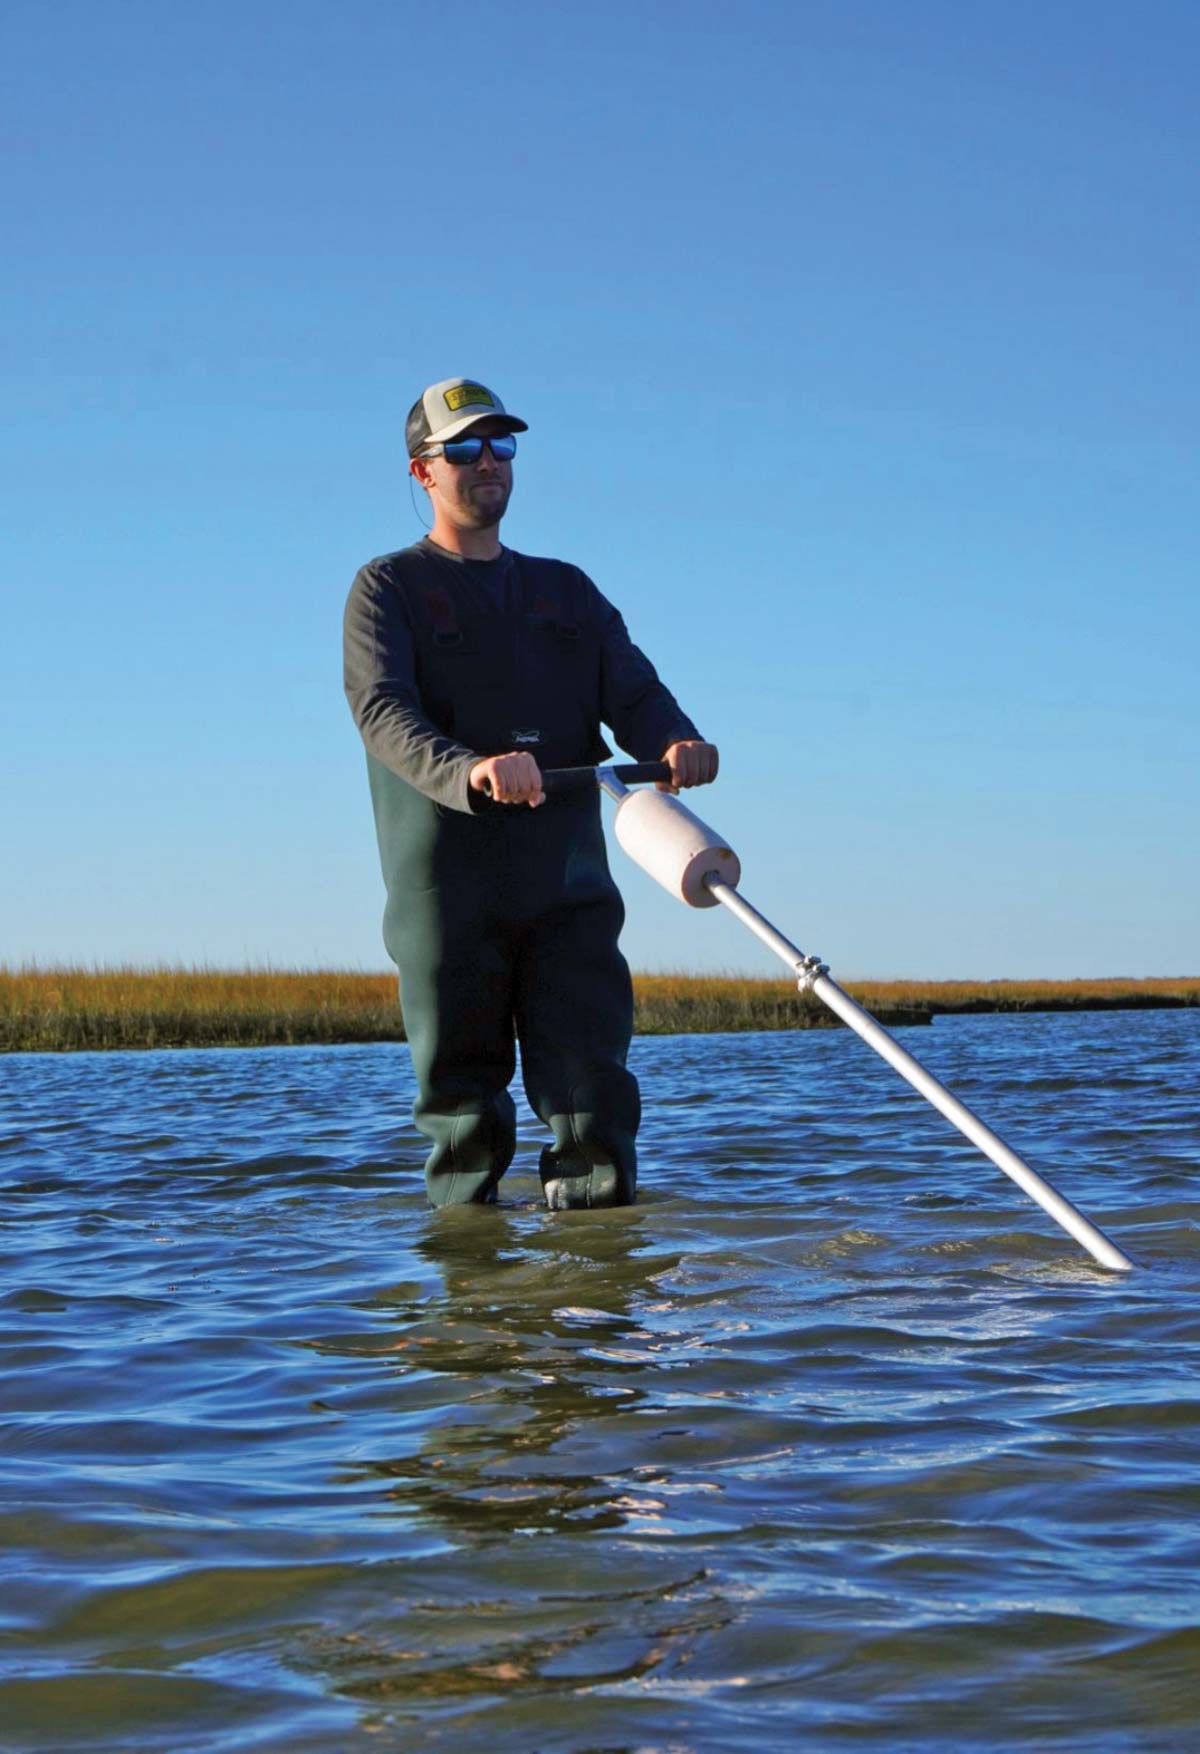
Bull Raking – Mostly practiced by commercial clammers, bull raking is done with more of a commercial style rake head with a T-handle fixed to it. This method gives you quite a bit of leverage when digging clams. If you have ever seen a clammer working off a boat, this method is very similar. You’re pretty much popping the clams out of the bottom and walking backwards in the water.
Keep in mind while using a T-handle is legal, certain states restrict the number of teeth used on a rake to differentiate commercial versus recreational. Be sure to read up on your state regulations before looking into this method.
Clamming Essentials
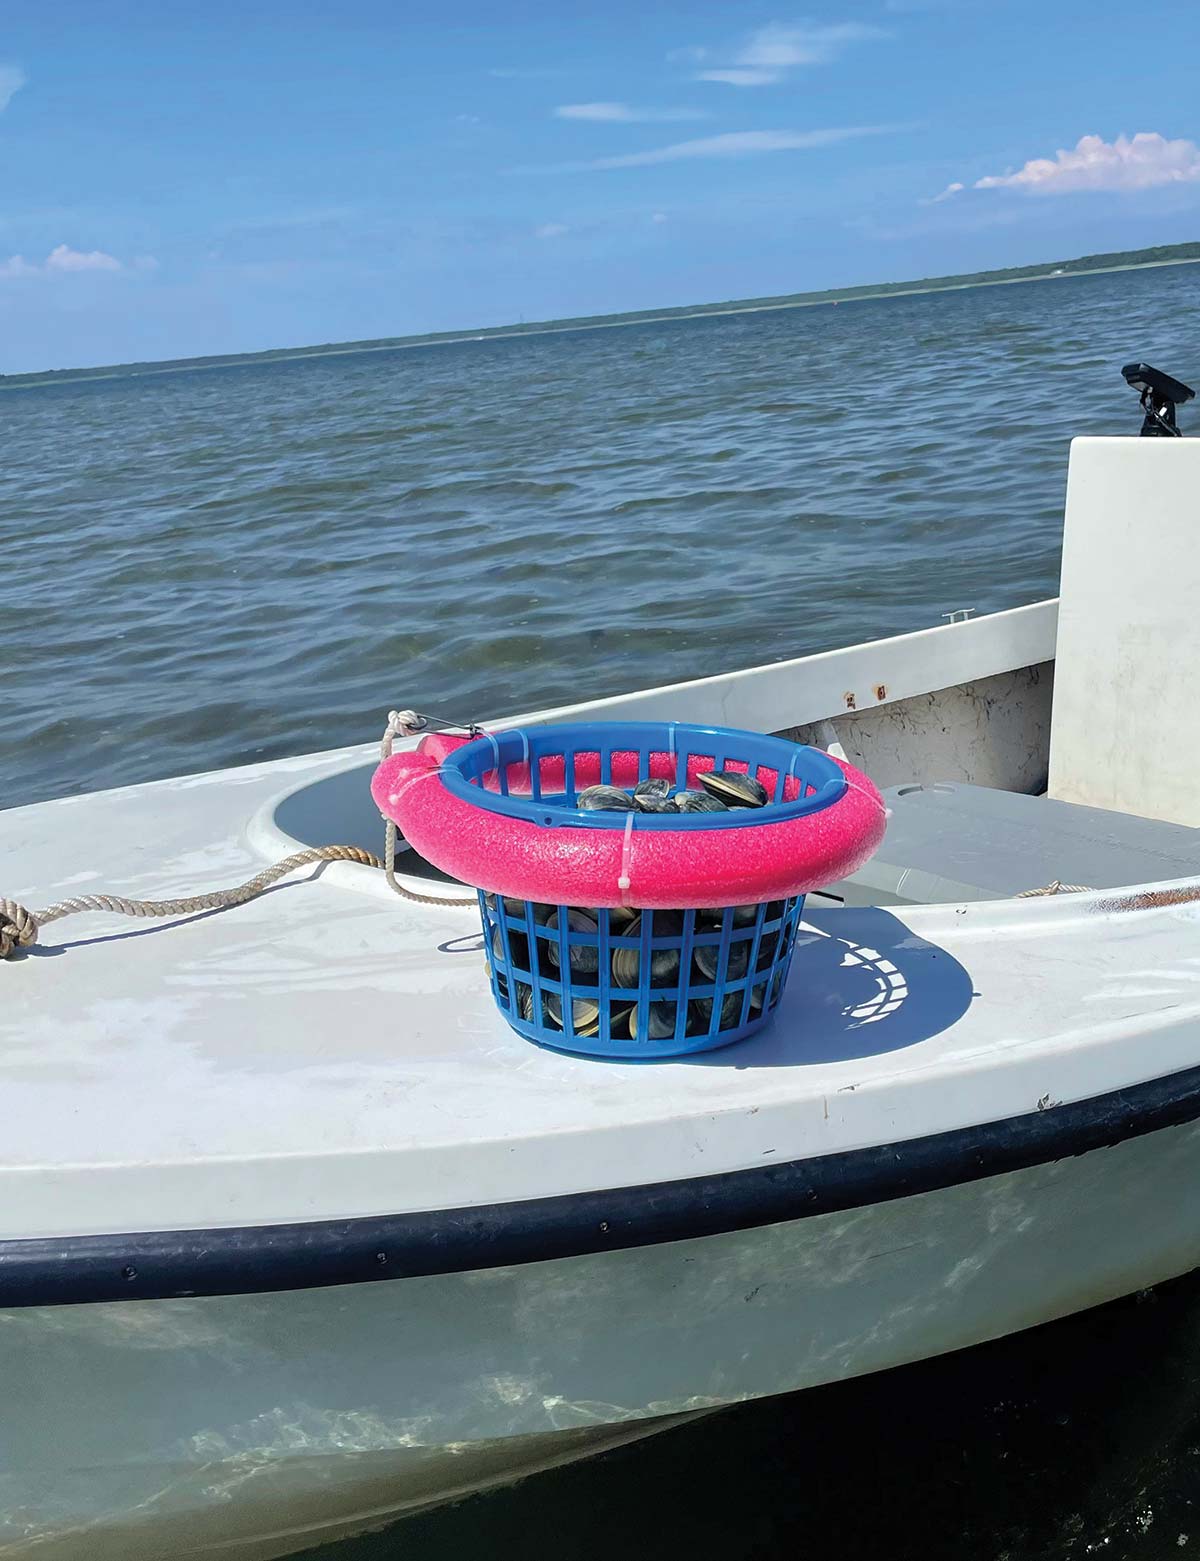
Now that you have dug a bunch of clams, where are you storing them? You can only fit a handful in your pockets and walking back and forth to the boat could be a pain if you anchored up far away. Companies like KB White make clam baskets that you can outfit with a float which you can drag along while clamming. This might be the most hassle-free way to go. I went the DYI route and made my own clam basket by buying a small laundry basket and zip-tying pool noodles around it. The basket holds around 40 clams of mixed sizes for me before it starts to sink. Some treaders like to carry a mesh onion bag with them instead of a basket. Again, this all comes down to personal preference.
Another must-have tool to keep on your boat or on you when clamming is some sort of cull device. If you can find a cull rake, that would be the best way to go but for someone just getting into it, a simple hand gauge will work. You have to keep in mind that each state has different regulations when it comes to clamming and sizes to be sure to check on your state’s marine regulations site before purchasing a cull tool.
A couple more things I like to include on my clam trips is certainly some sort of bucket hat that will protect me from the sun. Sometimes it’s too easy to lose track of the amount of time spent in the sun and you’ll end up with a nasty sunburn. Wearing UVX, sun-fighting clothing will also protect you from the sun’s harmful rays.
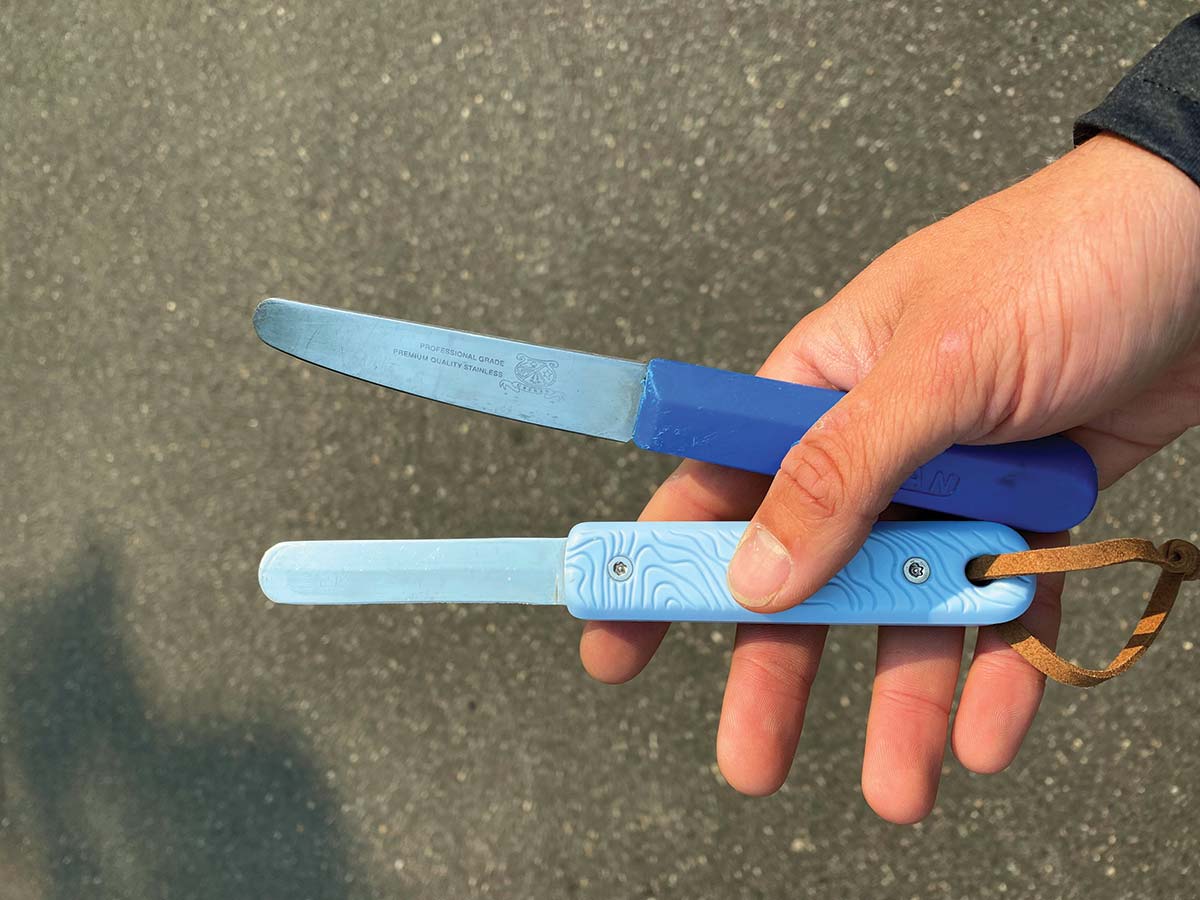
| AWW SHUCKS |
| Clams can be a pain to pop open if you don’t do it regularly. I found that the trick is to have a clam knife with a sharp, sturdy blade and a thick handle for leverage. Work the blade with the clam cupped in your hand and the hinge facing out, shimmy the middle of the blade up and down on the hinge until it pops open from the backside. I suggest wearing a knit gardening glove if you have not done this before since a slip could certainly result in a cut. |
Keep a cooler packed with ice handy for icing down those beauties after harvesting them. Remember to open your drain plug of the cooler to allow the meltwater to run out. Clams left in standing fresh water will create a bacteria hazard.
When it comes to scouting out locations, I’ll typically use a navigation app such as Navionics to look for areas that are shallow enough to hop off a boat or wade in the water to clam. I don’t like clamming near the mouths of outflows since the water coming off them might have a lot of runoff which may be harmful for the clams. Usually my choice is sandy bay bottoms that have a sparse amount of grass, making it easier to work for clams. Mud bottom can also contain clams but treading in mud is a mess and it becomes a safety concern as well if you become stuck and start to sink into it. Stick to the shallow sandy bottoms and if you can take a boat to a flat far away from where others can typically get to, you have a better shot at finding numbers of them.
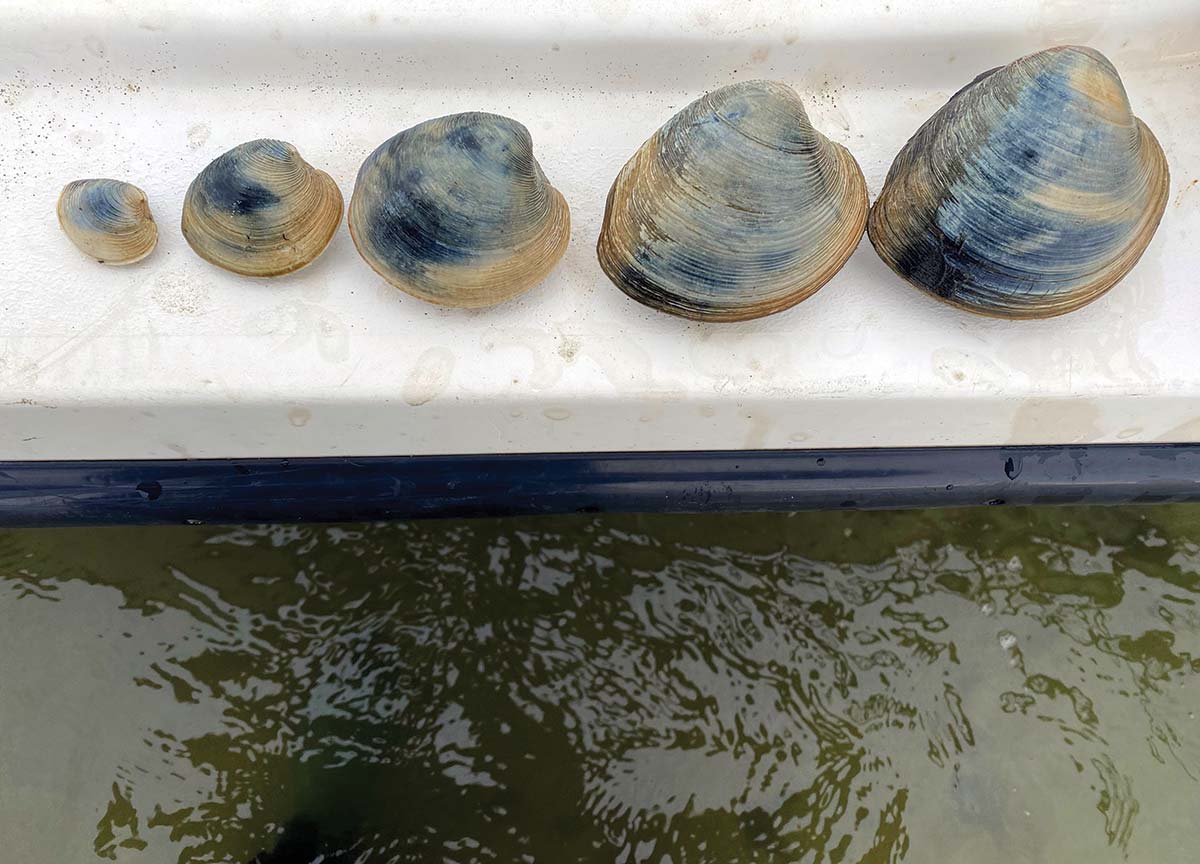
Clams come in all sizes and if you like to eat clams in every way possible, like I do, you certainly will appreciate every single one you catch. Certain ones are preferred for certain cooking methods though. Here’s a quick rundown…
Littleneck- These clams are usually the prized catch for many and I certainly smile when I come up with one myself. Sized about 1 to 1-1/4 inches across the hinge, these are the smallest legal clams and are the top choice of those who like them raw on the half shell with a little cocktail sauce like me. I also use them to make a white wine and clam sauce with pasta.
Topneck- Still an excellent size to have on the half shell or in a pasta dish, the topneck is about 1-1/4 to 1-3/4 inches across the hinge. You can also grill these up with a little lemon and butter for a delicious summer treat.
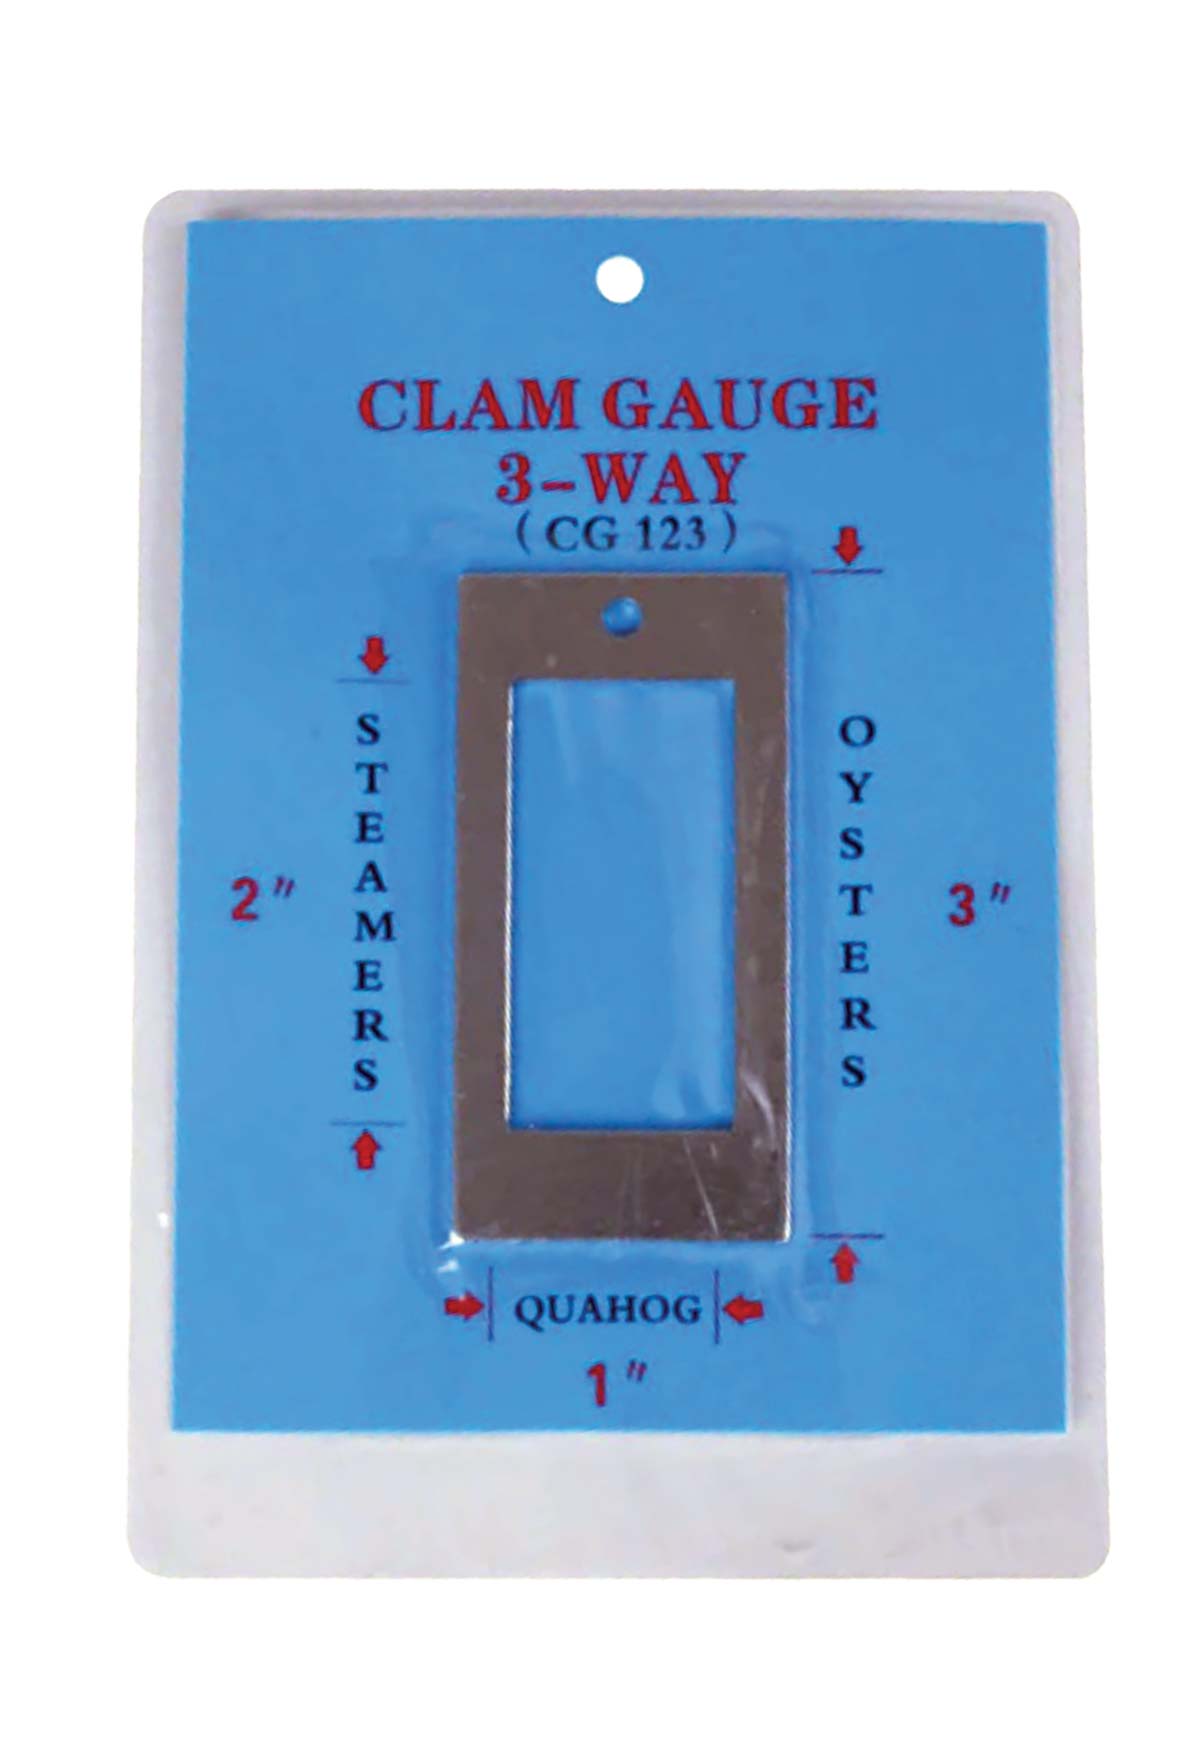
Cherrystone- Cherrystone clams are about 1-3/4 to 2 inches across the hinge and are good on the grill, excellent for clams casino, great for fried clam strips or could even be used for making baked clams.
Chowder- The biggest of them all at 2 inches or larger across the hinge is the chowder clam. The name itself says one of the preferred ways to use them. In a chowder of course! They have more value to the clam lover in the winter due to their use in making chowders but can still make an excellent baked clam if you prefer to eat them that way.