The plug that crowned John Haberek as the Needlefish King.
Recent history is weird, because I lived it and it doesn’t seem all that long ago, but Hab’s Needles were the first plugs that I saw guys lining up across a room for. This was back in 2004 at the RISAA Show. The late John Haberek, the proprietor of Hab’s Custom Plugs was quite the showman; he would even hire a few waitresses from the nearby Hooters restaurant to ‘work’ in his booth at the show, as if the plugs weren’t enough enticement for the throngs of male anglers crawling out of their winter lairs.
| FISHING THE HAB’S |
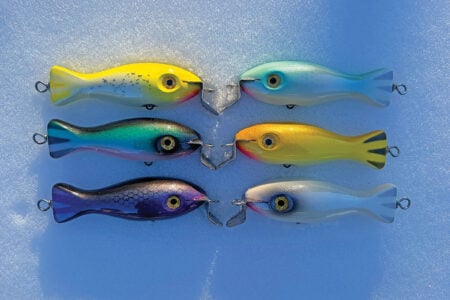
| This needlefish is a very effective weapon for surfcasters fishing the night surf. When it comes to working them, the only thing that’s really important is that you believe in their ability to draw strikes. The slower you reel, the better off you are. The more you resist the urge to ‘improve’ their action by jiggling or popping your rod tip, the better your chances of hooking up. Because of their rear-weighted configuration they come up to the surface rather quickly, but that ‘junk in the trunk’ also translates to good traction in heavy surf. Keep your retrieve slow and don’t be afraid to throw it in really sloppy surf, the fish will find it. |
John was a heck of a guy and was a major steering force in my early days of plug building. I was 24 when I met him for the first time and just 28 when he passed away, but I was smart enough in my younger days to plant myself next to John and say just enough to keep him talking. I learned a few valuable lessons from him, but none were more intriguing to a budding plug builder than the notion that it was possible to create a plug, confirm that it worked and then continue to make changes until you felt that it was perfect. Up until that point, I figured ‘perfection’ was achieved when a fish ate my plug.
The progress of the Hab’s Needle is well-documented in many collections around the region, his first release had longer, skinnier noses and a broader taper. But as he tinkered and strove for a higher level of refinement he was able to learn the value of more buoyancy up front, a blunt nose and slight shoulders. I have to say, I don’t know that I would have ever arrived at Hab’s shape myself, but in his quest for the perfect needlefish, he earned the well-deserved moniker “The Needlefish King.”
Good To Be King
Back in those early days when I would periodically fasten myself to John at winter get-togethers, I had no idea that the historic bites at Block Island even happened, but I would wager that the success of needlefish at Block played a part in his choice to make them. And even though the Block Island bite was long over by the time he arrived at the final configuration, his design still accounted for hundreds of trophy linesiders, including a 63-pounder taken in 2004 by “Iron” Mike Everin from the Newport, RI surf.
While all of his needles caught fish, in my estimation and personal experience, none of them was quite as refined as the 7.5-inch, 2-ounce version. I felt a little uneasy about whether or not it was appropriate to detail the design of a friend that has passed on, so I asked his son how he would feel about me profiling the 2-ounce needle in one of my plug building articles and he gave me his blessing and permission.
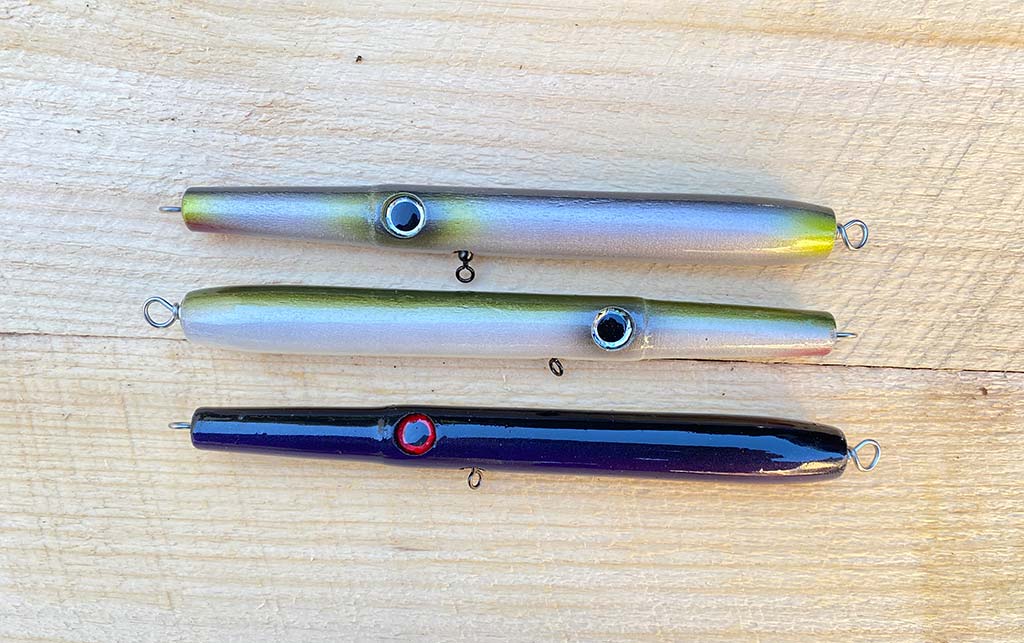
When made correctly, this needle rockets on the cast and is balanced in such a way that it rides quickly to the surface. The belly weight is unique because the thru-wire passes through it, but I believe it’s that little bit of instability, introduced by some of the weight being situated above center that gives the Hab’s design just a little touch of extra life. You will see it when you swim it in daylight, most other needles come in like a stick, this one has just a hint of shimmy and shake—which just might be why it has remained so popular and effective for so long.
The Build
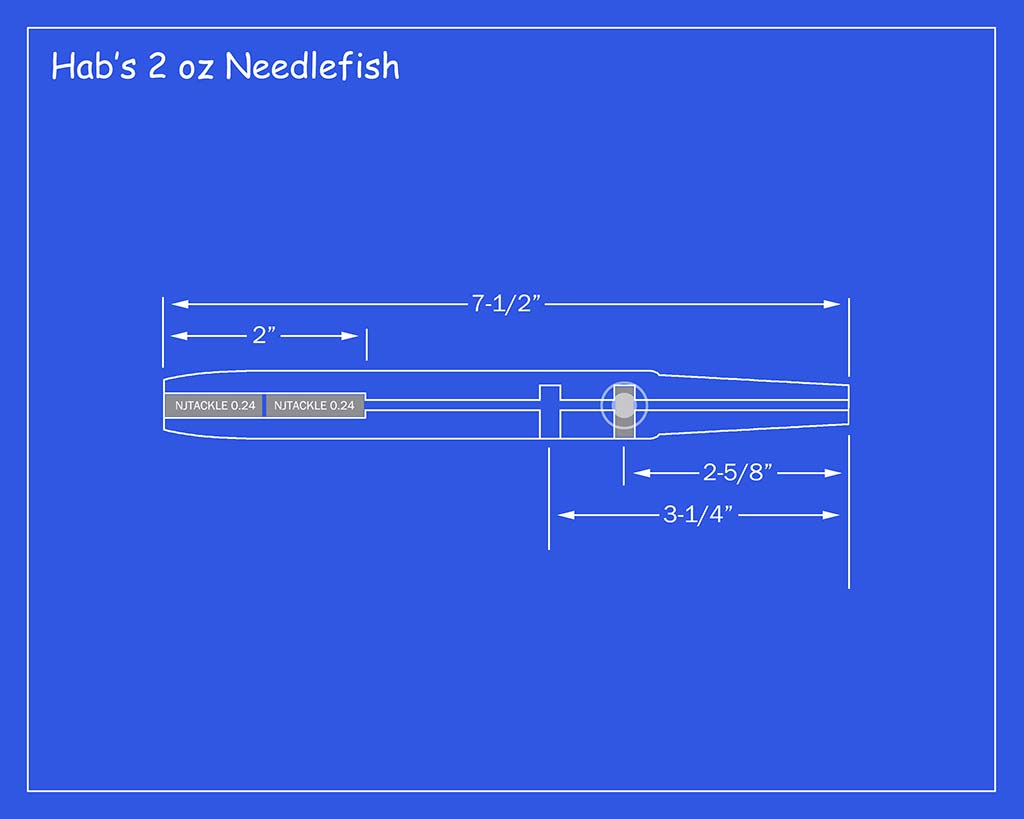
This plug is a pretty simple build, at least woodworking part. I believe the originals were made from hard maple, but birch will yield good results as well. Whatever wood you choose, (I’ll be honest, I often use glued together pieces of maple from the scrap bin for mine), cut them into 1×1 squares at lengths of 8-3/4 inches, find the center at both ends and set them spinning in the lathe. Use a gouge to round off the corners, making sure to leave about a half inch of each end square, now take a skew chisel and work the whole length of the plug down to about 13/16-inch diameter and turn off your lathe. This plug measures 7-1/2 inches, so make pencil marks 7-1/2 inches apart for your nose and tail. Now make marks at 5/8-inch in from the tail mark and two more at 2-1/8 and 2-1/4 inches in from the nose, these mark the location of the ‘shoulder’ that transitions the body to the nose. Turn the lathe back on and touch each mark with your pencil to make them easier to see. Now, working with a small, sharp, skew chisel rough out the shape of the needle using these diameters as a guide. (Refresh your pencil marks as needed.)
Nose Mark: 1/2-inch
Shoulder Mark #1: 11/16-inch
Shoulder Mark #2: 13/16-inch
Beginning of Tail Taper: 13/16-inch
Tail: 9/16-inch
The taper from the nose to the shoulder is a straight line; use your skew chisel to cut that. The shoulder is slight and will require some delicate work, a small round chisel will make this easier, but it doesn’t have to be perfect, you can do a lot of cosmetic work when you’re sanding it and, if you really botch it, you can Bondo it before you sand. The outline of the tail taper is hard to describe, it’s kind of like a bent fishing rod, gradual at first and then a sharper ‘hook’ toward the end. Bear in mind, that it’s not imperative to the function of the lure that the tail taper is exact, just do your best. Use a parting chisel to give the nose and tail nice, flat ends. Sand the whole thing smooth on the lathe with a strip of 180 grit sandpaper and move over to the drill press.
Bits & Bores
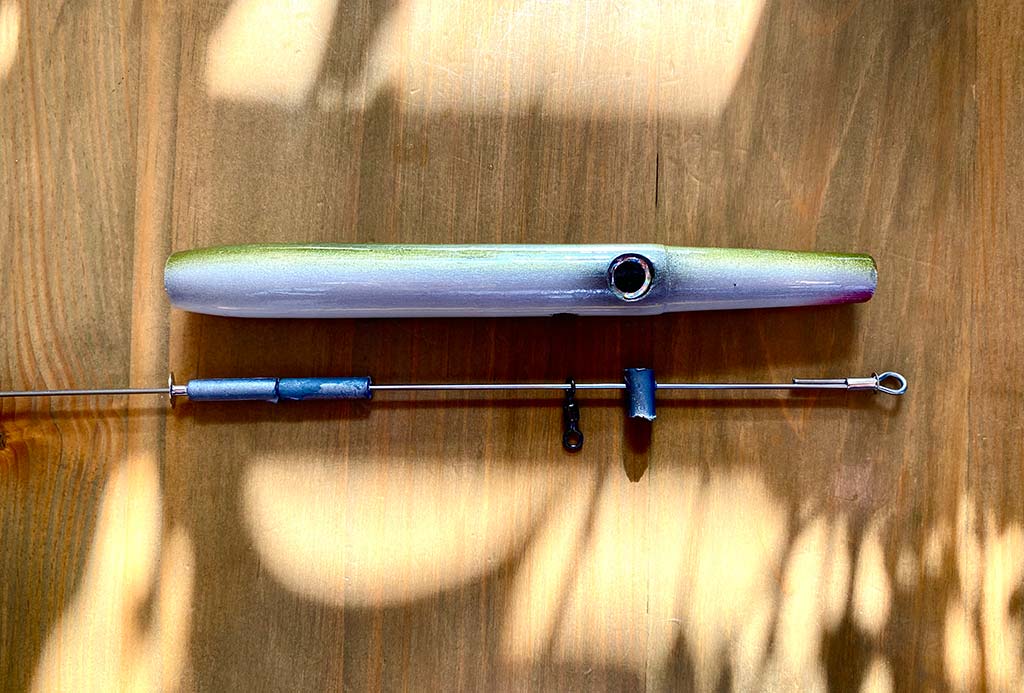
Now you’ll need to drill two 5/16-inch diameter holes both about 5/8-inch deep, one at 3-1/4 inches back from the nose, this will be your hook hole. Drill the second hole at 2-5/8 inches back from the nose, this will house your chin weight. The last set of holes is optional, something I have noticed when fishing Hab’s needles is that they have a weak point, because the eyes and weight are drilled on the same line, there’s a lot less wood there and I have had two of them broken by fish. On the OG Hab’s, the eyes are drilled with a 1/2-inch Forstner bit, and they are drilled about 1/4-inch deep, I would advise drilling half that depth or not drilling them at all.
Once you have all your holes drilled, thru-drill the plug using a 3/16-inch bit and then cut the square off the tail only. Head back to the drill press and drill a 5/16-inch diameter hole in from the tail a hair over 2 inches deep, this will hold your tail weights. Cut the square end off the nose and give the whole thing a light sand with 220 grit sandpaper, this will knock down all the sharp edges and you can move on to sealer.
Paint & Protect
Now take your turned and drilled needles and give them a bath in the sealer of your choice, a 60/40 mix of high gloss interior polyurethane and mineral spirits is an effective sealer; because maple and birch are prone to cracking, I would highly recommend giving them a second dip after two or three days to ensure your hard work won’t split on your first trip. When the sealer is fully dried, give them another light sand with 220 sandpaper and wipe them down with a damp rag.
| MATERIALS LIST |
|
1” thick Maple or Birch .24-ounce NJTackle tailweights 12” pre-bent thru-wires ½” Tail Grommets Nose Grommets ½” Eyes #3 Krok Swivels 4/0 VMC Treble Hooks 6/0 VMC Siwash Hooks 5/16” diameter lead wire |
Before we proceed to painting, we have to put that chin weight in place. You’re going to need to buy a length of 5/16-inch diameter lead wire from rotometals.com, you can buy it for about $4 a foot. You’ll need to cut this into 7/16-inch long segments—the best way to cut it is with a bandsaw, but you can also do it with a sharp box cutter or even wire cutters. Now we have to drill a hole through the weight, grab the weight with pliers (they can get hot from drilling) and drill a centered 1/8-inch diameter hole through the weight about 1/2-inch up from the bottom. Trim the edges of the hole with a razor blade and epoxy it into the plug—making sure that the hole lines up with the thru-wire hole, the wire needs to pass through the weight. When the epoxy has cured, cover the weight with Bondo and sand it smooth. Now it’s time for a couple coats of primer such as Painter’s Touch All-Purpose Primer and you’re ready for paint.
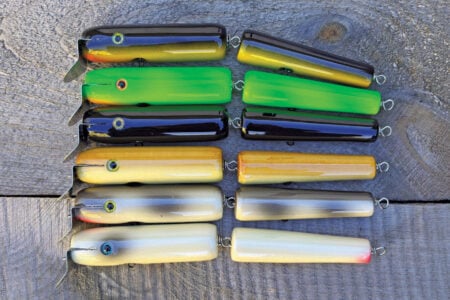
For colors, as always, I like to try and stay true to the originals. John was known for simple, yet clean, paintwork. Most of the plugs he made were either solid colors or two-tone. For mine, I will mostly paint black, white or parrot—I might add a blurple in there or maybe a sand eel too. He was also known for adding a touch of glitter to many of his creations, I would recommend adding just a pinch of silver glitter to your clear coat if you want to mimic this effect. I prefer to clear coat my plugs before assembling them so, after your plugs are painted, Super Glue some eyes in (if you’ve elected to use eyes) and give them a coat or two of your favorite clear finish—I use bar top epoxy.
Putting It All Together
When the finish has cured, assemble the plugs. Drop a #3 Krok swivel into the hook hole, slide a nose grommet over a pre-bent, 12-inch thru-wire and send it through the plug—threading the swivel on the way. Now slide a pair of .24-ounce NJTackle tail weights over the wire and into the tail of the plug, cover the hole with a 1/2-inch tail grommet. Finish the build with a neatly-wrapped tail loop. Rig them with a 4/0 VMC treble up front and a 6/0 dressed Siwash on the tail.
I hope I have done my old friend justice with this article, passing his design and legacy on to the next generation. You might say that John Haberek was the bridge from the old school plug builders of the 1980s and before to the new generation of wood-spinners that we know today. When you take your homespun Hab’s for swim this season, take a moment to thank its designer—a guy that wasn’t satisfied with a plug that caught some fish, a guy that strove for perfection (and wore the most epic moustache in New England fishing.) Thanks John, you are missed, but never forgotten.