There is nothing more satisfying than catching fish on a rod built by your own hands.
There are a lot of steps that go into rod building. Truthfully I wouldn’t even call them steps, it’s more like a. Through trial and error, flies in your epoxy, and reevaluating your guide layout, as a builder you have to push through and cross that finish line.
Your journey, based on skill and time investment, can take you a few weeks or a few months. But when your custom rod comes together it is super rewarding and it gets even better catching fish on it.
This is the story of my first ever custom rod, the one that started it all.

The Build
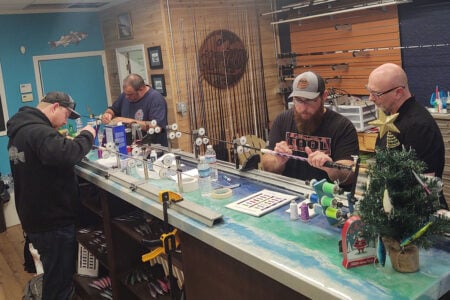
I wanted my own inshore rod for the boat, it had to be versatile. I wanted to catch every inshore species under the sun on this weapon and it had to be blue; everything had to be blue about it. With those specifics in mind, I went shopping at Grumpys Tackle in Seaside Park, NJ to visit with my mentor, Bob Hyrszko. He had, and has, everything needed to start the rod building journey; after reviewing a few options, I picked out a blue St. Croix Legend Xtreme blank, the perfect inshore rod for fluke jigging, blackfishing, light tackle stripers, you name it; the St. Croix Legend Xtreme can handle it.
The first step after selecting your blank is to get a feel for where you want your reel seat and spit grips to lay. What’s great about gathering these materials is that it is all available on Anglers’ Resource; your own local shop that specializes in rod building can typically turn around a materials order through Anglers’ Resource pretty quickly.

Once the lower half of your rod is put together, it’s time to get even more scientific – the guide layouts. When you’re setting up a guide layout, you want to ensure that your guides prevent line slap when casting; when there’s pressure on the rod, the line must flow through every single guide. I only trust Fuji guides on all my rod builds and for this specific build, I picked Fuji K-Guides. Fuji K-Guides are a great selection for beginner builders and then you can work your way up to those Fuji titanium guides.
Following a successful test cast, you begin laying down the thread. Anglers’ Resource offers a great selection of Fuji Thread so I had a lot of blues to choose from for the guide wraps, and ultimately my decorative wrap. Once the guides are all wrapped, bring out the reading glasses and align those guides; this particular build is a spinning rod so we didn’t want those guides acid wrapped. Now that your eyes have regained their sanity it’s time to lose it all again with the decorative wrap! I did a closed decorative wrap for my first ever custom rod, which Bob couldn’t believe that I completed successfully on my first try.
A closed wrap takes longer than an open wrap, because you have to completely close the decorative area with thread instead of leaving the blank exposed and as you go, you have to use a sharp pick to move the thread cautiously without raking the thread jeopardizing your progress. The scariest part other than raking thread is when you close the wrap; you could let all those tail ends get too loose and your decorative wrap literally slides down the blank like a Slinky.

Drying & Field Testing
When you’re ready to mix epoxy, your journey is almost over. A couple of coats of epoxy over all of your thread, while also avoiding dust, bubbles, and gnats is a step in the right direction, as long as it’s spinning on the drying rack. The epoxy process takes a few days, usually three to four, for the epoxy to dry and reapply. I would go into the shop every day and check my rod spinning on the rack and mix more epoxy for the next layer. The great day is when your rod is all done and you take it off the rack, and pop your reel on there, now it’s official.
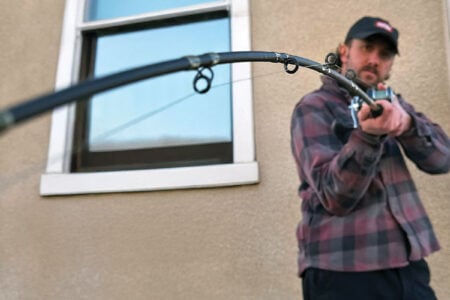
The greatest satisfaction following your journey of course is catching fish on the rod you built. Like those custom plugs, it’s not meant to be hung up on a wall; if you’re building your own rod to fish, then by all means fish it! I finished this rod in July, peak fluke season close to home running out of the Manasquan Inlet. I pitch up-current for fluke so this rod was perfect for that; a sensitive tip to feel those bites yet a strong enough backbone to chuck heavier jigs out if needed. Working the bucktail at the bow of the boat, I finally felt that first “tap”, a couple more jigs and another two more “taps” before setting the hook on that first fish, feeling every headshake on the rod worked all the way up to my shoulders. It was all big smiles when I got that fluke up, knowing that this rod that I built was up to the task as designed.

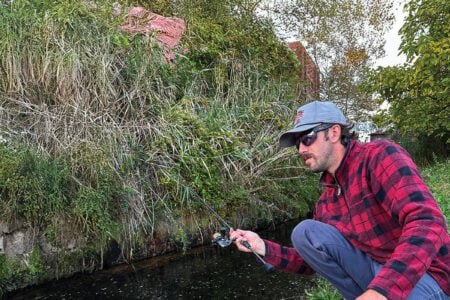
The rest of the summer I slayed it using that rod; not just fluke but sea bass, schoolie stripers, bluefish, and albies. The cream of the crop for me personally, was using that rod in the winter for my favorite species, blackfish. If you think the feel of a fluke tapping on this rod is great, a picky blackfish bite was like they were ringing a doorbell for me to swing on. I felt unstoppable with this rod and each fish I brought up on it, my appreciation for the art grew more and more.
Rod building truly is a work of art. And much like an artist taking a step back to look at his masterpiece on the easel, this is the feeling a rod builder gets looking at their rod on the drying rack with its last coat of epoxy on it. Whether it’s the artist’s painting hanging in a local gallery or the rod builder eying up his or her very first catch on their custom, hand-built rod, I have to think it’s the same feeling of absolute gratification.
The places you can go with rod building too, if you choose this journey. I have had multiple rods showcased at the International Custom Rod Building Exposition and the rod I talked about here, was the first to be displayed. As of writing this article, I have built a dozen rods, and that feeling of hooking into a rod’s first catch never ever gets old.
As I close out this decorative wrap, I invite you all on this journey of creating art and exploring the same feelings I felt when you land that reward, but it is up to you to accept. Will you?