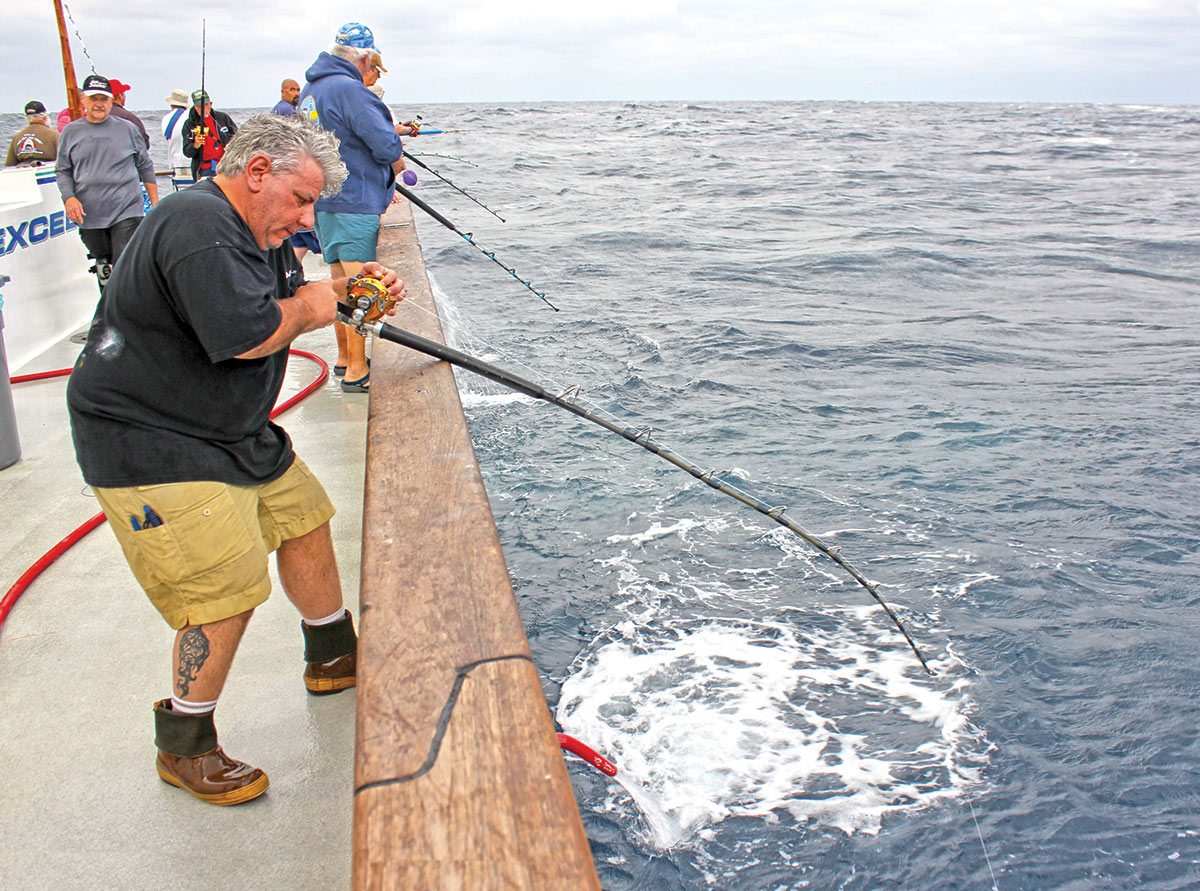
In the depths of winter last year I took an interest in tuna fishing and decided a party boat trip would be a great and affordable introduction to the fishery. While doing research on the gear I would need, I came across West Coast Style rail rods. These rods are typically longer in length than standard stand-up rods and are placed on the rail to gain leverage on the big tuna (100 to 300 pounds) encountered on long-range trips.
Fights with these “cow” tuna can last for hours and push the development of equipment and fighting techniques. This design made a lot a sense to me; I have found myself using the rail for leverage when cod or pollock fishing and it seemed like it would offer a lot more mobility on a crowded party boat than a cumbersome harness.
The most prominent feature on these rods is the extended foam fore-grip, which provides protection to the blank when using the rail for leverage. There are a number of excellent factory-built rods from brands such as United Composites, Calstar, Black Hole, Phenix, Shimano and Seeker. Having some experience building rods I figured custom building my own would be a great way to learn and save on the budget. After an extensive amount of research I honed in on a United Composites blank due to the near unanimous rave reviews and reasonable price.
As part of my rod build, I took a trip to Trophy Tackle in West Babylon, NY to check out these rods and got a whole lot more than I bargained for. Shop owner and seasoned long range tuna fanatic John Nappo graciously spent more than an hour walking me through the different blanks, provided invaluable insight on how to build a rail rod and how to properly employ the rail fighting technique. As convenient as online shopping can be it was really a great reminder of what a different experience it is to visit a good shop with top-notch customer service.
John exclusively uses United Composites blanks, and the Challenger Platinum and Challenger Extreme series have several models that fit Northeast party boat tuna applications. When asked about specific blanks, here is what he had to say, “The 76 Raptor (7’6” 60-80lb) is a great rod for fishing 60- to 80-pound line. It has a soft tip and soft back end putting minimal stress on the angler. It is also a great rod for casting a bait away from the boat. The 76 Centaur (7’6” 100lb) could be the best rod for east coast party boat fishing. It has a nice action as it is not super-fast, but not slow-parabolic. It loads up effortlessly and is great for fish to 200 pounds. The 70 and 76 Viper (7’ and 7’6” 100-130lb) could be the best all-around rail rod made today. It can fish multiple line classes with complete confidence. The hallmark soft tip is evident with this one, but the back end power is limitless. It’s difficult to find a point where the rod will not keep pulling. The 76 Invictus (7’6” 130-150lb) is my personal favorite for fishing heavy line, on a 130 especially. It has incredible power yet loads up easily for what it is. It’s an incredible rod for big fish. While it has limited application in the Northeast party boat fishery, if there is a bite on bigeye tuna in the canyons, this is the one you want!”
Rather than get into a comprehensive how-to on all aspects of rod building, what follows are some highlights from the build of my Challenger Platinum 70 XH and how building a heavy rail rod is different than inshore or surf builds.
Grip Construction
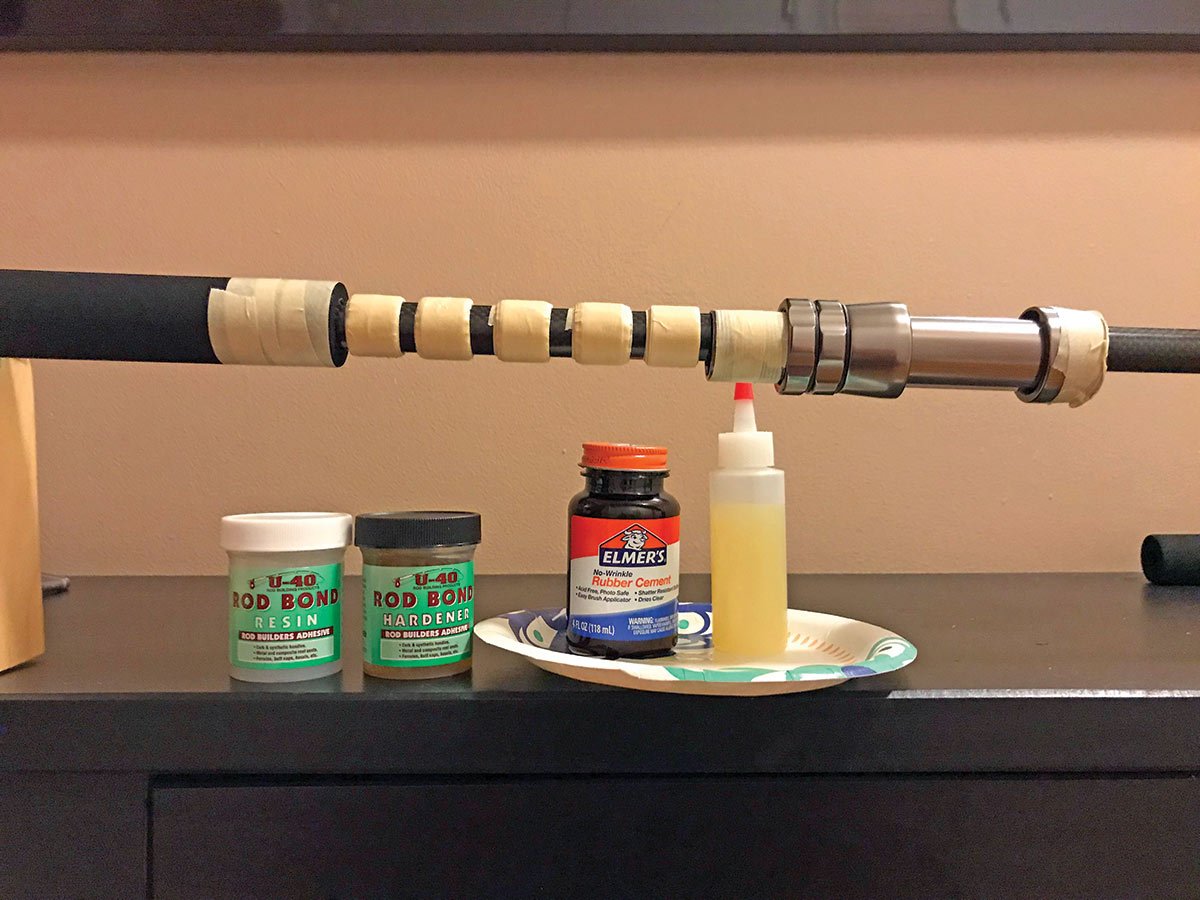
Fore and rear grips are critical components of a rail rod. The fore-grip provides protection to the blank for placement on the rail, and the rear provides much needed cushion when it is tucked under your armpit for extended periods of time. The most popular grip material for this application is Hypalon, a squishy but extremely resilient foam material. I opted for a 16-inch fore-grip and a 14-inch rear-grip. Foam grips with smaller diameters than the blank can be used and are actually a breeze to install using a trick developed by a well-known west coast rod builder. Drop the foam grip onto the blank, and once it reaches the point it won’t drop anymore, apply a light coating of rubber cement to the remaining blank area and in one smooth motion slide the grip down into the desired position. I have to admit I was extremely skeptical and took a leap of faith to goop up a brand new blank with rubber cement, but man did this trick work great and save a lot of time on reaming out the grip. The excess rubber cement can be easily removed from the blank with a paper towel with no remaining residue. The rubber cement serves as a lubricant and allows the foam grip to expand around the blank while sliding down. The fore-grip, which will be subject to more abuse, can be installed with a blend of rubber cement to help slide it into position and U40 rod epoxy to secure it.
Placing the rod on the rail when fighting a fish can degrade the foam grips over time, and replacing a grip once the guides are on a rod can be very difficult, so it is common for a protective material to be put over the fore-grip. For lighter-duty applications heat shrink tubing can provide sufficient protection. However, in heavy-duty applications with much longer fight times 3M cold shrink tubing, a material developed for protecting large electrical connections, is the preferred material. While cold shrink provides unmatched durability it is also expensive (around $25 a foot) and heavy compared to other materials.
Reel Seat
Given the heavy-duty application of a rail rod, aluminum reel seats are used. The reel seat inner diameter ideally should be just slightly smaller than the butt diameter of the blank. It is always better to err on the larger side since the diameter can be built up with masking tape arbors and epoxy to secure the reel seat to the blank. When sliding the foam grips and reel seat into position be mindful of the excess epoxy that may be pushed out the bottom. I used masking tape to protect the ends of the grips and most importantly the threads on the reel seat.
Guides
The next step is to mock up the guides and load test the rod. The guides are taped into position, and the rod is fully loaded to see if there are the correct number of guides and that they are properly distributing the load. In an ideal arrangement, when under load the line path should smoothly follow the curve of the blank; keep an eye out for any flat spots in the line between guides and adjust the spacing accordingly. This process is also known as the static deflection test and is a critical part of building any rod.
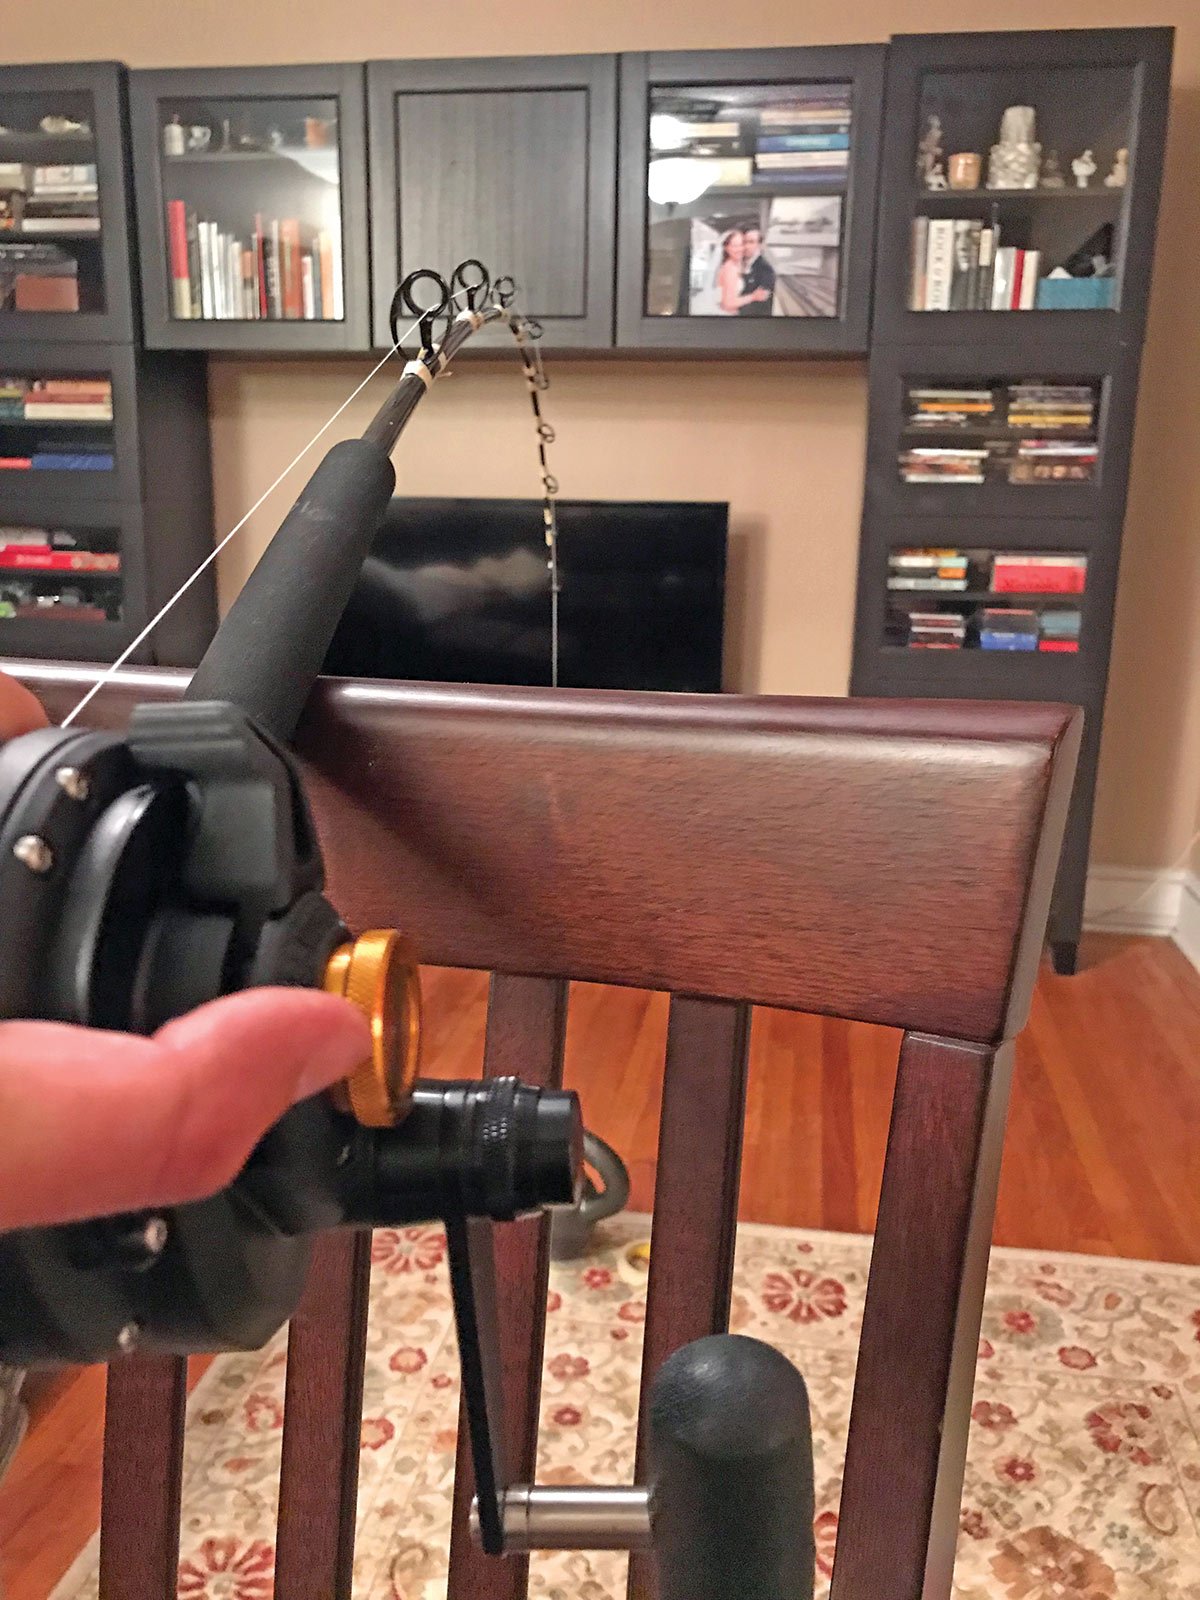
It can be challenging to fully load a heavy rail rod; I had to tie the end of the line to a 35-pound kettlebell and place the fore-grip on the back of a dining room chair for leverage to fully load the blank. Another challenge was finding tape strong enough to secure the last few guides toward the tip. I found that under full load these guides had a tendency to want to roll over to the underside of the blank; for the first time I understood why some rod builders “acid wrap” their rods and place some guides on the underside of a conventional rod. I found that Gorilla Tape did a better job of securing these guides than regular masking tape.
I elected to use ring guides over roller guides, primarily due to budget and aesthetics. After a bunch of trial and error I found success using eight guides and a tip on a 7-foot rod. In order from largest guide out to tip I used size 25, 20, 16, 12, 10, 10, 10, 10, and a tip. I would not recommend going smaller than a size 10 guide to allow clearance for any knots or connections if using a mono top shot. Guides by Alps and Fuji seem to be the standard for rail rods.
The guides were wrapped on using a “triple wrap” where one wrap of thread was placed beneath the guide feet as an under wrap, and two layers of wraps were placed over the guide feet. Each wrap received a coating of Flex Coat epoxy to seal the thread with a thicker finishing coat on the final wrap. I elected to use size D thread, which is the largest and most durable thread and also much easier to wrap than smaller size A thread.
Unfortunately very few tuna were caught on my rod’s maiden voyage so I didn’t get to put it through its paces, but there is always next season. If you are thinking about adding a tuna rod to your arsenal for party boat fishing, consider a rail rod and use the rail to put the hurt on the fish and off of your back!