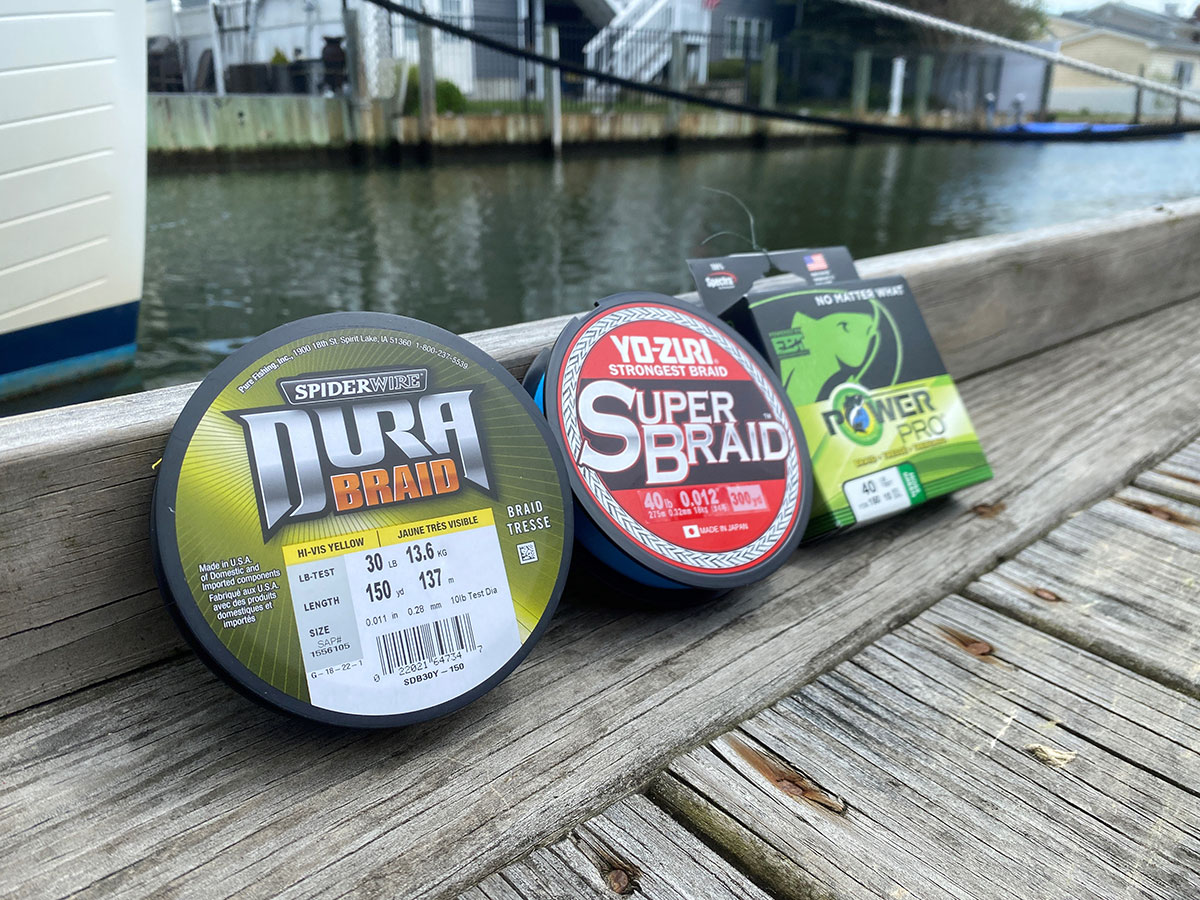
Apply these four tips to your braided line use this season.
Once we all heard about braided line and what it was capable of, we couldn’t get enough of it. Braided line offers strength, sensitivity and superior casting with half the diameter and three times the strength. But it comes with some downsides too.
I can still remember the early days of braided fishing line and seeing the old advertisement that said using it was like “hitting a brick with a lawnmower” Since those days that way of thinking remains true to its way of being incredibly strong and sensitive.
But is braided line all that it’s cracked up to be?
For better or worse, braid is here to stay and since it is so productive to use, let’s review a few ways get the most out of your braided line. For the uninitiated, braided fishing line is made from synthetic materials such as Dacron, Spectra, and Micro-Dyneema, and for most anglers, once they try it, they never go back.
1. The Best Knot
While there are many good fishing knots, there is a clear leader for use with braided line. And that knot is the Palomar Knot. It is a very simple knot to learn and use: make a loop in your line that you will pass through the lure’s eye or snap swivel. Once through, use the loop to tie a basic overhand knot. Don’t tighten it yet, but instead pass the hook (or swivel) through the loop, and then wet the line just a bit before pulling it tight. Be careful pulling the line tight because braided line will cut into your skin since it is so thin, slick and strong.
2. Place Backing on the Spool
I’ve found from experience that before you spool braided line onto your reel, you will need to add some mono backing first. This is due to the fact that braid is slick and may spin independently of the spool without any backing to improve its grip. I’ve used both mono and fluorocarbon as backing, this layer provides an uneven surface for the braid to grab onto and also provides just enough ‘cushion’ for the braided line to bite into. Sometimes anglers want to pack as much braid as possible onto their reel, in this case a thin layer of tape like electrical, duct or hockey tape will offer adequate grip and cushion to keep the braid from slipping. The downside is that the tape may leave sticky residue after your remove it.
3. Reel It Up Tight
You’re not done yet. It has always been my experience that you need to now take a few minutes to go out and finish it off. Here’s what I mean: tie on a hook and attach it to something in your yard or at the park where you can walk away and still see it. Walk away far enough to get back down near (but not all the way to) the knot, and then start reeling it back onto the spool. The key here is to keep a lot of tension on the line and wind it back on tightly. You will often find that if you don’t, loops and birds’ nests will haunt you until you do.
4. Making It Disappear in the Water
In the beginning, braid only seemed to come in grey, green, or high-visibility yellow, and those choices aren’t always the best for clear water fishing. These days, you can find some better choices of colors and patterns for every kind of angling experience, but if you really want to help, here’s an old method that I use: Take a blue or a light blue Sharpie marker and make a slit in the tip. Now run the braided line through the marker along the first 18 to 24 inches of the line. This gives it the ability to disappear better in the water column, especially against the sky.
Price & Pro Tips
You might double-take when you look at the price, but most anglers will agree that braided line is worth the expense. It’s true that tangles and backlashes are tougher to unravel with braid, but if you make sure to keep your line tight to the spool at the end of your cast, you’ll alleviate most of those issues. Some claim that braid can saw into your guides, I’ve never seen that happen, but if you’re concerned just make sure to use the latest ceramic guides which are certified ‘braid friendly’. Braid is tough to cut, so make sure you have a sharp knife or pliers with good cutters to make your life easier. If you haven’t made the switch to braid, follow these steps and it should be smooth sailing.


