Rebuilding that old fishing rod to its former glory.
Do you know that old rod may be sitting in the corner of the garage? Maybe it was Granddad’s surf stick from back in the 80s. Or maybe it’s one of those reliable rods from your current lineup and it just needs a facelift after landing thousands of fish. Either way, if you find yourself with one of those rods well deserving of a revamp to get it back to its former self, this next installment of The Fisherman Magazine’s Rod Building Series will suit you well whether you want to tackle the task yourself or are interested in bringing it to a builder and seeing what goes into the process.
Before getting into the actual process of stripping an old rod and rebuilding it, I want to share a little background on how I found the perfect rod candidate for revamping. I could have gone the lazy route and headed down into my basement for one of those old rods that probably could use a facelift. But that felt like ‘taking the easy way out’ and as luck would have it, an opportunity soon fell into my lap.
As many folks know, before my involvement with the magazine, I worked full-time at a local tackle shop since I was a teenager. I was always interested in the process of building a rod, and I convinced one of the rod builders to teach me the tricks of trade; in time, I was building them for customers, until I hopped onboard with the magazine. While working at The Fisherman table at one of the winter events this year, I was approached by a subscriber who asked if I still build rods. “Yeah, as a matter of fact, I’ve been doing a few rods for friends and just turned out a sweet inshore fluke rod for the first installment of the magazine’s rod building series,” I replied. We exchanged contact info, and in the following days, I was handed a battle-scarred 10-foot Lamiglas surf rod that clearly had subdued many stripers and bluefish over the years. This stick was the perfect candidate for a complete rebuild, and I immediately got to work.
Guide Removal
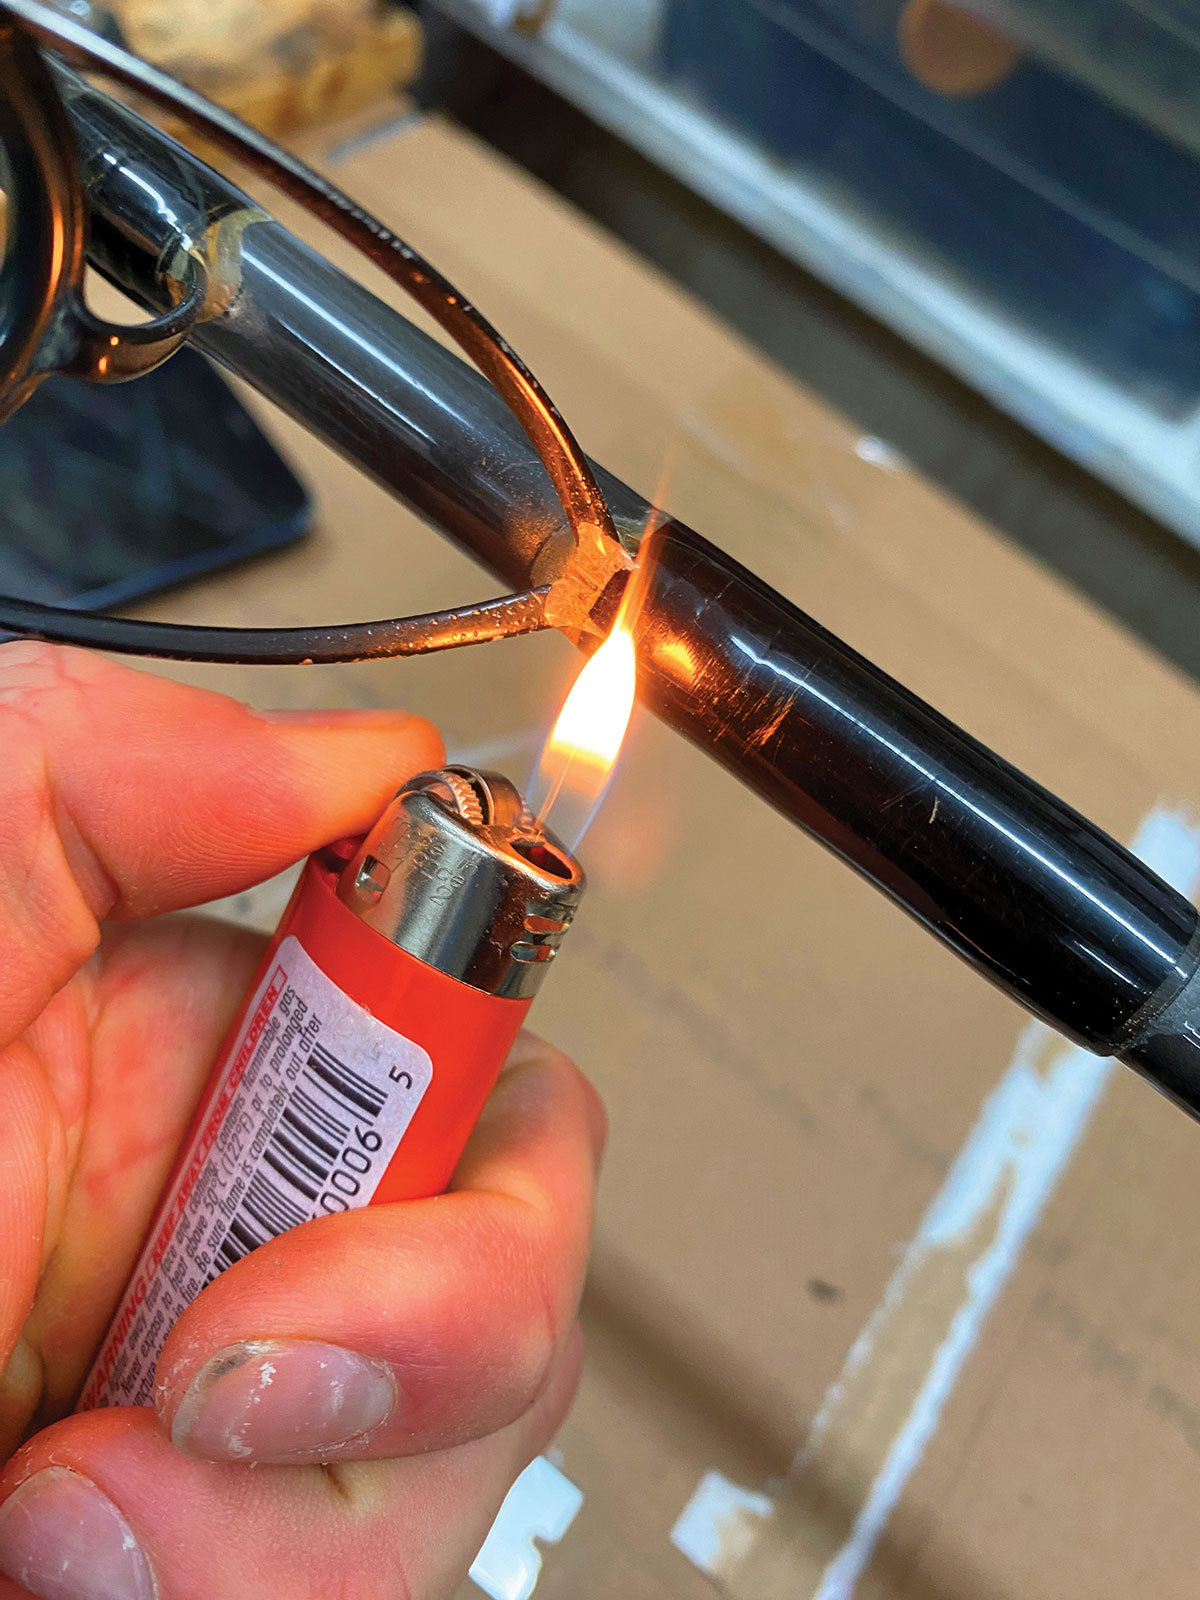
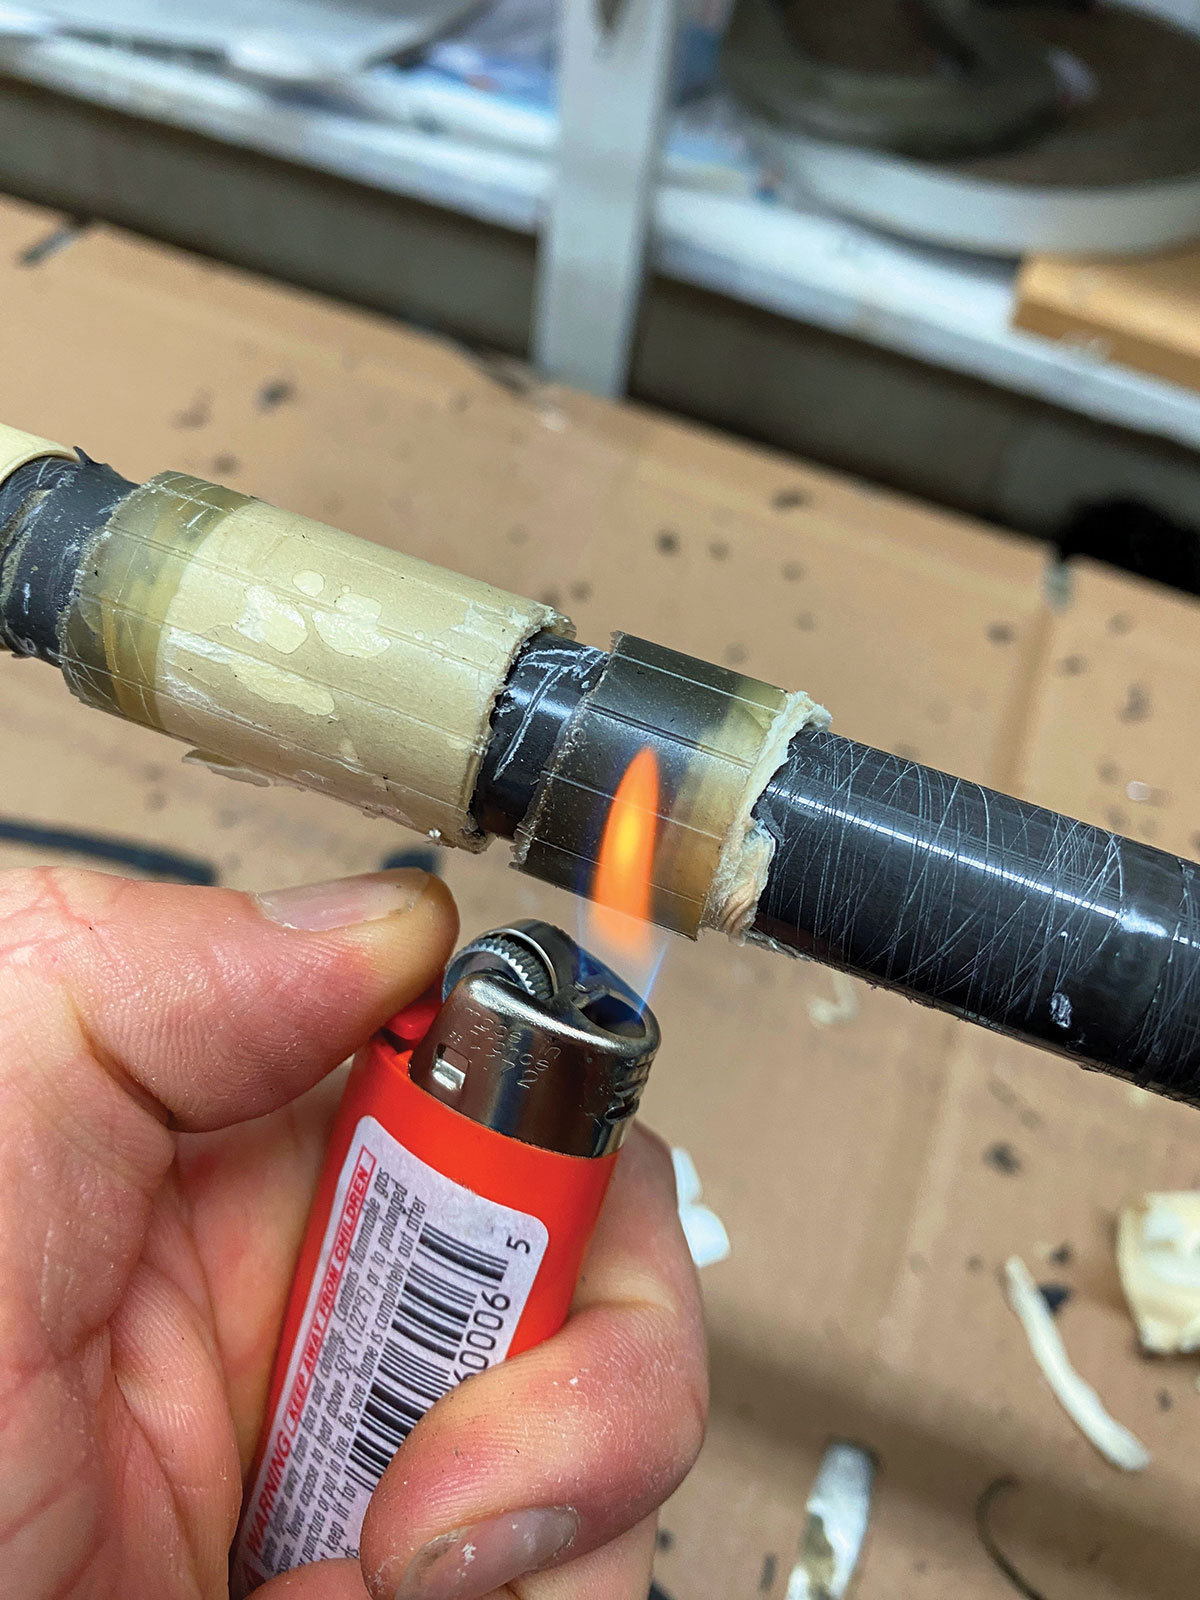
The first step in the process for me is removing the old guides. You can’t just go yanking them off or sawing through the thread because you’ll risk damaging the blank. The easiest way to go about getting the old, worn guide off the rod is by using a brand-new razor blade and a little bit of heat from a lighter.
Start by heating up the wraps with the lighter to soften up the epoxy. Don’t overdo it as too much heat could compromise the integrity of the blank – a few seconds should do. Run the razor blade right along the foot of the guide, try to make the cut along the foot and without scarring the blank. The thread and epoxy should come off fairly easily, but if it’s stubborn, put little more heat to it and continue the process. I was able to pop the guides off this blank easily once I cut the threads by twisting the blank in one direction and the guide in the other. The wraps came off fairly easily too, and I was able to just spin the thread in reverse with my fingers until all of it was removed. I used the point of the razor blade to pick off any of the loose epoxy chips from the wraps still stuck to the rod blank.
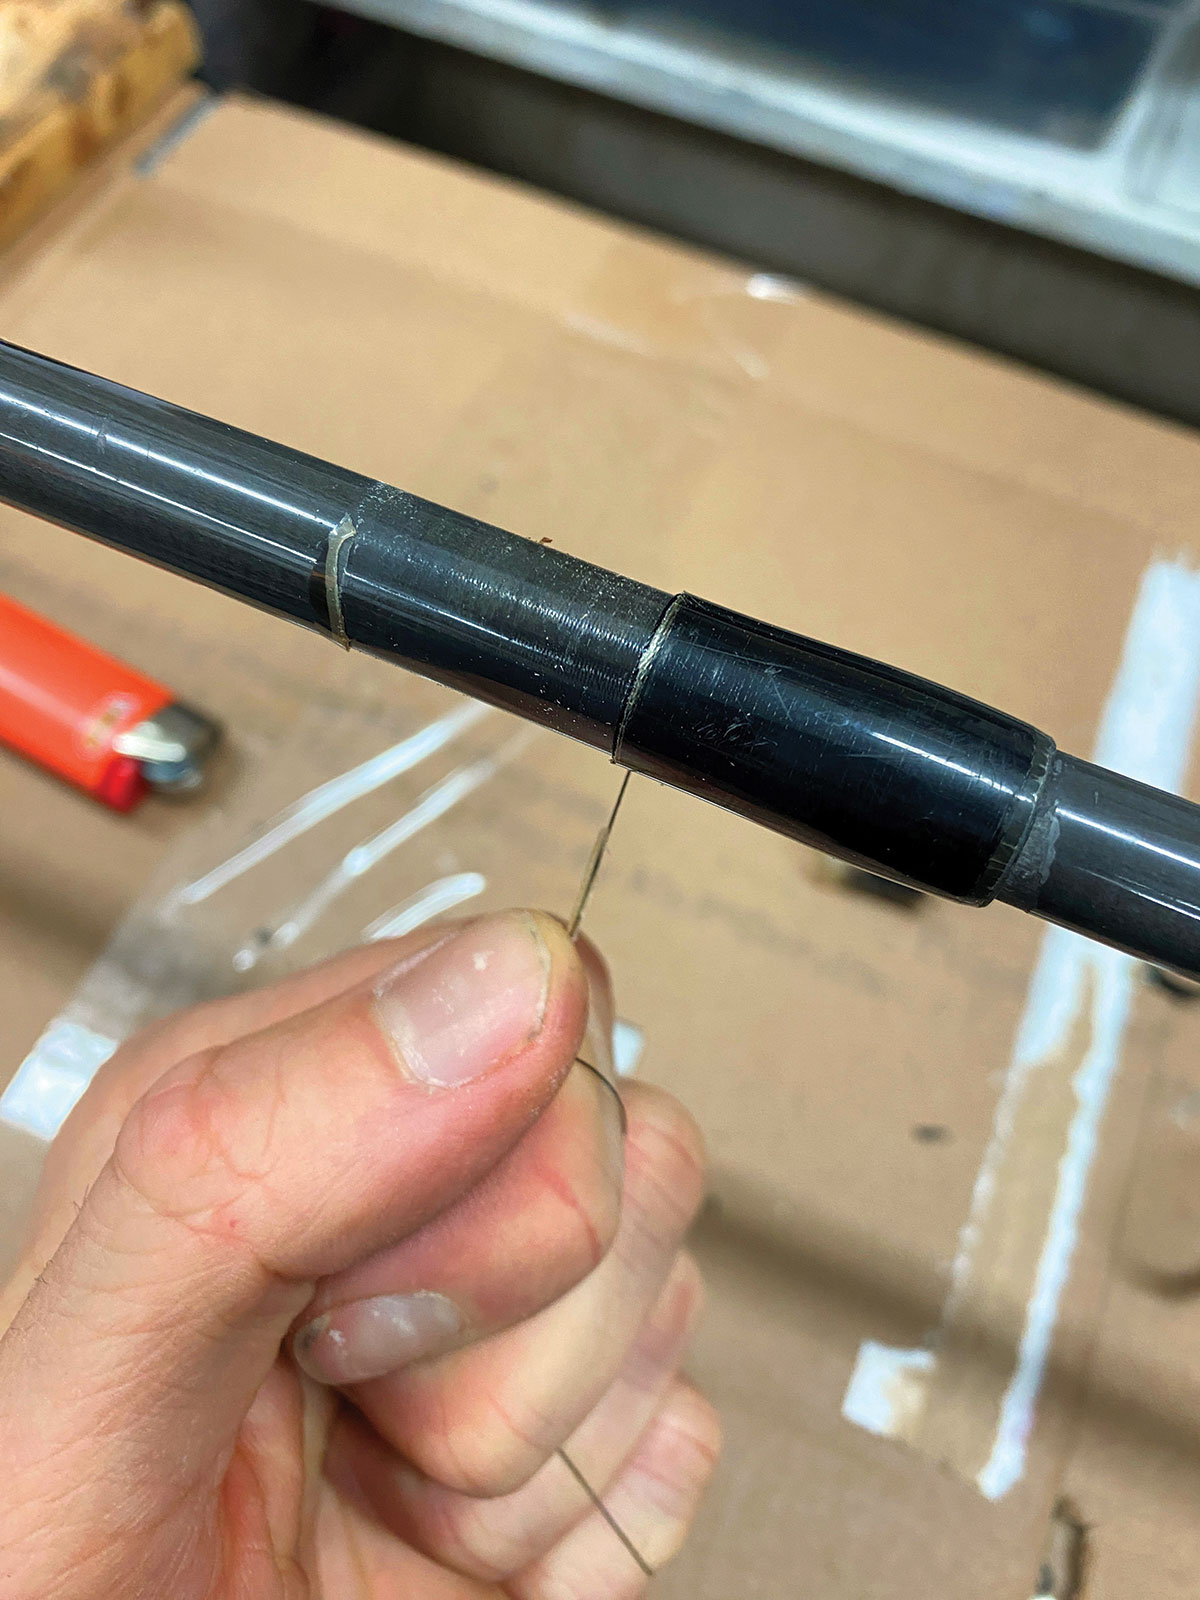
After repeating this process six more times for the rest of the guides, I was left with just a tip at the end of the blank. A little bit heat from the lighter and a pull from a pair of small pliers took the tip-top right off. The tip wrap thread was removed as well. The location of the old guides became a bit stained and dirty from the feet and wraps sitting on them for years. With a bit of acetone on a paper towel, I was able to remove the stains leaving a clean working slate once again.

Strip The Grip
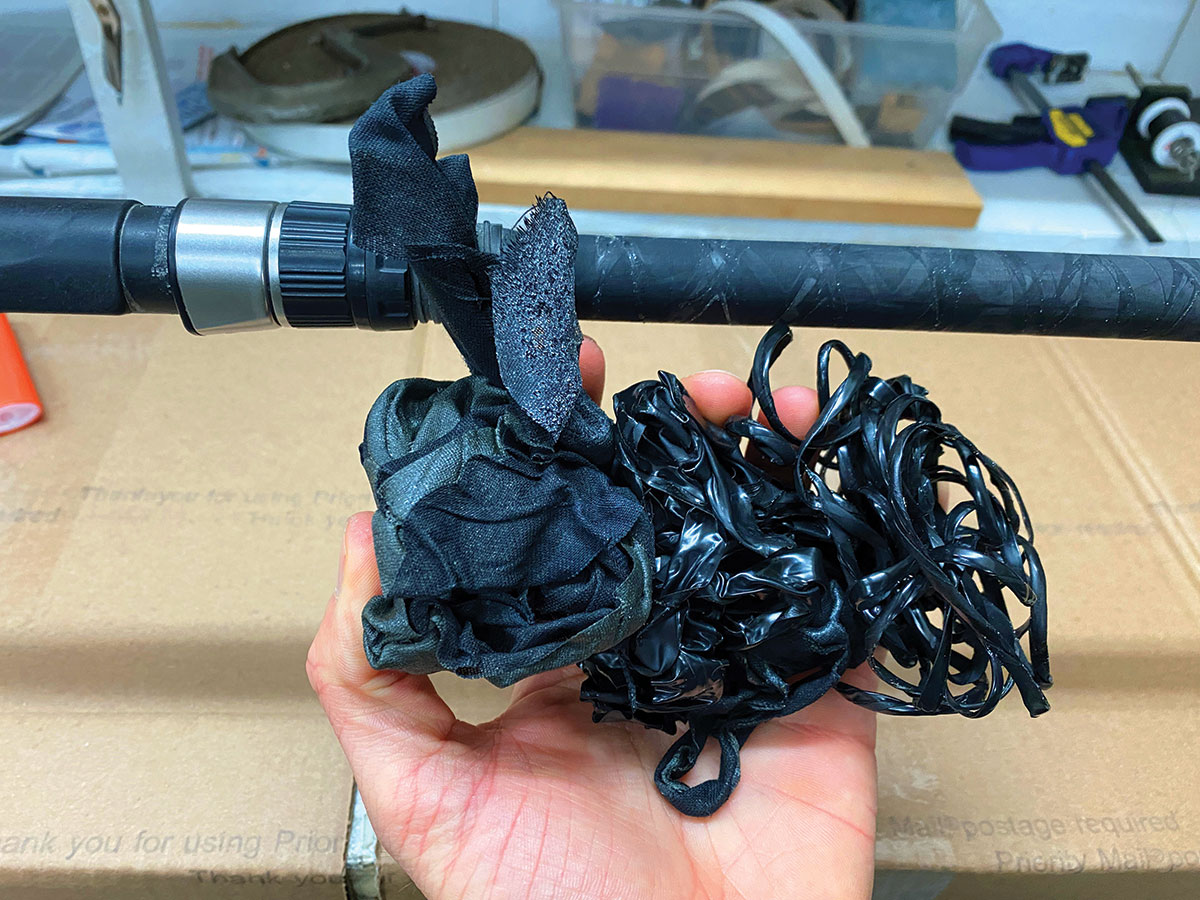
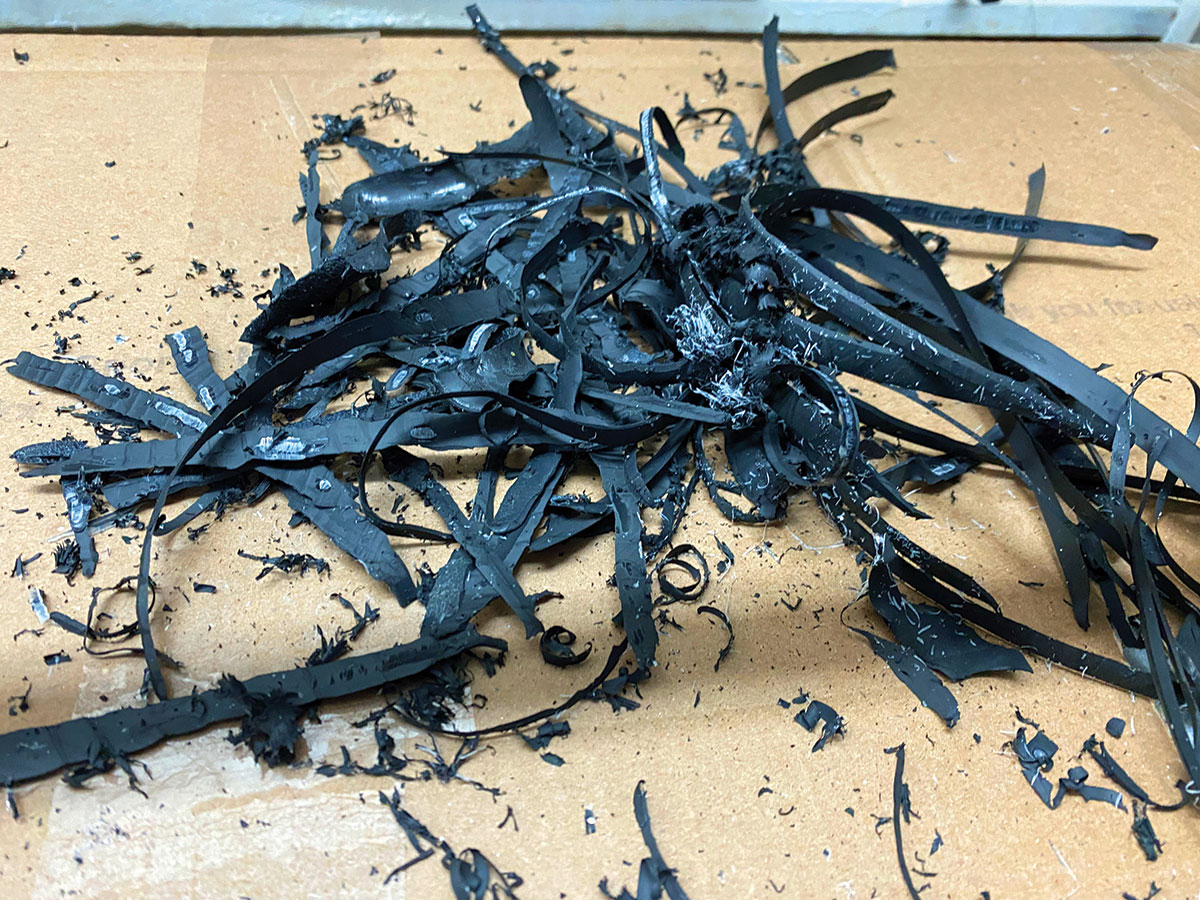
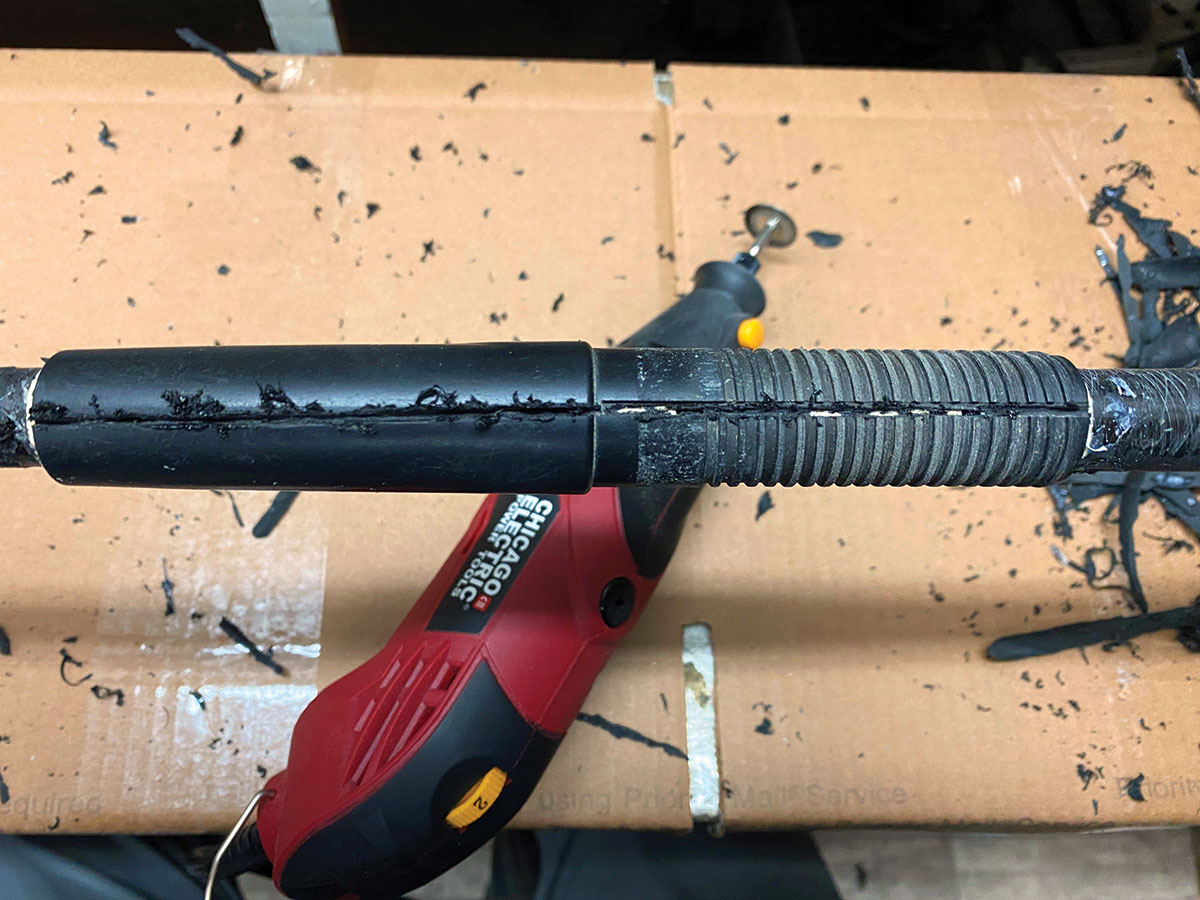
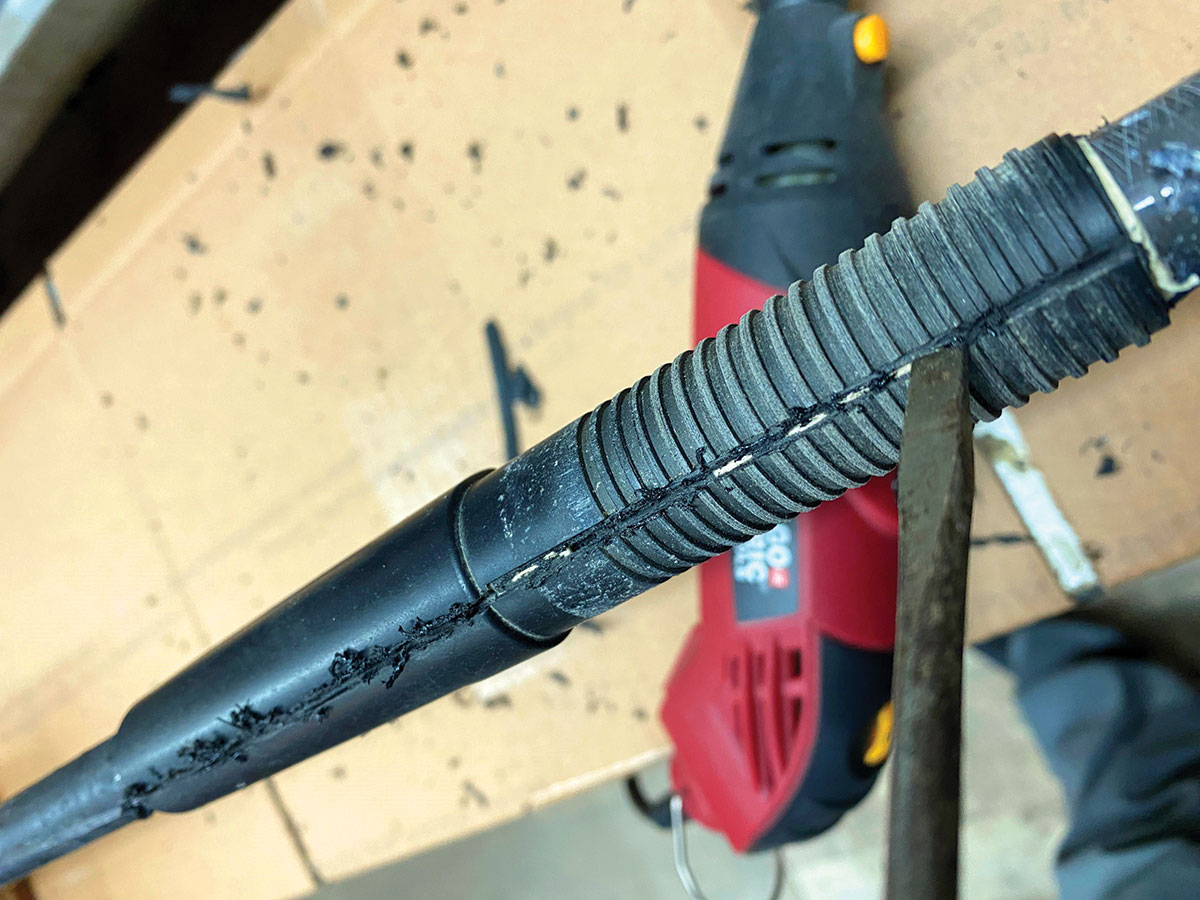
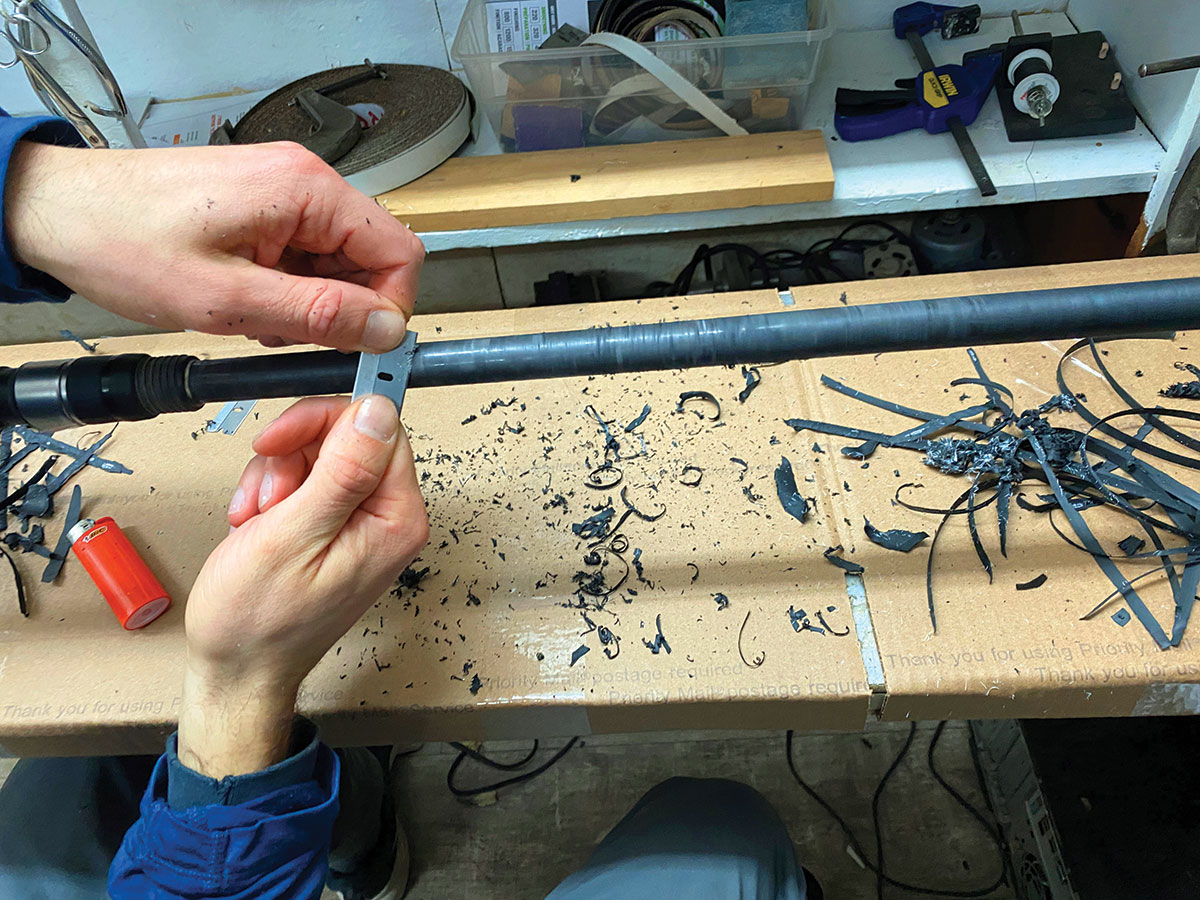
On this rod, the grip was definitely reworked with some good ole electrical tape, a custom job if you will, and while it certainly served its purpose, it was time for a redo. The first layer of tape came off fairly easily. This exposed the original shrink tube grip, which was a different story. The factory-applied tubing was well adhered and stubborn, I tried to ‘fillet’ it off the blank but it soon became apparent that I was going to have to use a sharp razor blade to cut the tubing off in strips; going from tip to butt end. It’s important to have the angle of the blade just right so that you won’t dig into the blank during this tedious process. Then to get things nice and smooth, I chucked the rod in the power wrapper and got it spinning, then I ran the blade along the spinning blank to shave off any residual rubber or adhesive, until I was back down to the original surface. Be careful when doing this! You need the right angle to make it work, and it requires some getting used to.
Reel Careful
Being that this was a full rebuild, I had to face the task of removing the reel seat from the blank as well. This is typically one of the tougher tasks when stripping and rebuilding a rod. Before starting, measure off the spot where the old reel seat was located so that you will be able to glue a new one in the same spot. Luckily, with some patience, going slow, and using the right tools, you’ll be able to remove the seat without too much hassle. For this rod, I chose to use my Dremel power tool, which would be a more expedient method for removal. The cutter of choice is the circular cutting blade.
Start by slicing the seat right down the center on the backend, but don’t go too deep so that you end up gouging the blank. This is a very slow and careful process, and I highly recommend you use extreme caution with a power tool (and always use safety glasses). Once the cut is made from one end of the seat to the other, slip a flathead screwdriver into the groove and twist it to separate the seat from the blank and the glue. Work the screwdriver down the entire seat until it comes off. You might have to use a little extra force if the glue really took hold during the original installation, but it should eventually come apart.
Now that the seat is off, you should be left with the old reel seat bushings. These will have to be removed as well so that new ones can be installed. On this rod, the original bushings were made of masking tape covered in rod-building epoxy. The trick once again was a new razor blade combined with some heat from the lighter to soften up the old epoxy. Go slow and reheat if you feel that the epoxy or tape bushings need more of it. With enough heat and effort, everything should flake off and leave you with the original blank.
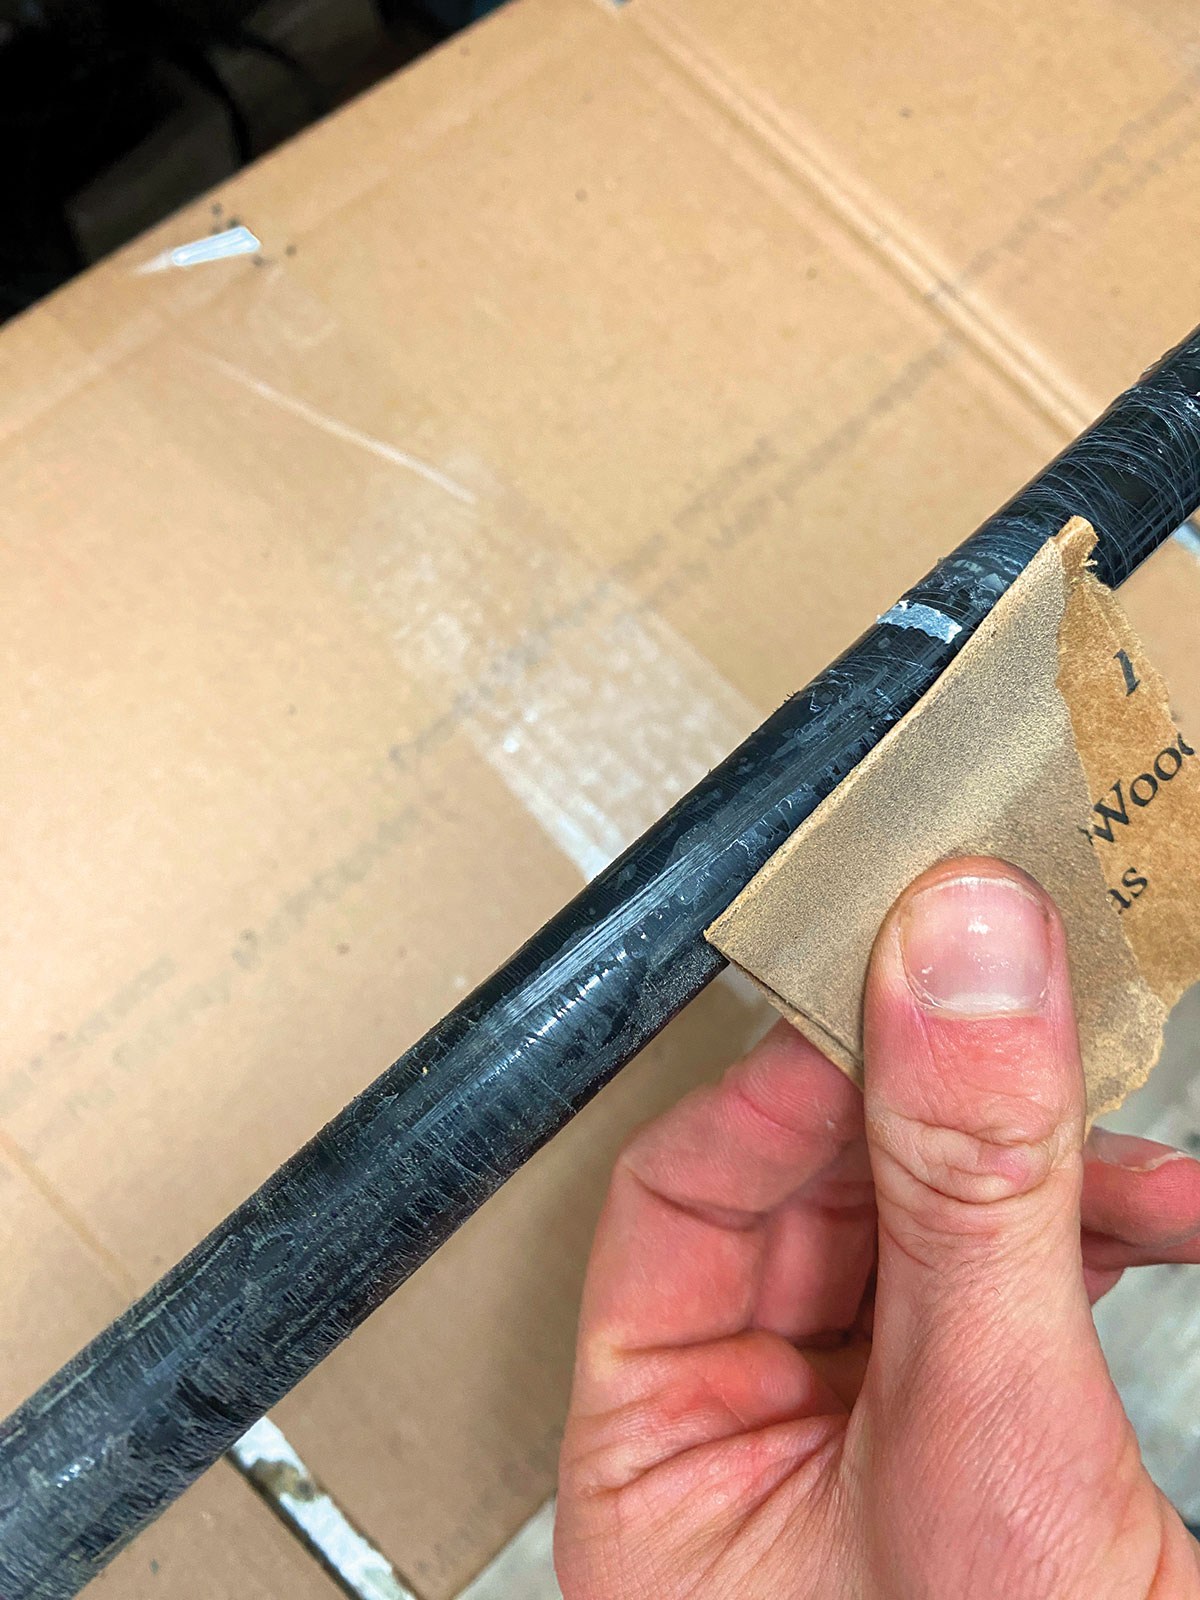
After everything has been removed, I’ll slice off the butt cap at the very end of the rod. Be sure to mark off the old locations where the grip started towards the tip end of the rod. The entire surface between the beginning of the grip and the butt end of the rod should be sanded very lightly with fine sandpaper. I used two different grits (230 and then 600) to get the job done without taking off too much material either.
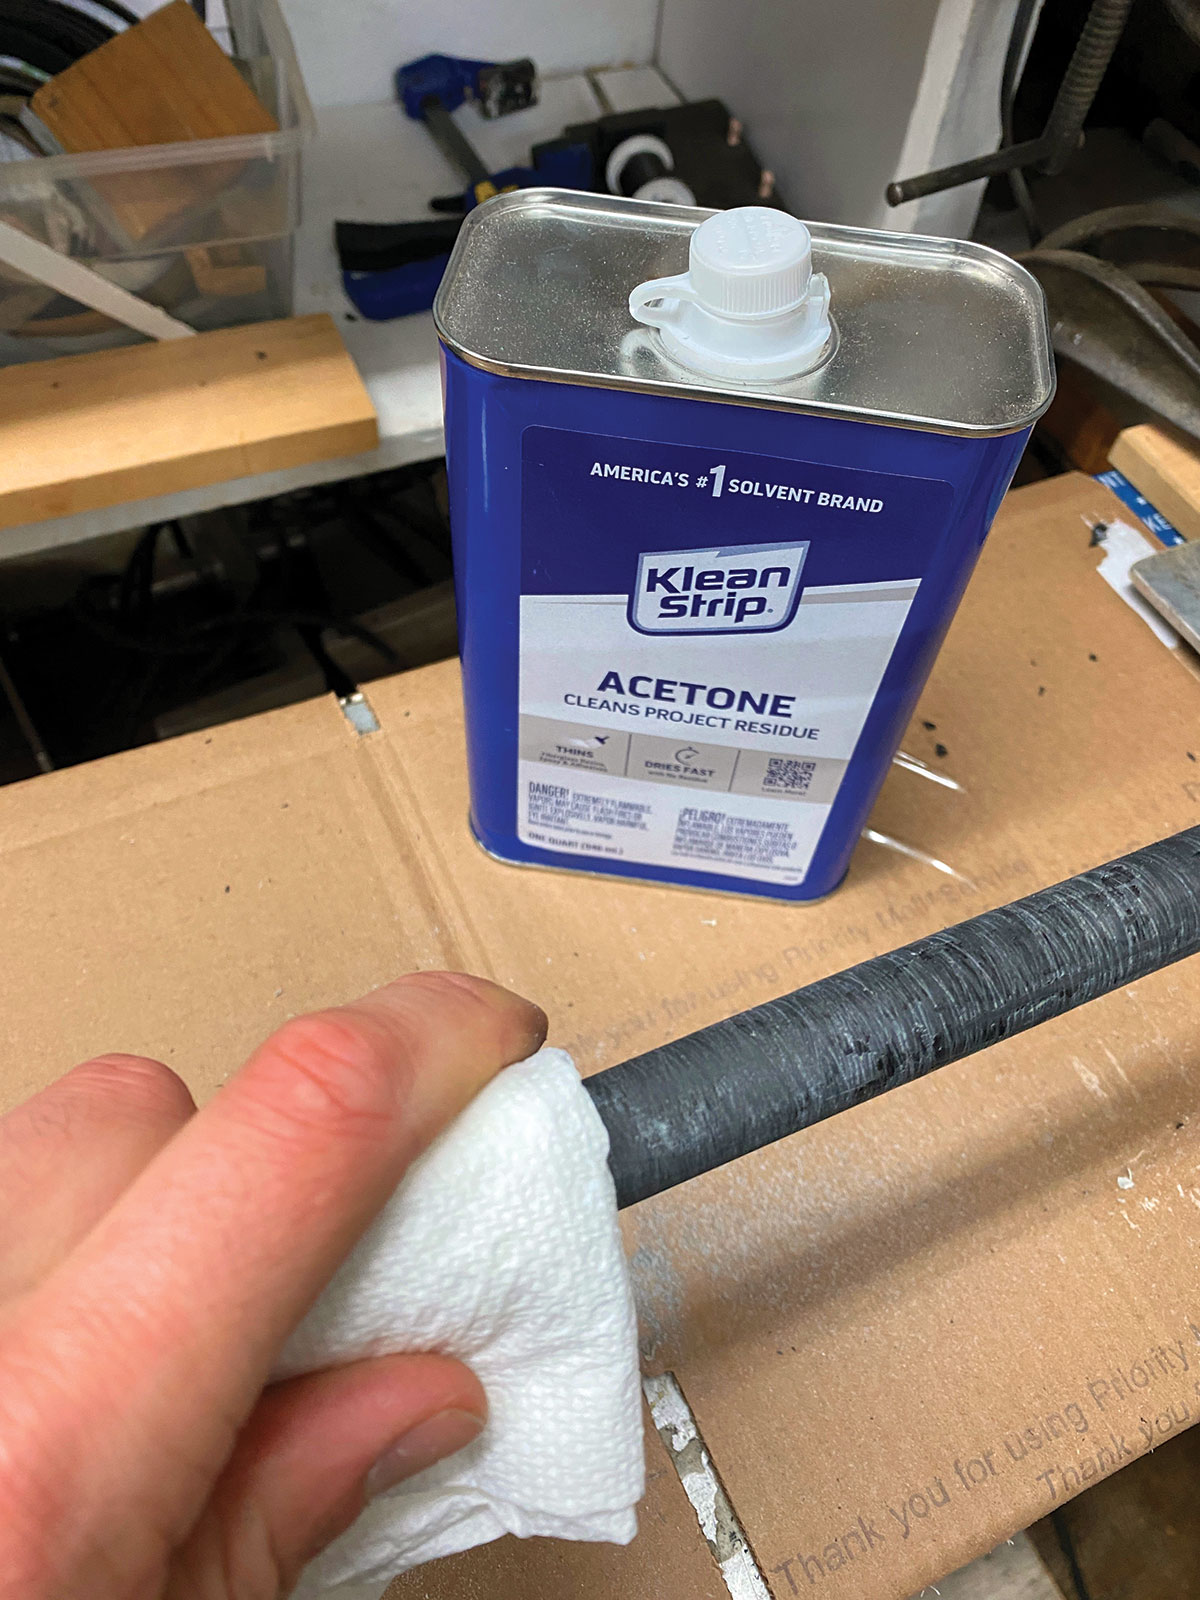
Once the surface has had all of the loose glue and high spots removed, wipe it all down with acetone again so that it’s back to its original surface. Don’t worry if you see imperfections in this portion of the rod. It will all be covered up by new grips and a new reel seat.
Reverse The Process
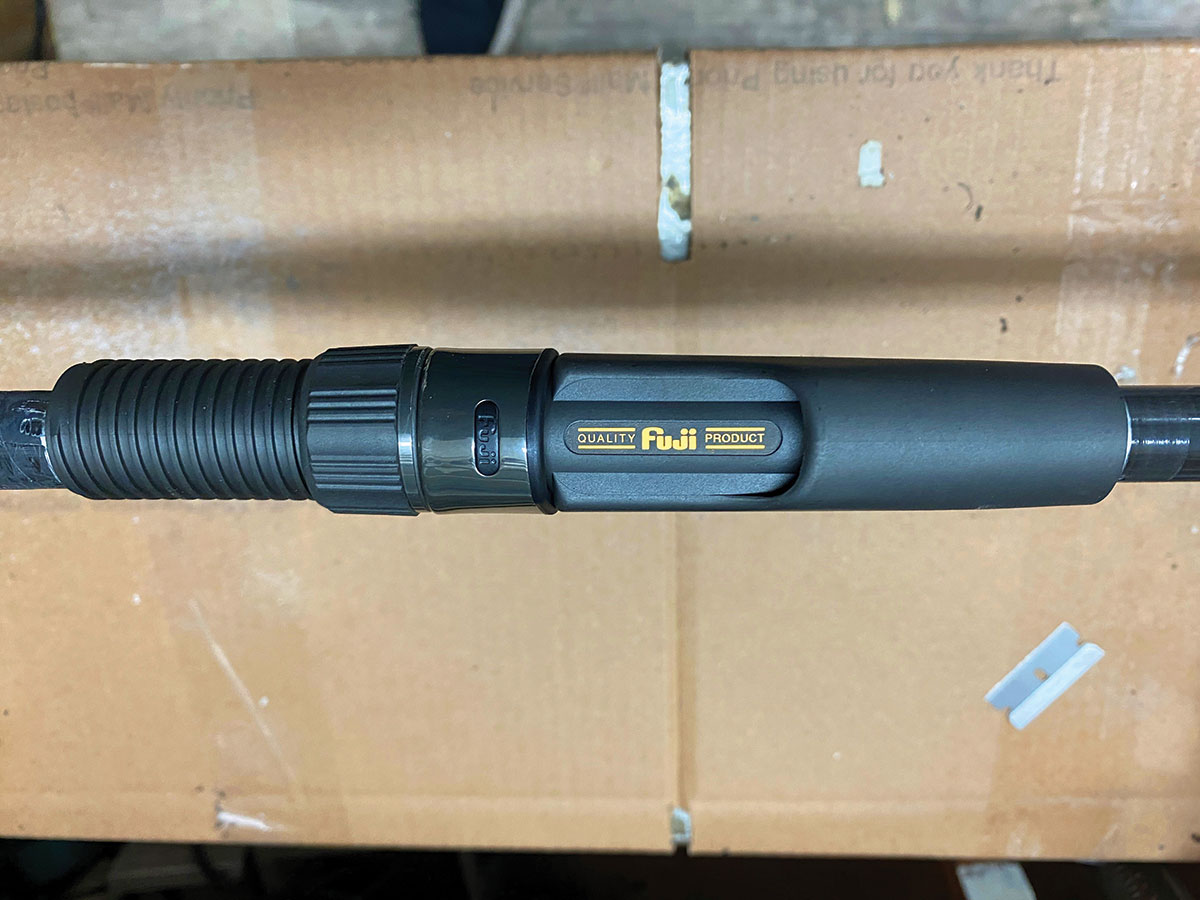
Just where I left off is where I’ll start again, by placing the reel seat in the desired location. For this build, I went with a Fuji DNPSD Deluxe Ergonomic Spinning Reel Seat in size 20. The 20 fits almost any spinning reel on the market, and the ergonomic design is extremely comfortable to fish with for extended periods of time. You should have the measurement that was taken down before the original removal of the old one. Either with small pieces of tape or a marker, make a mark on both sides of the seat so you know where the ends will be. Next, proceed to create tape bushings with masking tape for the reel seat to fit over. You don’t want the bushings to be super tight, but not loose either. The seat should fit just right over them. You can always adjust by adding or removing layers of tape until the fit feels right.
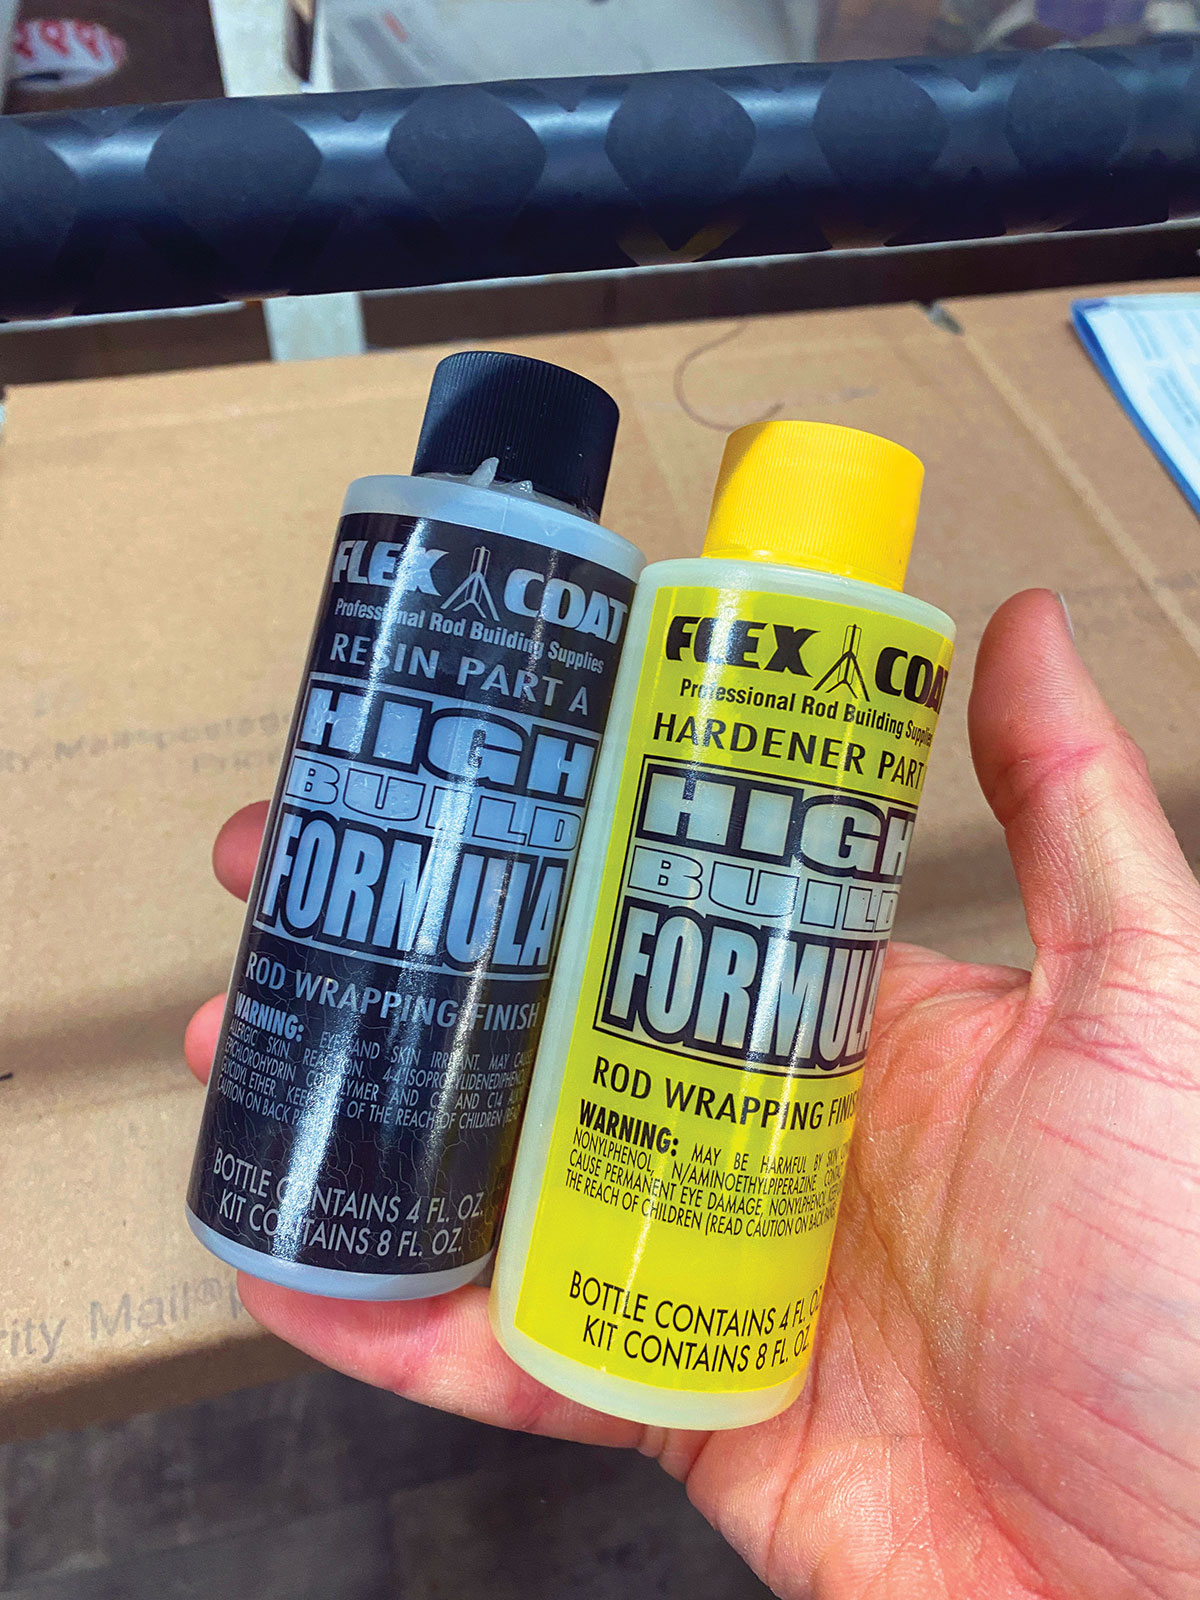
Next up is mixing a batch of Flex Coat rod building glue. For this seat, I found that 10 total drams, 5 of each part, was enough to get the job done. Coat all of the bushings evenly and make sure enough epoxy makes its way in the gaps. Slide the reel seat onto the bushings slowly from the tip towards the butt end, ensuring that the glue spreads evenly, and wipe any excess glue that comes out the end. Let the glue dry for a couple of hours before moving on to the next step.
Get A Grip
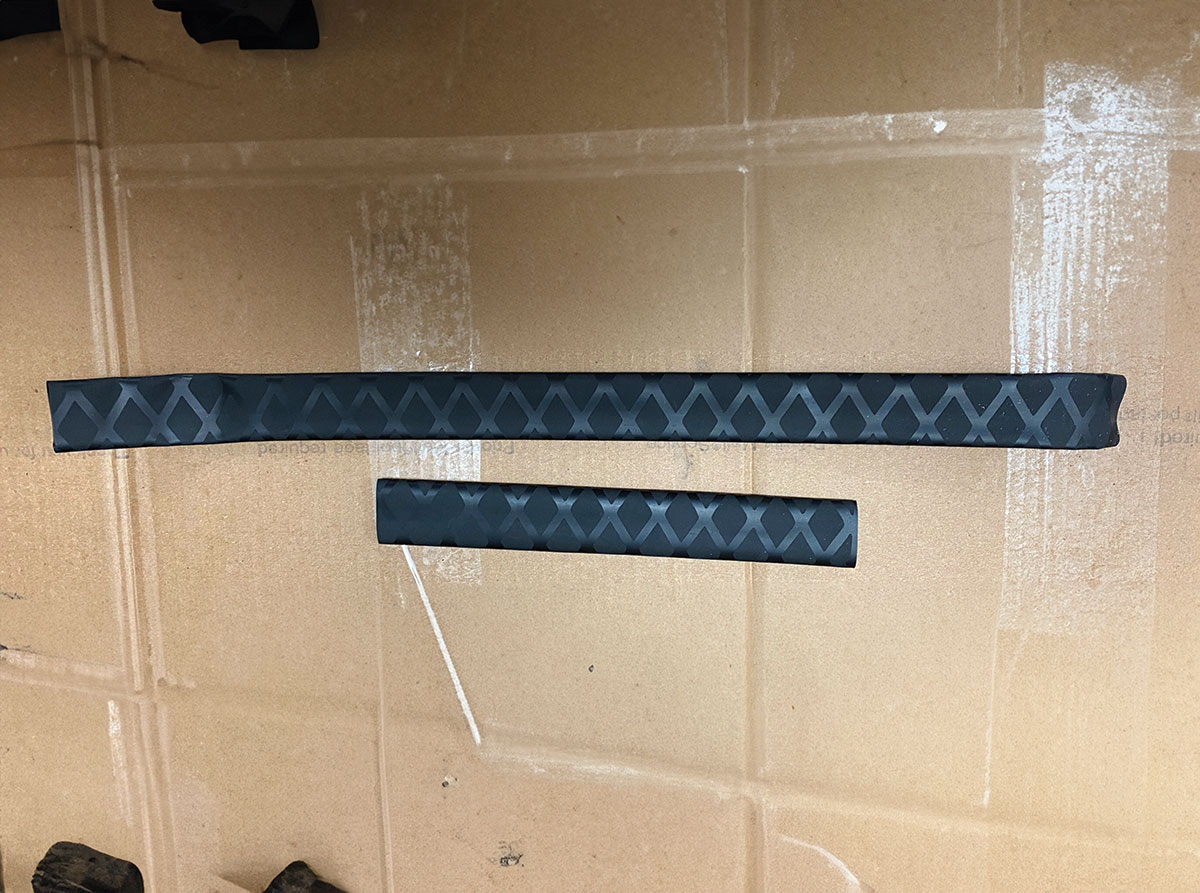
Just like the original grips that stubbornly came off the rod eventually, new X-flock shrink tube grips will go back on. Start by measuring the length of grip needed for the foregrip and rear grip sections. Leave an inch or so extra so that you will be able to trim it up perfectly. For this build, I used a 20-millimeter size tube, but some larger diameter rods might call for a 25. You’re going to need a heat gun as well to get the heat shrink tube to form around the blank. Any hardware store will have a basic model that will work perfectly. Don’t get lazy and use flame heat – some of the glues used for adhesion are flammable and will catch fire if they come in contact with the flame.
My choice of adhesion for the shrink tube to the blank is 3M Hi-Strength Contact Adhesive. This stuff works very well for outdoor use and has done the trick for countless rod builds of mine. I would suggest laying down some old newspaper first before you start using the spray because it’s a pain to clean up. Once you do that, you’ll want to tape off the ends of the reel seat to make sure the spray won’t go on the seat, too.
Start with the backend of the rod and give it a decent coat with the adhesive. Slide the backend piece of tube over the rod right to the reel seat and wipe away any glue that may have been pushed out. Let the glue tack up for a minute, and then hit it with some medium heat from the heat gun, making sure to spin the rod at the same time and not keep the gun in the same spot. If you do, you might burn the rubber.
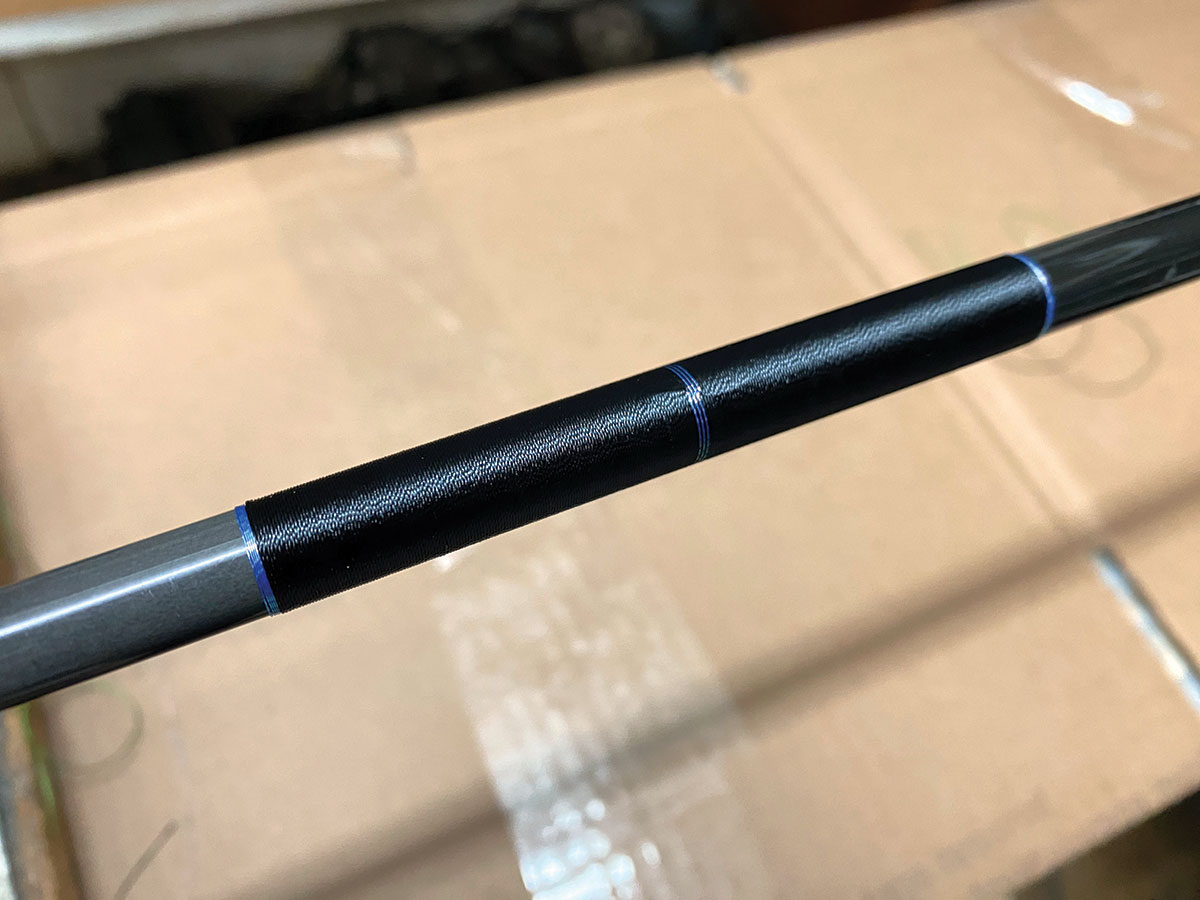
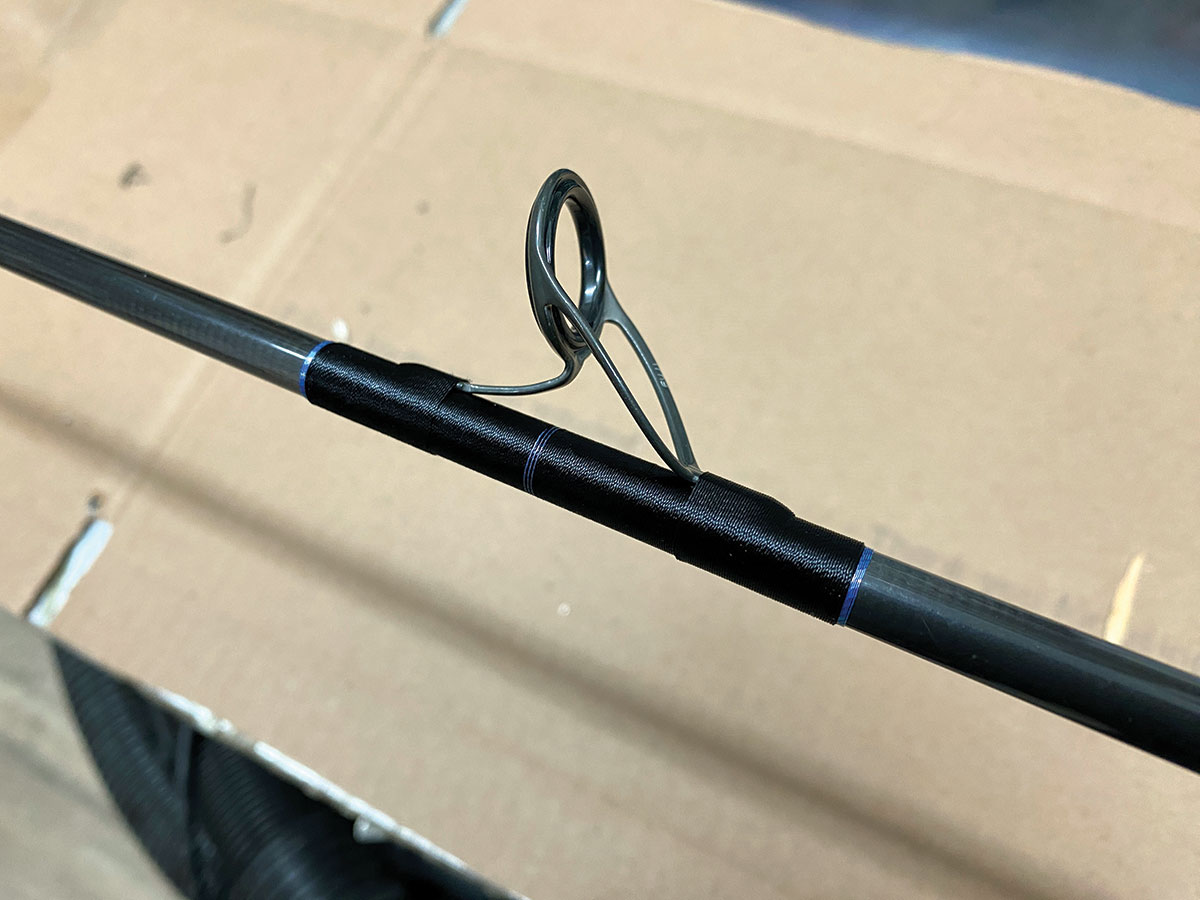
It’s important to make sure the tube shrinks right up to the end of the reel seat. This is tricky and comes with practice. You should be able to tuck the back end of the tube into the rod after you shrink it down as well. Repeat the process for the foregrip of the rod. You can use a razor and spin the rod to even up the end of the tube with a straight cut and clean finish after it’s shrunk down. Add thread wraps on the end of the foregrip and on both sides of the reel seat for a sealed and clean finish look. Pop a Fuji BRC butt cap onto the end to get it back to factory finish. Mixing up a small batch of Flex Coat glue and dripping it into the cap before putting it on the end will make sure it stays put for years of use.

Fresh Guides
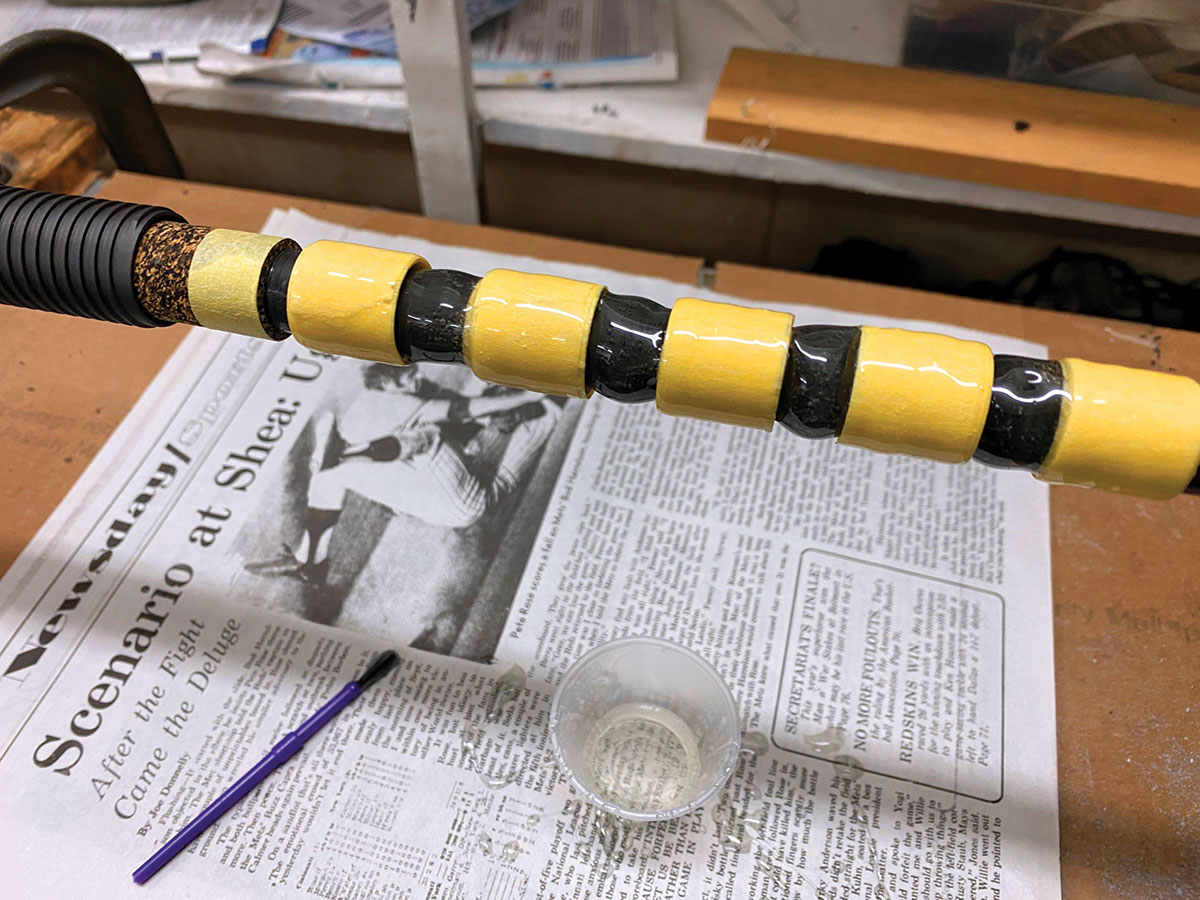
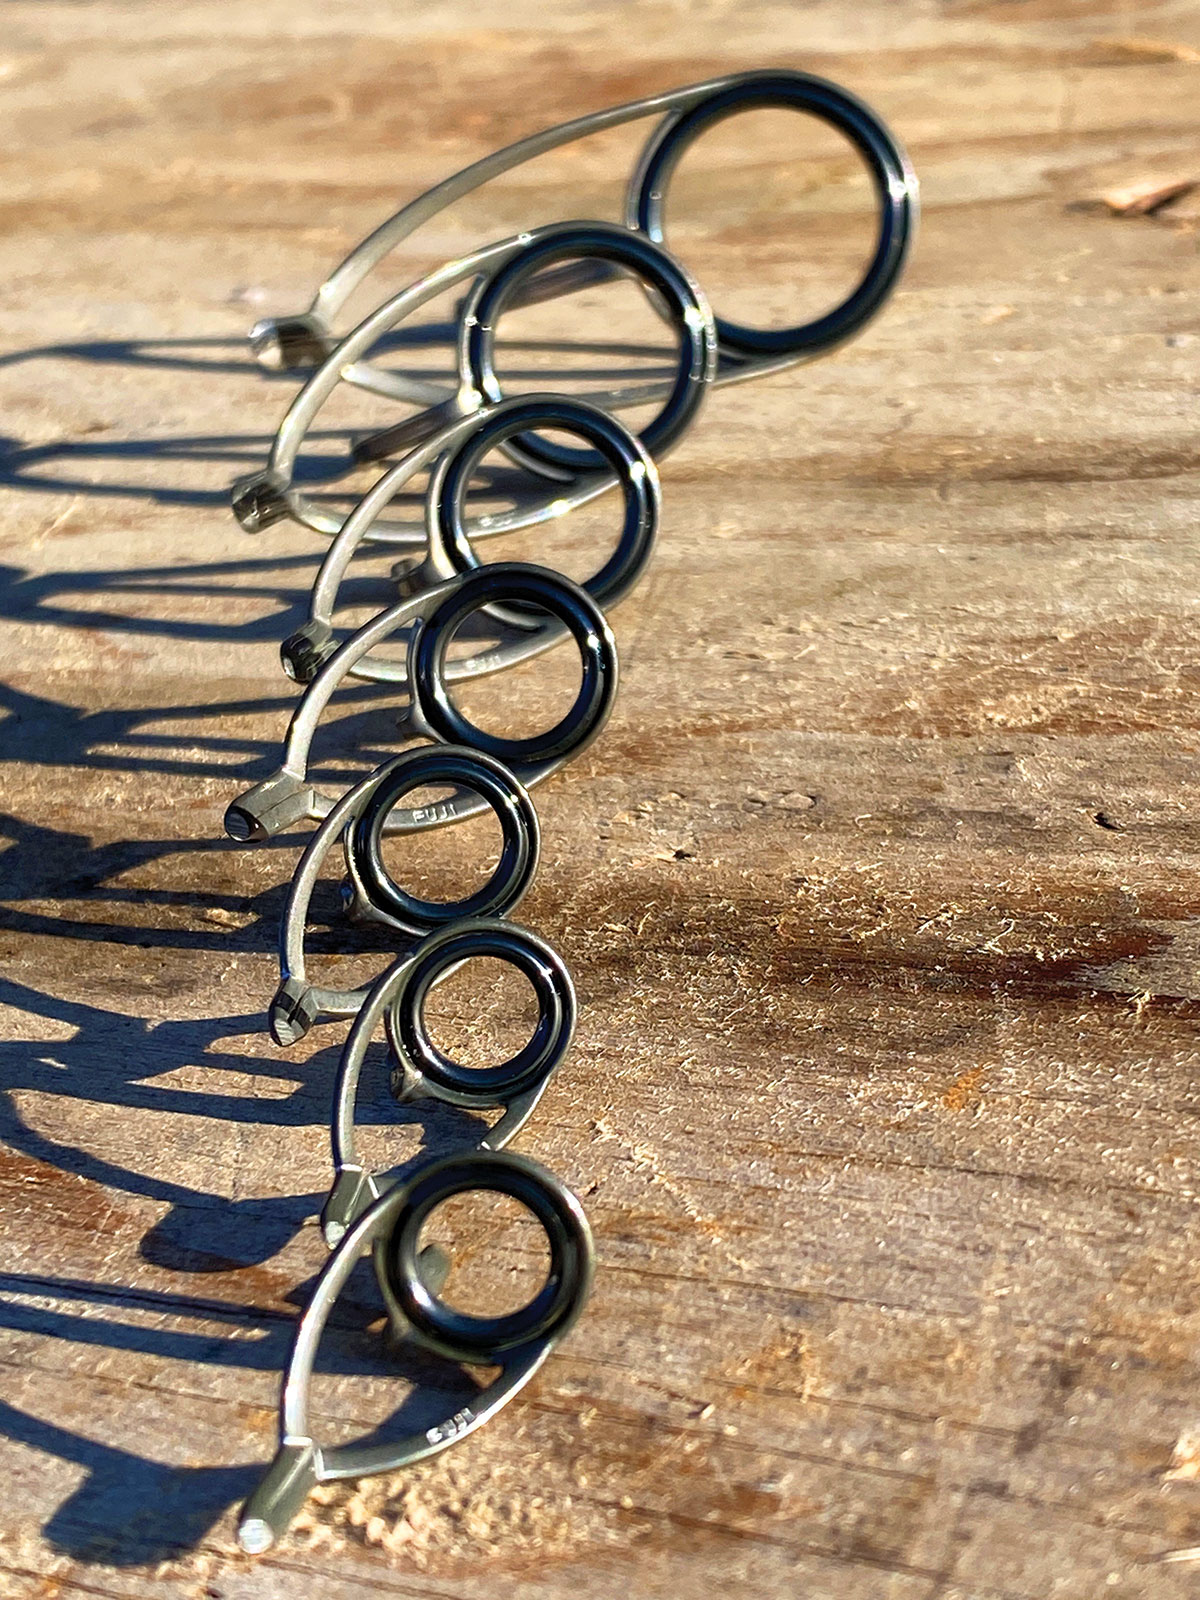
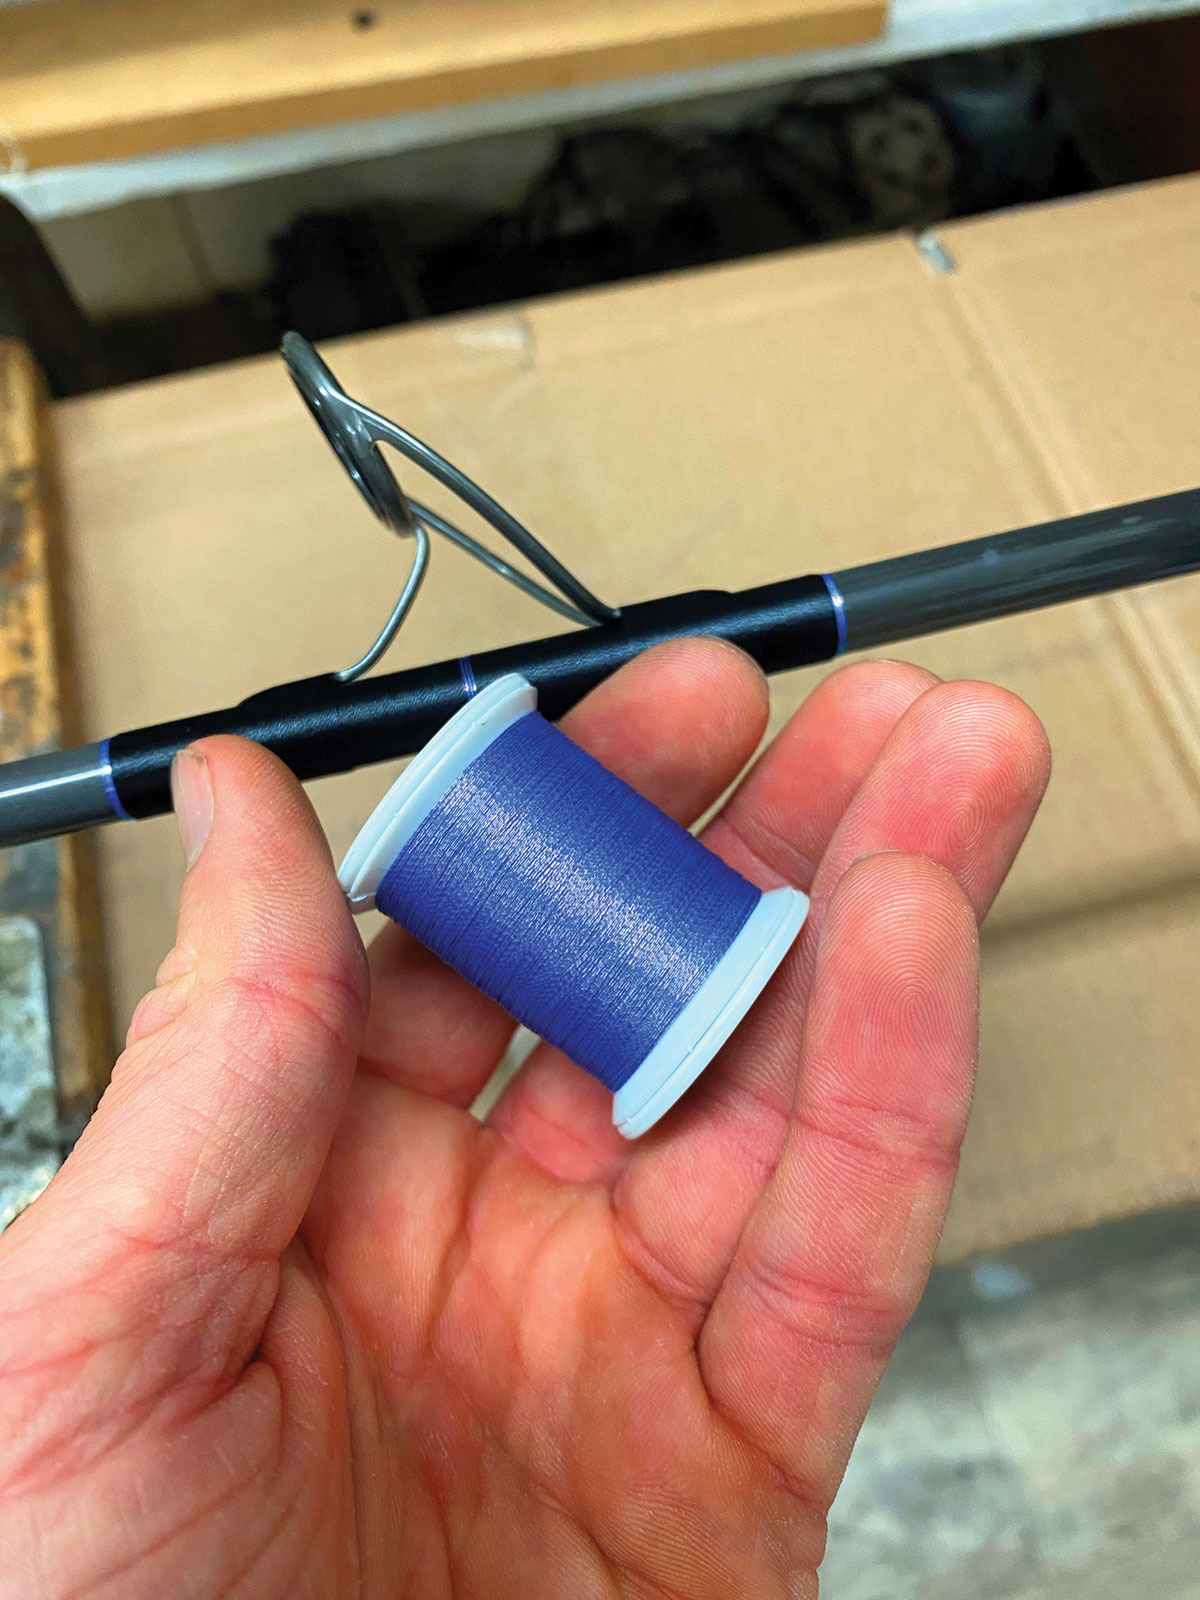
The rest of the build is pretty straightforward. The old Fuji K-frame guides that stayed true for literally hundreds of fish were ready for retirement and were replaced with similar Fuji KW series frames in BC Grey with an Alconite ring in the exact same sizing. Instead of doing single wraps like the original build had, I went with doubles for a more custom look. A double wrap is a base wrap all the way from one foot to another, with the guide on top and the feet wrapped down as well. I wrapped the base wrap first for all of the guides and then taped the guides on top and wrapped the feet down into place. You can certainly go with just the single wraps on the guide feet for convenience purposes as well.
Once all of the guides are wrapped on, you will want to make sure they are all straight and lined up with the reel seat before gluing a tip into place with rod tip glue. The tip model was a Fuji MG in BC Grey and Alconite again to match the guide train.

Flex Coat’s two-part finish is the last step to sealing all of the thread wraps in. You’re going to want to do all of the guide wraps with at least two coats – letting each dry for a day in between, along with the other trim wraps at the reel seat and above the foregrip. A little heat from a torch should pop out any bubbles while the epoxy is still wet.
Don’t give up on that old rod yet! With some effort and a little elbow grease, you might be able to resurrect that old stick to its former glory and give it new life for many more years of catching fish.