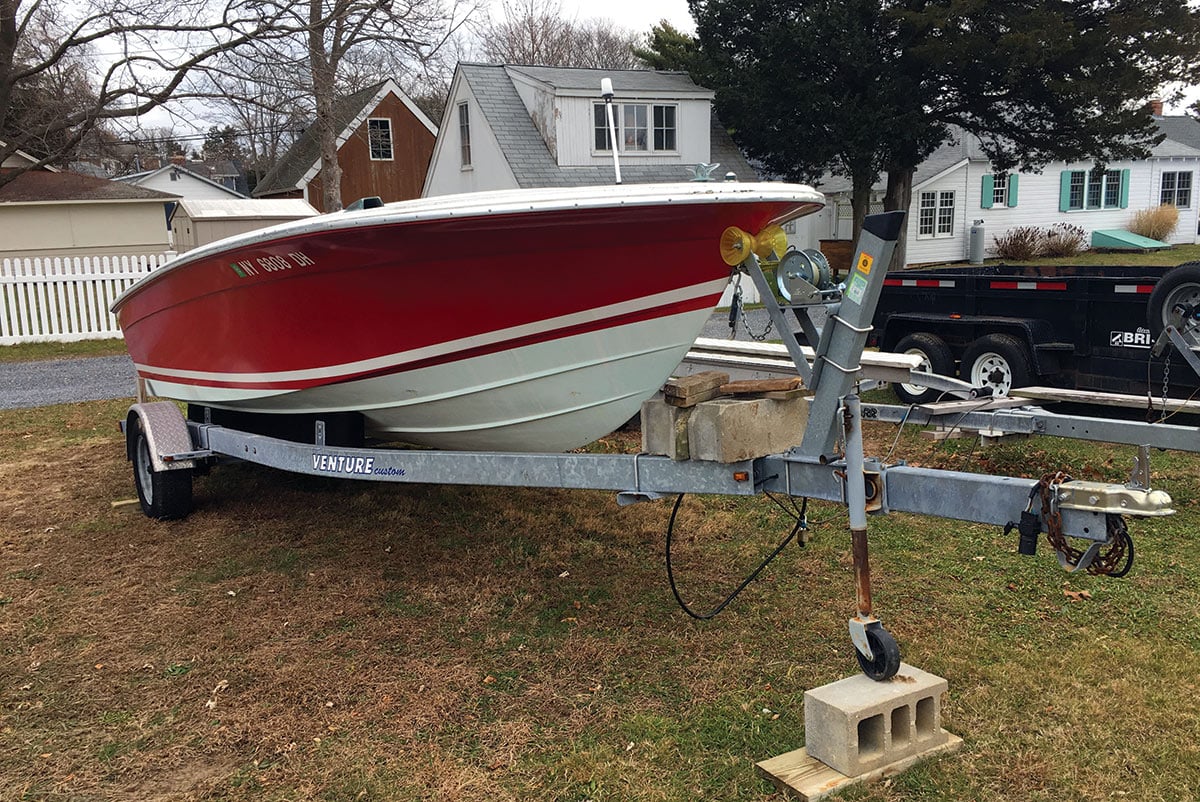
For close to 40 years of fishing from my own boat, I always kept it in the water and hired a trailer service to move my boats from the house to the launching ramp for spring commissioning and fall decommissioning. These days, I have two boats and two trailers, one of which performs this twice a season service for my 228 EdgeWater that sits in my slip from May through November. My 18-foot EdgeWater is trailered to the town launching ramp a few dozen times a season. Both used trailers require basic annual maintenance and as a relative neophyte, I was compelled to come up to speed as quickly as possible to learn the dos and don’ts of boat trailer maintenance.
What’s totally cool about the majority of galvanized steel or anodized aluminum boat trailers is that they are like big erector sets. Most of the trailer’s component parts like wheels, bearings, rollers, bunks, winches, tongue jacks and lights can be “easily” removed in theory and replaced by do-it-yourselfers. Sometimes it’s not as easy; the biggest problem with removing modular items like those mentioned above is that the steel bolts and nuts that retain them to the trailer frame rust in place after seasons of saltwater dunkings and exposure. Still, these problems are typically solved with a spray of penetrating oil, an oversized breaker bar, a hammer or a reciprocating saw (Sawzall). Now, let’s take a closer look at some of the typical maintenance and replacement items on your boat trailer.
Rusty Hardware
This is an obvious malady of trailer boaters, and rusty parts like hardware, nuts and bolts should be checked periodically. While some exposed components can be cleaned and dressed with a wire brush and a spray of penetrating oil or waterproof grease, when the parts become so distressed that the rust is flaking off in layers, it’s probably a good idea to replace the affected hardware. While some Fisherman readers might be tempted to replace these parts with stainless steel to enhance long-term durability, a handful of boat trailer manufacturers that I spoke with down at the recent Miami Boat Show recommended sticking with standard steel mounting hardware, which offers a higher strength rating than the softer and more brittle stainless steel parts. When removing rust from exposed steel connecting hardware, be careful not to remove the galvanized or painted finish from your boat trailer. If necessary, protect the area around the rusted part with blue painter’s tape before using the steel brush to remove any of the rust.
Leaf Spring Maintenance & Replacement
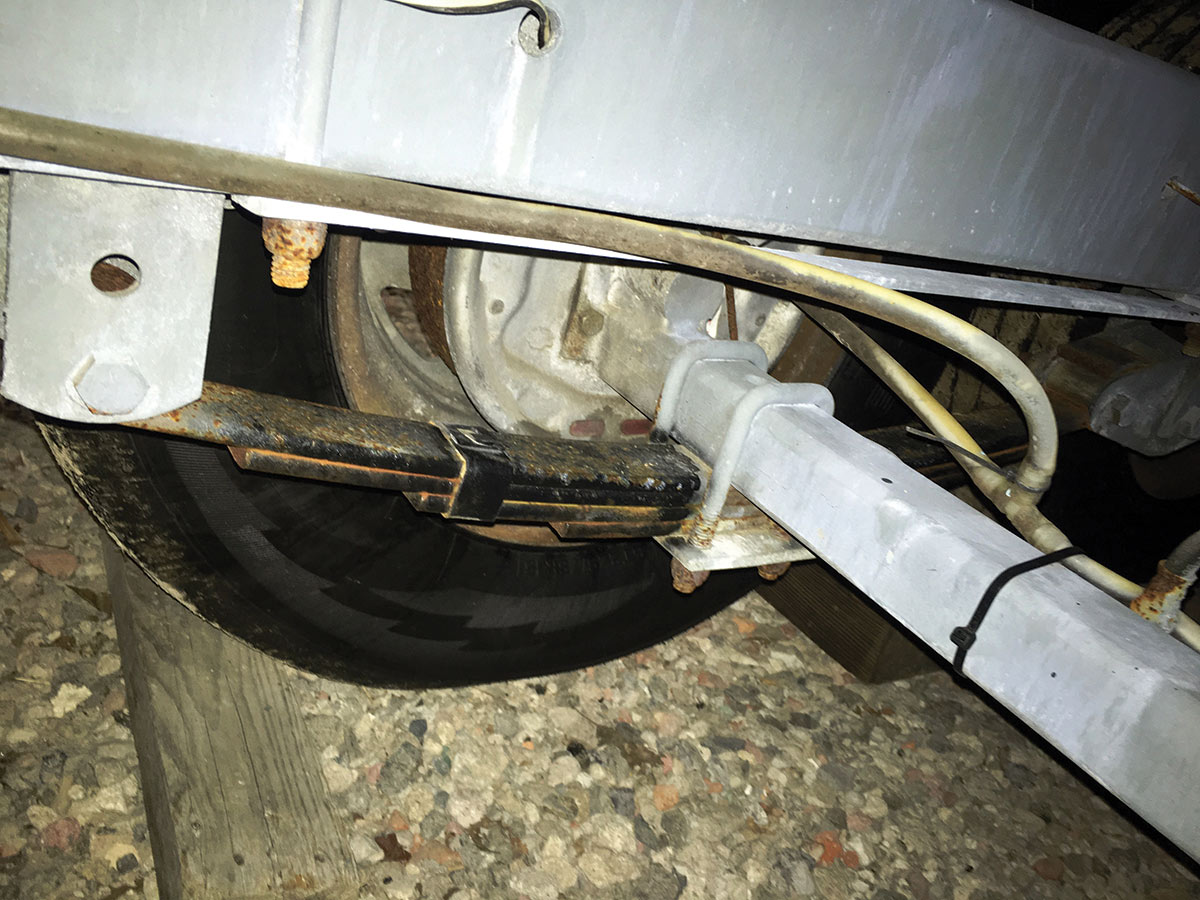
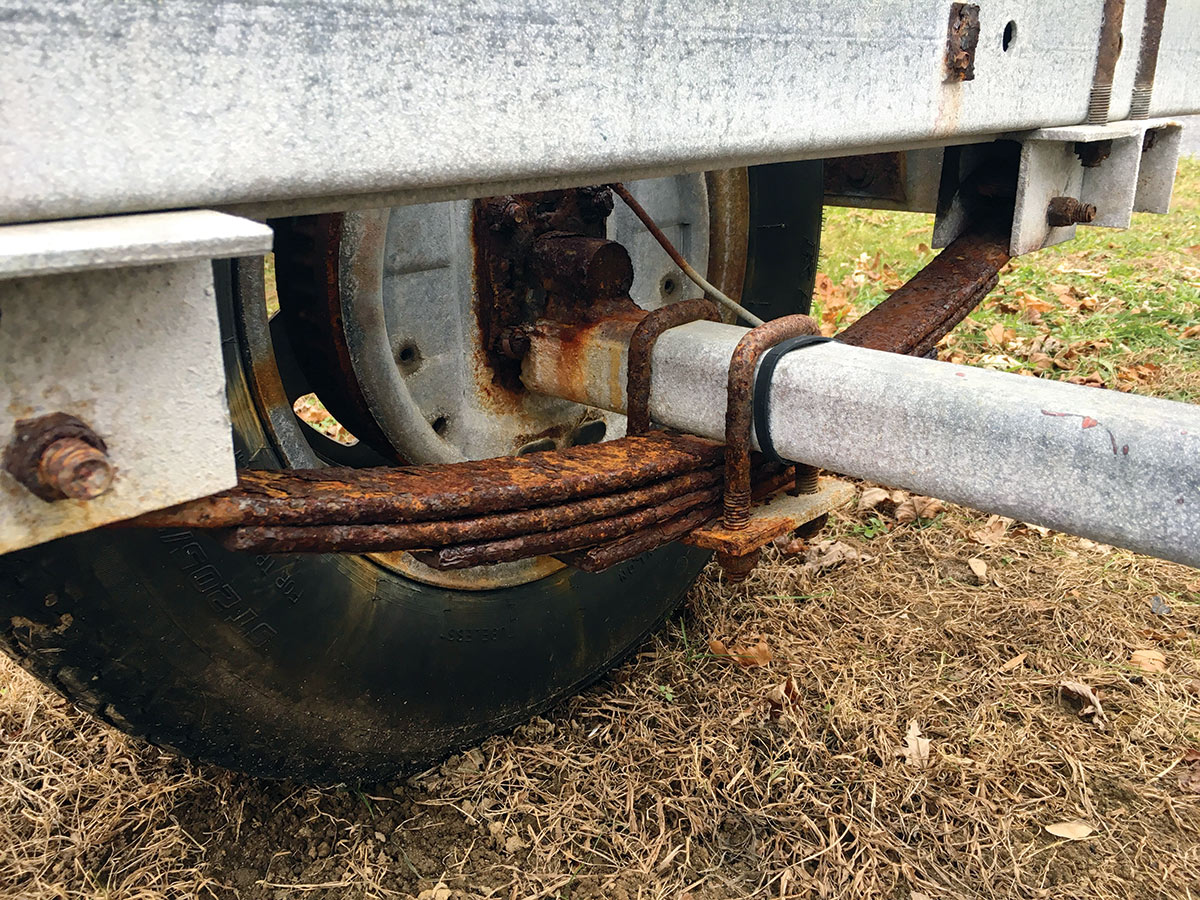
The majority of boat trailers feature some form of leaf spring suspension system (Torsion bar is the other type.). The purpose of the suspension system is to prevent your boat from bottoming out on the trailer frame every time you hit a pothole or bump in the road. In operation, the leaf springs flex to keep your boat’s weight suspended above the trailer, solidly supported under the hull by either bunks or rollers.

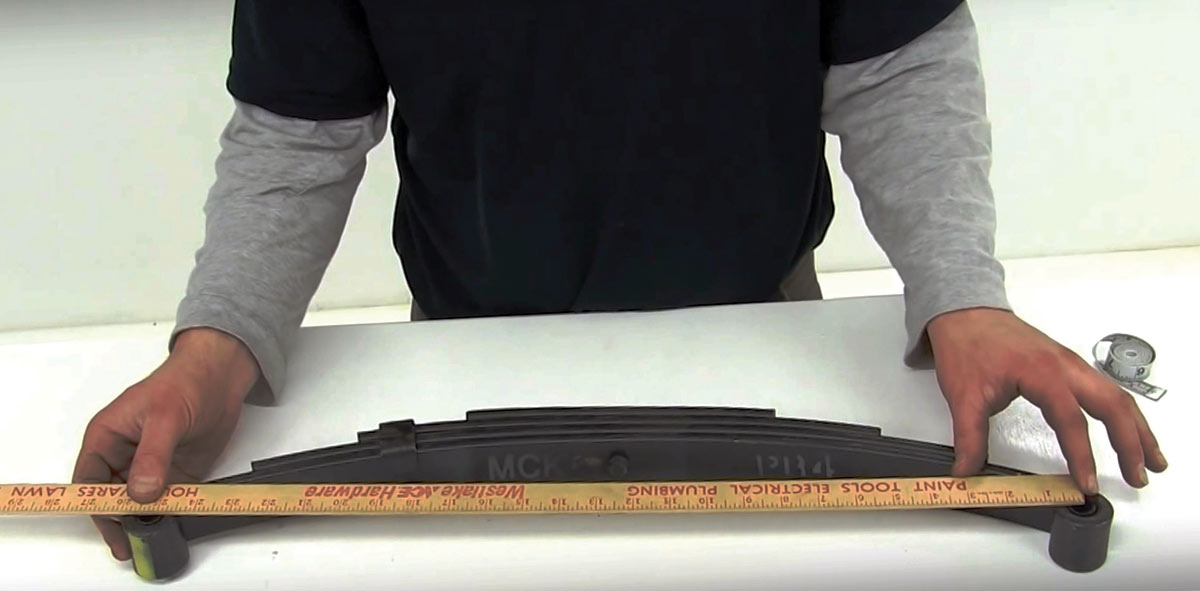
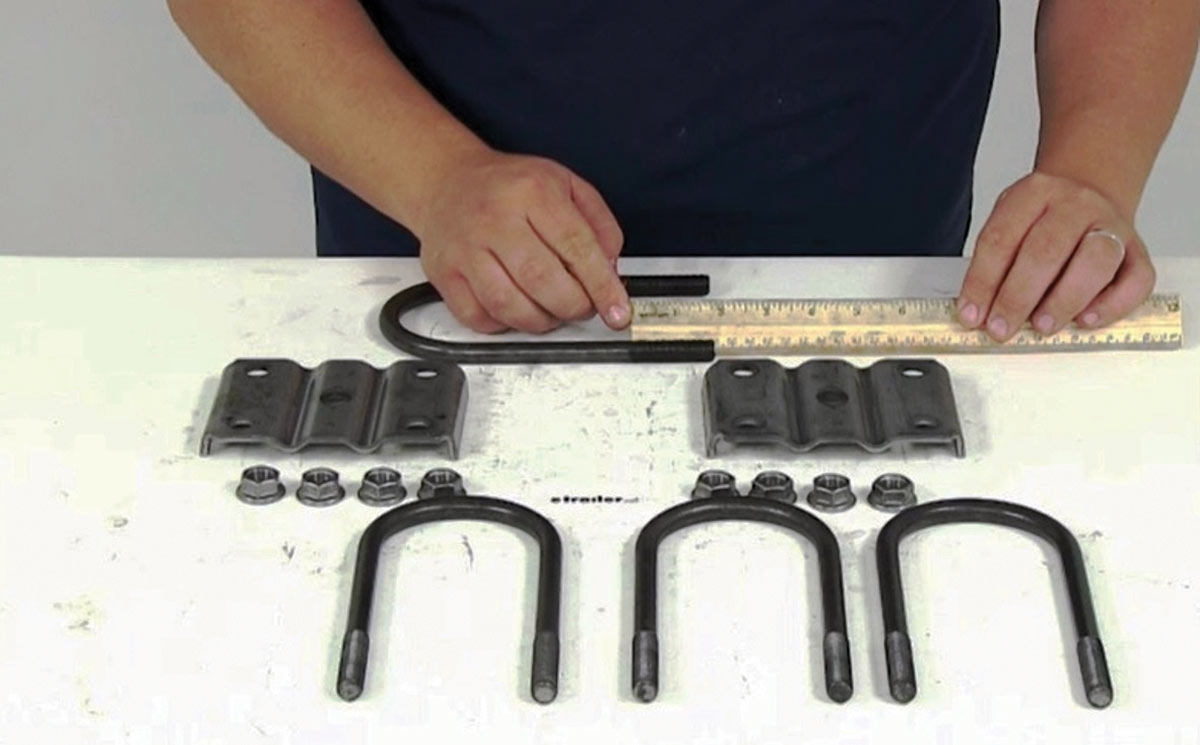
Leaf springs are constructed and formed from inexpensive common spring steel that is painted and arranged in multiple regressing layers, with the largest spring on the top and progressively smaller springs that follow underneath. A leaf spring will typically feature anywhere from two to six elements per set. The greater the load bearing requirement, the more springs will be stacked on top of each other to bear the weight. The stacked leaf spring sections can appear to be tight and solid enough at rest, but they flex when under a load. That’s where the problems start to occur. When you are down at the ramp, materials like sand, grit and salty water can get trapped in between the flexing spring leaves when your boat is launched or retrieved. A freshwater washdown rinse (Some public or private ramps have this feature and some don’t.) will help to lessen the potential for corrosion, but won’t blow out the grit that’s trapped in between the spring leaf layers that are shut tight. This is where the problems start and fester over time.
It’s a good habit to get into a specific periodic inspection routine for your trailer’s leaf spring suspension system. This includes looking for rust, cracks, daylight beaming through the stack of springs, flat spots, the U-Bolt/clamp hardware connections or missing leaf parts in the spring set. If your trailer’s leaf springs are exhibiting some average surface rust, but appear to be otherwise solid throughout, you can add some shelf life to the metal by wire-brushing the springs, wiping the dust and residue off with brake cleaning fluid and a rag and then repainting them with a flat black Rustoleum or cold galvanizing type of weather-resistant spray paint. If you are unsure of the condition of your metal, even after a visual inspection, tap firmly on the spring steel with a hammer; a sharp and solid “ring” will typically indicate that the metal springs are solid, while a dull “thud” will indicate a weakness in the metal and that the spring needs to be replaced.
Once the boat is off the trailer, you should be able to make short work of this scraping and painting task and get it done in an hour or two, depending on how many leaf springs are on your ride (Remember, you have two per axel.). If you need to replace any of the suspension spring sets, this is a reasonable DIY project that the average Fisherman reader can accomplish with some basic tools and safety precautions. Check out www.etrailer.com for more info and some helpful instructional videos on the topic.
Wheel Bearing Maintenance & Replacement
 The wheel bearings are critical to enable your trailer wheels to roll down the highway. Boat trailers feature an inner and outer wheel bearing assembly for each wheel hub. Depending on your amount of use, it’s generally a great idea to repack your wheel bearings at least once a season. If it doesn’t get a lot of use, certainly perform this task every other season and make sure that there’s sufficient grease in the hubs that can be added via the “zerk” grease fitting. See the section in this article about adding a Bearing Buddy to your wheel assembly.
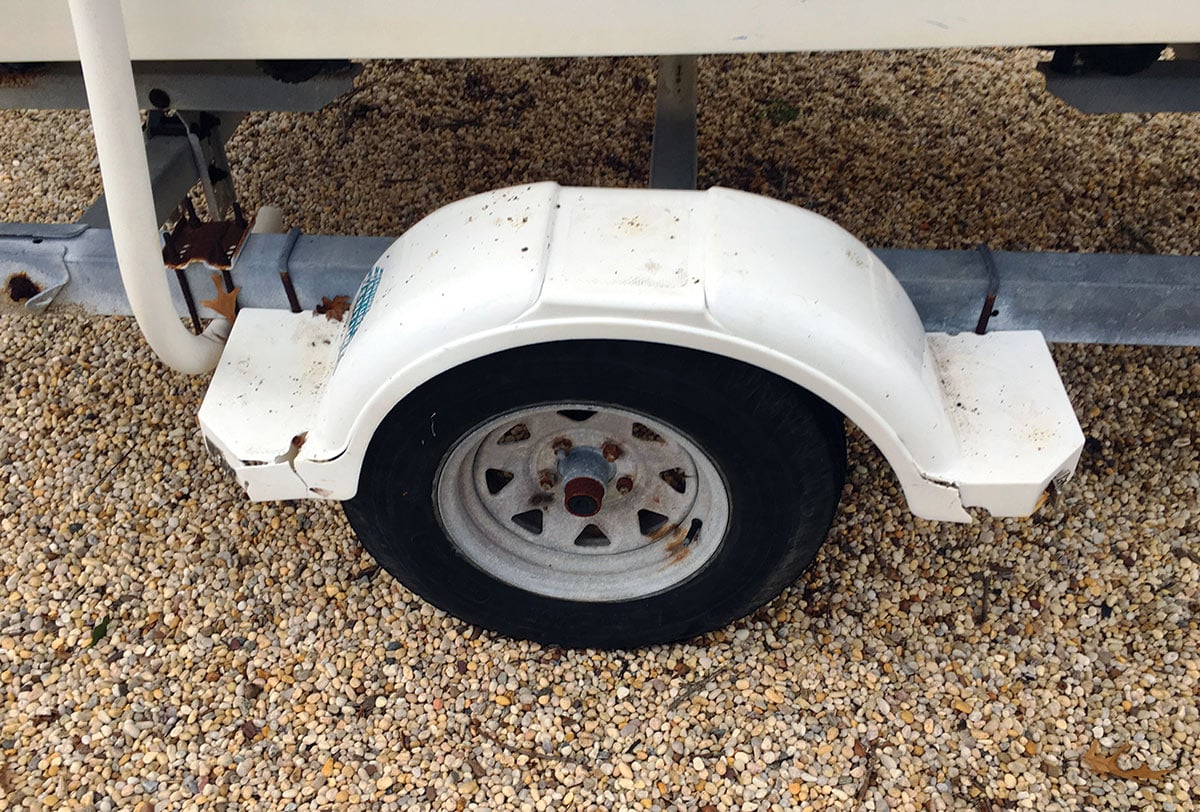
Fender Maintenance & Replacement
 Fenders set over the trailer wheels keep the mud, salty grit and other road gunk from peppering the bottom of your boat hull with a gory mess. Fenders can get crunched during trailer maneuvers down at the ramp or in your driveway, but these can be easily replaced. Damaged parts can typically be removed via a few U-Bolt clamps, and replacement parts that match the correct material (steel, aluminum, and fiberglass) color and size can be reinstalled in less than 10 to 15 minutes, so this is a great DIY project.
Tongue Jack Maintenance & Replacement
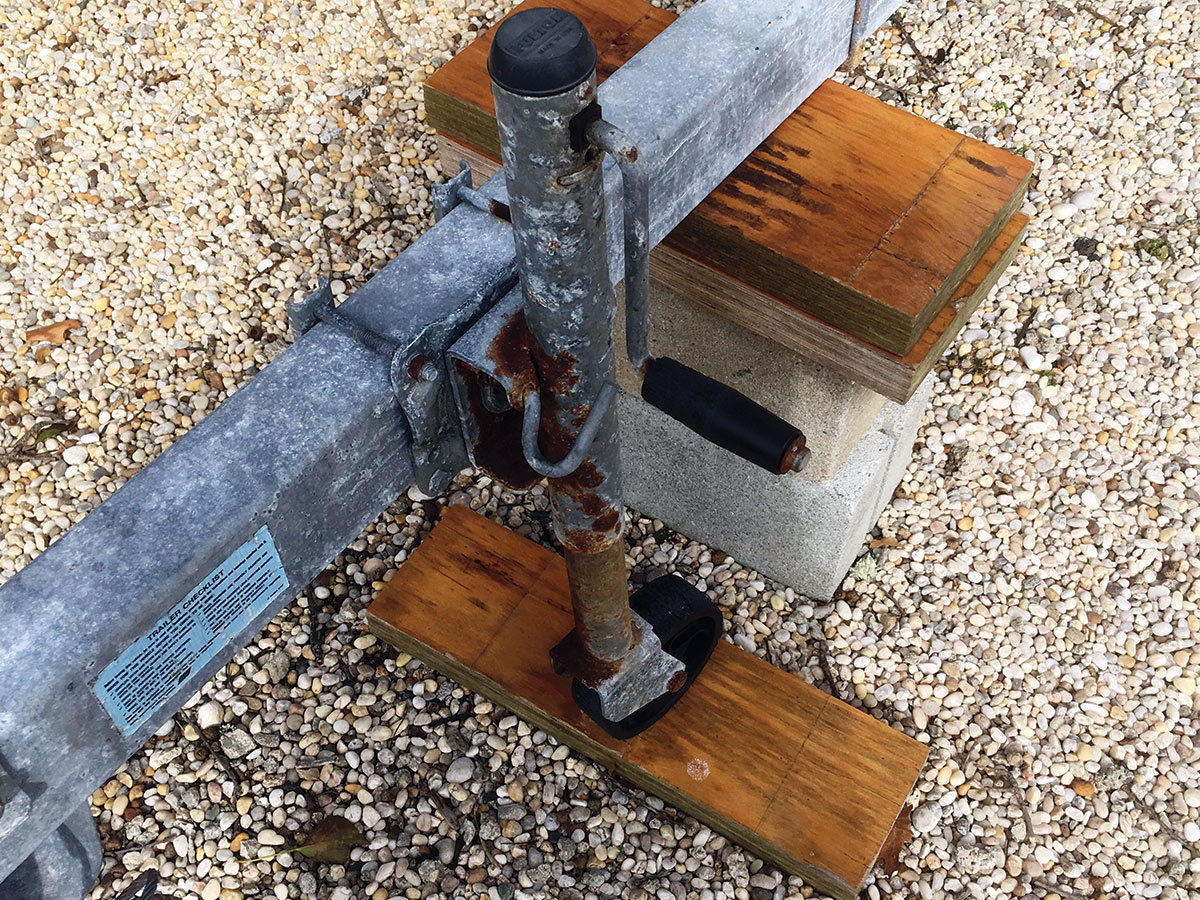
 If your tongue jack is not working up to expectations, you will have a difficult time lifting the coupling ball assembly on and off the hitch of your tow vehicle. Fortunately, the jacks are easy to replace and are typically mounted to the trailer’s front beam or “tongue” with a pair of U-bolt clamps. Be sure to get the right lifting height and load rating before replacing your existing unit. To keep the new one working smoothly, a periodic squirt of penetrating oil or light grease should keep it working for many seasons. Many videos exist on YouTube to offer step-by-step encouragement for this simple DIY project.
Coupling Ball Maintenance & Replacement
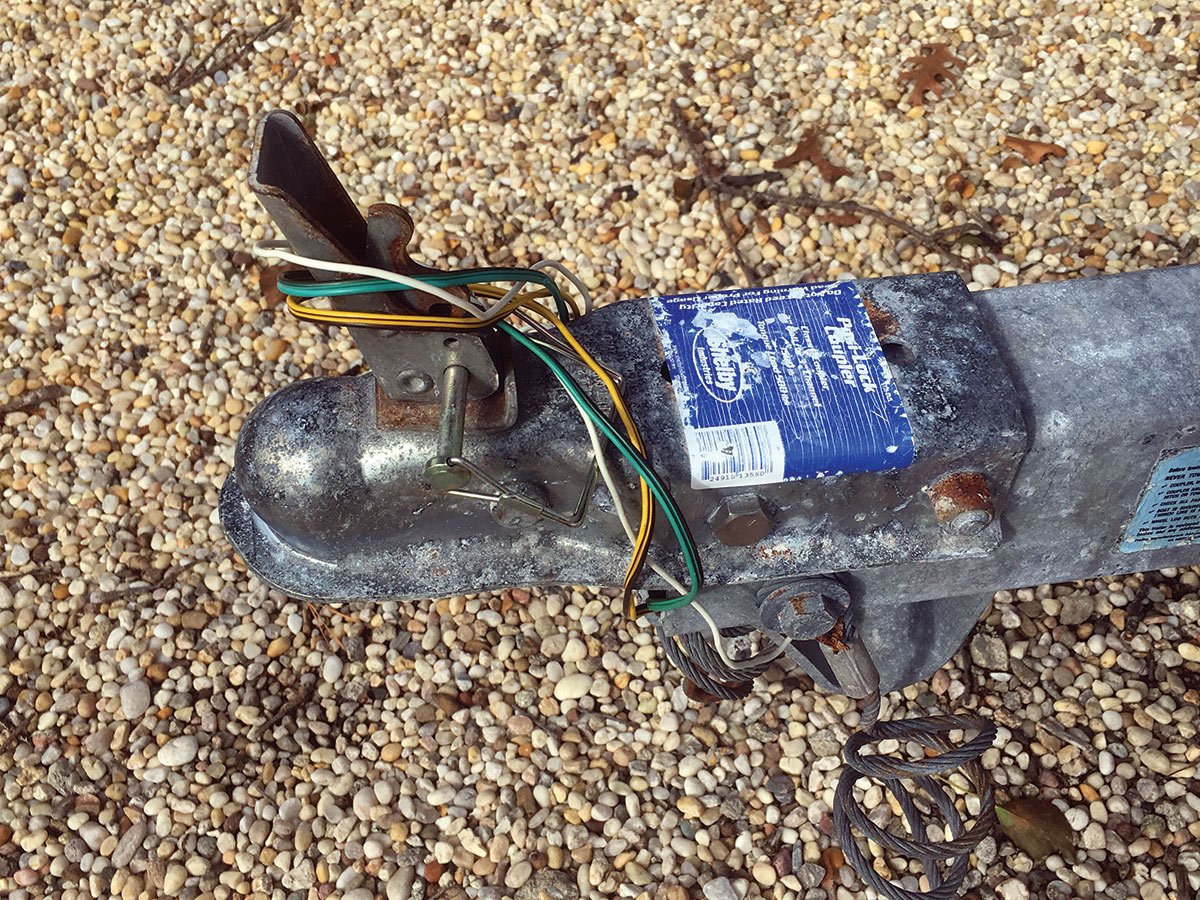 The coupling ball on the front of your boat trailer is a simple, yet critical component that keeps the boat connected to your tow vehicle. The operation is simple. The correct size coupler (1-7/8-inch, 2-inch, 2-3/8-inch, etc.) is married up to a similar sized ball on your tow vehicle’s hitch, then the parts get locked into place with a snap latch and a lock pin is inserted into the locking latch to keep it all in place. The mechanism should be sprayed with a coating of penetrating oil on occasion and then greased with a light film of waterproof lube. If the coupler housing gets dented where the ball cannot insert, or if the locking mechanism won’t close down and lock up tight, it’s time to replace the coupler with a new one. This is an extremely modular part and is typically held in place with two bolts, which makes it a snap to replace. Be sure to get the correctly sized replacement part.
Trailer Winch Maintenance & Replacement
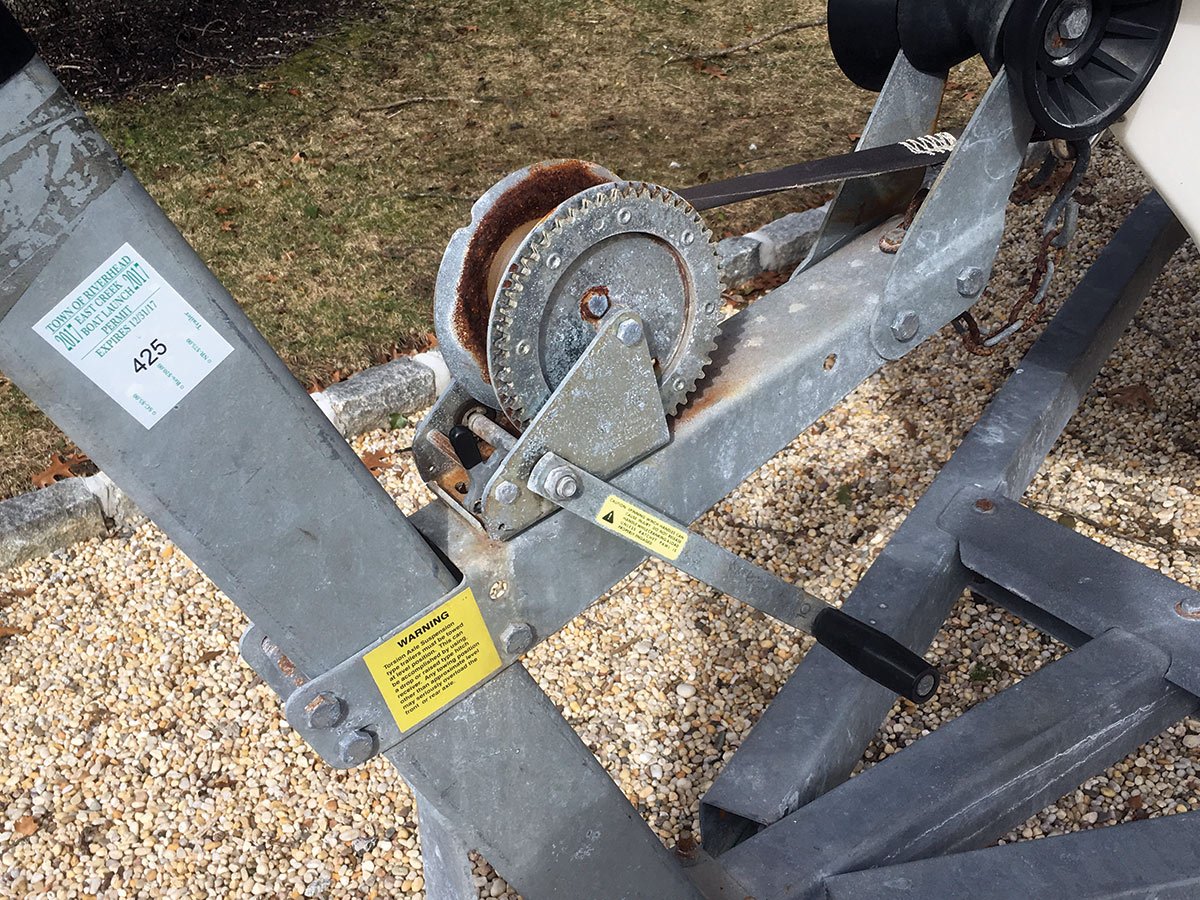
 The trailer winch is yet another simple-but-critical component part of your boat trailer. It can come in a manual winch form, or electric, which requires a battery and hookup cables. I have manual winches on both of my trailers and the larger one features a two-speed winch, whereas the smaller boat trailer is equipped with a single speed model. Keeping these rust-free and greased ensures trouble-free service. If your manual winch handle is removable, it’s a good idea to stow it in a safe place when trailering and definitely have a spare, or you will have a bad day when it’s time to retrieve your boat and you can’t find the winch handle. Check the locking and reverse mechanisms on your winch and be sure they are smooth and operational. It’s also a great idea to check the winch cable for wear and replace that as needed. If anything is defective, remove and replace immediately. Once again, this is a relatively easy “erector set” task, accomplished by removing a few nuts and bolts to replace this critical part.
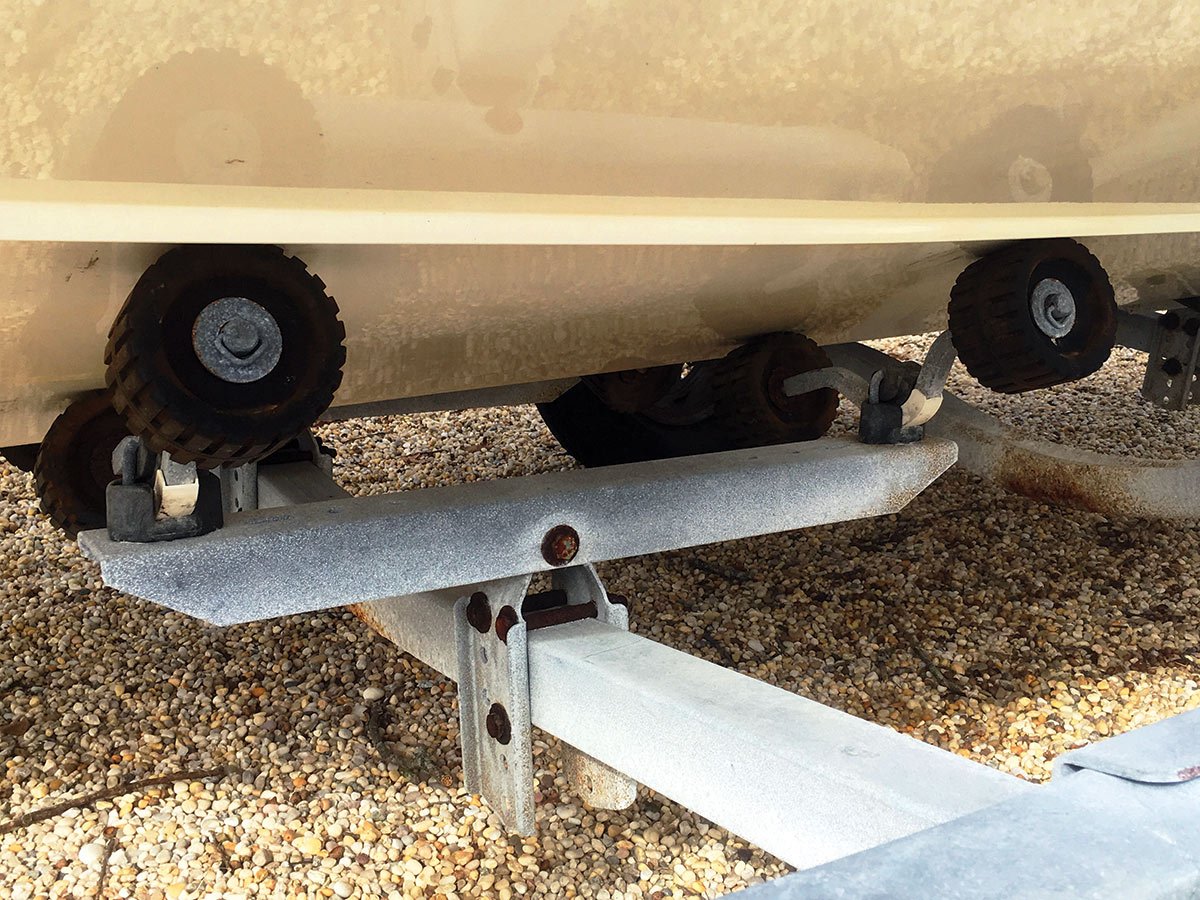
Roller Maintenance & Replacement
 There can be many locations for rollers on a boat trailer (hardly any on a bunk trailer, except for the stem). These can be located in the stem, the keel, sides and in flexible arms on either side under the hull. They go by names like keel roller, bow roller, spool roller, side roller and wobble roller, among others. These rollers are all modular and can be replaced when required, especially when they lose their surface finish and start leaving black streaks all over your perfectly waxed hull. They are manufactured in a variety of materials and if they are in good shape, an occasional spray on the inner bearings with penetrating oil or silicon should keep them rolling.
Brake & Signal Light Maintenance & Replacement
Be sure to check them frequently for full operational status, which includes both the brake and turn signal functions. These typically get totally immersed in saltwater, and the shelf life of these can be compromised quickly, especially if they are cracked, have compromised wiring connections, etc. Be sure to check on these before and after every trip. If they become dysfunctional, it’s time for repairs and replacement. Replacement lights are available in every marine supply store. Check out the various trailer websites for helpful videos on how to troubleshoot trailer light problems before diving into it.
Trailer Tires
 Tire wear typically comes in two conspicuous forms. The first is specifically observing the amount of tread that is remaining on your tire (and looking for an even wear pattern) and the second is to check the sidewalls of your tires for any unsightly cracks. Before you start taking tires off your trailer and purchasing replacements, be advised that not all tires are created equal. It is inadvisable to use car tires on trailers and vice versa. When in doubt, check the capacity plate on your trailer for specifics regarding what size tires are recommended, the rim size, recommended tire pressure and load rating (B, C, D, etc.). If there are any doubts, call the trailer manufacturer for more details.
SOME COOL AND USEFUL ADD-ON ACCESSORY ITEMS
There are three totally cool and super functional add-on accessory items that you might consider adding onto your boat trailer if budget and time permit. They are as follows:
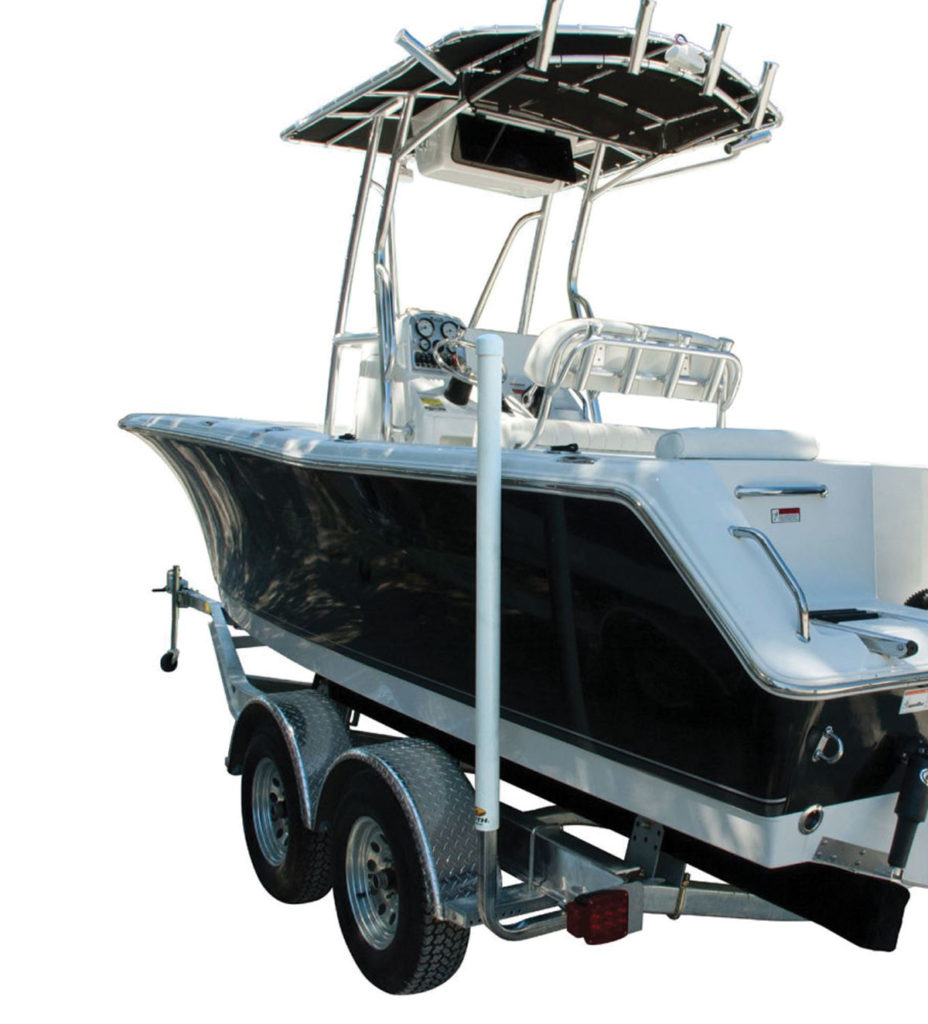
 Guide-On Posts: This easy addition to your boat trailer is a fairly simple and straightforward DIY project that is definitely worth the investment. If you’ve ever tried to line up your boat to a submerged trailer in a stiff crosswind, you know exactly what I’m talking about. According to the techs at E-Trailer.com, guide-on posts make it easy to load your boat onto your trailer, in addition to giving a welcome visual assist when backing your trailer down to the ramp. Installation is simple and they attach with U-bolts and clamps to the rear of your trailer frame beams and extend upwards out of the water. These guide-on posts are offered in a variety of lengths (40inches, 60inches, 75 inches) providing an easy-to-see target when maneuvering your boat onto the rollers or bunks and trying to center it on the first shot. There are other variations on this theme, like roller guides, lighted guides, etc., but the basic concept using white or black PVC tubing is a winner and it should be a high priority for your boat trailer if you don’t have them.
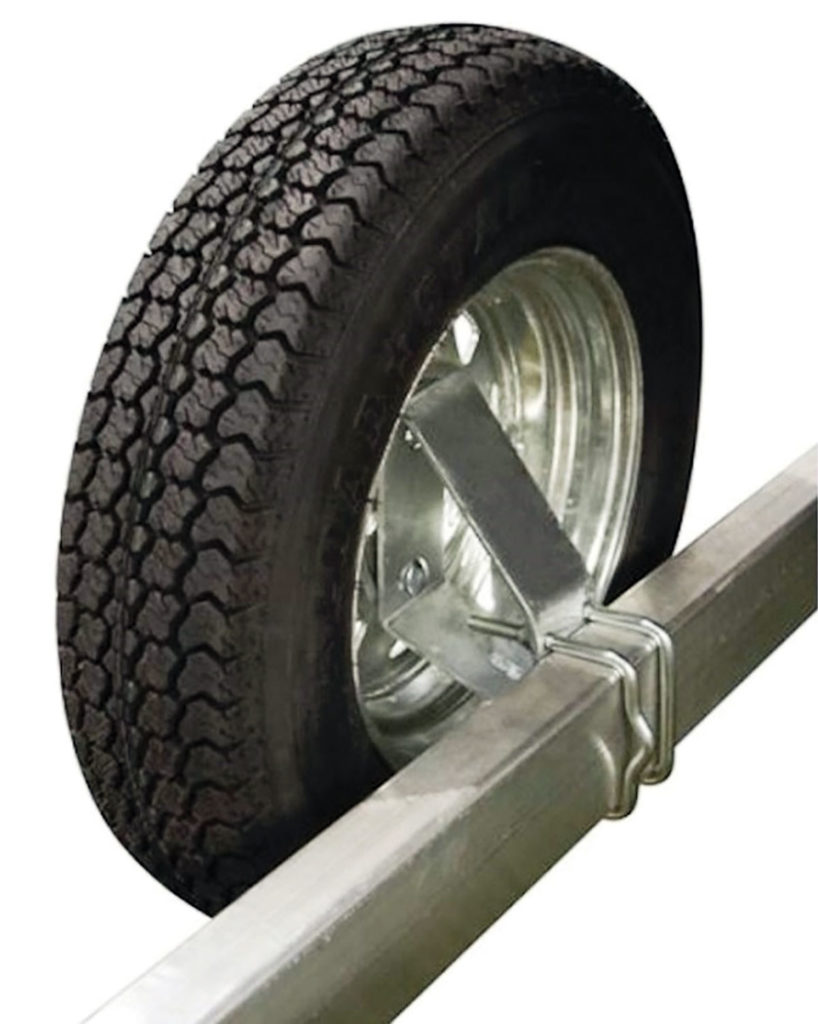
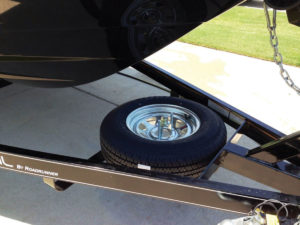 Spare Wheel Holder: Having a spare tire is another one of those “mandatory” accessory items and mounting a spare wheel holder on your trailer ensures that spare is always with you, and easy to access when needed. They mount easily to your trailer’s beams via U-bolts and clamps and are available in either vertical offset or lay-flat designs that are out of the way when launching or recovering your boat, but ready for immediate deployment.
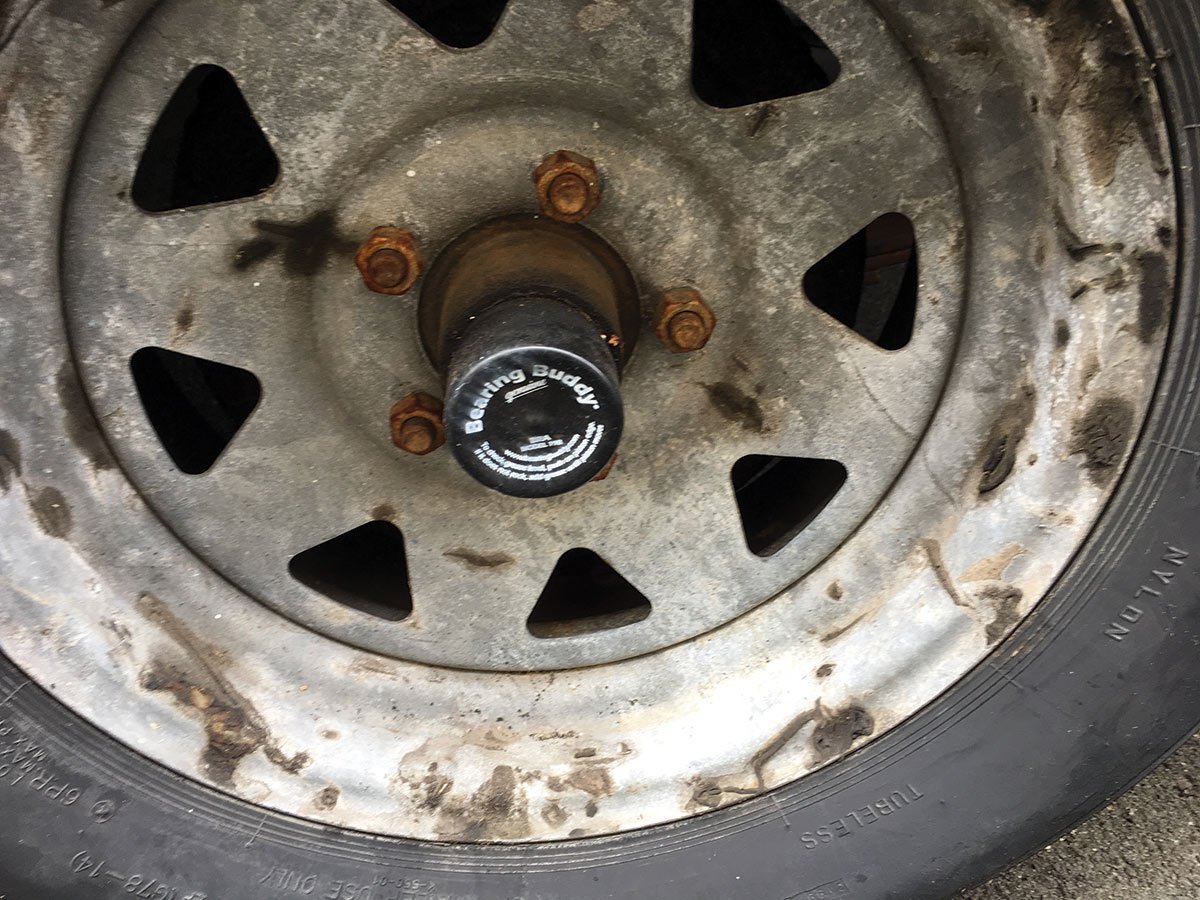
BEARING BUDDY INSTALLATION
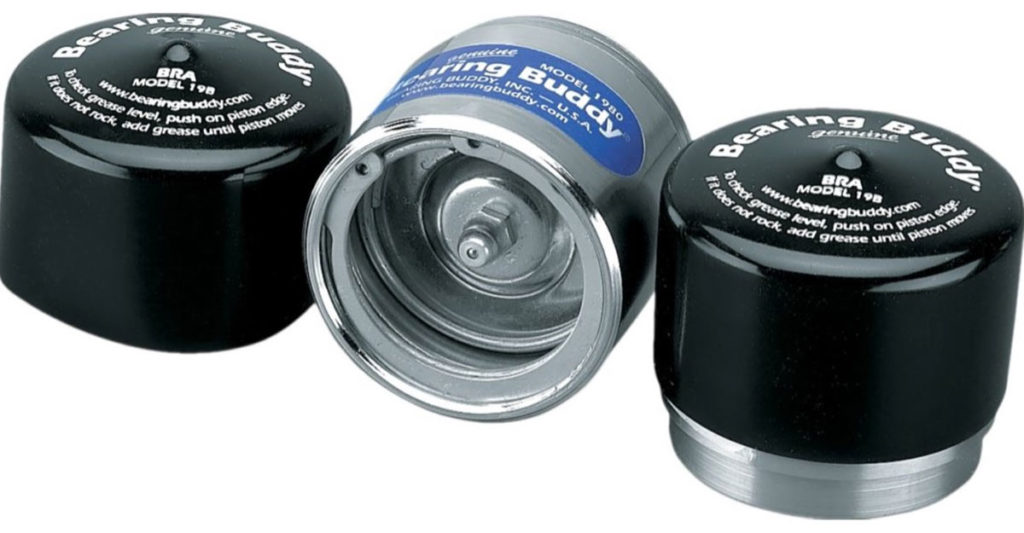 The Bearing Buddy is a neat upgrade for your trailer’s wheel bearings. The unique design of the Bearing Buddy makes it an easy way to protect your bearings by keeping water out and ensuring enough grease is in the hub during trailer operations on the road. It replaces the grease cap in the axle hub and helps to prevent wheel-bearing failure by keeping water and dirt out of hubs and bearings. This allows the boat trailer wheels to be completely submerged and minimizes corrosion and pitting on the roller bearings. The Bearing Buddy also provides easy access to the outer wheel bearing’s grease fitting and makes adding grease to the bearings quick and simple. The Bearing Buddy maintains a slight, controlled pressure with its spring-loaded piston, preventing water from entering the hub, while also allowing visual monitoring of grease levels with its blue indicator ring. This ring sits flush with the top of the cylinder when the grease levels are full and prevents overfilling and rear seal damage with a unique automatic pressure-relief feature. Grease seeps around the piston edges and into the barrel when full and the housing is constructed of stainless steel for long life in the marine environment. The Bearing Buddy is equipped with a rubber cover or “bra” that helps keep water out and the grease in place. They are offered in a variety of sizes and materials (chrome plated steel or stainless steel) and essentially snap into the wheel hub’s opening on either side of your trailer. There are myriad DIY videos on YouTube that describe in visual step-by-step detail the proper/recommended procedures for doing this installation, but a summary of it is as follows:
Safely immobilize the trailer with wheel chocks.Clean the wheel and axel area that you will work on with some spray cleaner and a clean rag.Remove the existing dust cap over the outside wheel bearings on your axel(s). You might need large Channel Lock pliers to make this happen, depending on the last time this was removed.Take a properly sized Bearing Buddy cap and carefully tap it into the wheel hub’s outer housing frame, using a rubber mallet or a piece of wood and a hammer to friction-fit it gently into place.Fill up the grease fitting on the Bearing Buddy with a quality saltwater-proof wheel bearing grease, but don’t overfill it to avoid blowing out the rear bearing seal on the back side of the inner/outer wheel bearing housing. When the piston of the Bearing Buddy shifts out to the edge of the retaining rim of the frame, and you can rock it back and forth, this typically is the optimum fill point for the bearing grease.
As a final step to the process, push the bearing cover or “bra” onto the Bearing Buddy frame by inserting it over the rim of the Bearing Buddy and pushing down on the center to create a suction effect that should keep it lightly in place. This creates a vacuum that keeps the grease in and the water out when immersing your hot bearings down at the launching ramp.
| LEAF SPRING HOW-TO |
|---|
|