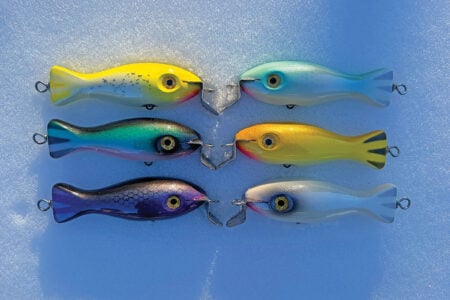
It’s been long enough now that, I’d guess, a good number of the guys who fish the Canal have no idea what a Hawg Hunter is. Furthermore, I’d wager that many don’t know how the flat-bottomed pencil popper came to be. As with so many things relating to wood lures, Stan Gibbs had his hands all over this modification. The story goes that the ‘Canal Special’ was born when some of the guys in the Gibbs shop tried to rescue some chipped pencils by sanding off the chipped part, leaving a flat side on the plug. It didn’t take long before they realized that orienting the plug so that the flat part was on the bottom helped the pencil ride over the current while maintaining better action, even when worked against the tide. Stan then started adding more lead to these plugs; the flat bottom helped carry the weight without killing the action. For years the ‘Canal Specials’ were only sold directly from the shop, and many were painted crazy colors—in fact pink mackerel was one of those ‘crazy colors’ that has since become a staple color at the Big Ditch.
The Hawg Hunters were created out of necessity; when John Gibbs sold the company sometime in the late 1990s the new owners stopped making the Canal Specials, much to the dismay of its Ditch casting followers. A man named Paul Brunnell took on the task of making them. When Brunnell was injured in a car accident he passed the torch to Brad Poehler, and the Hawg Hunter was born.
These pencils are based on the Gibbs principle with the Brunnell design—a unique pencil popper shape, sporting the flat belly of the Canal Special. The interesting part of it being that Brad turned each and every plug by eye, there was no duplicator or micrometer, Brad looked at one of the Brunnell plugs and eye-balled the shape—this meant that every plug was just a little bit different. He also made them out of whatever wood he could get for free or for dirt cheap—pallets and 2x4s were often used to crank out the Hawgs. But the plugs worked and quickly gained traction among the secretive, old-school Canal crowd.
Hair of the Hawg
Of all the sizes that Brad made, I find the 3-1/2-ounce to be the most interesting—I also gravitate to larger pencils when fishing the Canal. But the shape of this plug is so sleek and so different, with the long neck and ‘trumpeting’ at the head. In recognition of the fact that 2x4s were commonly used to make the originals, I am using clear, white pine to make my Hawg Hunter clones.
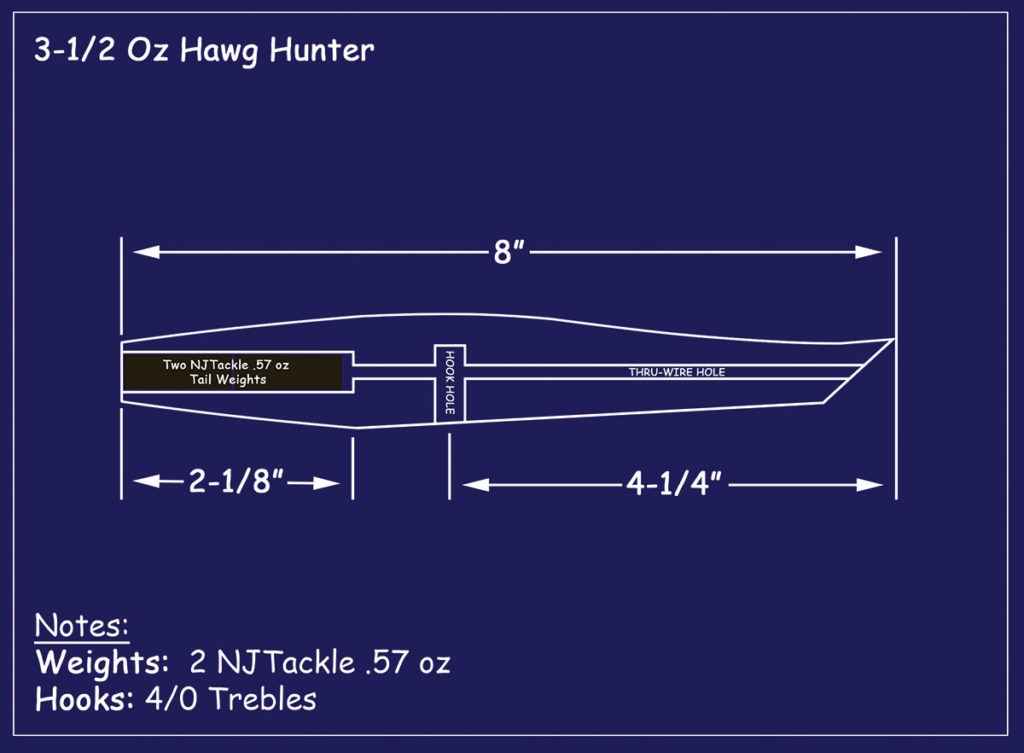
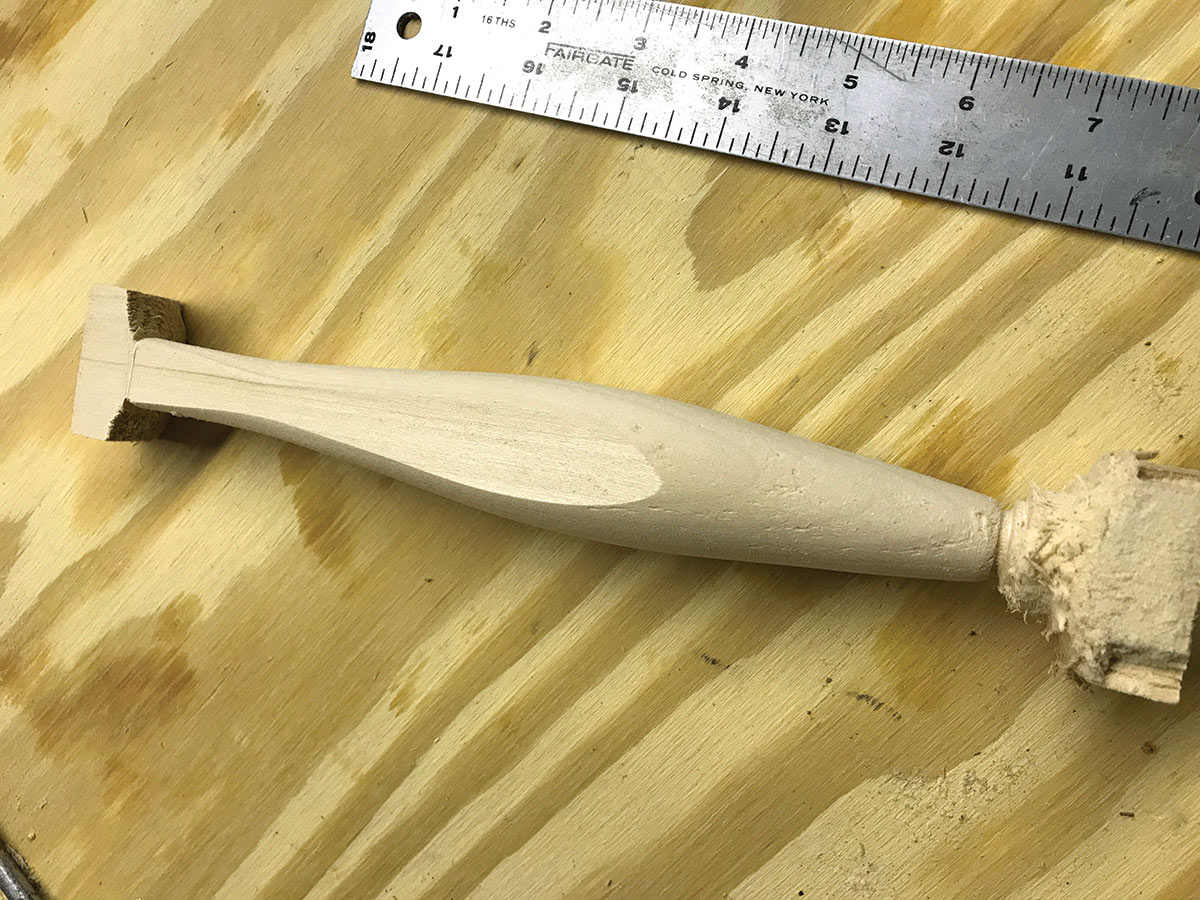
At 8 inches and 3-1/2 ounces, this pencil is a formidable offering, designed to stand out in schools of mackerel, squid, sea herring and bunker. You’ll notice that the flat bottom is larger than most other Canal Special style pencils; this helps support the large weight in the tail while also helping the plug lay flat in the current.
Makin’ Bacon
At its widest point, the Hawg Hunter measures 1-5/16 inches in diameter. Normally I’d suggest using 1-3/8-inch square blanks to conserve wood, but because of the flat bottom and how I achieve it, you’ll need to use 1-1/2-inch squares cut to 9-inch lengths. I looked at several versions of the 3-1/2-ounce Hawg Hunter and kind of settled on an average for the shape; some had a very steep taper on the tail end. I liked the ones with the more gradual grade. Some had a flared nose, some didn’t. I opted to go with a slight flare. I chose these characteristics purely for style points and I am certain that there were many of these made that looked almost identical to my ‘averaged’ version.
Get started by finding the center at both ends of your 9-inch blanks and set one spinning in the lathe. Use a gouge to round off the corners, leaving about a half-inch of each end square. Then grab a skew chisel and work the blank into a 1-5/16-inch diameter cylinder. Now shut the lathe off and grab a ruler and a pencil. As always, start by making marks for the head and the tail—these should be 8 inches apart. Now measure back 5 inches from the nose and make a mark there; your goal will be not to remove this line, this is where the widest part of the plug should be. Then make marks at 3/4, 1-3/4, 4 and 6-1/4 inches back from the nose—these will be your reference marks and should be replenished as needed. Turn the lathe back on and touch each mark with a pencil so that they are easier to see; you may also want to use a colored pencil for the 5-inch mark to remind you not to remove it. There are no perfectly straight lines in this plug; it’s a fluid shape throughout—kind of a snaky, abstract S-shape. A small, sharp skew chisel will get the rest of your work done, with a rounded chisel maybe making the slight flare at the nose a little easier. Turn your Hawg Hunter body using these target measurements:
Nose: 3/4
3/4-inch mark: 11/16
1-3/4-inch mark: 3/4
4-inch mark: 1-1/4
5-inch mark: 1-5/16
6-1/4-inch mark: 1-1/8
Tail: 11/16
Finer Tooling
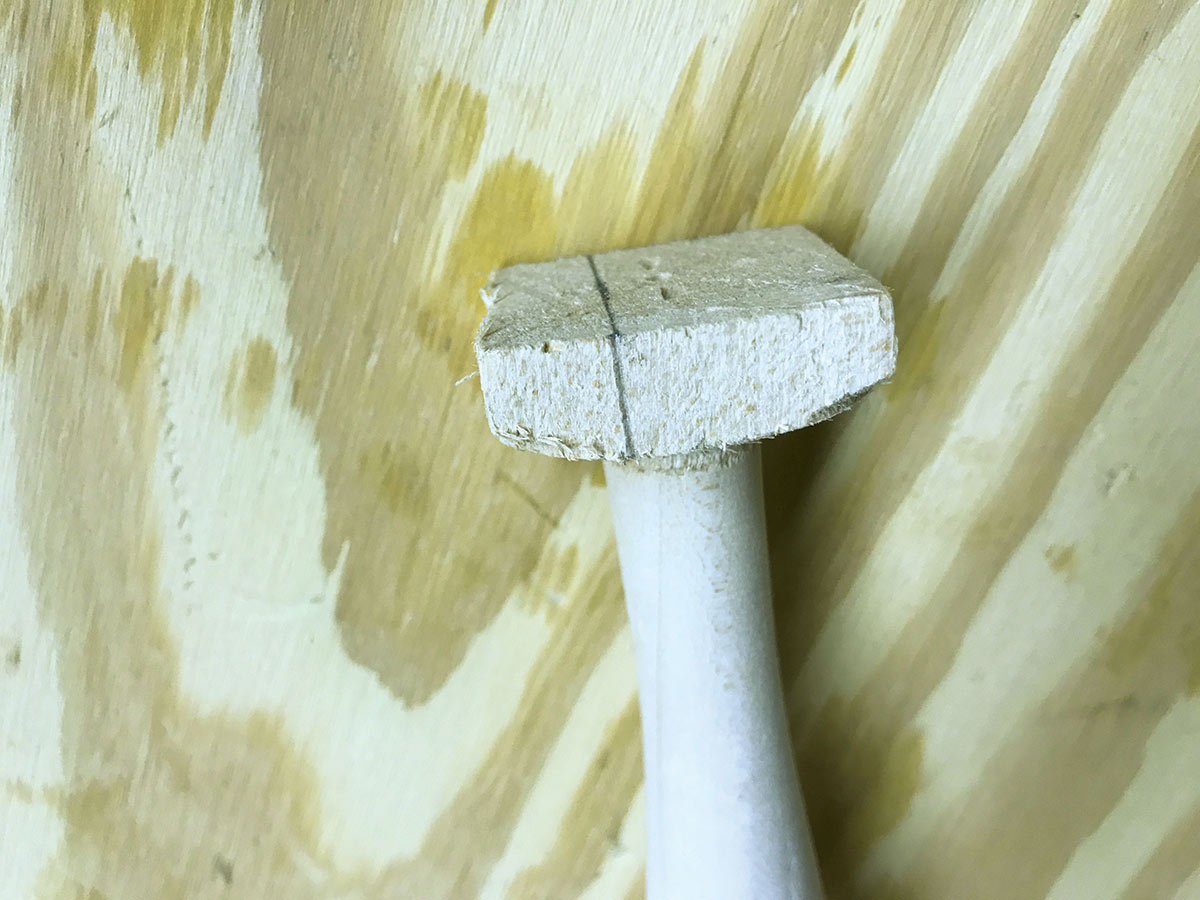
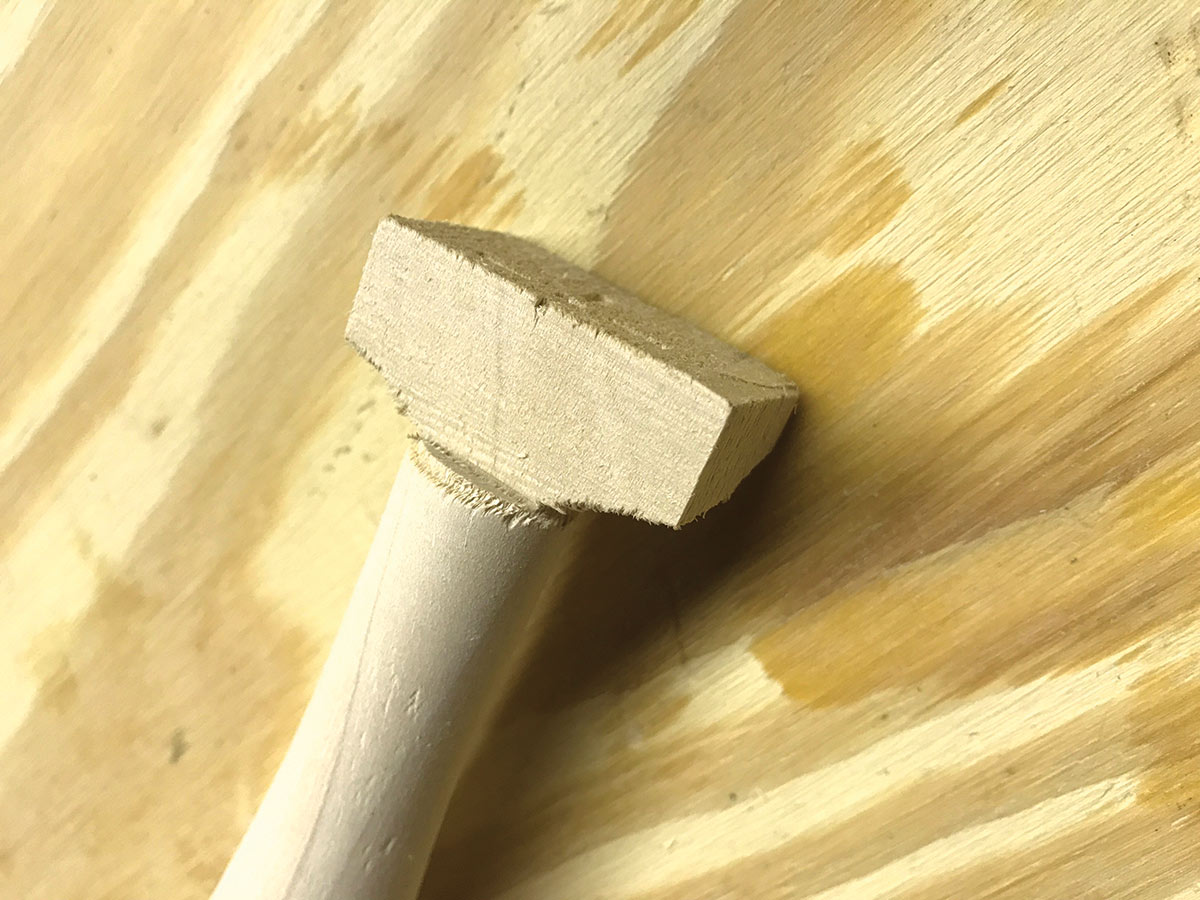
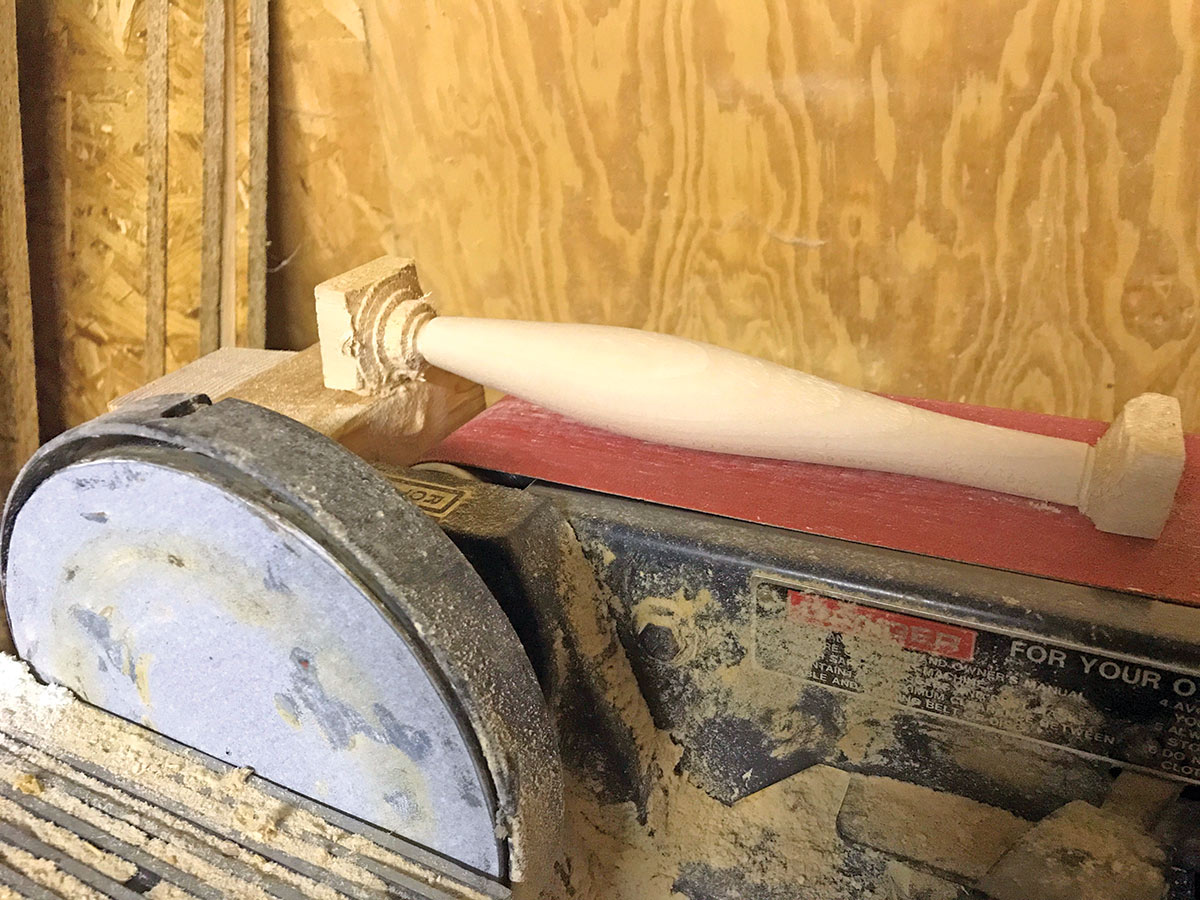
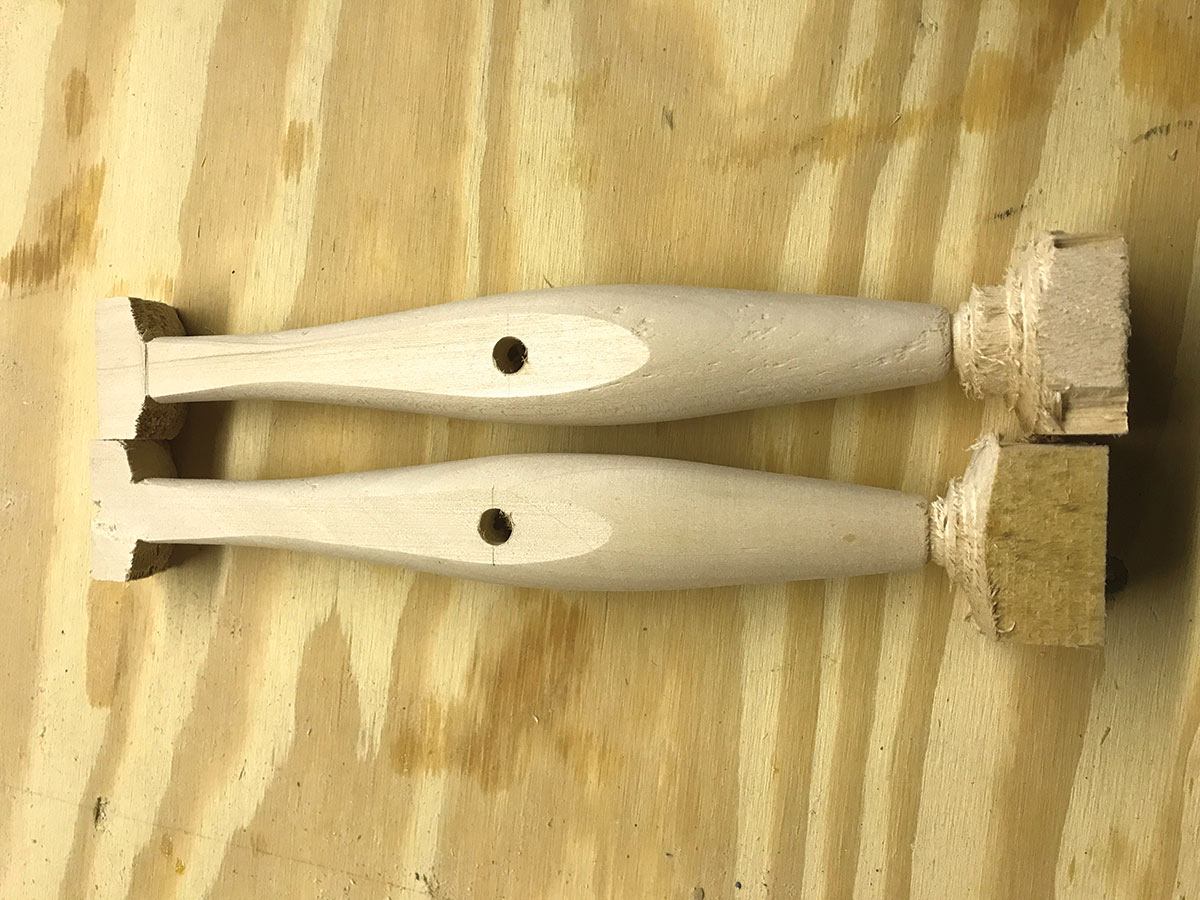
The flat belly seems to baffle many builders. Sure, you could rig up a joiner or make an angle-cut sled for your table saw, but why go to that trouble unless you’re planning to make 1,000 of them? I have a very easy solution for you: start at the nose and measure down from the hole left by the lathe center about 1/4 inch and make a mark, then use a square to transfer that mark to the side so you can see it when making a cut on the band saw. Then basically notch the square end off at that line. Now we’re going to use the angle created by the notched nose end and the full-sized square on the tail end to create the flat bottom using a belt sander. I highly recommend making a simple jig—see photo—to make this easier, but you can also eyeball it. Now you just have to carefully press the plug body down into the sander until the top of the notch is touching the paper. You can also use this to ensure that your flat belly is square to the rest of the plug—just keep an eye on the notch and the paper as you’re nearing contact and you should be able to muscle it square before you touch down. Just watch your fingers; sanders like to steal fingernails—and you can’t put them back on!
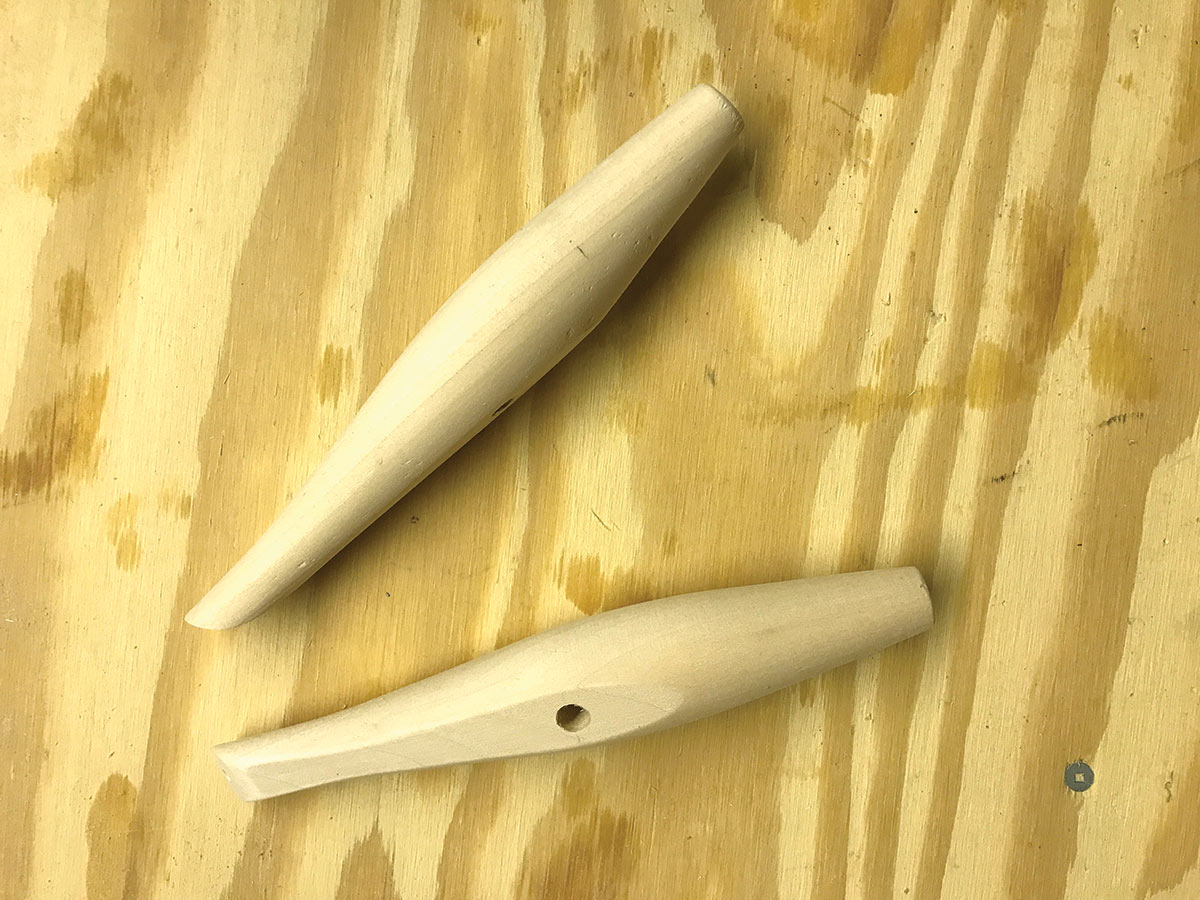
When you have your flat bottom looking good, measure back 4-1/4 inches from the nose and then, a nice side effect of the flat bottom, you can measure the perfect center of the flat portion and drill your hook hole—I use an 11/32-bit and drill about 1/8-inch past center. After that, you’ll want to thru-drill the plug using a 9-inch long, 3/16-inch diameter bit, using the lathe centers as your guide. Cut the square end off of the TAIL ONLY and then drill the hole for the tail weight. Drill this hole on the drill press with a 3/8-inch diameter bit—drill it just a touch deeper than 2 inches.
Now we can finish up the body. The nose is cut at roughly a 45-degree angle, and it is slightly scooped or concave. I don’t think this makes a whole heck of a lot of difference, but you can achieve it using the rounded end of the belt sander—or just leave it flat. While you’re at the sander, put a nice flat end on the tail and then give the whole body a good sand with some 220-grit sandpaper to soften the edges. Then it’s off to a bath in sealer (60/40 mix of oil gloss polyurethane and mineral spirits) and then to be hung on a wire for several days to dry.
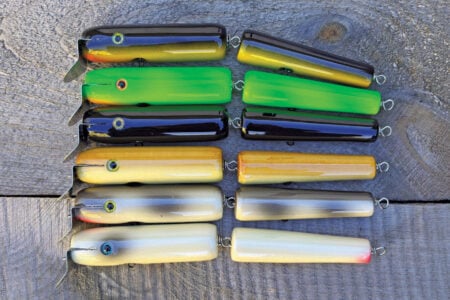
When fully dry, light sanding should produce a fine, white powder. Give the whole plug another light sand, just to knock off the sheen and any raised grain or adhered dust. Then spray your bodies with Painter’s Touch all-purpose primer and start thinking about colors. If you’ve followed these stories over the years then you know that I am a fan of simple colors—and that would be even more true of pencil poppers. I would feel totally comfortable going out with just white pencils. But at the Canal, it’s necessary, even if only for personal confidence, to have some mackerel colored plugs in your bag, so I’d do a few green and a few chartreuse macks and—just for nostalgia’s sake, a few pink mackerel, since that was a common favorite color of the original Hawg Hunters.
From the paint booth, I’d strongly recommend some clear finish, before assembly. Wire the plug using the 11-inch pre-bent wires from Cape Cod Tackle or NJ Tackle. Slide a #1 swivel into the hook hole and a nose grommet onto the wire. Slide two .57-ounce tail weights from NJTackle into the hole and cover it with a 1/2-inch tail grommet. Attach a couple 4/0 hooks with 5.5H split rings and you’ll have a plug that has the action and durability to handle anything those crazy Canal stripers can throw your way.