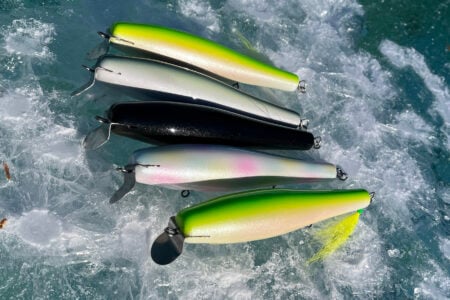
A classic jointed eel, designed a true legend of the Rhode Island surf.
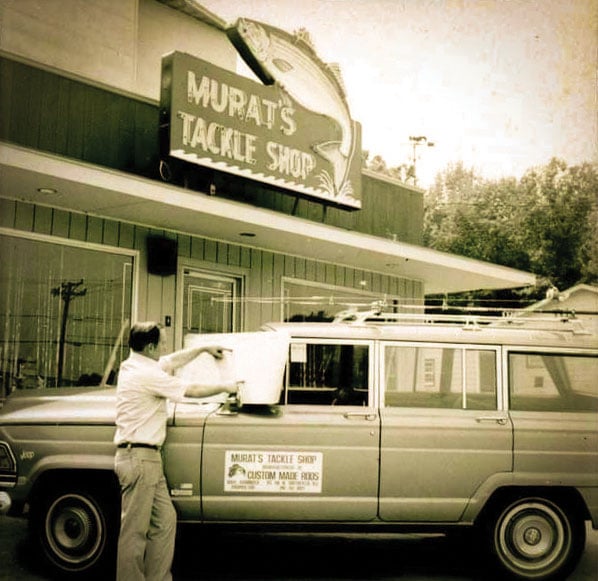
As surfcasters, our lives are defined by how we live. In the case of Charlie Murat, his life was as much defined by how he lived, as it was by how he died. Charlie was the owner and lifeblood of Murat Tackle, a hub for surfcasters that he between 1946 and 1970, in North Smithfield, Rhode Island—the shop changed hands a few times after his passing and closed for good in 2003. It has been said that Charlie was a great mentor and teacher to many aspiring surfmen, at a time when most casters took their surf secrets to the grave.
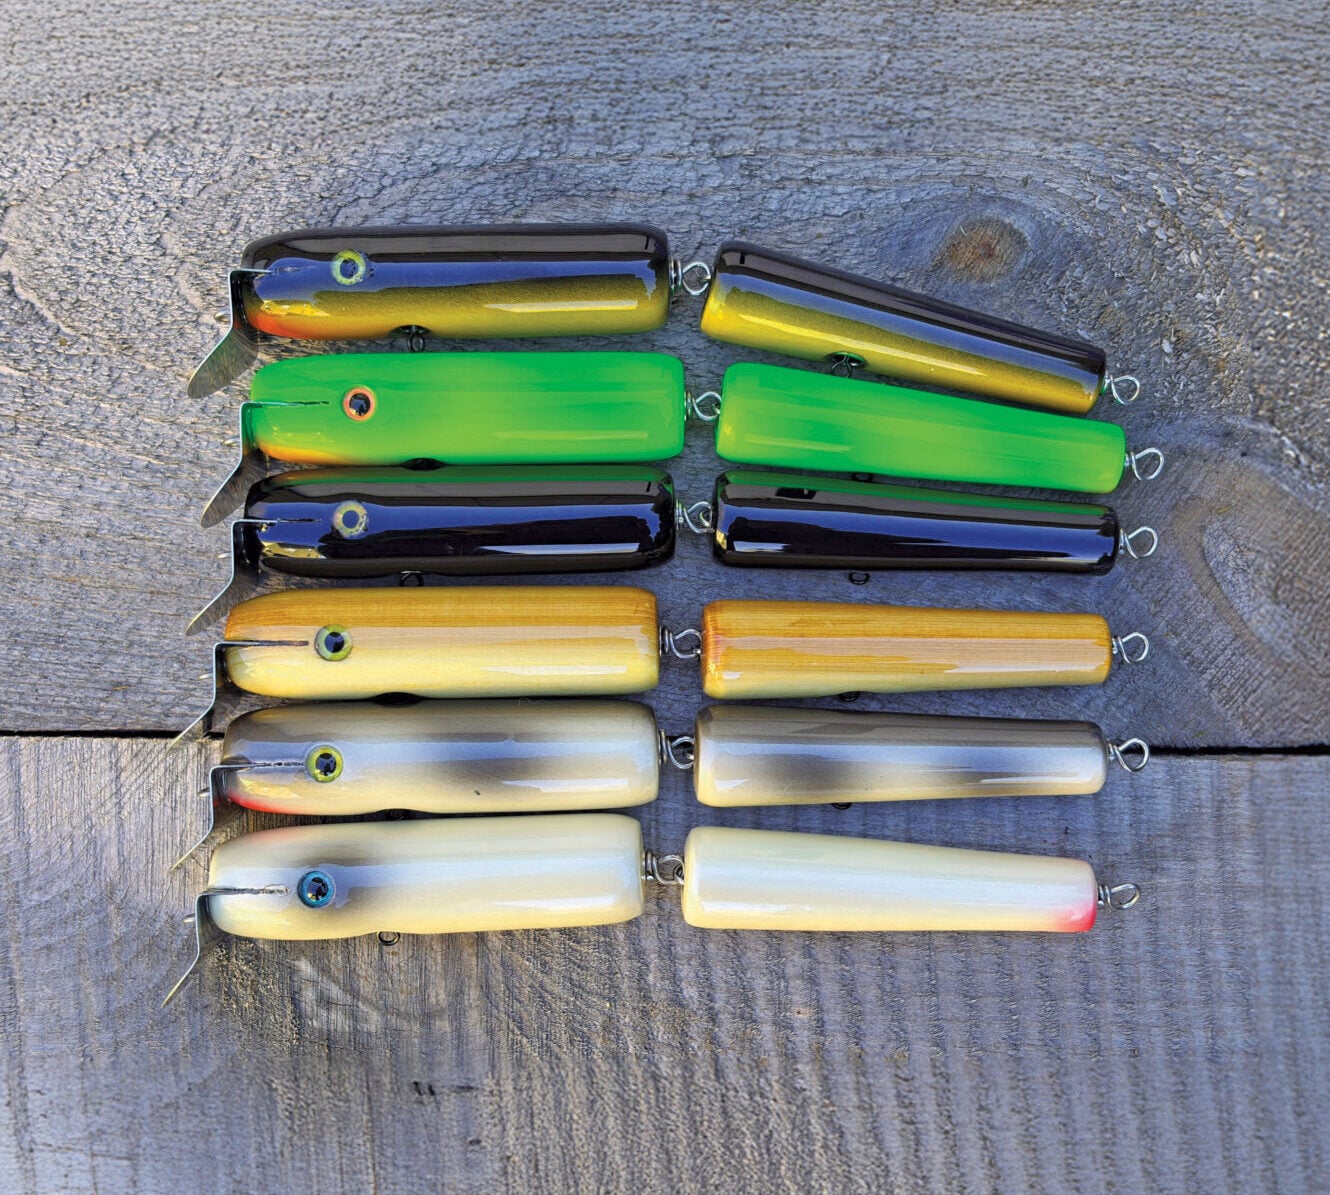
The shop was the first one making custom surf rods in the Ocean State and they were highly coveted. Somewhere along the line, Charlie began making plugs in a handful of styles, the most iconic being the Mur-Eel. As with any plug made by an obsessed fisherman, modifications were made along way, making it difficult to confidently recreate this Rhode Island classic. My friend, and obsessive Murat collector, Pat Laforge tells me that Mur-Eel configurations run all over the map, different wood species, varying head shapes, hook layouts and weight configurations. Some have very open joints, while others have very tight joints that restrict the swing.
A Different Era
One of the things I love about this era of plug making is that many of the plugs being sold were not wonders of artistic creativity, they were innovations made to fill a need in the toolkit of the surfcaster. In other words, they were thought of semi-disposable tools not works of folk art, and as a result, they were often painted simple colors, sometimes the nose and tail were left with the rough edges of a band saw cut, you might find sawdust or a thumbprint in the paint… but they were designed with a discerning eye for action, and when someone like Charlie Murat set his mind to perfecting a jointed eel, we’d all be wise to listen up.
The perplexing bit about the Mur-Eel are the inconsistencies over the years, most puzzling is the variation in the tightness of the joint. After looking at several Mur-Eels, I think the joint spacing can be blamed on the way they were constructed. Many of the Mur-Eels I have seen used a pinned hook hanger and a pinned link of toilet chain for the joint, in the head portion of the plug, while the tail section was thru-wired. I would wager that the differences in joint tightness can be tied directly to the fact that small variations in where the hole for the pin that secured the chain link was drilled would result in noticeable changes in the joint spacing. Knowing that Mur-Eels were made from various wood species including pine, poplar and red cedar, I made mine from cedar, because I had some on hand that was already cut to size… and I was happy with the results. But, by all means, please, experiment.
Setting Up The Build
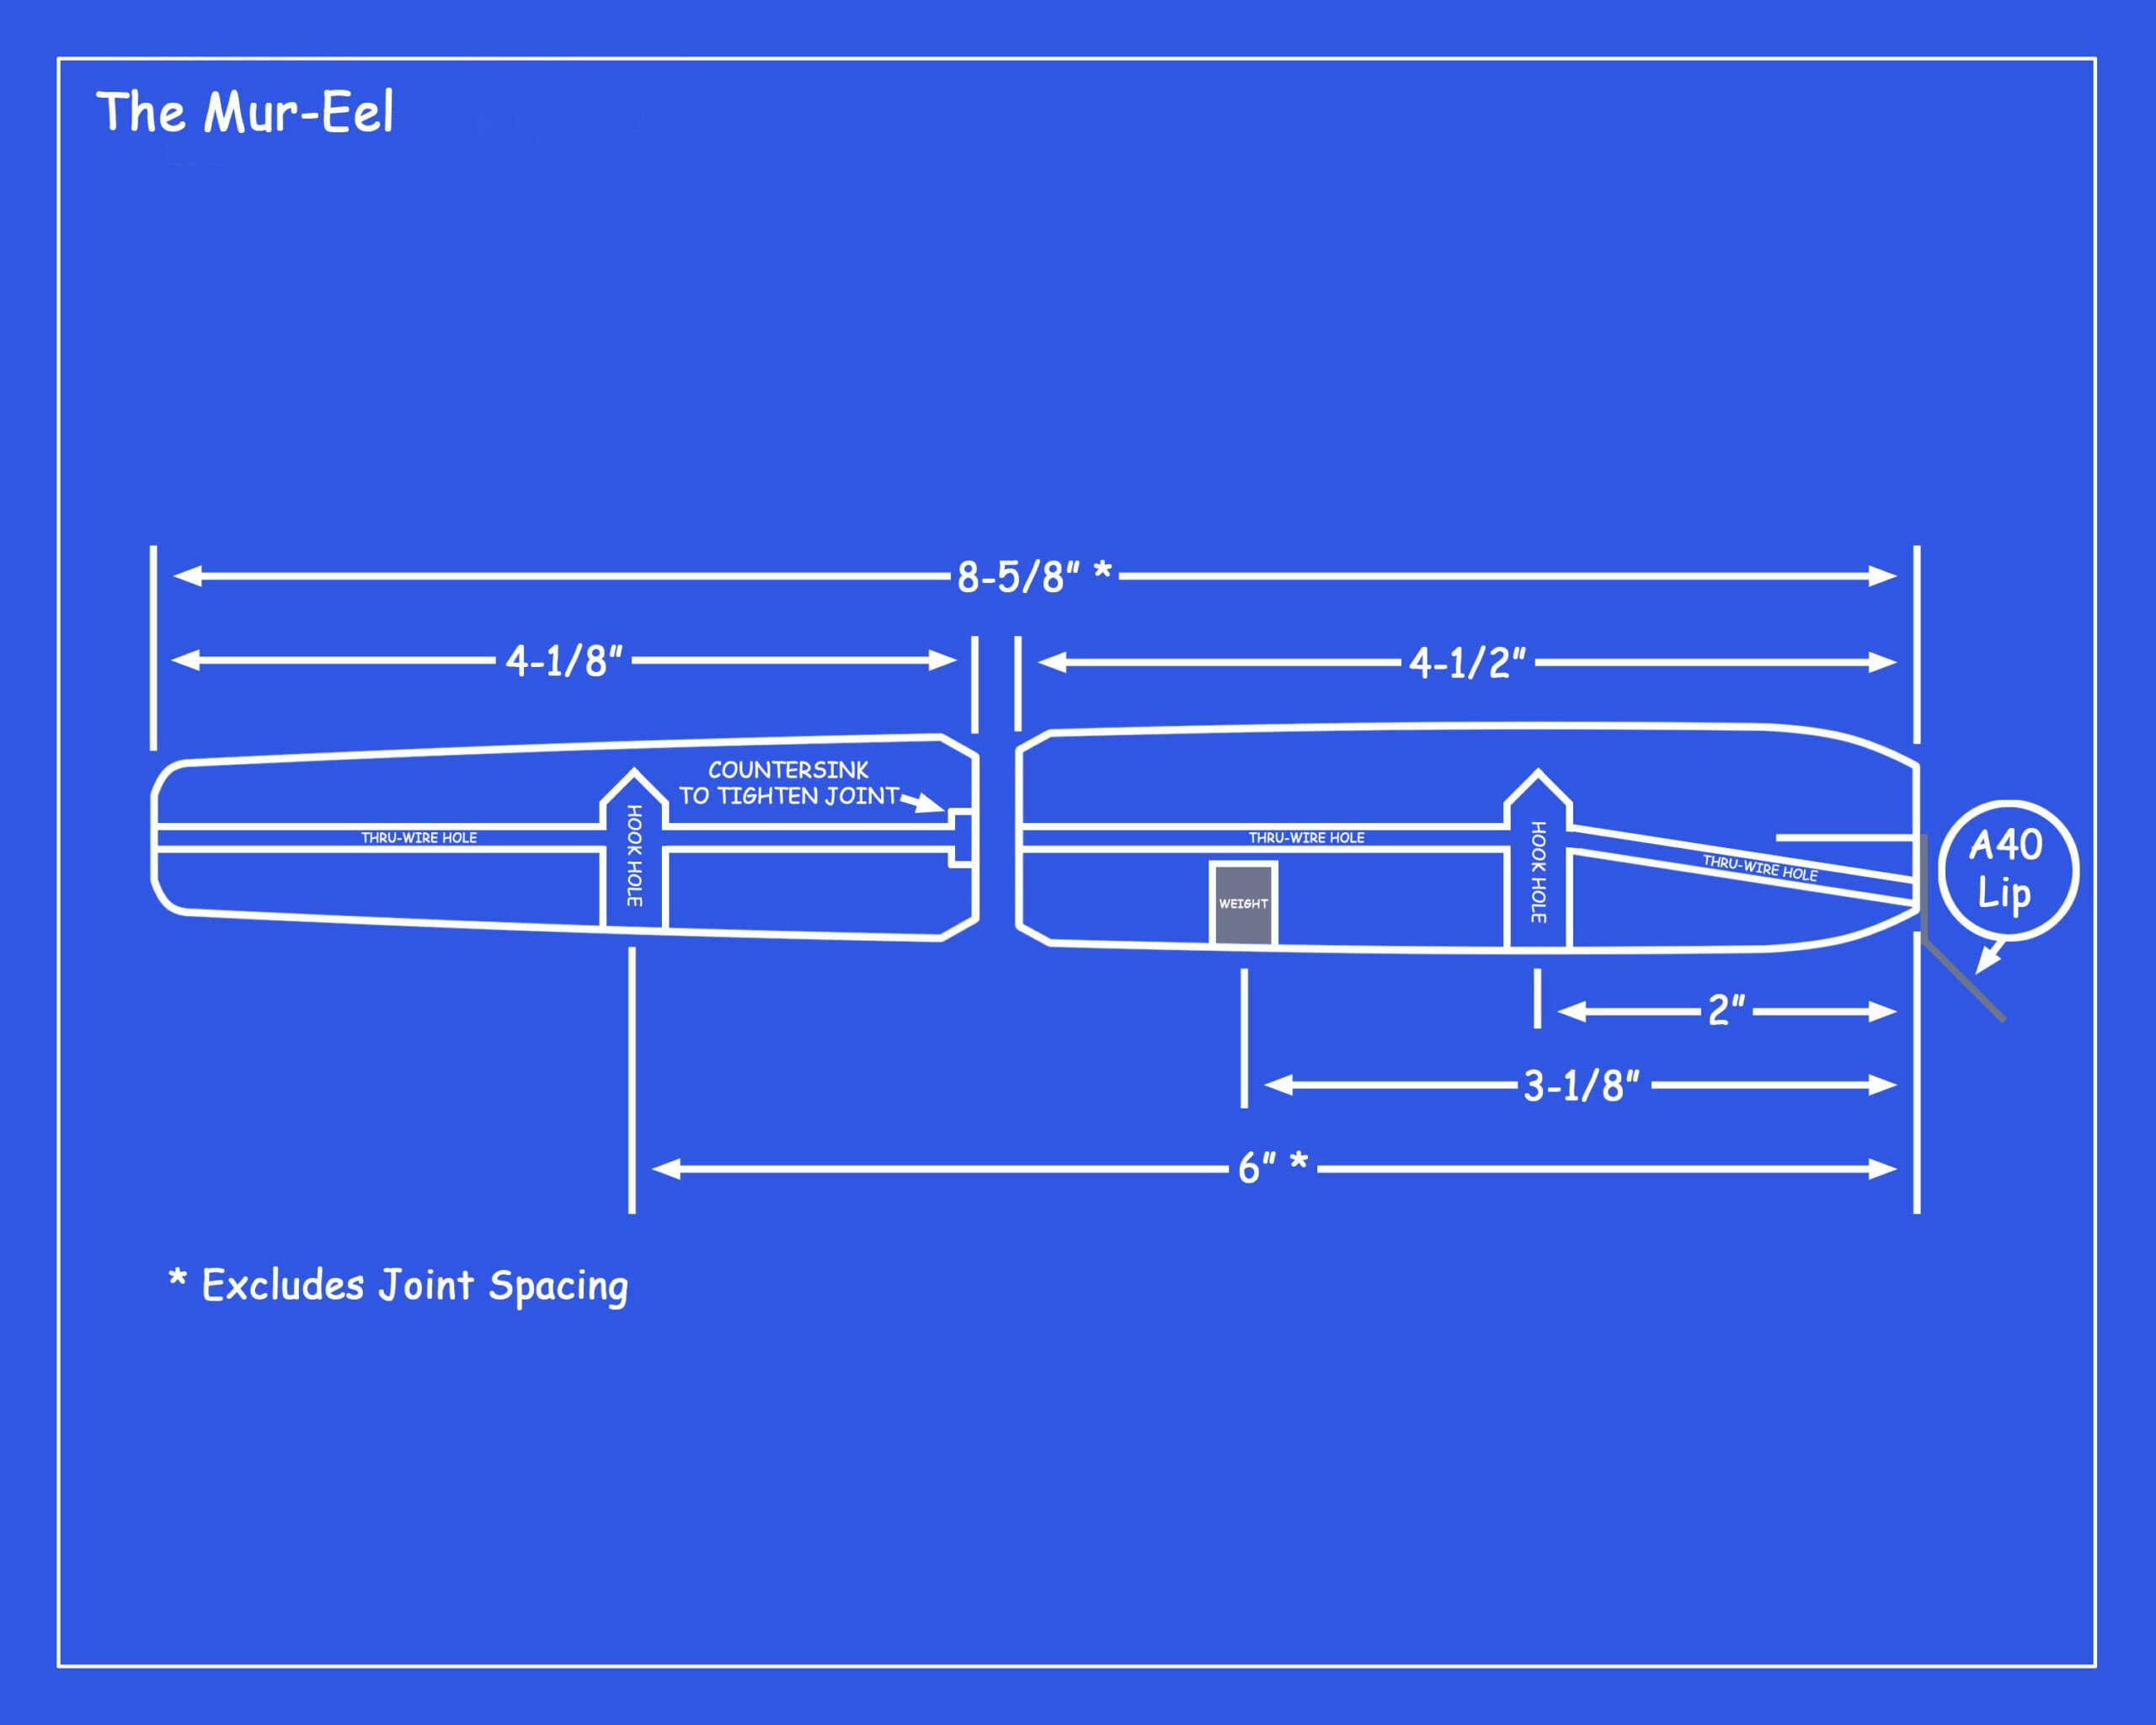
Not counting the space between the joints, the body of the Mur-Eel measures 8-5/8 inches in length with a max diameter of 1-1/8 inches. So, using some 5/4 pine or cedar would be an easy way to cut your squares, with minimal waste. Cut your blanks to 9-3/4 inch blocks, cut your lip slot while it’s still square. This plug takes an Atom 40 style lip, which has a long ‘tongue’ so cut your slot about 1-3/8 inches deep, and keep it centered and straight. Now, find the center at both ends and set one spinning in the lathe. Use a gouge, to round off the corners of the block, leaving a half-inch of both ends square. Now power down the lathe and lay out the following marks; first make two marks 8-5/8 inches apart for the head and tail, then make a mark 5/8-inch back from the head mark, and another 4-1/2 inches back from the head, make one last mark an inch in from the tail end, turn the lathe back on and touch each mark with your pencil, these are your reference points and should be refreshed as needed. Use the following diameters to guide your work.
Head: 3/4-inch
5/8-inch mark: 1-1/8-inches
4-1/2 –inch mark: 1-1/16 inches (joint location)
Mark before tail: 13/16-inch (approximate)
Tail: 3/4-inch
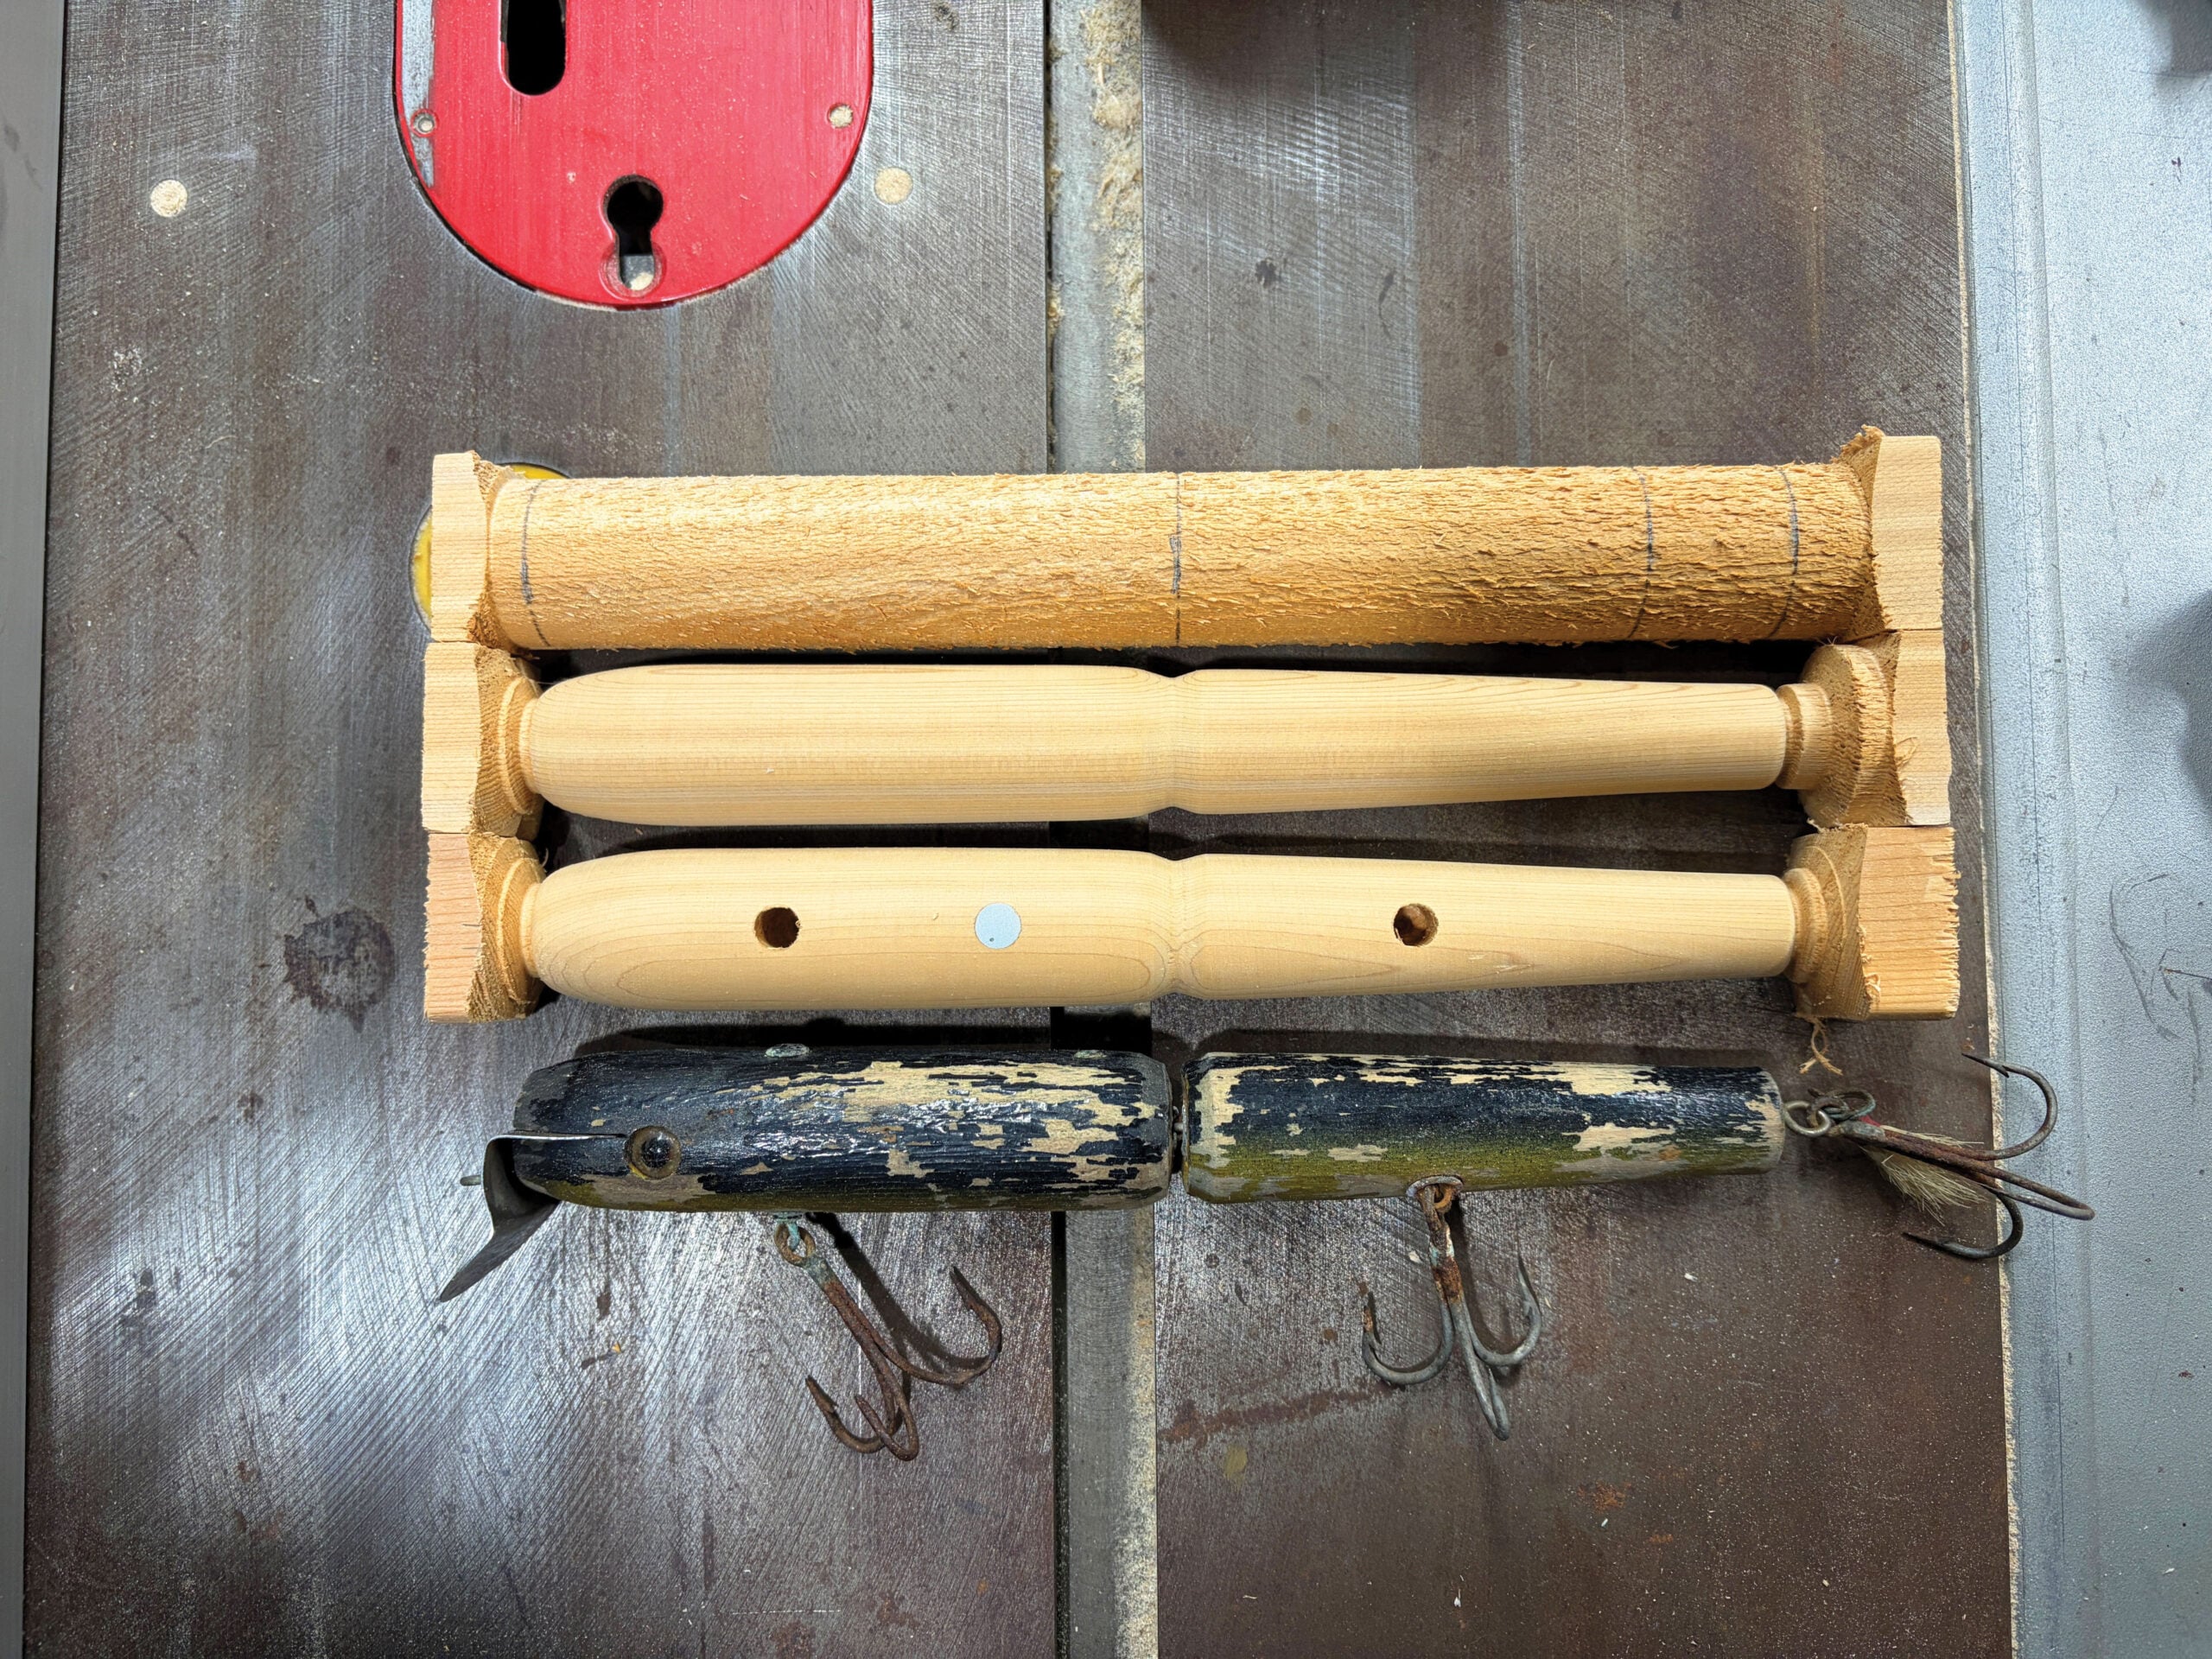
This is a pretty straightforward turn, the head portion is basically a 1-1/8-inch diameter cylinder with a rounded taper at the head, terminating in a 3/4-inch diameter face. The tail segment is almost a straight-line taper with a slight ‘reverse curve’ as it flattens out at the tail. As we’ve covered, this plug was not built to exacting standards, so don’t fret if you don’t nail every measurement, just make it look ‘eel-like’ and you’ll be on the right track. When you’re satisfied with your turn, refresh the 4-1/2-inch mark one last time and use a parting chisel to slowly open up a chamfer between the two segments, a depth of roughly 1/8-inch will be fine. Now sand the plug with 150-grit sandpaper, until it looks and feels nice and smooth.

Finer Points
Now it’s drilling time. Chuck a 5/16-inch bit in your drill press and drill centered holes at 1-3/4, 3-1/8 and 6 inches back from the head. The holes at 1-3/4 and 6 inches should be drilled just past halfway through and the one in between should be drilled just shy of halfway. I took mine a step further and countersunk the hook holes to accept a belly grommet. I just think it adds to the classic look of this legendary Rhode Island plug. Not all Mur-Eels had eyes and many of the ones that did featured glass eyes, to replicate this as closely as possible, I chose some hard plastic ‘doll eyes’. I nudged the eye location back just a smidge because I didn’t like the lip slot backing right up to the eye socket, I drilled mine at 1-1/8 inches back from the head. Cut an NJTackle .39-ounce tail weight in half and Super Glue one half of it into the weight hole, cover it with Bondo and sand it smooth. From here you can cut the plug bodies in half at the joint and thru-drill the tail section and thru-drill just the rear half of the head portion, the front end of the head portion will be drilled after! Make sure your thru-wire holes are centered in the joint faces.
As we’ve already discussed, the spacing of the joint has been a point of inconsistency in this plug, in an effort to standardize this, I chose to countersink the tail portion using an 11/32-inch drill bit and adding a clean flourish here in the form of a belly grommet, (see photo). This will allow me to pull the loop deeper into the plug, tightening the joint. The countersink hole should be drilled 5/16-inch deep. Use your drill press to drill this hole and use the square end for support when drilling. Now cut the square ends off and slide an Atom 40 lip into the slot, use an awl to mark the hole location and use a hand drill and a 5/32-inch bit to drill from the awl mark, back into the forward hook hole, try to make it come out in line with the thru-wire hole coming in from the rear. Sand every rough edge smooth and seal the wood inside and out.
Color & Construct
When your sealer has fully dried, sand the whole thing lightly with 220 grit to knock down any sheen and to smooth things out. Prime the plug with your favorite spray can primer and get ready to paint. Murat usually kept it simple, white, eel, black and some two-tone and ‘swirl’ variations were the norm, but you can take it in any direction you like. When you’re satisfied with your color choices, pop in the eyes and grommets, and give the body segments a coat or two of your favorite clear finish.
The assembly of this plug requires some choreography. First, epoxy an Atom 40 lip into the slot, while that cures, take a pre-bent thru-wire and use a pair of pliers to crush the loop carefully, until it will pass through a belly grommet. Now, wire the head portion of the plug as you would any other, with a #1 swivel in the hook hole. Take care to make the tail loop as small and tight to the body as possible. Before you wire the rear portion, hook the loop of the thru-wire through the tail loop of the head piece, add a nose grommet. Then pass the wire through the tail section – threading a #3 swivel on the way – and wire the tail segment. Now you should have a completed Mur-Eel resting in your hand. Add a pair of 4/0 trebles and a thick flag to the tail and you’re ready to fish.
Legends on Legends
Charlie Murat, died in May of 1970, while hooked up to large striped bass on Nauset Beach during an evening blitz. An account of which was written by another surf legend, Frank Daignault.
“Everybody was into fish when he came out, and Charlie tried to seem casual as he hurried down to the surfline. Five of his disciples were close by, fishing furiously, when Murat caught his first.
“Ah-ha,” he chided, “the old man is going to show you again!”
Another of the gang hooked up… and to the left, another angler leaned into a bull striper. The pace was feverish, as almost everyone had fish on. By now Charlie was landing his second, a 20-pounder, when he called out, “beat that fellas!” he made another cast and hung another right off. The Cape sun had lowered enough to lengthen shadows and suddenly it was evening. [Charlie hooked] his third fish.
One of the men turned in time to see Charlie tumble face down on the beach, the rod – made by the master’s own hands – sliding under his shoulder on the wet sand; alive with the thrashing weight of a big striped bass. A wave rose, stretched toward the shore, broke into foam and anointed our Charlie.
Word traveled on Long Bar, and the burley characters there could only sob. Another tucked his long-billed sword-fisherman’s cap under his arm and prayed. His friends stood in a tight circle around the body because, for them, time had stopped.
Then, an orphaned rod standing in its spike groaned under the strain of a bass surging away with the bait. A caster turned and instinctively headed for the pounding stick. “Cut that [darn] line,” someone shouted. But before anyone could move all the rods were leaning to the east, each tied into a hooked striper.
“Cut them all!” the voice commanded. And one of the boys that Charlie had tutored walked through the stand of surfrods lancing the taught line on every one. Five sticks snapped straight in the last fire of sunset.
Word spread like fire all along the Cape. We’ll never know if it was he or the way he went that caused anglers to whisper of his passing over the gunwales of their surf boats or at every hotspot where surfmen gather. He died with two fish on the beach and another cartwheeling wildly out there on a darkening sea. Having had a warm sun over his shoulder, his last impressions must have been the softness of the clean sand and the sweet song of the high surf. Some of us envy him.”
We all have to go eventually, but for an obsessed surfcaster who built his life around fishing for striped bass, that is one heck of a way to go out. And his legacy lives on in the wooden artifacts he left behind. Build a few this winter and when your rod bows under the strain of a heavyweight striper, offer a whisper of ‘thanks’ to the night sky, I’m certain, Charlie’s spirit will be out there, somewhere, to receive it.