A modern take on an old-school classic for delivering small offerings to big fish feeding off the beach.
The egg float or casting egg is one of the most effective and essential gadgets you can have in your plug bag. The egg float is not really a lure, it is simply a casting weight used to get a small lure or jig out to fussy feeding fish. It also serves a double purpose of a float to keep your lure high in the water column, a plus when fishing shallow, rocky areas.
Although you can buy egg floats in many tackle shops, most fishermen like to make their own. When I was a kid I used to make broom handle floats in my father’s basement by simply cutting a 2-inch section of wooden broom handle and attaching a stainless steel crew eye from the local hardware store to each end. When paired with a bucktail jig, I caught good numbers of stripers back in the day on this simple set-up.
Today, I’ve gotten much more sophisticated in my float making. I use aerodynamic wooden eggs that cast like a bullet and run a through-wire that is strong and durable. I also add a nail to aid in casting. I also make different sizes of egg floats to go with different outfits. I generally make them in ¾-, 1- and 1.5-ounce sizes, but they are all made in the same manner. Also, I don’t make one or two at a time, generally I make them in batches of a dozen or so since all the drilling, painting and wiring is easier to do on multiple eggs.
Before beginning, you need to secure some wooden eggs. You can buy these in craft stores like Michaels or online, but a good source of online wooden eggs that I use is www.craftparts.com. They have a 2.5-inch white, wooden hen egg (1.5 ounces) that is already painted. I also buy some unpainted smaller eggs and do my own spray painting.
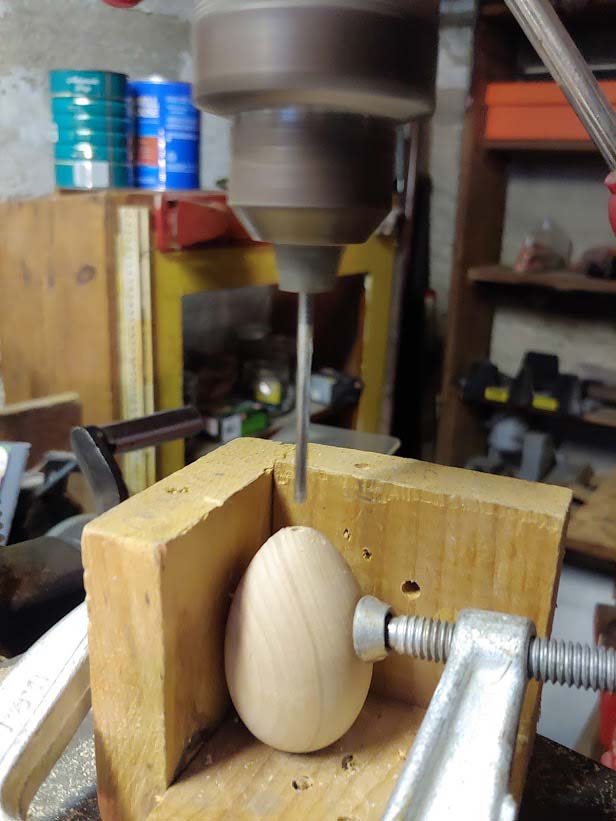
The first step is to drill a hole through the egg with a 1/8-inch standard drill bit. I use a drill press, but if you have a sharp eye, you might be able to do this with a regular hand drill. My drill bit is only three inches long, so once in the drill press, it will not go through a 2.5-inch egg. No problem since I get the hole as deep as I can drill, and then finish off the job with an oversized 6-inch 1/8-inch drill bit. Note, you can use just that big bit, but it tends to wobble and run off course so drilling starter holes with the shorter bits makes for more accurate final products. Note that I might also place the egg in a small wooden chuck and secure it with a clamp to keep the egg perpendicular. This especially helps if the egg has a rounded bottom.
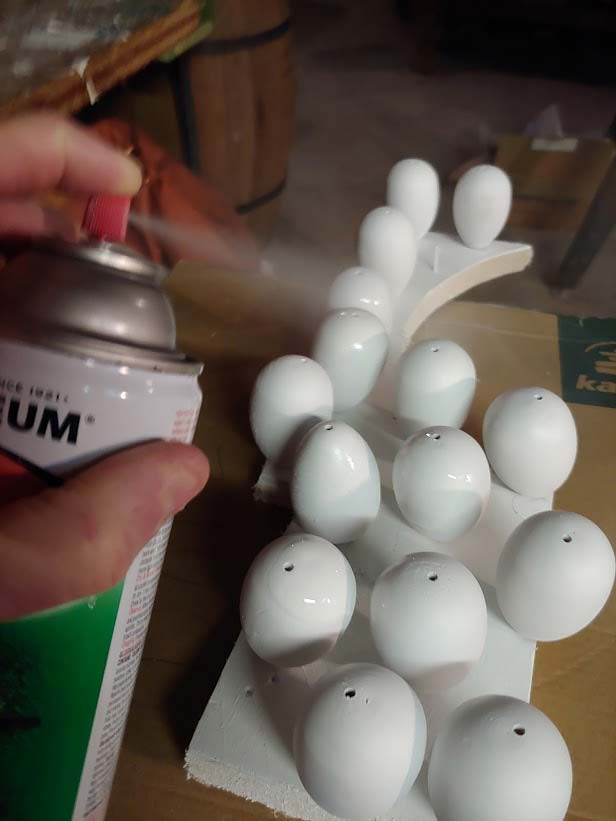
The next step if you have unpainted eggs is to paint them. I set them up on a board and use white enamel spray paint to paint many at once. I only use the color white, but I’m not picky about paint type because I know that anything I use will chip over time, and I can always do a touch-up job at the end of the season.
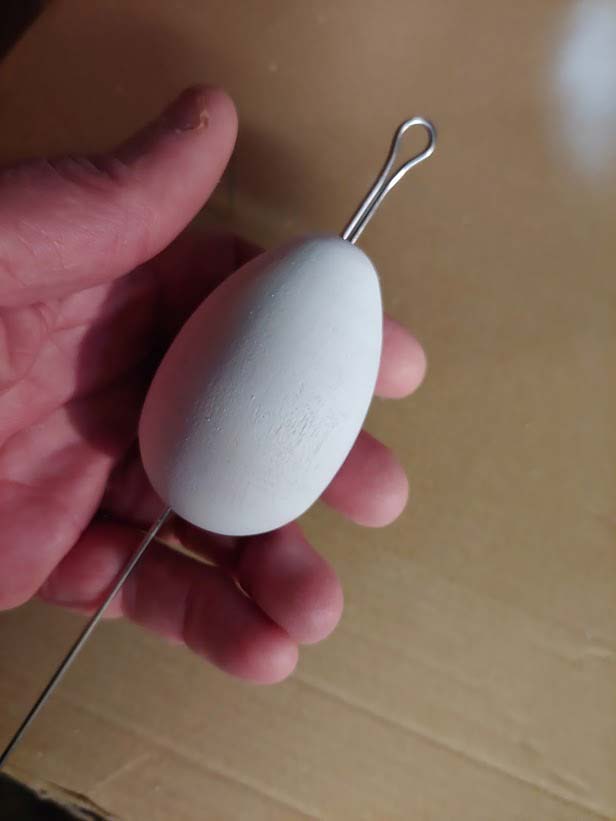
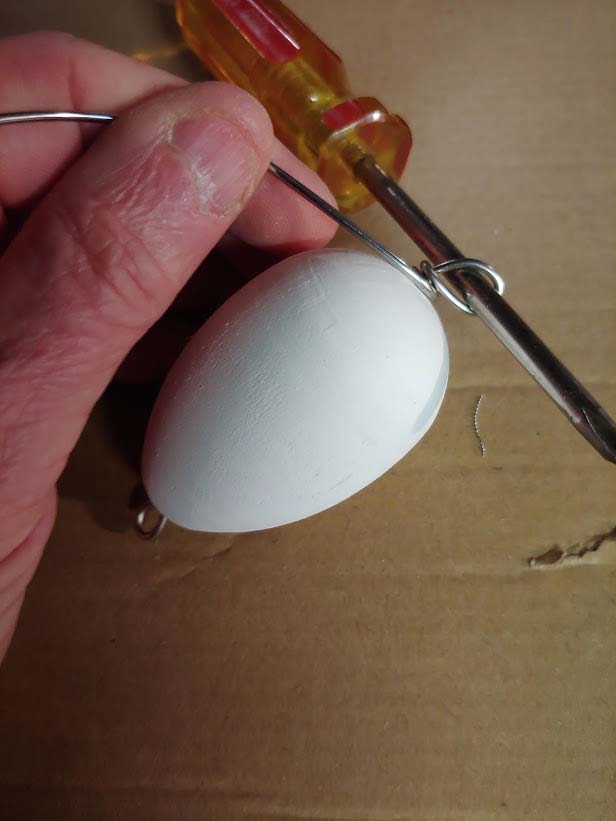
The next step is the through wiring. I use plug wire purchased from www.njtackle.com and find the .062 inch diameter x 11.5-inch annealed stainless steel wire that comes pre-bent with a loop at the top works quite well. You could also use galvanized wire (not as durable) or other stainless wire from a hardware store and pinch your own loop at the top around a screwdriver with a pair of pliers. Once you have your wire, pass it through the top of the egg, snugging up the top into the egg by pulling the wire down tightly. Now, it is time to form the bottom loop. I place a small Philip’s head screwdriver against the wire at the base of the egg and twist the wire around it several times; clip off the excess when finished.
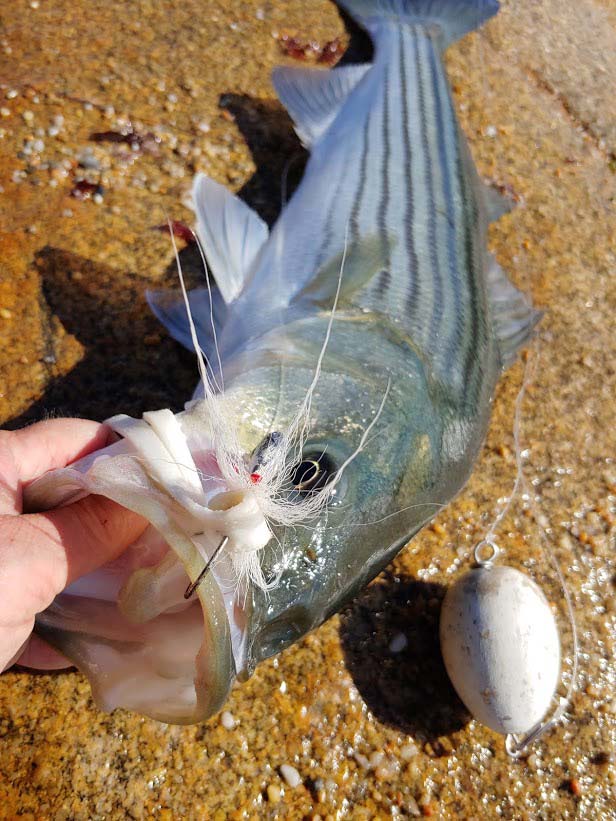
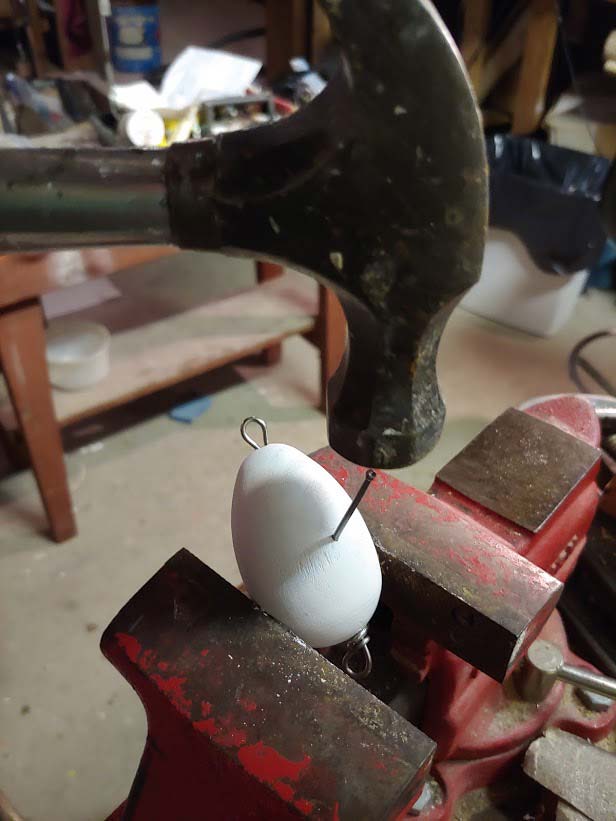
The final step in your custom egg float is the nail holder. This little trick allows you to place your jig onto the nail so that you won’t get that helicopter blade effect when casting. The jig remains on the egg, but once it hits the water, the jig falls right off. This will add a good distance and some accuracy to your cast. With a hammer, bang in a small, 1-inch nail into the side of the float on about a 45-degree angle. Bang it deep enough so that it is solid. Lastly, cut the head of the nail off with snipping pliers. The nail should stick out about 3/8 inches from the float. I might file the end of the nail if I find any sharp edges from the clipping.
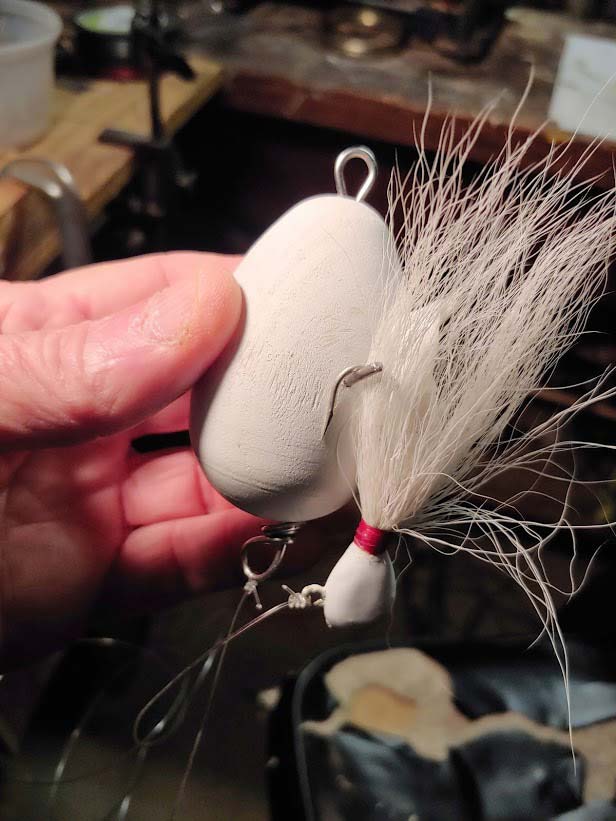
Looking for rigging ideas to fish your newly-made casting egg floats? I tie on a mono leader of 30- to 50-pound test at the bottom of the float (I like a long leader and generally make it about 30 inches) and tie on a favorite jig, bucktail, plastic on a jighead or even a fly.
Wooden egg floats are easy to make and a must-have for every surfcaster. In the upcoming season, they will be worth their weight in gold once the spring run of stripers begins and small baitfish begin to invade the surf.