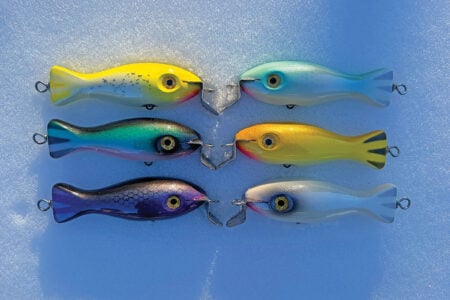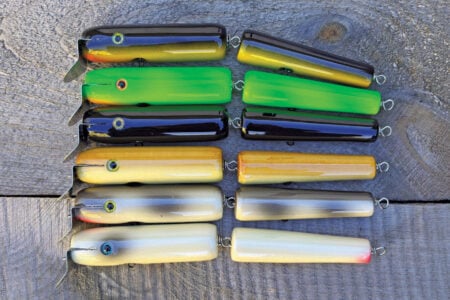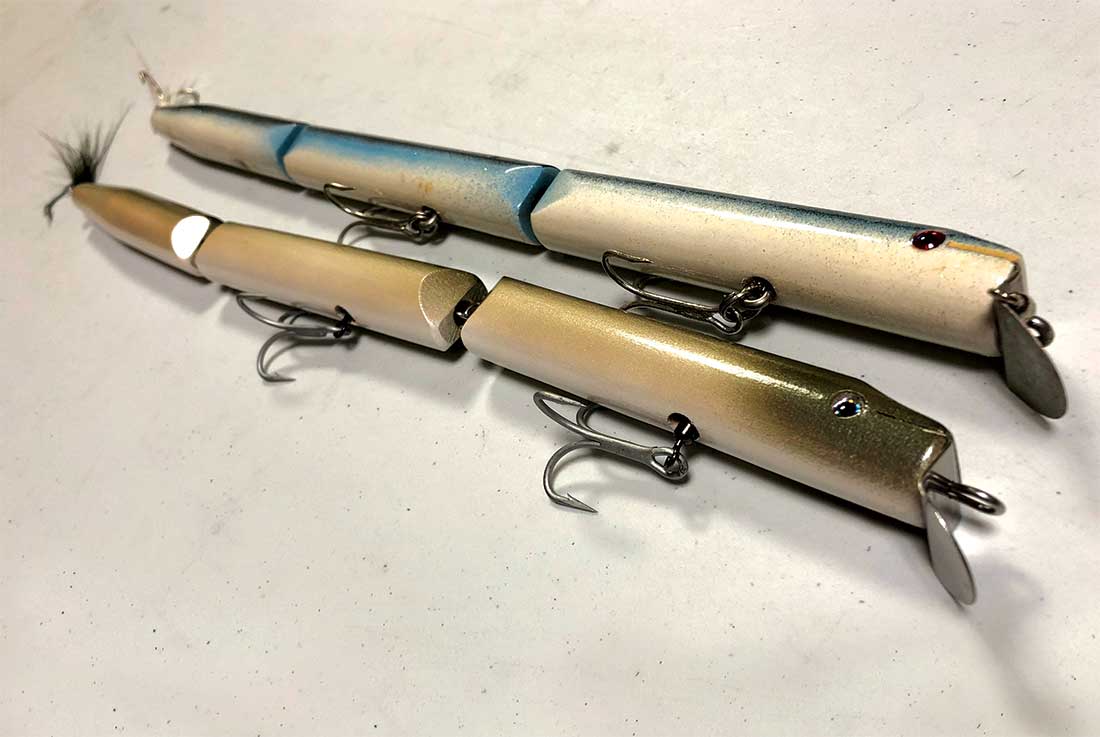
A triple-jointed eel designed by the late Charlie Cinto.
The world of striped bass fishing lost one of its greats this winter. A lifelong angler in the truest sense, a former world-record-holder (and current MA state record holder), a man who lived for the next battle with a big bass and a great friend and fishing partner to another cornerstone of modern striper fishing, Charley Soares. This man was Charlie Cinto and he lived and breathed bass for more than 80 years.
About a decade ago, I was over at Charley Soares’ house helping him identify some old plugs he had accumulated over the years. In among the Pichneys and Atoms and Beachmasters, there were several freakishly-long, triple-jointed plugs, each of them stored in a custom tube made from a plastic fluorescent light bulb protector. I’m not the leading expert on wooden plugs—I’m nowhere near that—but still, it’s not every day that I see a wooden plug I’ve never seen before. He proceeded to tell me that it was one of Charlie Cinto’s creations and handed me one, saying something like, “If anyone should have one of these, it’s you.” He also gave me a popper made by Charlie and some tins that he had designed for the Canal.
I think he thought I’d fish them, but I didn’t. Cinto was still alive and well, but I wanted to have them in great condition because they were unique and made by a guy that I had so much respect for. So they sat at my house for years; I’d look at them now and then, but they only served as conversation pieces until I heard about his passing. My first thought was about Charley Soares and how difficult it would be lose a fishing partner, then I thought about that eel plug and I knew I had to change my plans for this year and fast-track this design through for the last build of the 2020 series.
The Cinto Eel may be the hardest and easiest plug you’ll ever make. If you follow my directions to the letter, it will be a challenge; if you do it the way Cinto did it, it might be the easiest. The overall length of this design is about 15 inches and the diameter is almost all 7/8 of an inch; this leads me to believe that he used either thin wooden broom handles or 7/8-inch dowels to make them. He also assembled them using screw eyes, which can save you oodles of time if you’re just looking to crank a few out to try. I called Charley Soares and asked him about the plugs he said, “Dave, we caught loads of fish on those plugs. We used them when we didn’t have live eels. I used to worry that we’d lose a few fish because of the screw eyes, but Charlie dipped them in epoxy before screwing them in and we never lost a single fish to a pulled screw eye. And that’s the truth.” He went on to say, “It was important to stop the plug in the air, just before it landed, to straighten it out so it didn’t land in a mess [and foul]. That plug has lots of action and we had a lot of fun catching fish on those in the early mornings casting into the rocks.”
Pick Your Poison
Before you start, you’re going to have to make some decisions: screw eye or thru-wire? Dowel or lathe? I find it much easier to turn them from square stock; I like to have the square ends to work off of, I also don’t like using round stock (dowels) on the lathe, I find centering a dowel to be an unnecessary pain in the butt—but that’s just me. If you’re going to use the dowel and screw eye method, you can do most of this with a drill press, a band saw (or even a pull saw) and a belt sander. You’ll need some 7/8-inch dowels and a v-jig to make drilling easier; from there, you should be able to arrive at the same result by tapering the tail on the sander and following along from there.
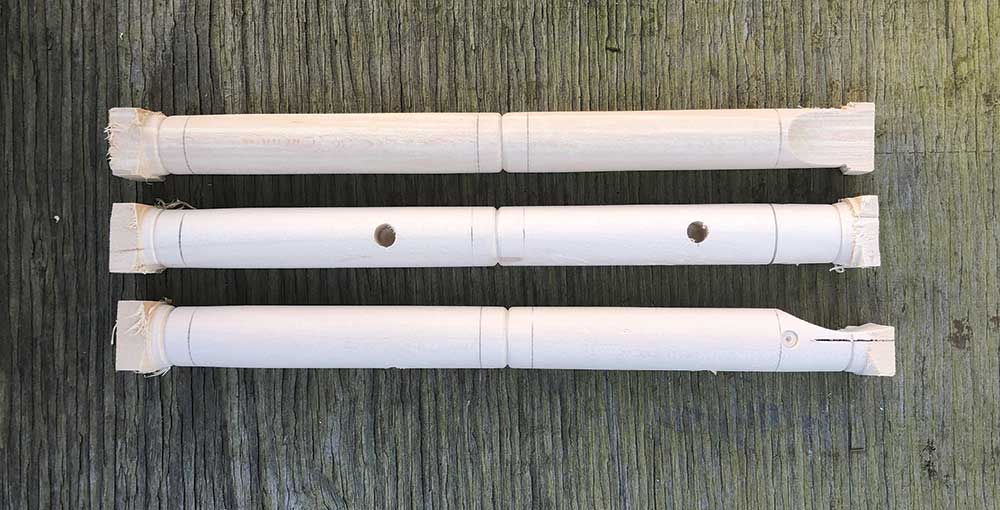
Since the Cinto Eel is mostly a 7/8-inch cylinder, you can start by cutting your stock to 1-inch squares—I had good results with both Alaskan yellow cedar and pine. I found the best result by turning these in two pieces, the head and middle piece and then the tail piece separately; I did this because then I can have a square end to work off of on each segment. See, I can be smart sometimes. Each segment measures 4-7/8 inches in length. I turn the head and midsection from an 11-inch piece and the tail from a 6-inch piece.
So to begin, cut your stock to length and then find the center at both ends of each piece by connecting opposing corners with a ruler and a pencil. I’d suggest turning all your larger pieces first; they’re an easy turn, just a uniform 7/8-inch cylinder. I turned mine to about 10-1/4 inches long—leaving a little of each end square. Then I made marks that were about 9-3/4 inches apart and then marked the center between those points. Then I turned the lathe back on and used a spear point chisel to add a slight chamfer at each mark, just to give the edges an extra bit of extra finish. The tail portion should also begin with roughing the stock down to a 7/8-inch cylinder. But at 1-7/8 inches in from the tail end, a slight, conical taper should begin, terminating at a half inch diameter—chamfer the large end with the spear-point chisel. Sand everything on the lathe until smooth with strips of 150-grit sandpaper, but before you take each piece off the lathe, make a mark at about 3/8-inch in from each end that will comprise a joint then make another mark at 7/8-inch in from the head end. Turn the lathe back on and touch each mark with a pencil. The marks on each joint with be your guidelines for a deeper chamfer, the mark on the head will guide you when making the ‘pikie style’ scoop.
Next I would recommend cutting the lip slot, unless you’re using a pull saw to cut it, then I would do it when you cut all the squares off. I push the square ends against a fence on my band saw to cut the slot, which should be centered and cut 1/2-inch deep. Now we need to drill the hook holes. The originals had four treble hooks, but Charley told me that they had better luck after removing the belly treble from the tail segment, so I left that off. The hook holes should be drilled using a 5/16 bit, centered in the body and drilled a little more than half-way through. The hook hole in the head segment should be drilled 2 inches back from the head. The hook hole in the middle segment should be drilled 1-5/8 inches back from the first joint.
Finer Details
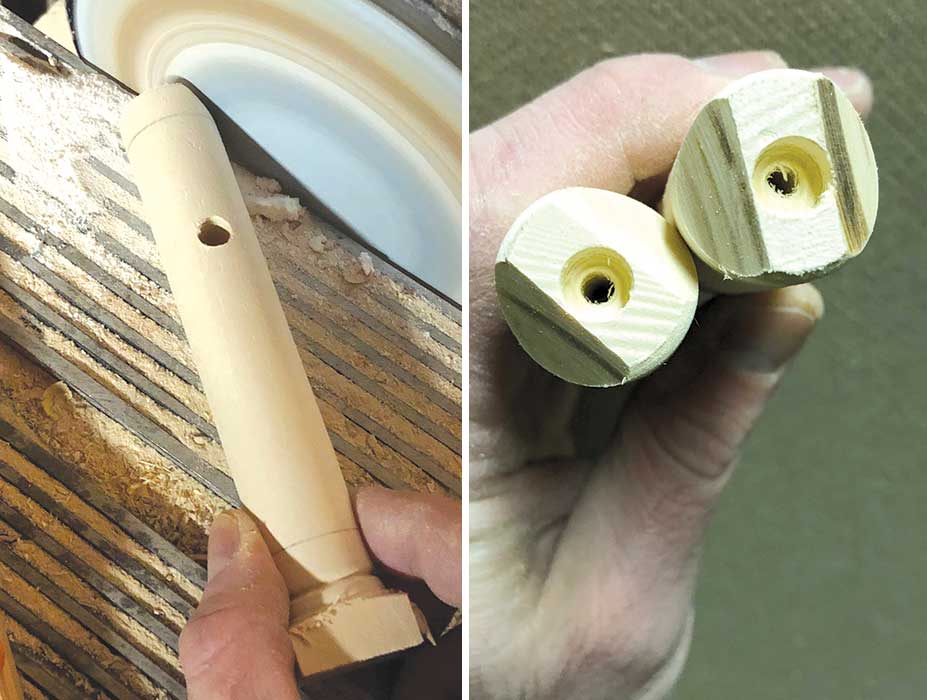
The next step is the pikie-style head scoop. I busted out my trusty 2-inch drum sander for this and set it up in the drill press, lowered down to a piece of plywood (just like the eye scoops in the 2T last month.). Then, using the lip slot and the pencil mark as my visual guide, I sanded the scoop into the head until it just about reached the pencil line and stopped a little less than 1/8-inch from the lip slot. Then I drilled a 1/4-inch eye socket about 1/4-inch behind the lip slot.

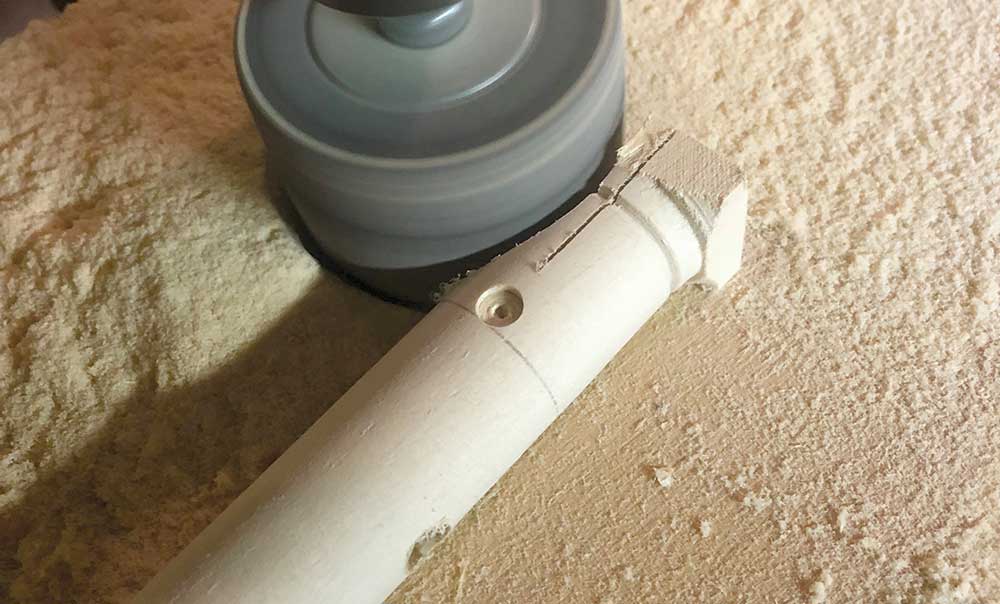
Chamfering is used to give a little more movement to what is a pretty tight joint. If we didn’t cut away a little of each side of the joint, the joints might stick, or, at the very least, the clacking on the cast, retrieve and while fighting a fish would chew the joints up quickly. A chamfer gives a softer edge to absorb abuse and gives the joints more freedom to move. You could definitely make a band saw or table saw jig for this, but I kept it simple and easy. Using a disc sander with a table mounted at a right angle to the disc, I clamped a piece of wood at about a 30-degree angle to the disc as an ‘eyeball guide’ and, using the square end as my rest; I sanded until I could see I was approaching the pencil line and stopped. The main thing is to keep that square end pressed flat on the table or else you’ll get a crooked chamfer. The tricky part is that second set of chamfers on the middle segment; you have to cut the square off, so I used the belly hole as my ‘compass’ and sanded one on the right side of the disc and the other on the left, so I could keep the hole facing up for visual guidance. Before thru-drilling, measure the dead-center of the end of each joint and mark it with an awl. Do the same on the tail end and then place a Pikie 1 lip into the lip slot and use the awl to mark the hole in the lip. Using these markers, thru-drill each segment with a 5/32-inch bit.
The originals have a very tight joint and achieving that kind of tightness on a thru-wired plug is not easy, so there’s one more little trick I used to close that gap. I used a 5/16-inch bit to drill into the forward end of each segment, following the thru-wire hole, drill them each about a quarter inch deep. This serves as a recess to pull the loop of each thru-wire into the body of the plug, effectively tightening the joint. When you’ve done all that, sand every rough edge with fine sandpaper and we can seal the plugs—(In the interest of space, I’m going to assume you know how to seal prime, paint, add eyes to and clear-coat your plugs. If you’re unsure about any of this, reread any of my prior articles on plug making.)
Assembly
As with any jointed plug you will be essentially assembling multiple plugs, in this case three. I suggest doing everything possible to tighten the joints. This means making each tail loop as small and tight to the body as possible, it also means not using the pre-bent thru wires you can buy at www.njtackle.com. I recommend cutting the premade loop off of a few of these wires and making a new one, bending it around a 1/8-inch diameter drill bit and making the forward (nose) loops that way. You can use a ‘factory’ loop for the head segment, but the two in the joints should be made smaller. Start the process by wiring the head segment as you would any other plug, slide a Pikie 1 lip into the slot, drop a size 3 swivel into the belly hole, thread the wire through, slide a small tail grommet over the wire and wrap the tightest loop you can at the back. Then take one of the smaller loop wires you made and hook it over the tail-loop of the head segment, slide a nose grommet over the wire and send it through the midsection, again with a size 3 swivel in the hole. Pull the loop into the recess we drilled earlier, to lessen the gap between the two segments, add another tail grommet and then wrap another tight loop. Then repeat that whole process again with the tail segment. I’d be lying if I said wiring jointed plugs isn’t—just a little—tedious, but we’re almost done.
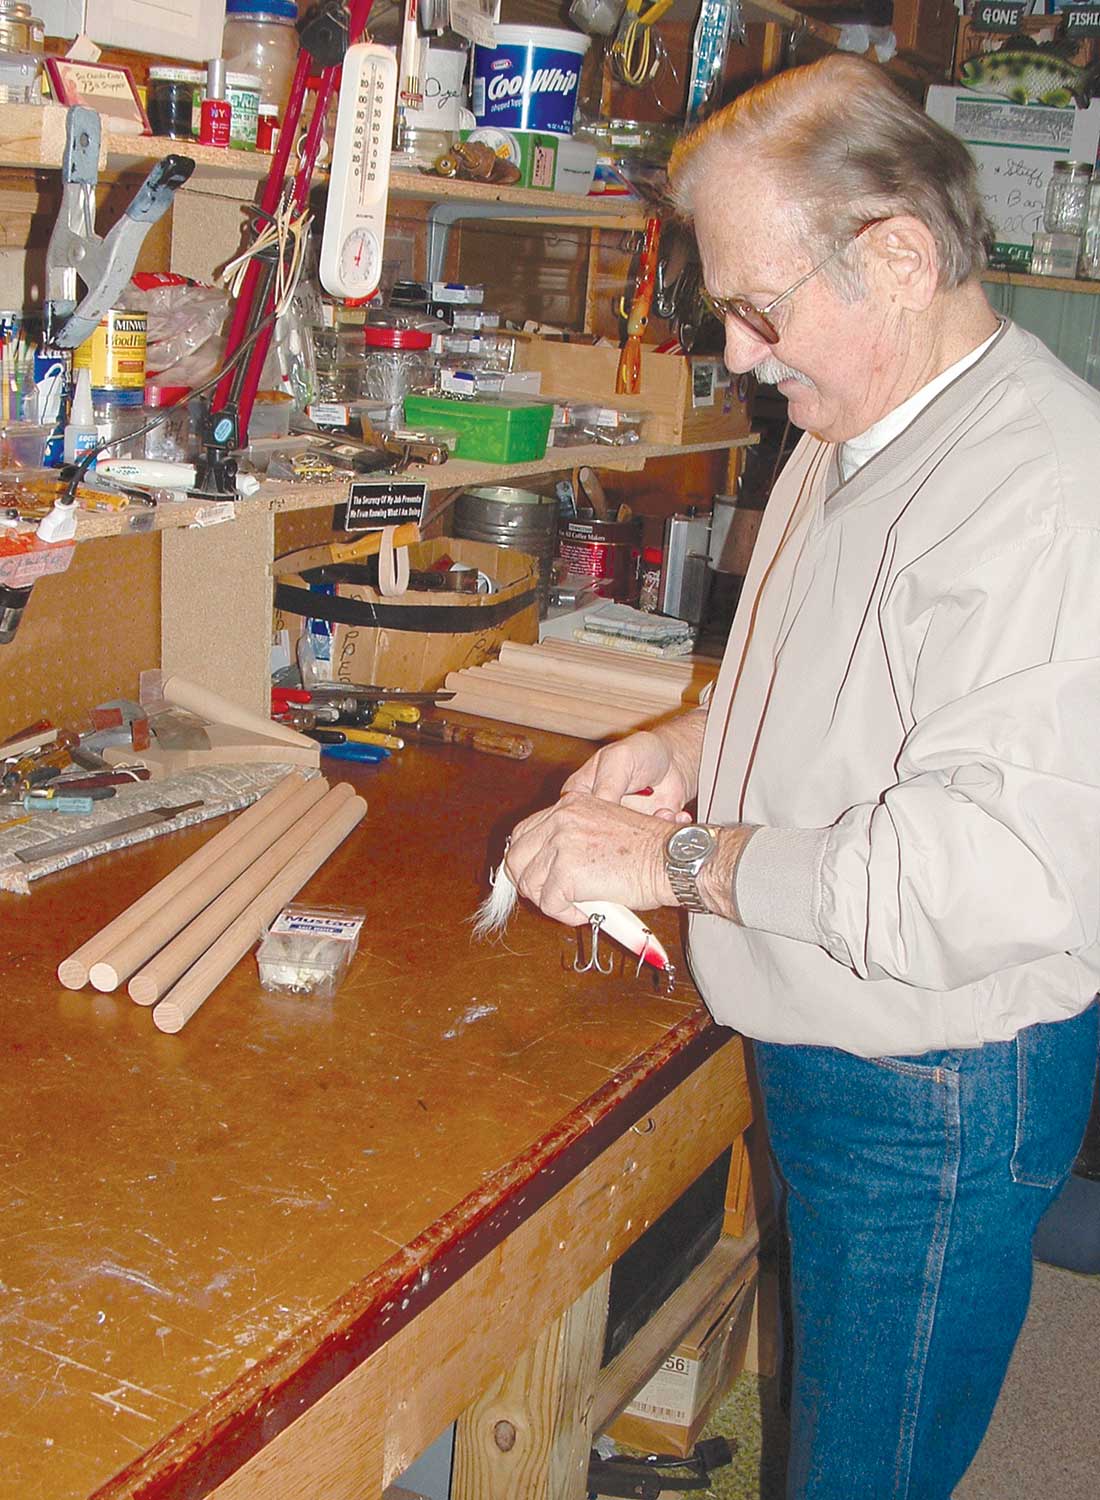
I rig them with two cut 3/0 VMC trebles on the belly and a dressed 5/0 siwash on the tail. Once I finished my first prototype, I sealed it and took it for a swim and I couldn’t believe the action! The Cinto Eel really does swim like an eel! They don’t cast much better than a wet pair of boxer shorts, but they come right to life, dive down about 2 feet and wiggle like a frantic eel trying to find the refuge of shallow water. In hindsight, I should have known better; Charlie Cinto was a striper fishing legend and his handiwork can now live on in the workshops and tackle bags of all of you that take a crack at making one. After hanging up the phone with Charley, I received an email from him with a photo of Cinto working on plugs in his shop with a short note that ended with this quote, “I hope you can use this photo of one of the most talented, kind and generous men you could ever want to call your friend.”
Those words resonated loudly within my striper fishing soul. They say that ‘friends are the family that you choose for yourself’ and it sounds to me like Soares and Cinto were not so much friends as they were brothers. It’s sad to lose one of the greats that walked among us for so long, but as Babe Ruth once said, “Heroes get remembered, but legends never die.” And all of these things; from the plugs he made, to the stories Charley Soares has shared with us to that 73-pound behemoth he dragged off of Sow and Pigs Reef back in June of 1967, they will ensure that his status as a striper fishing legend, never dies. Enjoy the build and the journey into the mind of Charlie Cinto.
See you next winter.