The story behind, and the instruction to build, a lure that has reached almost mythical status in recent years up and down the Striper Coast.
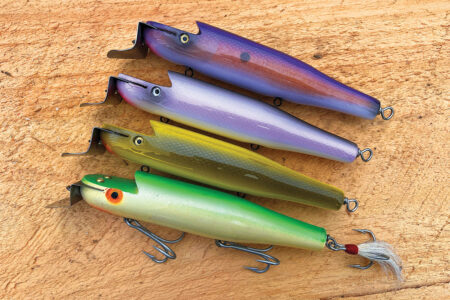
About seven years ago a sharp angler named Joe Paiva started producing a unique pencil popper that defied the definition that most of us associate with that plug. Joe’s pencil, or the 2T as he called it, featured an elongated, skinny neck, deep scoops in the side of the body and a bulbous rear half. At first most people chalked it up to nothing more than a creative shape that worked more or less just like any other pencil. But then Joe started posting videos of this thing in the water; something about that shape and the way he balanced it made the plug come alive on nothing more than a straight retrieve. In fact, working the 2T like a pencil only serves to lessen its natural swim. The action of the 2T is a snake-like swim that falls somewhere between a metal lip and a slithering cobra; it’s really cool. They also cast like rockets and reach further than almost any other plug.
What happened next was one of the most shameless displays of money-grab hysteria I’ve witnessed in my years as a fisherman. Builders started blatantly copying Joe’s design and trying to pass it off as their own. Before I even considered writing this story, I asked Joe if it was okay with him and he said he didn’t mind at all and seemed happy to finally get the credit that he really deserves for this concept and design.
Joe told me that he took his initial inspiration from a James Heddon bait called the Night Radiant Moonlight Bait. The shape is reminiscent of the 2T, but it’s rigged backwards to Joe’s design. How he derived inspiration for a pencil popper from this ancient freshwater bait is anyone’s guess, but you have to love that view into the inspiration and thought process.
The Specs
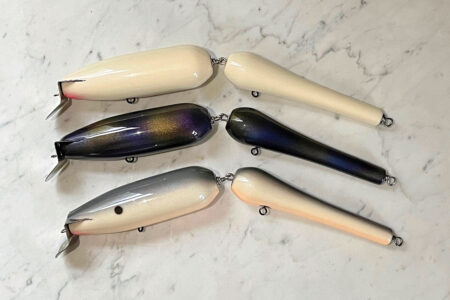
The version we will be building is not an exact replica of Joe’s design, it’s a simpler version that can be easily replicated without having to mold special weights and pin the thru-wire into place. Its overall length is 8-1/8 inches and at its widest point, this plug sports a 1-7/16 diameter. I have had the best results making these out of dense pieces of pine or light pieces of Alaskan yellow cedar. The finished weight of these plugs should come in around 4 ounces, and I really think you’ll enjoy this build.
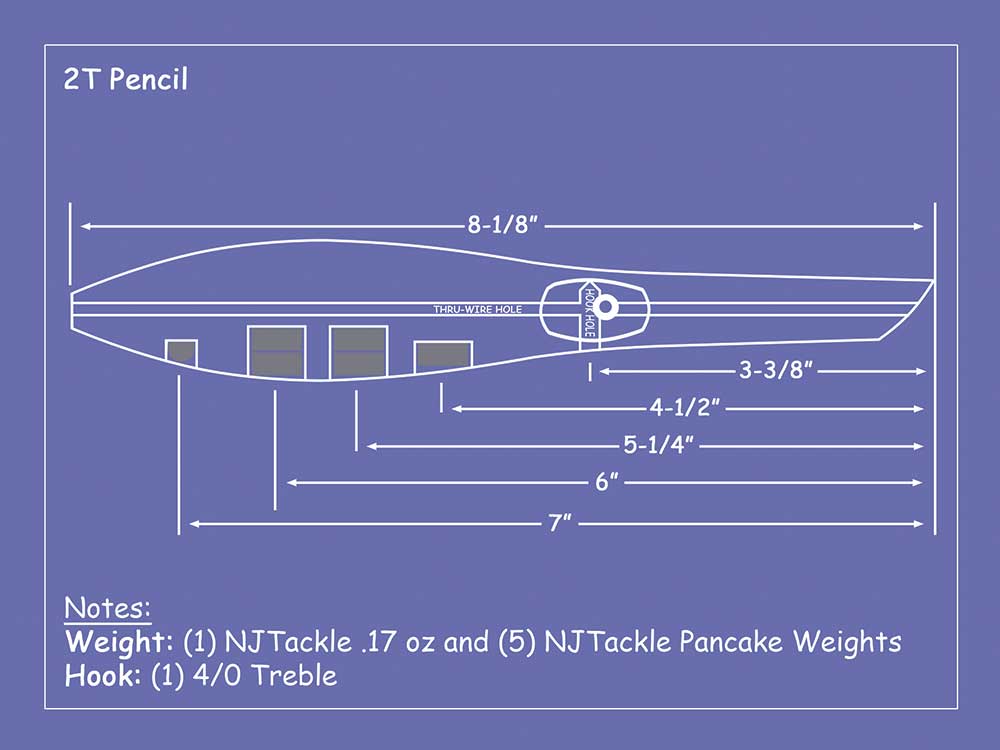
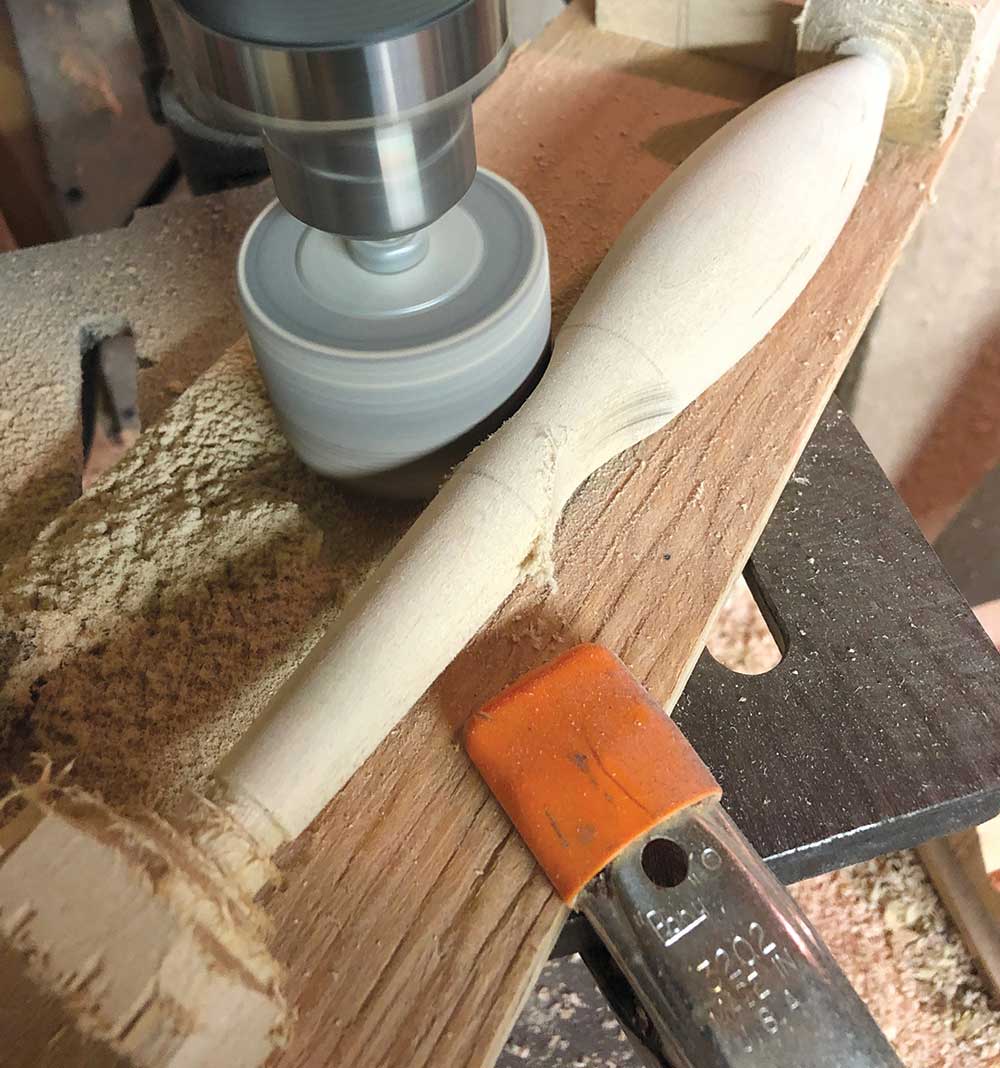
In keeping with the usual protocol, cut your blanks at 1-1/2 x 1-1/2 x 9-1/2 inches, find the center at both ends and set it spinning in the lathe. As always, use a gouge to round off the corners—leaving about 1/2-inch of each end square. Once you have the middle 8-1/2 inches of the blank rounded down, power down the lathe and lay out these reference marks: start by making two marks 8-1/8 inches apart, one for the head and one for the tail. Then make one 2-5/8 back from the nose and another at 3-3/4 and finally one at 5-1/2 inches back from the nose. Turn that lathe back on and touch each mark with a pencil, to carry them all the way around the blank in a ring. The rest of the turning can be roughed out using a small skew chisel and small rounded chisel. The elongated nose is a relatively straight cylinder that expands slightly as it approaches the bulbous rear portion. The shape of the rear half is very similar to a large version of a Super Strike Bullet. Your target diameters are as follows:
Nose Mark: 5/8-inch
2-5/8 inch mark: 13/16-inch
3-3/4 inch mark: 1-1/16-inches
5-1/2 inch mark: 1-7/16-inches
Tail Mark: 7/16-inch
Detail Work
When you are turning your 2T take special care to preserve the square ends because they will be integral in the detail work we have ahead of us. Once your 2T is roughed out and sanded, replenish both the 2-5/8-inch mark and the 3-3/4 inch mark, these boundaries will mark the start and end of the scoops on either side of the plug. You’ll need a 2-inch drum sander in your drill press and, unless your drill press has a large table, you’ll want to clamp a piece of plywood down so that both square ends can rest on it. Raise the table until the drum sander is just barely above the plywood and then press the plug into the sander, taking care to keep it within those lines; when you have just barely touched them, roll the plug 180 degrees and repeat this process. Then drill a shallow 3/8 hole in the center of each scoop with a forstner bit to house the eyes.
Now we have several holes to drill for weights and the hook. You can start by drilling a 5/16-inch hole at 3-3/8 inches back from the nose into the belly of the plug—this is for your hook hanger and should be drilled a touch past halfway through. This is when I would recommend thru-drilling the plug and then move on to drilling holes for the weights. Now chuck a 12 mm forstner or bradpoint bit into the drill press and drill three holes at 4-1/2, 5-1/4 and 6 inches back from the nose. The holes at 5-1/4 and 6 inches should be drilled just shy of the thru wire hole; these will house two NJTackle pancake weights. The 4-1/2 inch hole should be drilled just deep enough to house a single pancake weight. Now drill a 3/8 diameter hole at 7 inches back from the nose, just deep enough to accept an NJTackle 0.17-ounce round belly weight. Epoxy the weights into place and cover them with the filler of your choice; Bondo would be a good choice here, or Plastic Wood. Pro-tip: sand the filler on the lathe.
Now you can cut the squares off the ends, cut the nose at about a 45-degree angle and round it off with a belt sander. At this point your plug should look a lot like the photos and diagram shown. Give the whole deal a good sanding using 180-grit paper to knock off any sharp edges and give them a bath in the sealer of your choice—a 60/40 mix of interior high gloss urethane and mineral spirits should do the trick. After a couple days to dry, give them another light sand and prime them with a couple coats of Painter’s Touch All Purpose Primer.
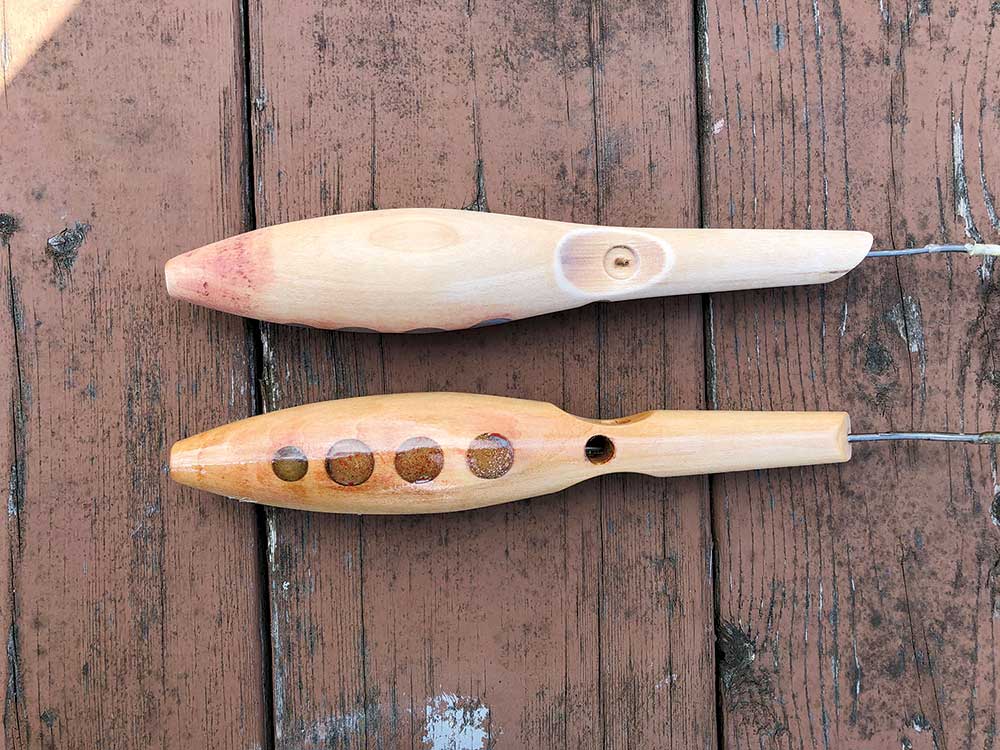
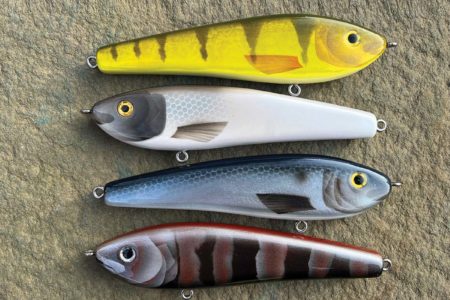
As always, colors can be whatever you want them to be; mackerel and bunker are quite popular, but white, yellow and parrot are all good choices as well. Once you have them painted, stick a pair of eyes in the sockets and give them a few coats of your favorite clear finish; bar top epoxy leads the way on that. And when the epoxy has cured, assemble the plug. Drop a #1 swivel into the belly hole. Add a nose grommet to a 12-inch thru-wire and send it through the plug and swivel slide a small tail grommet over the wire and wrap a tight tail loop.
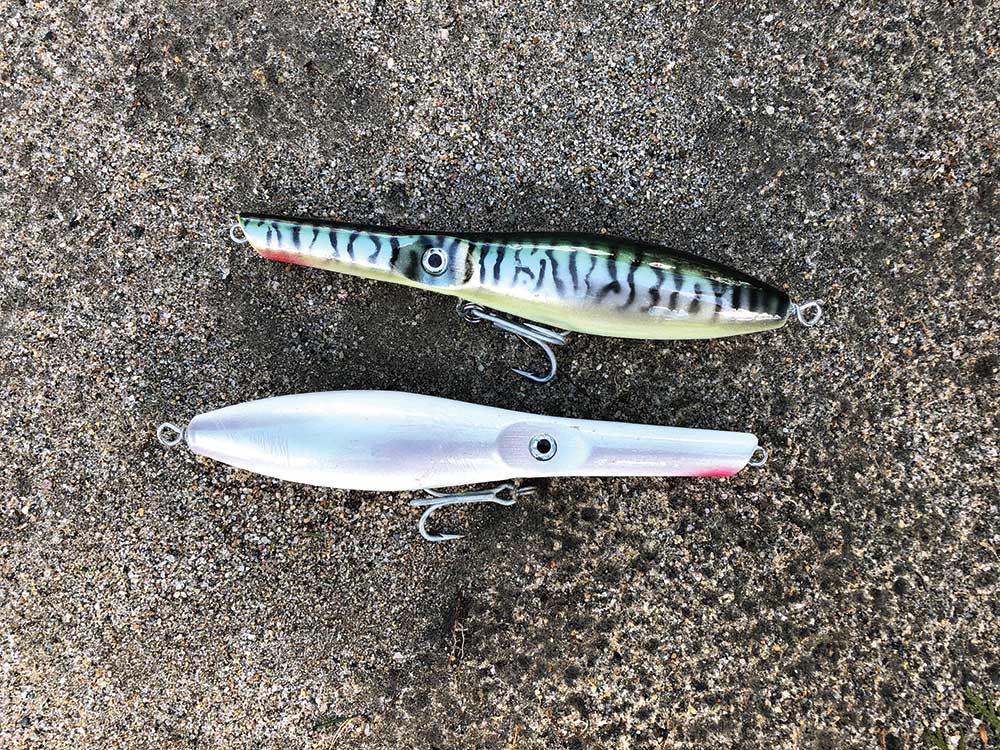
Rig the 2T with a 4/0 treble on the belly and either a flag or nothing at all on the tail. And now you can take it down to the water and see what all the fuss is about. When I made mine, the first fish I caught on it was a 35-pounder! You’ll marvel at the long distance casting and the effortless and unique swimming action of this very unique design. You can throw it anywhere, but it definitely loves heavy current. See you in a month.