A wooden rodent with a history of hooking giant bass!
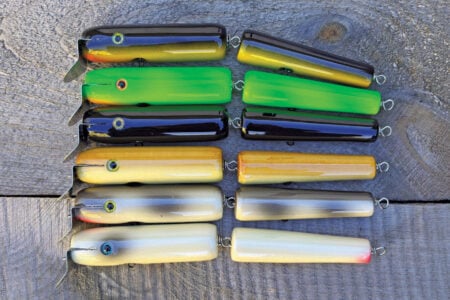
Every now and then I just want to do something different. There are hundreds of classic striper plugs, maybe thousands; but there’s so much more out there!
Lure building is big business these days and, as much as I hate to say it, the art of building custom lures has become a boutique enterprise, by this I mean that their prices count too many anglers out of the game and, for many others, they become collectible commodities—fishing cryptocurrency. I like to think I stand as a minor obstacle to all this because I give you the tools to make your own. In the case of the rat swimbait, I made this from scratch…it’s not a copy of anyone; classic or contemporary. It’s a labor of love that I am putting out there for anyone with a workshop to duplicate, hopefully it catches a few big ones.
If you follow swimbait culture, then you probably know that the Godfather of the rat swimbait is a California angler named Jerry Rago. The Rago Rat has been on the market since the mid-1990’s and was a closely-guarded secret before that. So I went to the source, I pinballed my way through the six degrees of separation and on a sunny December afternoon I dialed Jerry’s number and asked him about the origins of the Rago Rat.
“You’re not going to believe this,” Jerry laughed, “but I was driving home from hunting one night and it was really windy. I had seen a lot of rats around this one area and a big gust of wind blew up and a rat went tumbling across the road. Right then and there, I decided I needed to make a rat bait. And I caught a 5-pounder on my first cast with that first rat!”
The notion that a wind-blown rat might end up in the drink spawned its own segment of swimbait fishing! I went on to ask him why he kept it a secret and if it was worth keeping it quiet. “I think it was worth it,” he said, “The way the fish attacked it made it obvious that this bait was special. Plus, at the time, I couldn’t have kept up with the demand. All these years later I’ve sold close 20,000 rats in 20 different styles.”
Hot Rats
These days it’s no secret that rat baits catch big largemouth (and smallmouth) bass all over the country. Some swimbaiters will only throw rats in the summer (when rats are most active) or when waters have risen sharply, the thinking being that the rising water might flush rats out of their burrows, forcing them to swim for their lives. I asked hardcore Maine swimbaiter Jesse Hall what his thoughts were on this subject, “I think a big bass identifies a rat bait as something it is able to eat. It may not know it’s a rat but it sees it as something edible. And these baits are the right size, make the right noise and swim with the right action to be seen as something edible.” I 100% agree with Jesse’s assessment.
A quick perusal of websites that cater to swimbait anglers shows a wide range of prices for two-piece rat baits like the one we’re making here, on the low end you have the mass-produced but proven effective Spro BBZ Rat at $31.99 and then you go all the way up to $170 for some of the custom versions.
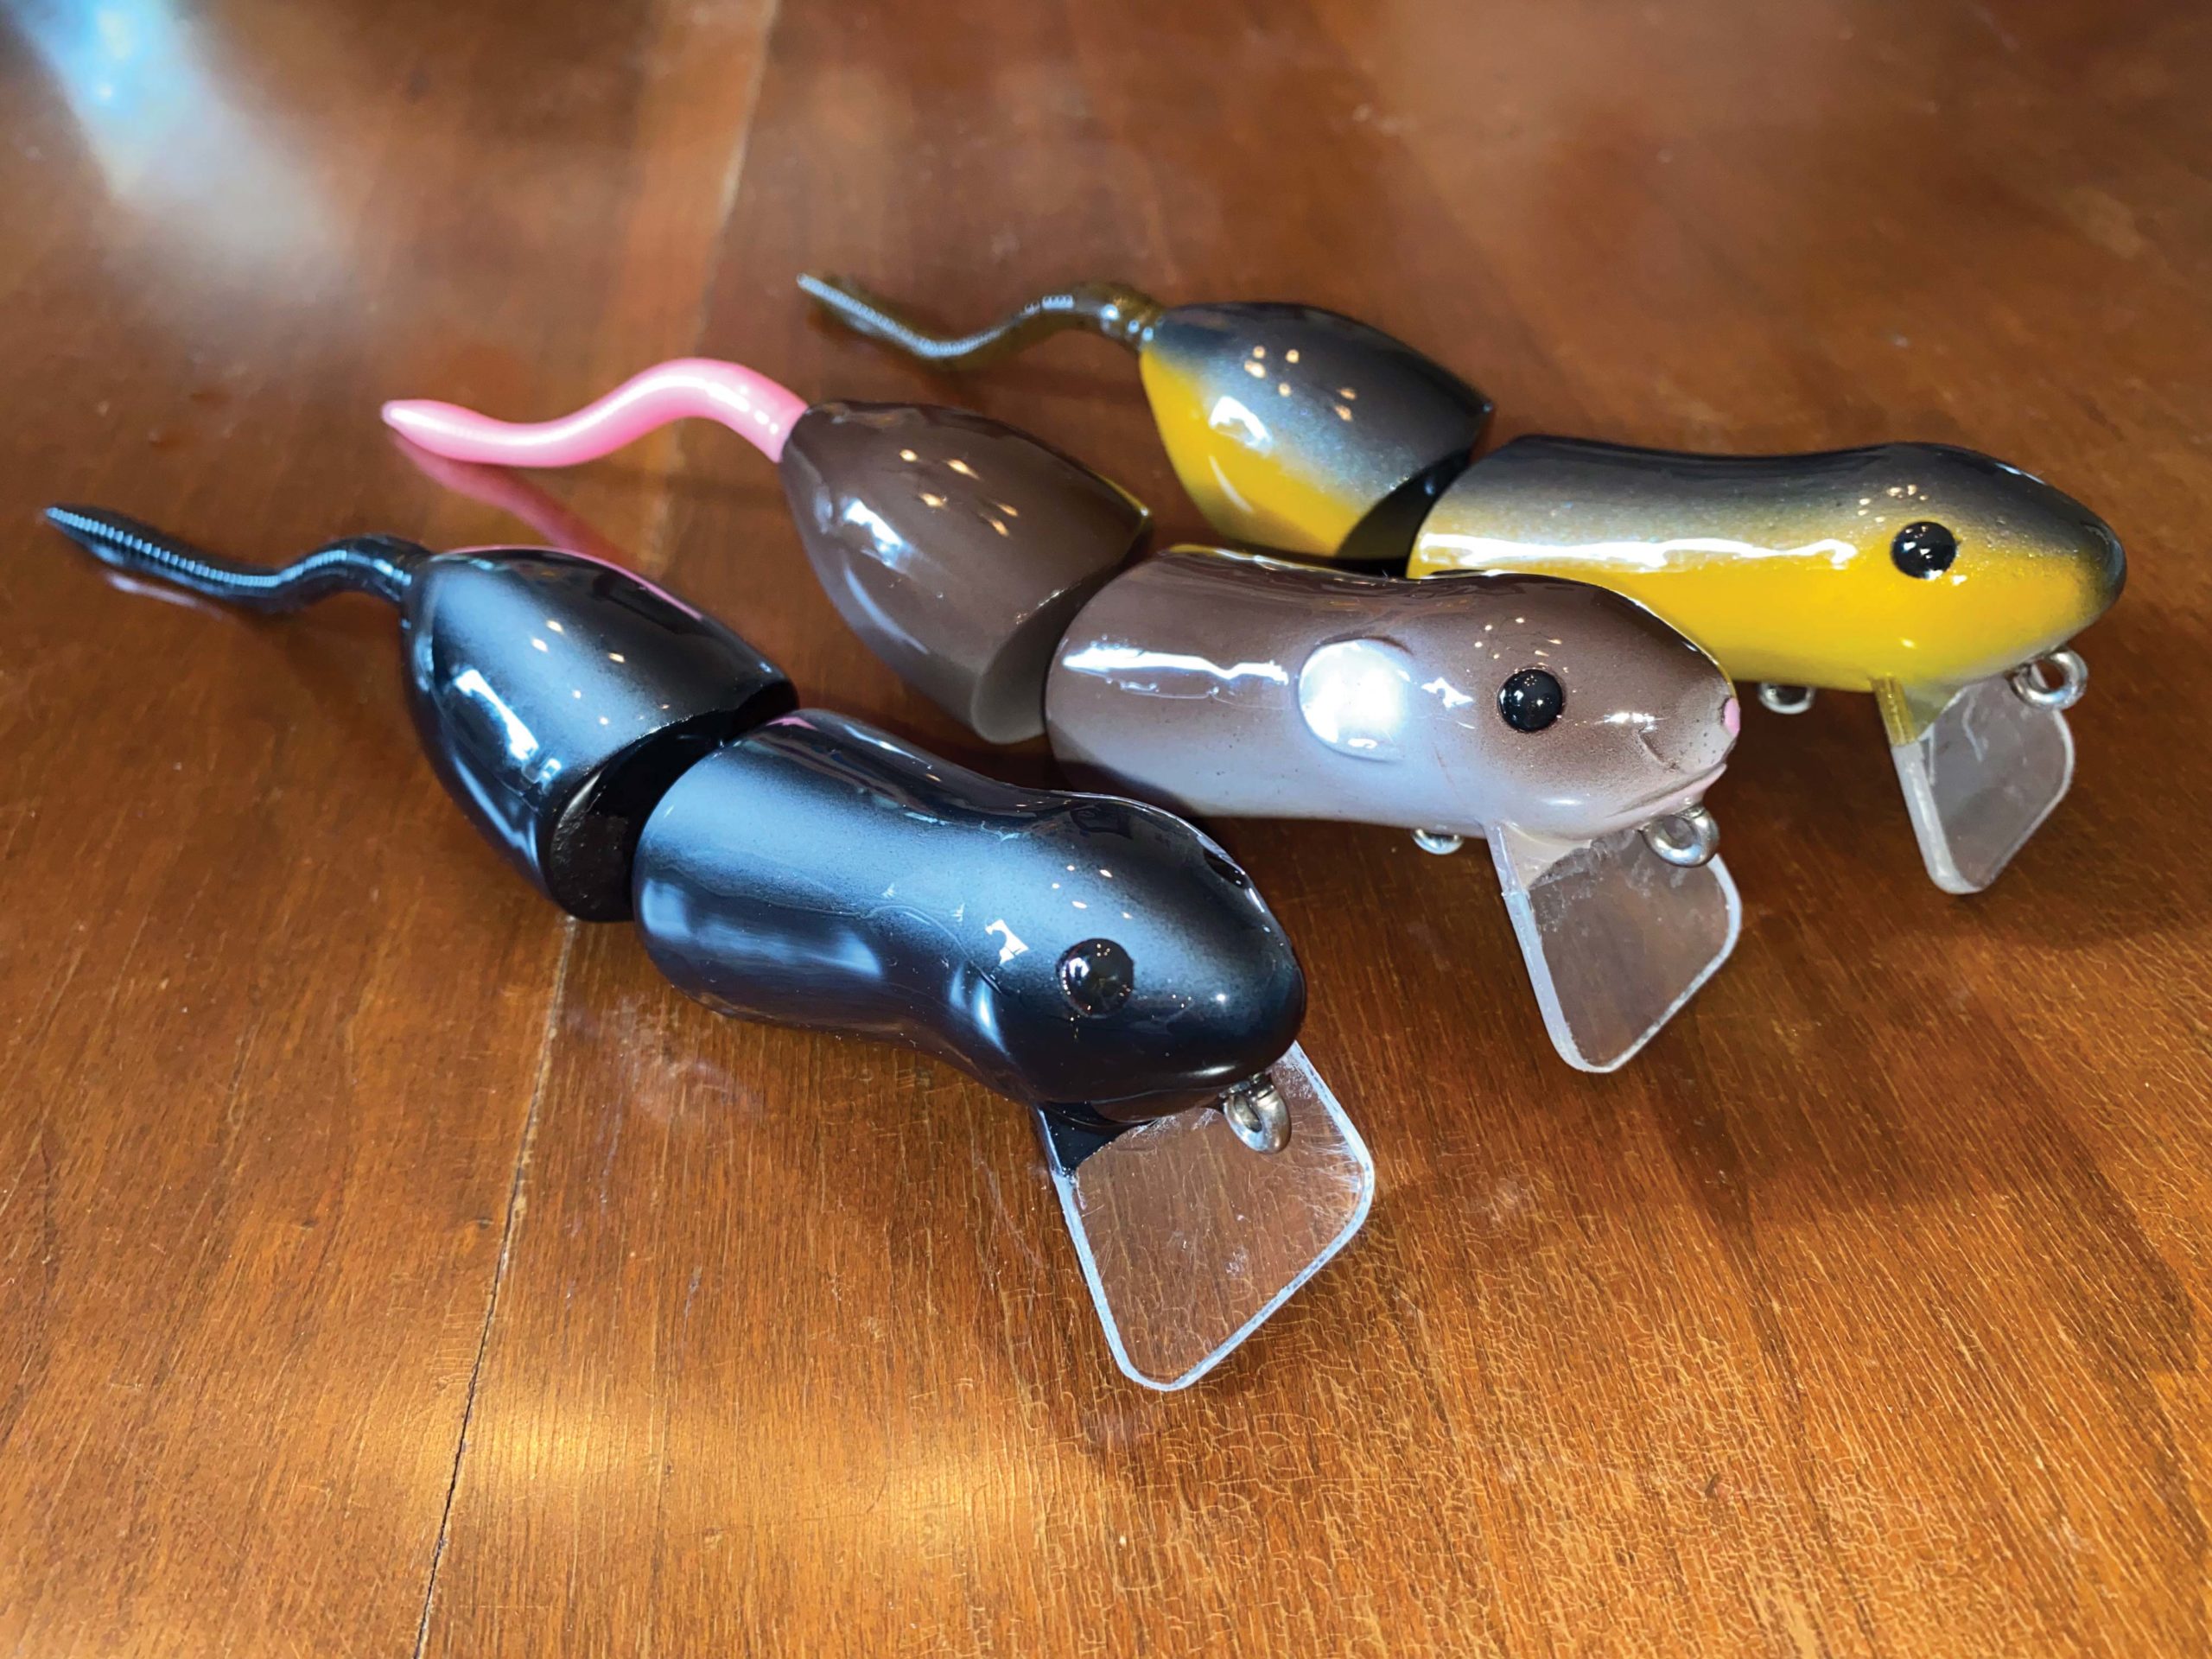
A Wooden Rodent
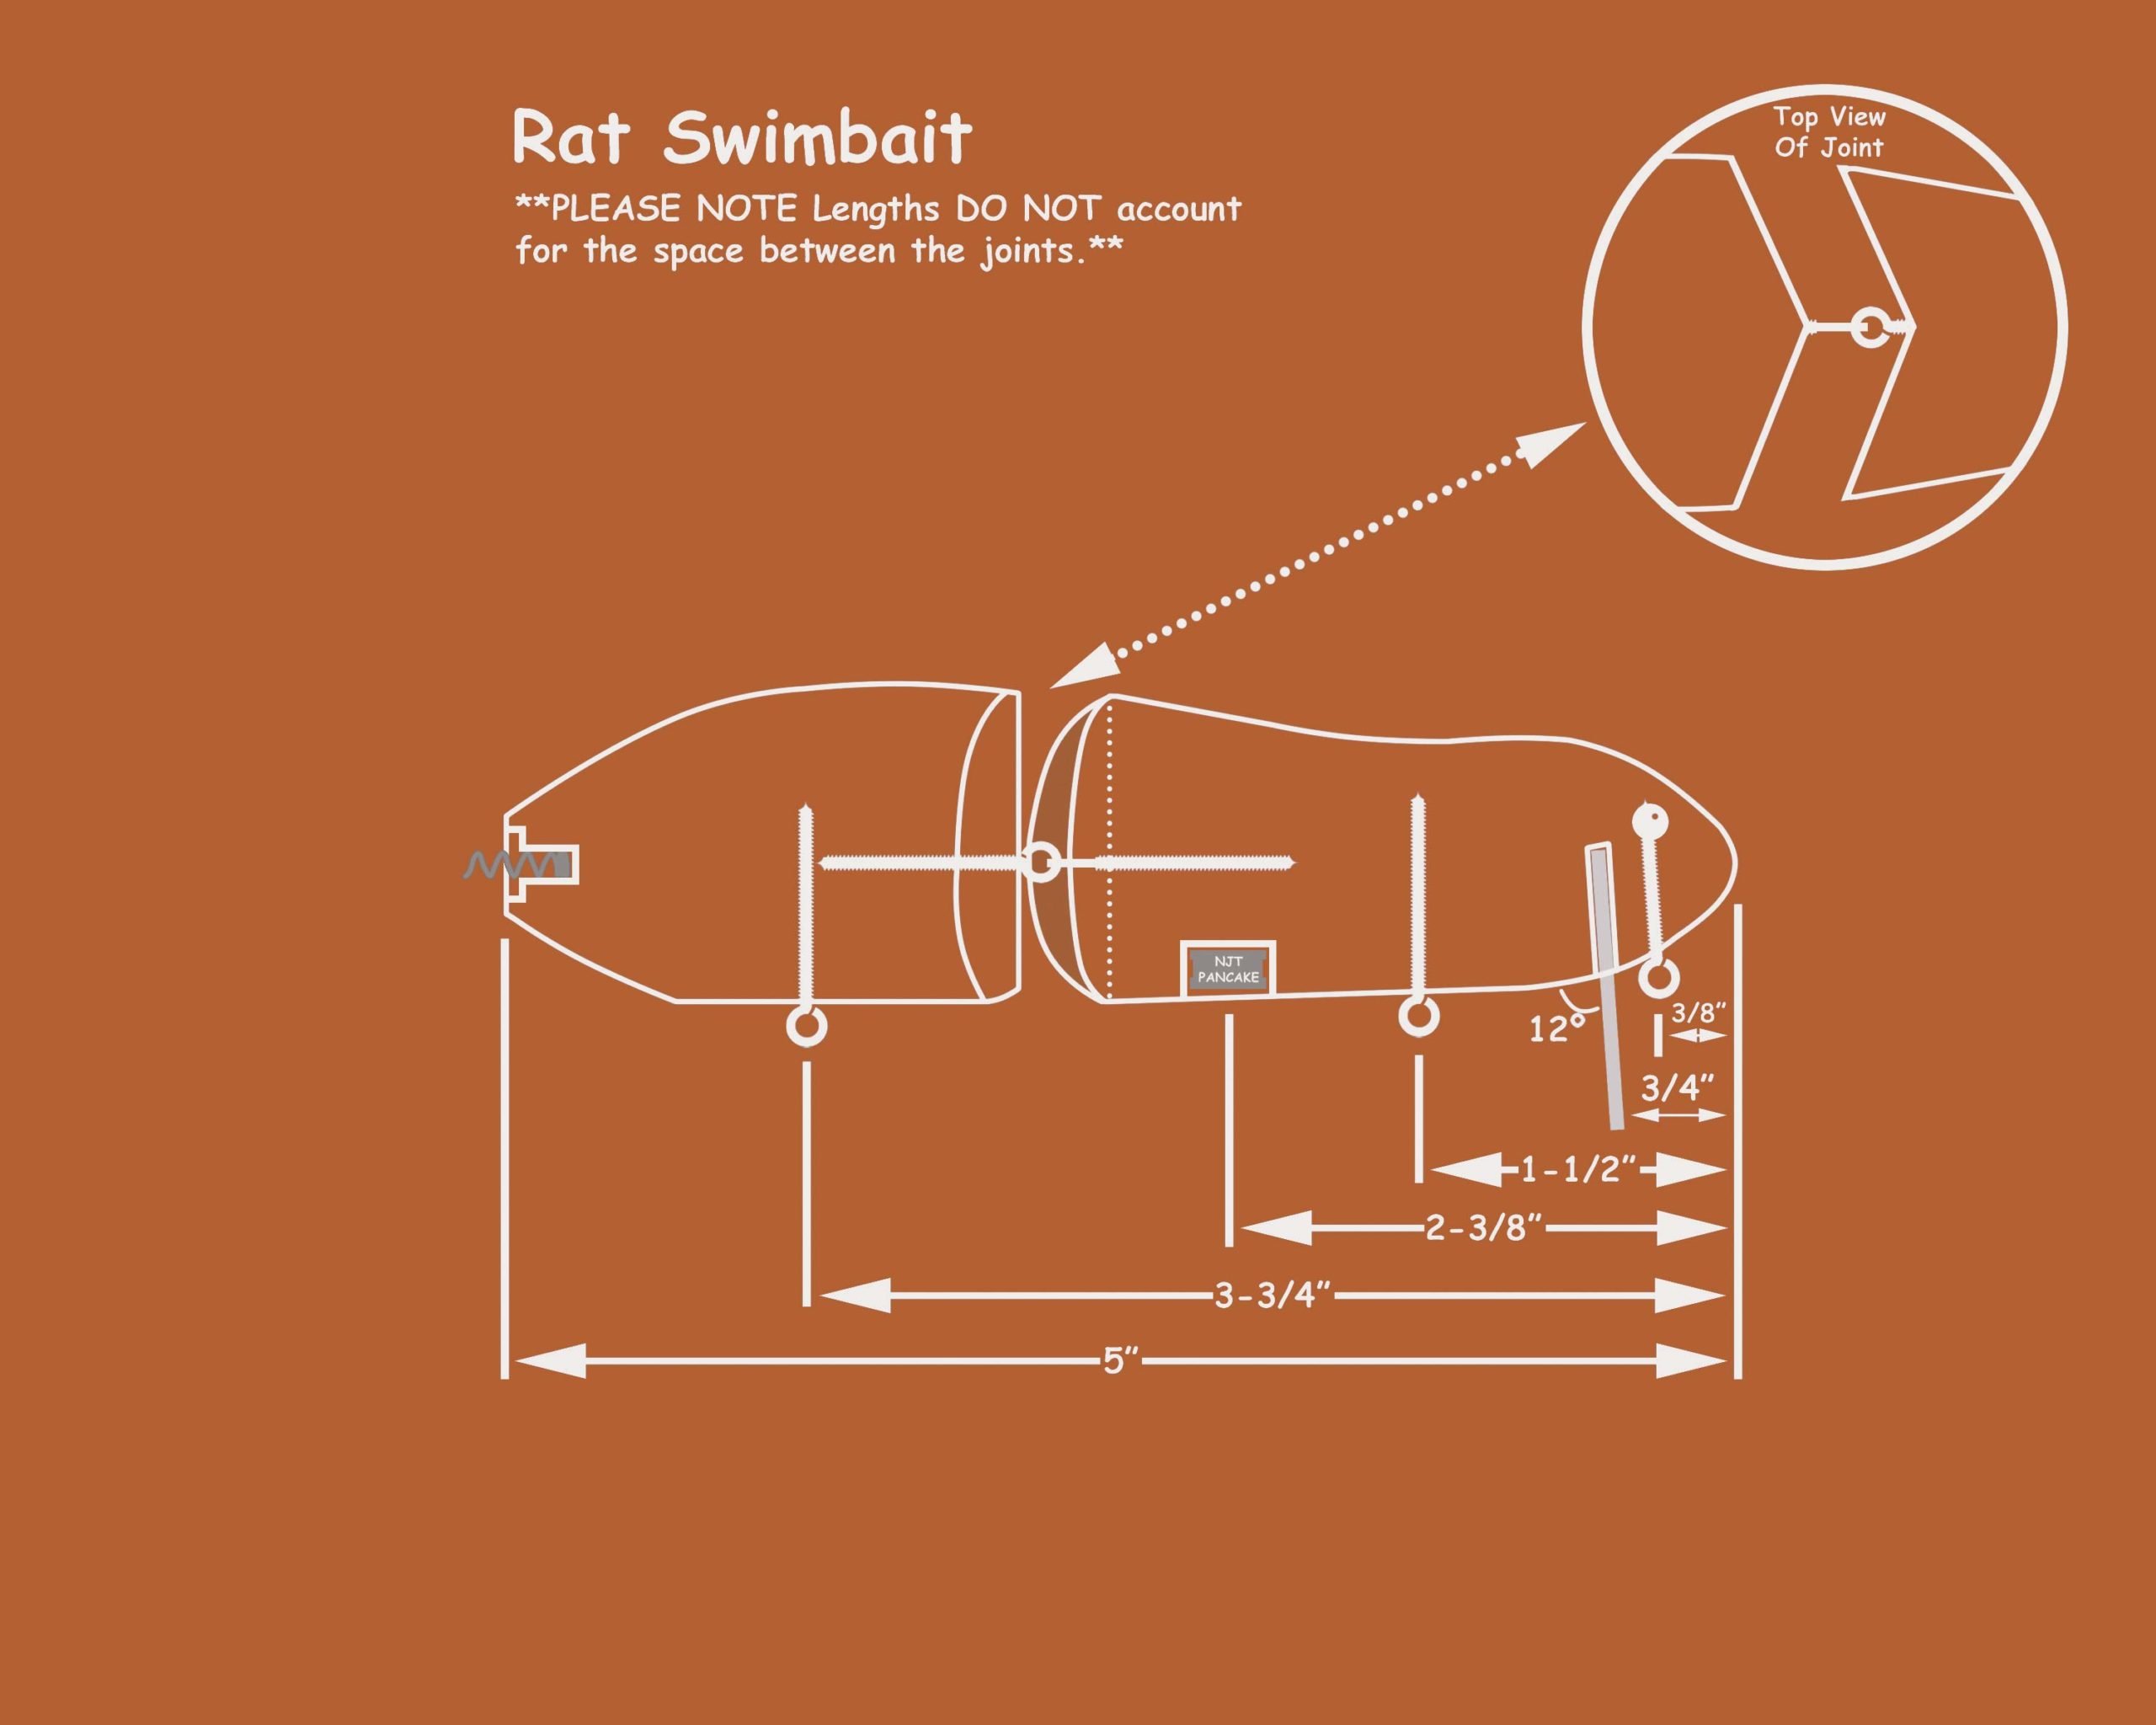
These are wakebaits and they’re going to benefit from using lighter woods; pine, cedar and basswood will all make fine rats. As simple as these might look at a glance, it’s actually a challenging build, but you’re going to learn some new techniques here. For starters, we have to cut an angled joint and we want that angle to meet in the exact center of the bait. To make this possible, I strongly suggest gluing two pieces of wood together to provide a static center line. Rip some wood at 3/4 x 1-1/2 inches and glue them together—clamp overnight and the result should be 1-1/2- x 1-1/2-inch square stock. Cut the squares into 7-inch lengths. This rat has a flat belly and we’ll turn it off-center to get that nice flat bottom. Choose one of the joined sides to be your belly and measure up 1/2-inch from the belly side and make a mark right on the glue line at each end, these will be your centering points for the lathe.
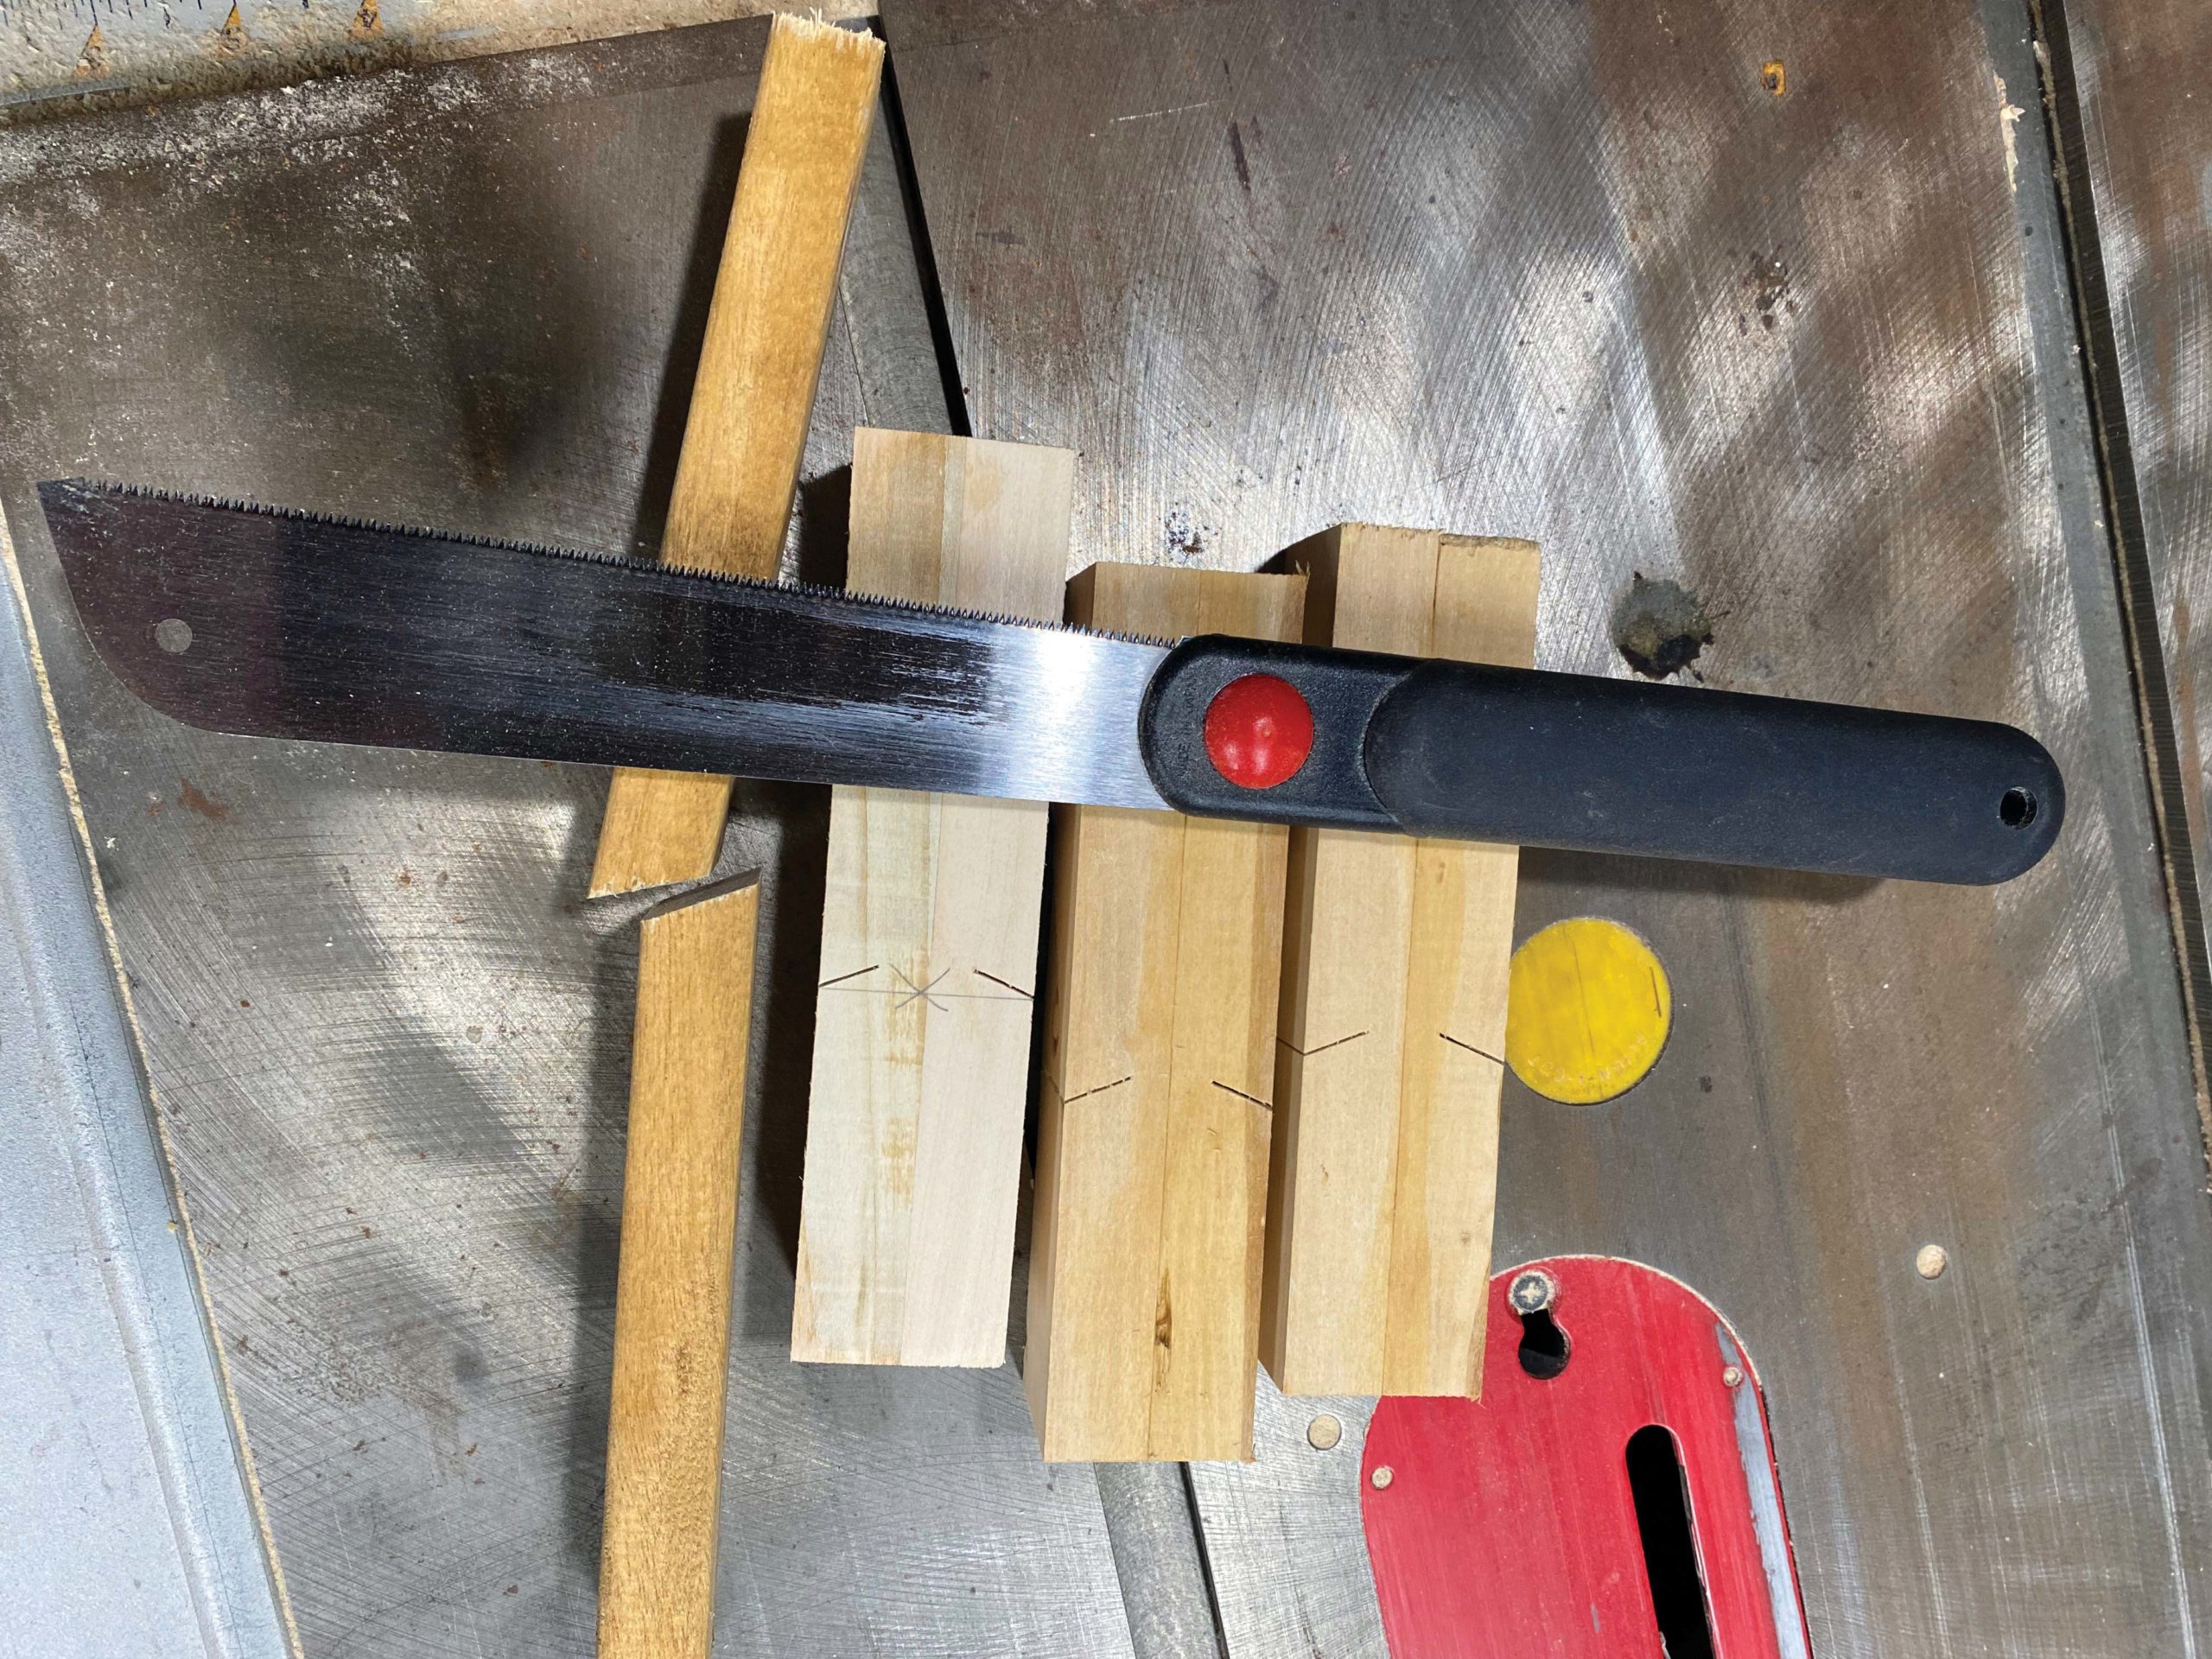
Now you’ll need to use a tool we’ve never used in these articles, a pull saw. This is a fine-toothed hand saw used to make accurate cuts. I saw a trick online to make accurate angled cuts by hand. Get yourself a piece of hardwood – I used mahogany – use a chop saw or table saw to cut it in half at a 25-degree angle. Choose an end of your block to be the head and mark it. Next measure back from the head about 4 inches and make a mark on each flank side of the wood (not the belly and not the back). Use a square to draw a perpendicular line on each side. Now line up the angled hardwood right on one of those lines and use the offcut piece to ‘pinch’ the blade of your saw so that it will cut at the desired angle—make a cut on each side about a half inch deep. Measure from this cut forward 3-1/4 inches, this will mark your nose, from there measure back 5 inches and make a mark for your tail—doing it this way will ensure that the joint is properly located.
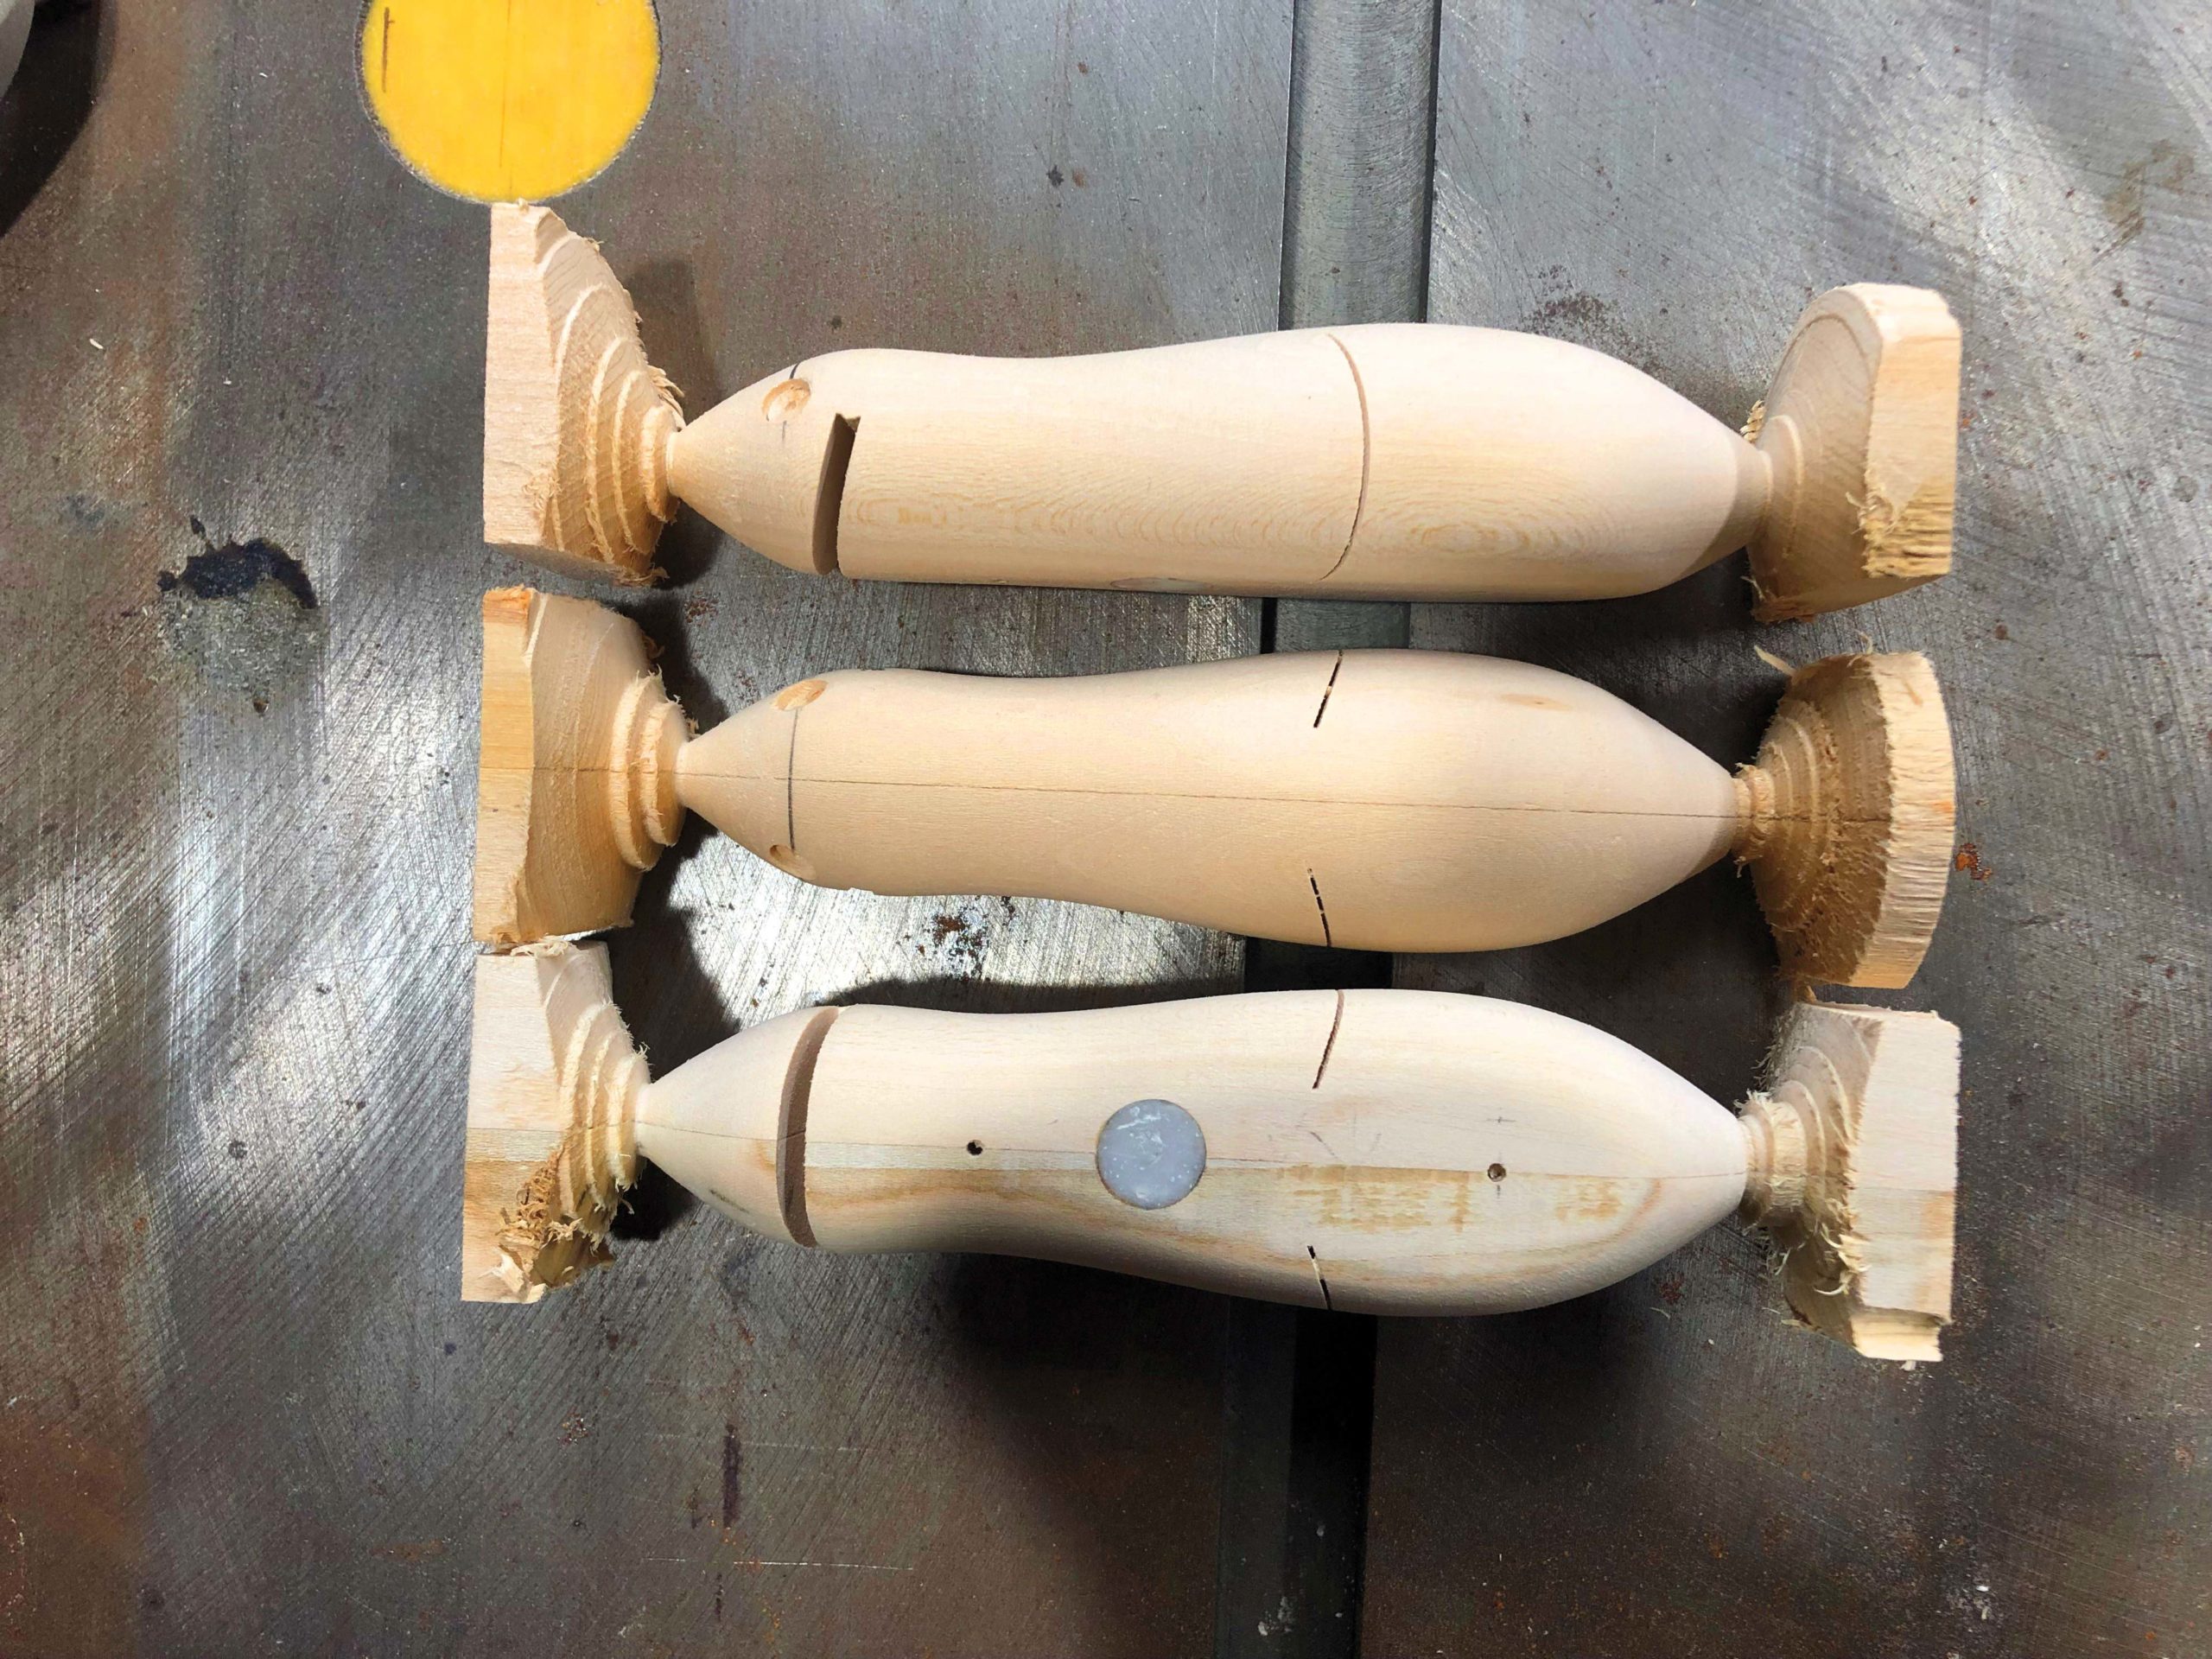
Chuck the block in the lathe using your pre-marked centers, make sure everything is tight before turning it on. It’s going to be a little scary as that wood spins on an off-center axis. Use a gouge to take the corners off (leaving some of each end square) and then power down the lathe. Refresh your head and tail marks and use the specs below to lay out and shape the body using a sharp rounded chisel, you’re basically shooting for an elongated pear shape with a flat bottom.
Mark: Diameter:
Nose (0 inches) 3/8 inch
3/4 inch 1-1/8 inches
1-5/8 inches 1-1/16 inches
2-5/8 inches 1-3/8 inches
3-1/2 inches 1-7/16 inches
4-1/2 inches 1-1/18 inches
Tail (5 inches) 7/16 inch
Rat Holes
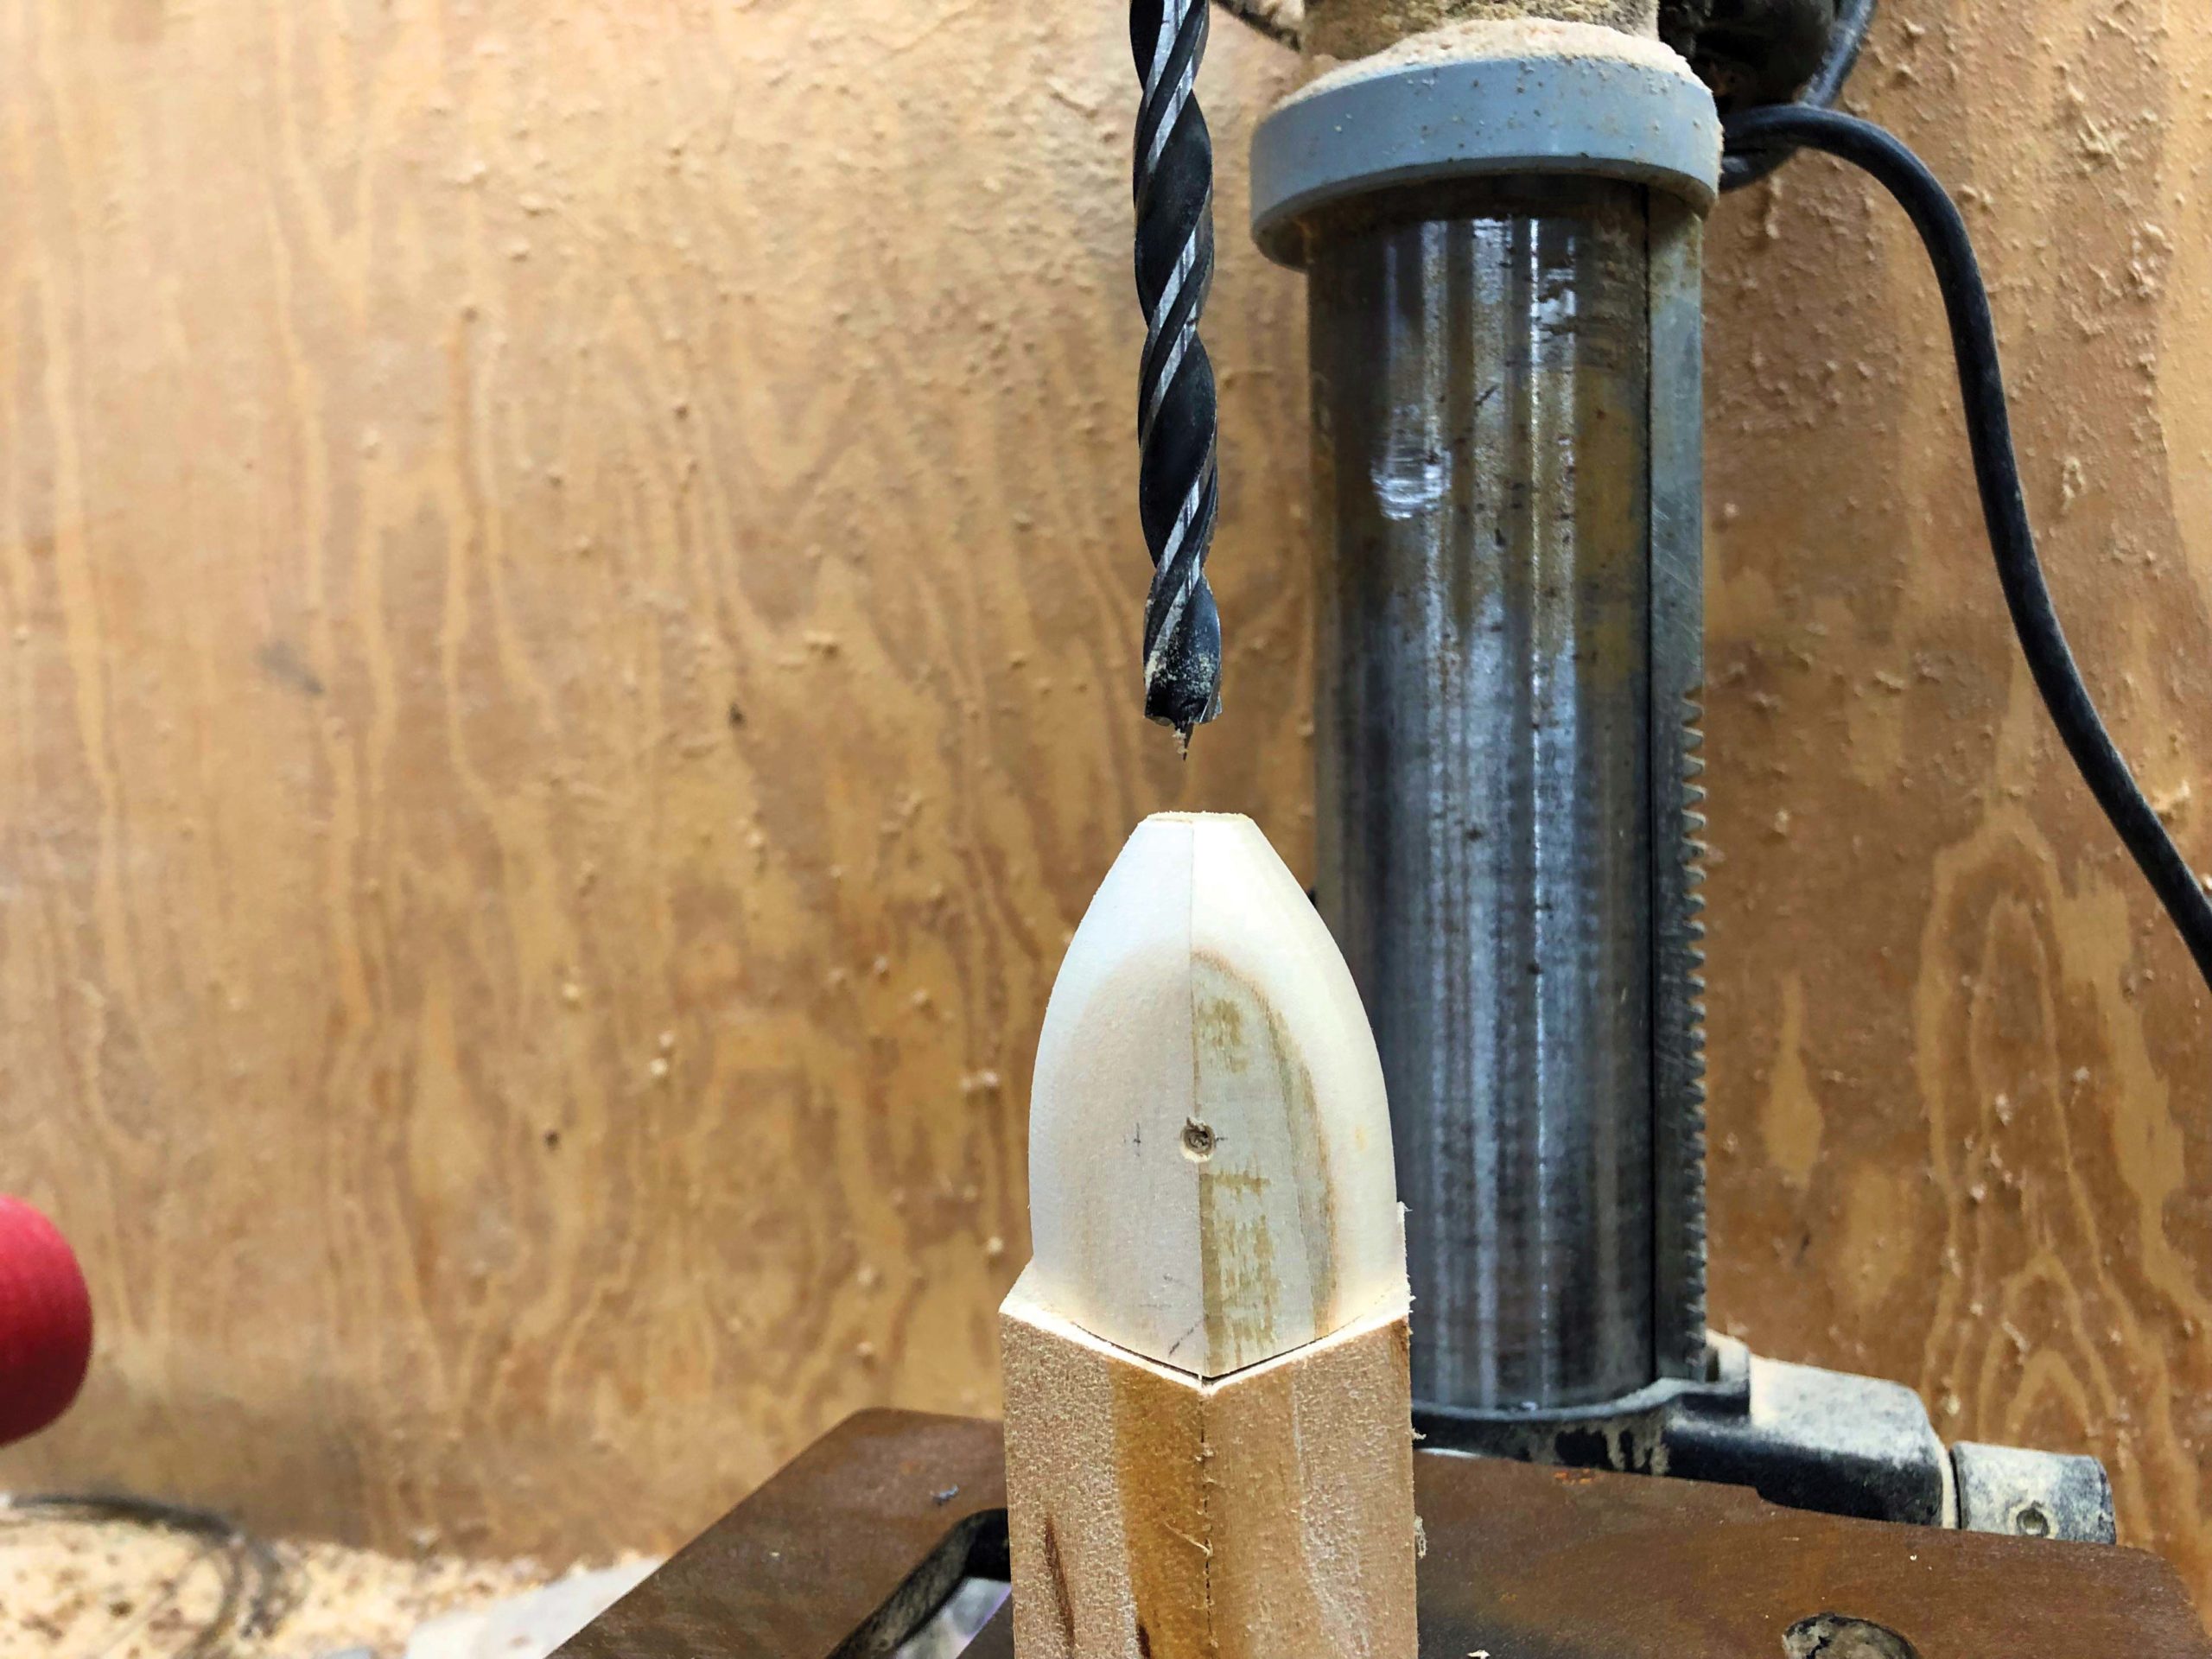
Once you have the body turned and sanded, take it over to the belt sander and make sure your rat has nice flat abs. Chuck a 3/32 bit in your drill press and drill two holes, right on the center line at 1-1/2 and 3-3/4 inches back from the nose, drill these about 3/4-inch deep. Now swap in a 12-millimeter forstner bit and drill a hole at 2-3/8 inches back from the nose, make that hole about 3/8-inch deep. Now set your table saw up to cut a 12-degree angle at a depth of 5/8-inch. Using a scrap wood fence, make your cut right at 3/4-inch back from the nose in the ‘chin’ of the bait. Dry fit your Lexan lip now and widen the slot if necessary.
Now would be an appropriate time to epoxy an NJTackle pancake weight into the 12-millimeter hole and cover it with filler—you can sand it flat on the belt sander. Drill your eye sockets now with a 1/4-inch forstner bit around 1/2-inch back from the nose—use your judgment to place them properly.
Now grab your pull saw again and finish the joint cut—watch both sides of your cut and try to make them meet right at the center line. Now cut your square ends off. At this point, we will have to drill a recess for the tail and the corkscrew that holds it on. I made a little cradle out of a piece of scrap cut at the same angle as the joint to make this easier—first drill a 5/16-inch diameter hole (centered on the tail) no more than 1/8-inch deep, then drill a 5/32-inch diameter hole about 1/4-inch deep in the middle of the first hole.
Now use a hand drill to drill centered 3/32 diameter holes in at the apex of each joint cut for the hinge, and another at 3/8-inch in front of the lip slot—drill this about 1-inch deep and at the same angle as the lip slot. Sand everything to knock off the rough edges, sand the nose to a rounded point, seal the wood and then sand everything lightly again.
The Pied Painter
Before we get to the painting part, we have to put the lip into place. I’m using a lip I made myself out of 1/8-inch Lexan, but a reasonably close substitute would be the 100P21 lip available at saltwaterplugs.com. I have found the best results with the lip protruding 7/8-inch from the lip slot. You may need to trim or shim the lip to get the proper finished length. Sand the portion of the lip that will be inside the slot and epoxy it into place, use Bondo to fill in the gaps after the epoxy has cured and sand it smooth. Now thread 1-1/8-inch magnum screw eye (dip the threads in epoxy) into the three holes drilled along the belly (line tie and hook hangers) and let them cure. Mask the lip and screw eyes off with tape and now we’re ready to paint.
Many builders fully assemble these baits before painting, but I don’t like to do it that way; epoxy and paint getting into the joint will permanently affect the action, so I assemble the joint last. I use a spring clamp to hold the lip and a long headless bolt to hold the two pieces together while painting. You can go as crazy as you want with colors, but natural rat colors tend to be the most popular—brown over white, solid white, grey over white and black are the mainstays. Look for a video in our weekly newsletter showing how I achieve a semi-realistic rat paintjob. When you’re happy with your paint, glue the eyes into place and clear coat your creation.
The Home Stretch
Now you can peel the tape off and prepare for the last few steps. You’ll need two open-eye magnum screw eyes for the joint (1-1/8 inch) close one with pliers and screw it into the head section (with epoxy on the threads). Try to make sure no epoxy gets into the eye. Now, repeat the process with your tail portion, but keeping the eye open. When you have it close to fully-seated, hook the two screw eyes together and then use pliers to close the eye and hold it still while you finish screwing it into place. You want the head eye to sit horizontal and the tail eye to be vertical. Hang it up to cure by the line tie.
| Item: | Where to buy: |
| 1-1/8” Open Eye Magnum Screw Eyes | Lurepartsonline.com |
| 100P21 Lexan Lip | Saltwaterplugs.com |
| .28-ounce Pancake Weight | NJTackle.com |
| Zoom Trick Worm | Your local tackle retailer |
| Medium Corkscrew Bait Keeper (optional) | Allaboutthebait.com |
In the meantime either order or make some large wire ‘twistlock’ corkscrews and epoxy them into the tail recess. When all your epoxy is cured, the final step is to cut a Zoom Trick Worm about 1/4-inch ahead of the ‘egg sac’ portion of the worm and screw it onto the corkscrew for your rat tail. Add a pair of 2/0 hooks, I like KVD Triple Grips, but ST-36’s will also work really well. And you’re ready to fish.
These baits wake right on the surface with a very enticing wiggle. What’s even better is that they have a long history of catching big fish. Jesse Hall told me, “For me rats are pretty much strictly a night bait since rats are nocturnal animals, but they are one of my favorite things to throw when hunting giant largemouths after dark.” On a nice, slow, creeping retrieve these baits give off a subtle knock and throw a massive wake—the hits are heart-stopping. When I asked Jerry Rago what the biggest largemouth ever taken on one of his rats was, he said, “the biggest one I know of was about 18 pounds.” Need I say more?