Resurrect this Rhode Island classic for some heart-stopping surface strikes this season!
It seems like a major innovation hits striper fishing about every 10 years, and way back in the 1940s the must-have plug was the Flaptail. These plugs were once kept secret by some of the best surfcasters of the time. Most of the ones being used were repurposed freshwater versions that—surprise, surprise—were being destroyed by heavyweight stripers. I read somewhere that Rhode Island surfcasting legend, Jerry Sylvester may have been one of the first people on the East Coast to make lures specifically for striped bass, and one of his first projects (or perhaps the first) was making an oversized flaptail that could stand up to a trophy striped bass. A quote from the August 1951 edition of Outdoor Life Magazine summed up the design nearly a decade after its creation, “With two years of experimentation behind it, Jerry’s [Flaptail] hit the Rhode Island surf in 1943. Casters found it to be a saucy, frenzied splasher with a freewheeling metal tail that churned foam. And how it stirred up the September bass! Jerry’s best with it so far: a 50- and 52-pounder.”
There are written accounts of surfcasters using the toe from an old sock to dampen the jingling of the blade so other anglers wouldn’t hear when they walked past. It’s obvious just how effective these plugs were at that time because just about every plug maker in the 1950s made them.
You may recall that I wrote a story a few years back about building the Heddon Flaptail, and I even said that I thought the way Heddon fastened the blade was the best method because it ensured that the blade was always spinning. The jury has reconvened on this matter and I’ll tell you why. The Heddon method uses an offset bracket that keeps the blade below the water line at all times, which basically turns any Flaptail made this way into a spinnerbait. The tail never stops spinning, and the action of the plug is directly linked to the movements of the tail. Variation is simply not possible beyond changing speeds, pausing or ripping the bait. So you’re getting some version of a tightly vibrating plug with a flashy, splashy blade in the back. Using the Jerry Sylvester method you’re able to get that churning, but you’re also able to walk the plug because the tail will lose traction several times during each retrieve. You can also chug it beneath the surface where the blade will automatically regain its rotation as it swims back to the top. I guess I should have known that a guy like old Jerry would know best, by all accounts the guy was a striper fishing machine and he never stopped thinking about it.
A Different Approach
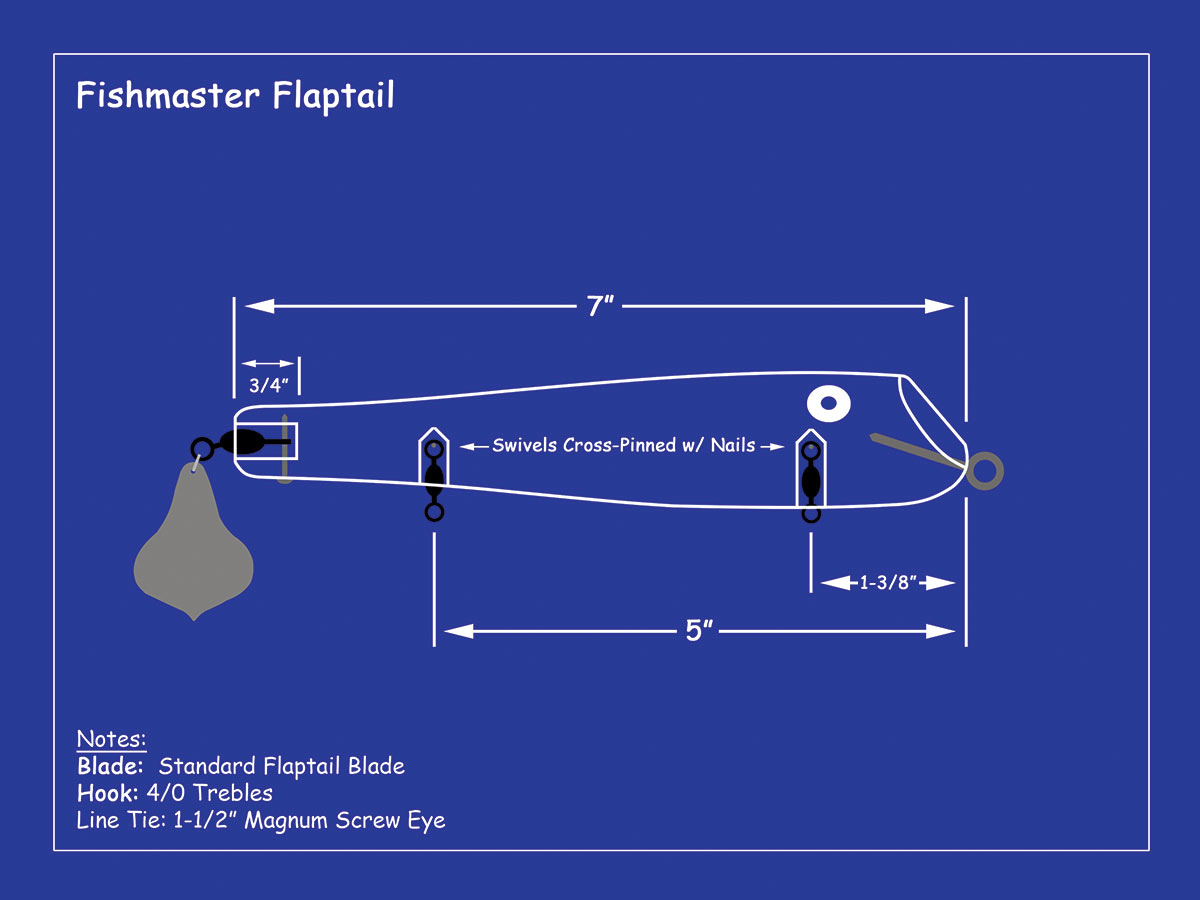
Another reason I chose to make this plug is that it offered the opportunity for me to show you a totally different way to construct a plug. The originals were made with screwed-in hook hangers but I just don’t trust those. So I modified the design to include cross-pinned swivels for hook hangers and a magnum screw eye for the line tie. Using these methods allows a whole new world of plug innovations where all different kinds of tails can be added, and you can use these innovations for literally ANY wooden plug you can make.
Jerry made his Flaptails (at least the ones I have seen) from red cedar. Red cedar is a light, soft wood so using white pine or another light wood will work fine; heavier woods will completely change the action. I made mine out of some light pieces of basswood I had laying around the shop.
The plug is 7 inches long and 1-5/16 inches in diameter at its widest point, so I cut my blanks down to 1-3/8-inch squares and cut them into 8-1/2-inch blanks; I made them a little longer to make shaping the nose easier. Find the center at both ends and set it up in the lathe. Round off the corners—leaving about a half-inch of each end square and when you have a rough cylinder, power down the lathe and lay out your reference marks. I found the best results starting the marks about 1 inch from the head end of the blank. Your first marks should be made 7 inches apart, then measuring back from the nose, make marks at 3/4, 1-3/4, 3, 4, 5-1/4 and 6-3/4 inches. Now turn the lathe back on and touch each mark with a pencil; they should be refreshed as needed. A small skew chisel is capable of knocking out just about this entire project, although some might find that a wider skew is easier on the main part of the body. Here are your target diameters:
Nose: 9/16-inch
3/4-inch mark: 1-1/4
1-3/4 inch mark: 1-5/16
3 inch mark: 1-1/4
4-inch mark: 1-1/16
5-1/4 inch mark: 7/8
6-3/4 inch mark: 11/16
Tail: 1/2 inch
Replicating History
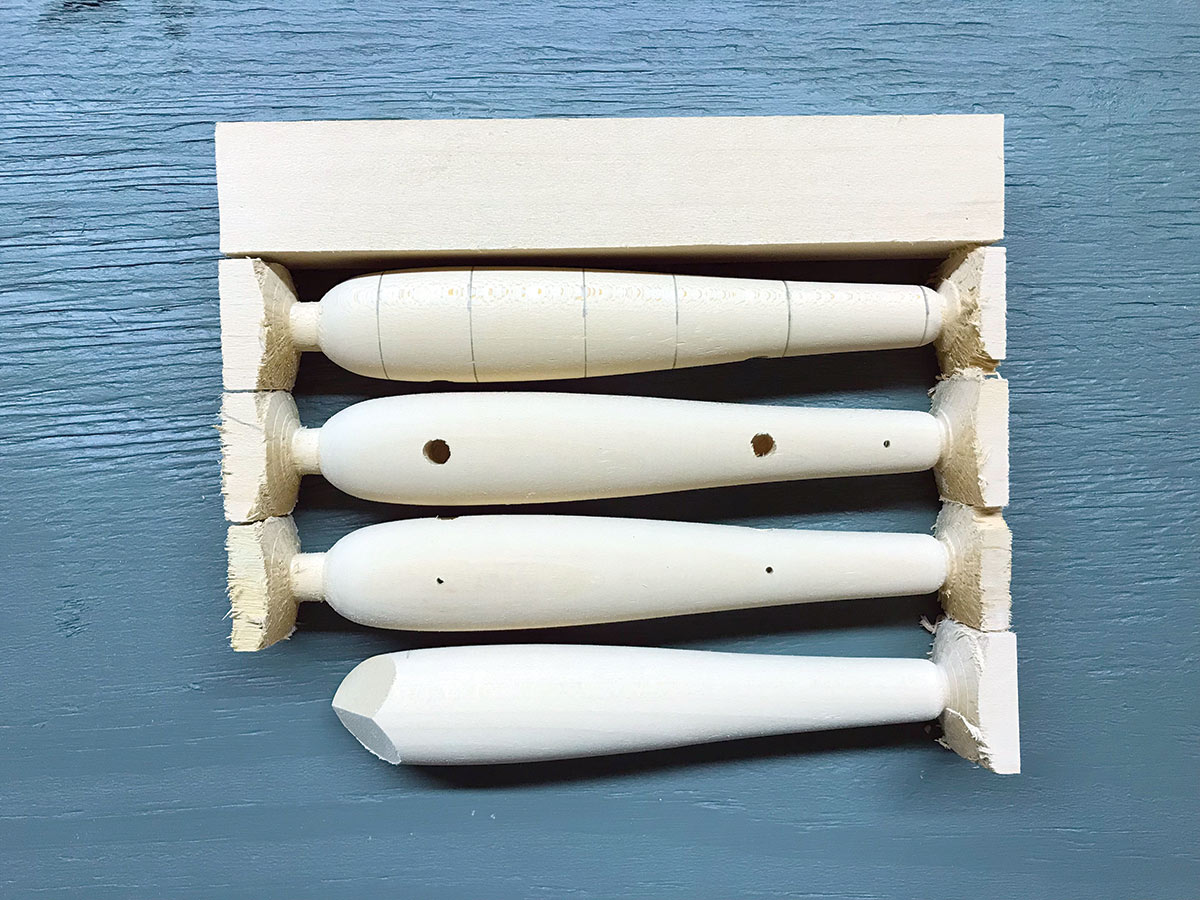
Once you have the body roughed out, sand it smooth with 150-grit sandpaper and take it off the lathe. This is where things will start to jump the tracks if you’ve followed these stories in the past. Start by drilling a hole into the tail about 3/4-inch deep using a 1/8-inch bit on the lathe, just like you would if you were going to thru-drill the plug; this will serve as a pilot hole later. Now use a 5/16-inch bit in your drill press and drill a pair of centered holes in the belly—just past halfway through, one at 1-3/8 inches back from the nose and the other at 5 inches. Now swap in a 3/32-inch bit and drill another hole in the belly at 6-3/8 back from the nose; drill this one about halfway through. Now roll the plug 90 degrees and drill two more holes at the exact same locations as the hook holes, you should feel the bit pop out into the hook hole, drill just a little deeper than the other side of the hole. Confused yet?
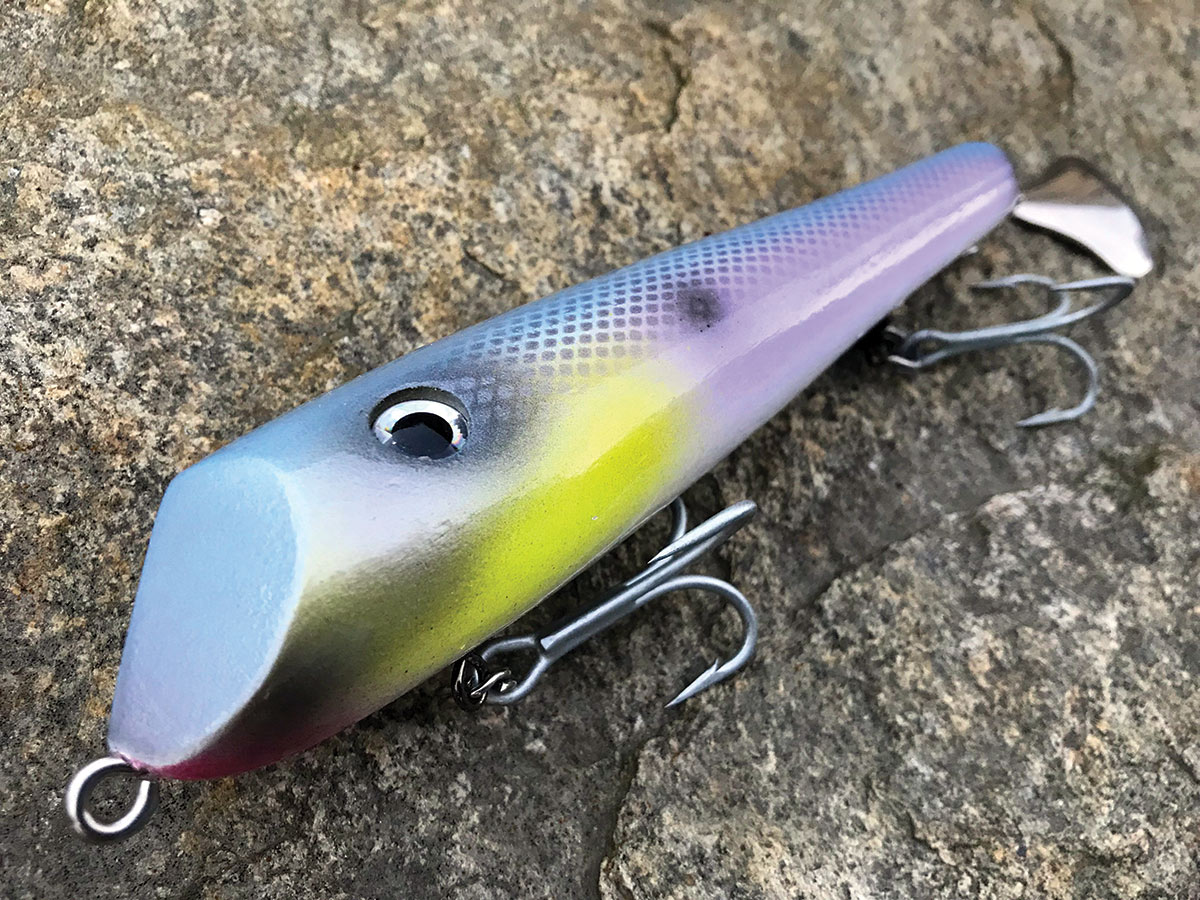
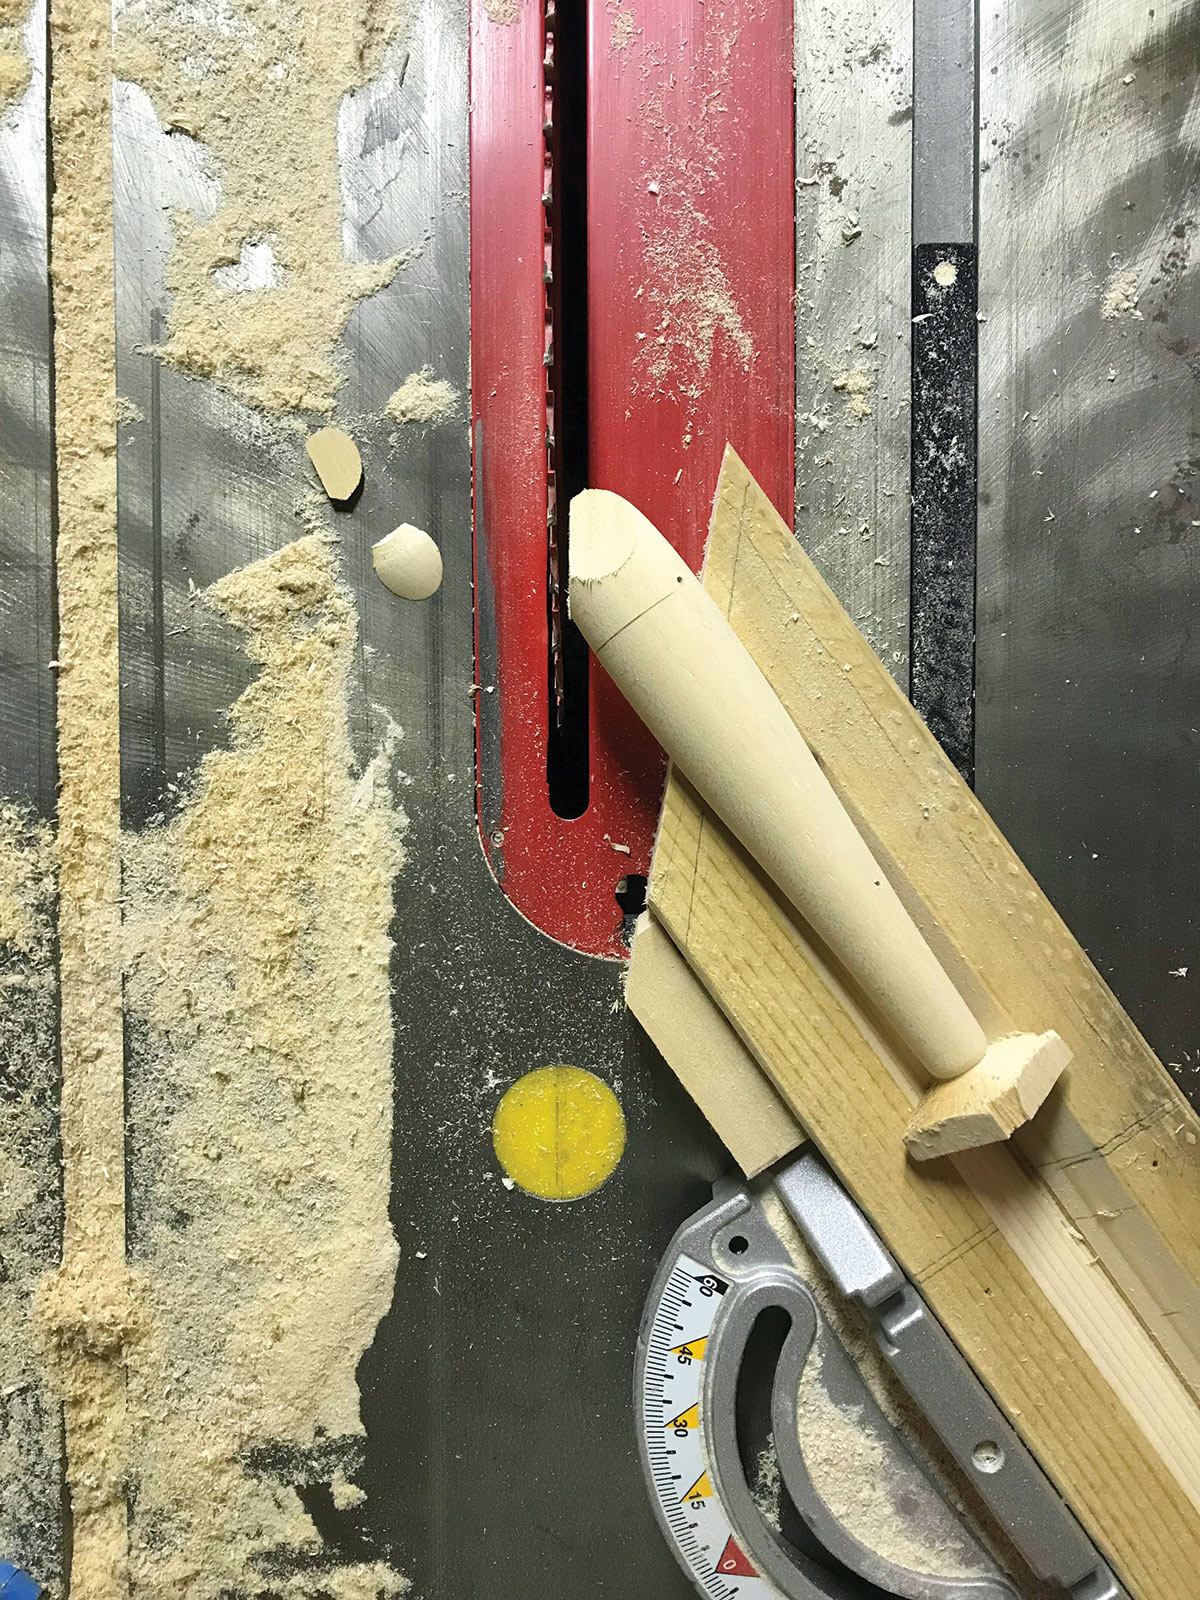
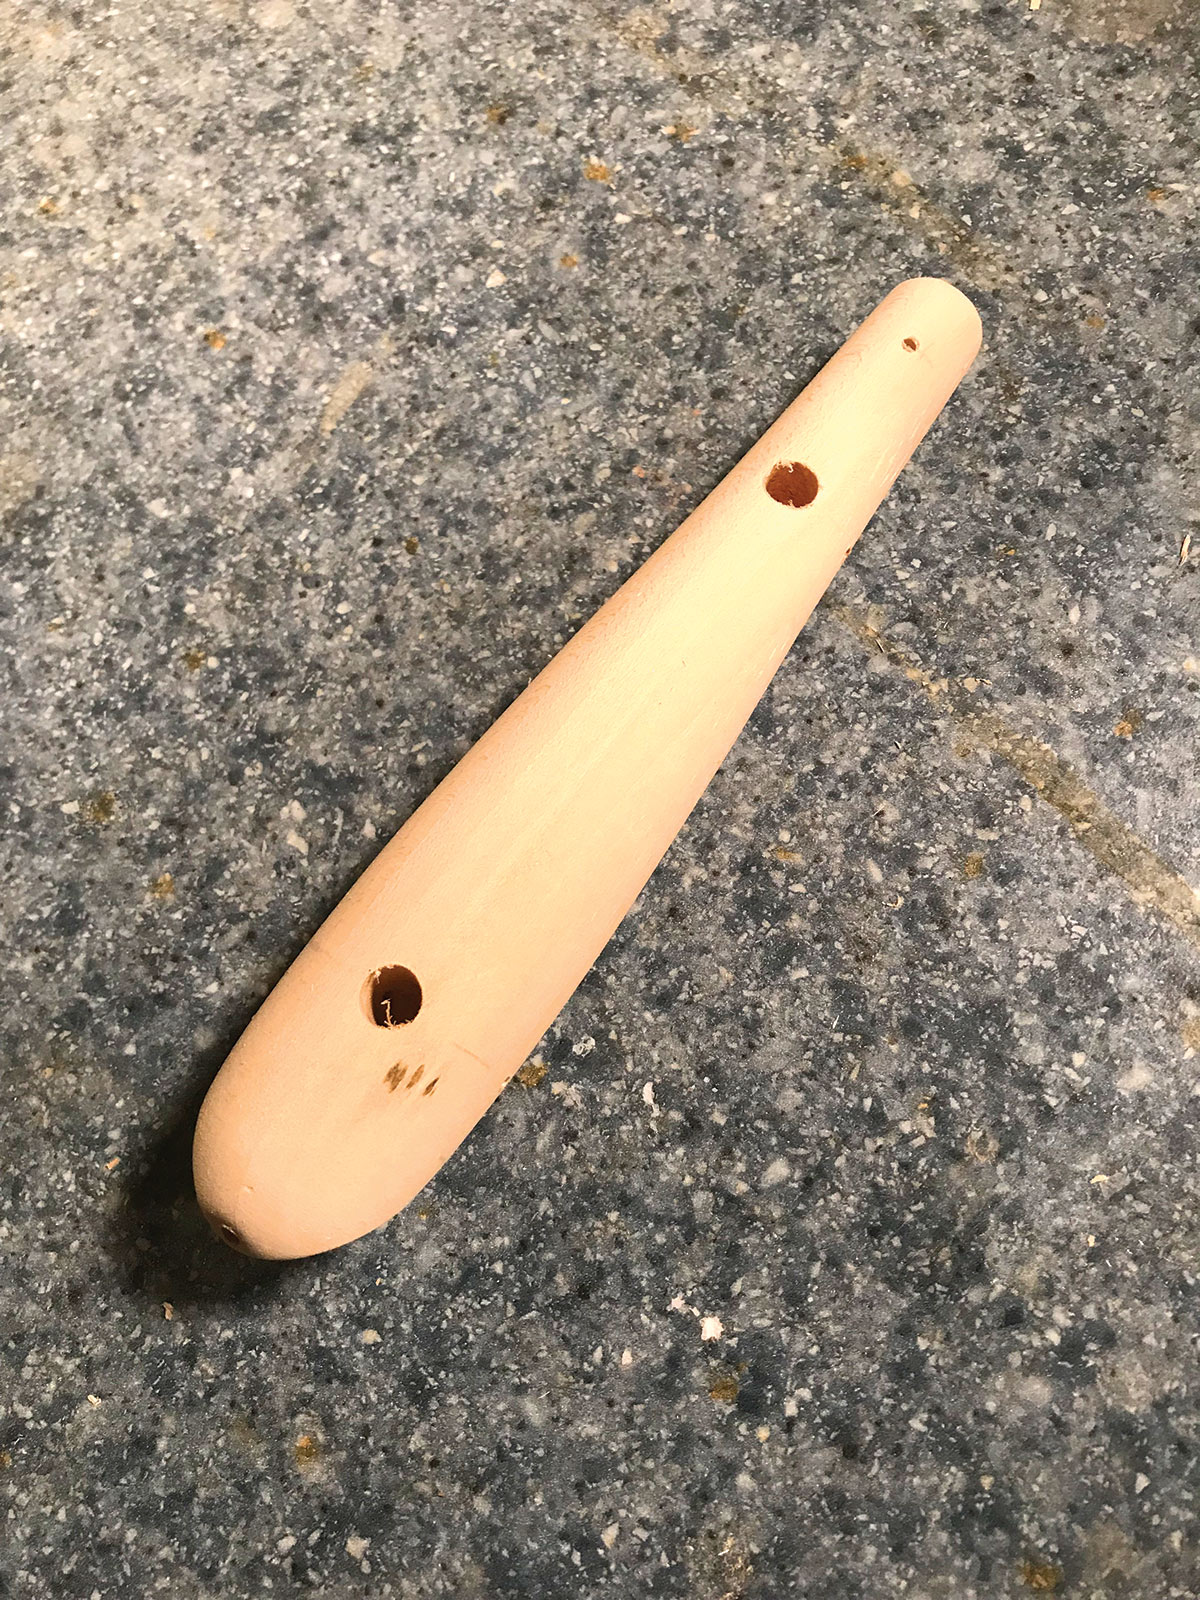
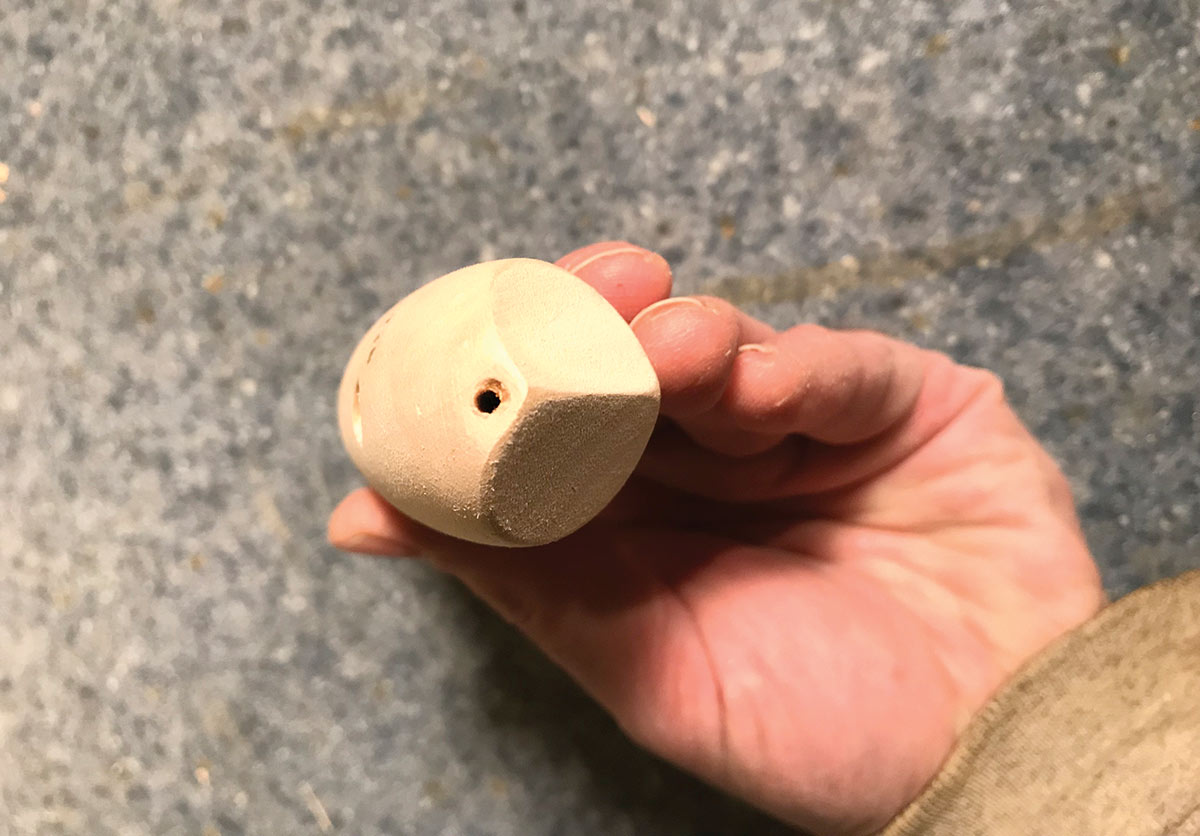
Shaping the nose of the Sylvester Flaptail is not easy. I had to build a jig specifically for this purpose. But for the hobbyist making a half-dozen for the season, a jig is overkill. Remove the square from the nose end and make your cuts holding the plug at 45 degrees to the belly while the plug itself is held at 55 degrees to the blade. I used a modified v-jig on the table saw, but you could also do it on a sander with sharp paper. It might not be a bad idea to drill a shallow centered hole to mark the apex of the two cuts and then just fill it in after. If you don’t want to deal with making these cuts, just give the plug a flattened head—somewhere between a troller and a pikie. Once you have the cuts made, cut the tail end off the plug and use a belt or disc sander to make a flat spot just below where the cuts meet on the bottom of the nose. Then use a 3/32-inch bit to drill a hole centered in that flat spot for the line tie. Now flip the plug around and drill a 5/16 diameter hole about 3/4-inch deep into the tail—following the pilot hole drilled earlier. Unlike most plugs, I found it easier to drill the eyes at this point; they are drilled 1/8-inch above center and you’ll find it easier to do in a v-jig—use a 3/8-inch forstner bit to complete this task. Now give the whole plug a sand with 220-grit paper to knock off any rough edges, and we’re ready for sealer.

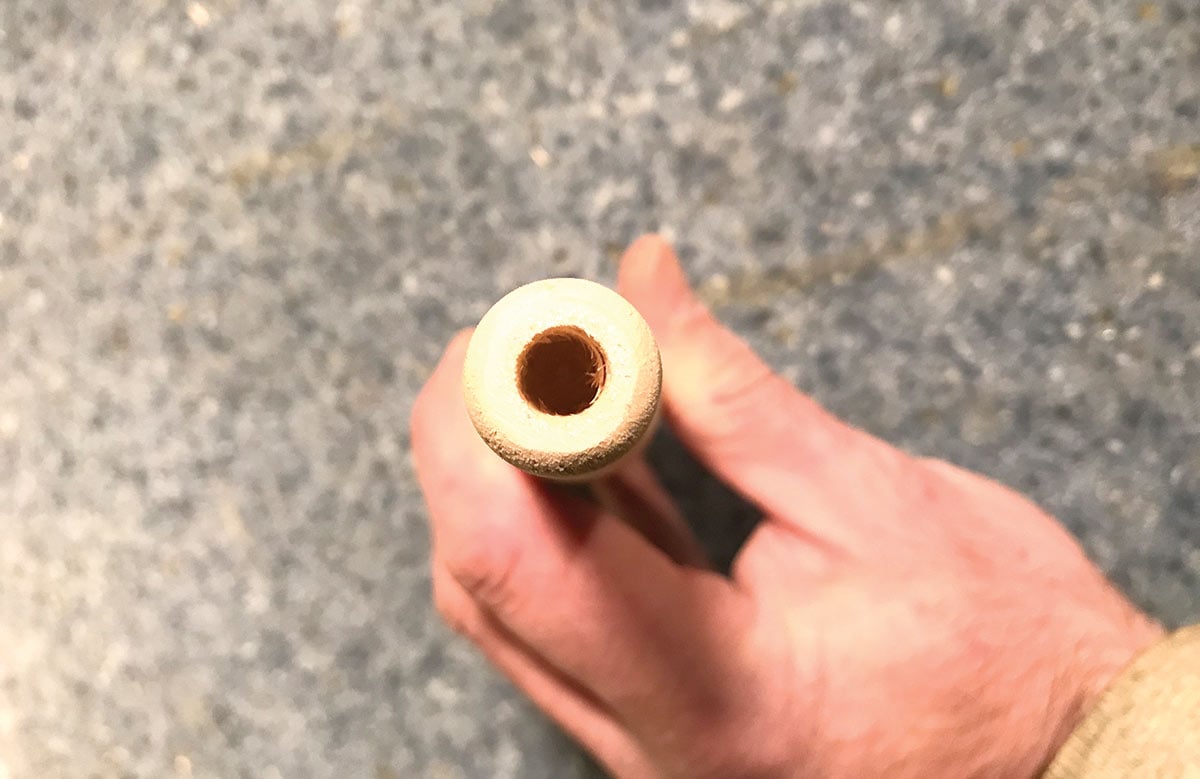
Jerry Rigging
Dip seal the plug in a 60/40 mix of gloss urethane and mineral spirits and hang it to dry for several days—make sure to clear all the small holes with a toothpick or a piece of wire before leaving them to hang. When the sealer has dried, sand the whole plug with some 220-grit to knock off the sheen and any raised grain and wipe it down. Now you’ll need some short stainless finish nails or pieces of stainless wire—no longer than 3/4 inch. Mix up some 2-ton epoxy and dip the tip of each nail/wire into the epoxy, now slide them into the small holes that correspond with the hook holes and drop a #1 swivel into the hook holes. Push the nails through, threading the swivel on the way and before the nail goes all the way in, add a dab of epoxy near the head of the nail and push it in, repeat this on the other hook hole and use Bondo to cover the holes. Then dip the threads of a magnum screw eye into the epoxy and thread it into the hole you drilled in the nose. When the epoxy has dried, wrap the screw eye in tape and put short sections of drinking straw over the swivels to protect them from paint—hit them with primer and then start thinking about colors.
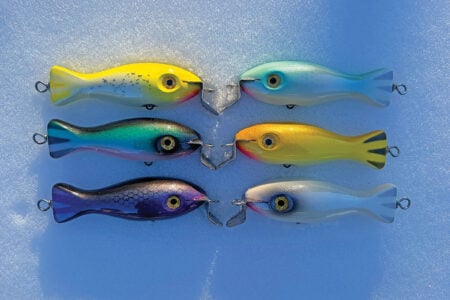
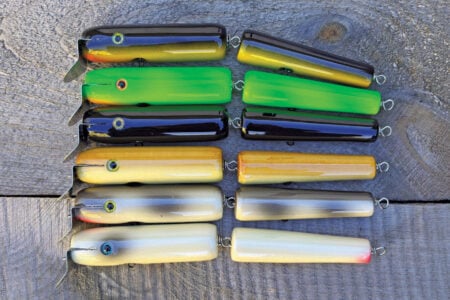
Colors, well, you know my stance on colors. Paint them to your liking, maybe go classic, maybe try and paint a few in a realistic mullet pattern, maybe a mackerel for the Canal. Glue a pair of eyes in there and give them a good coat of epoxy or a few coats of a spray clear, and then we have some final rigging to do.
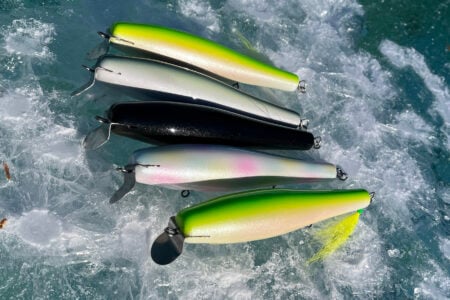
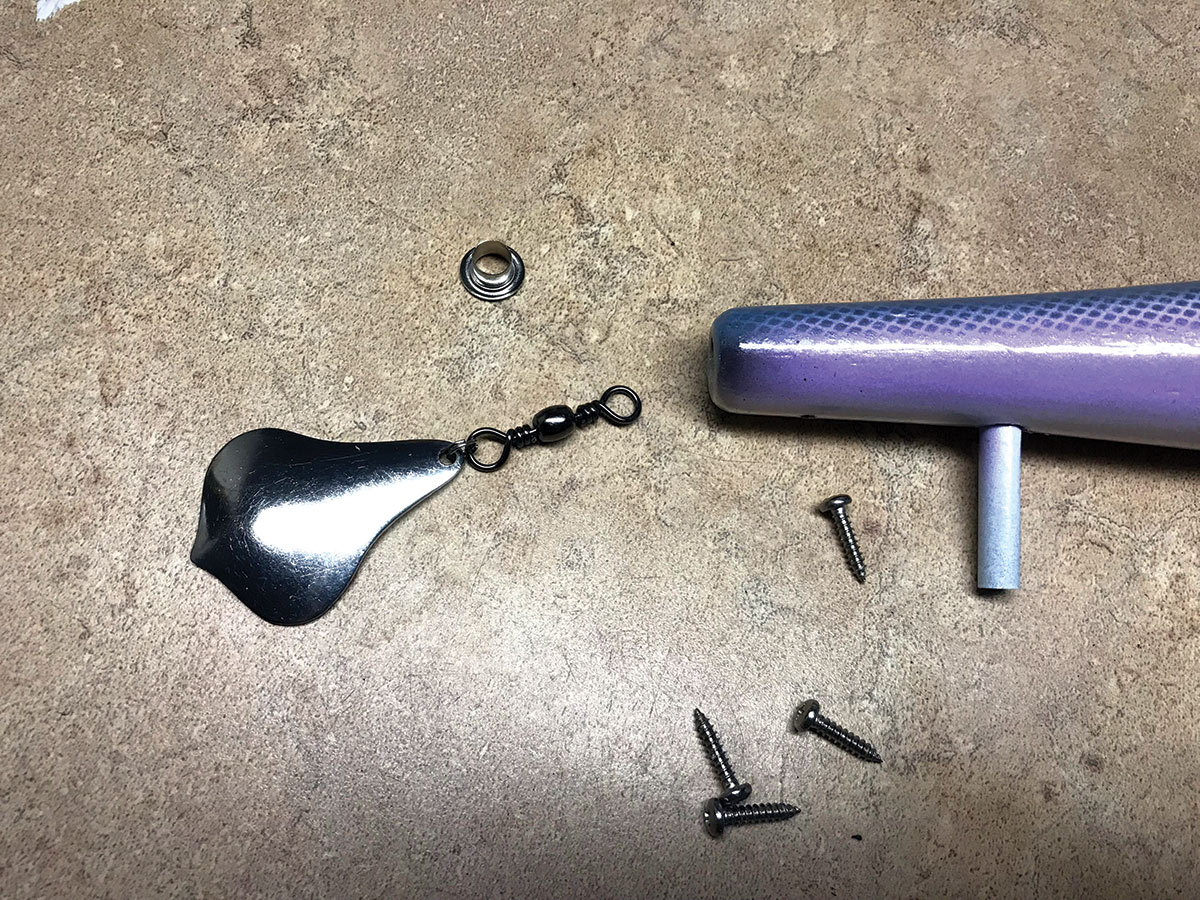
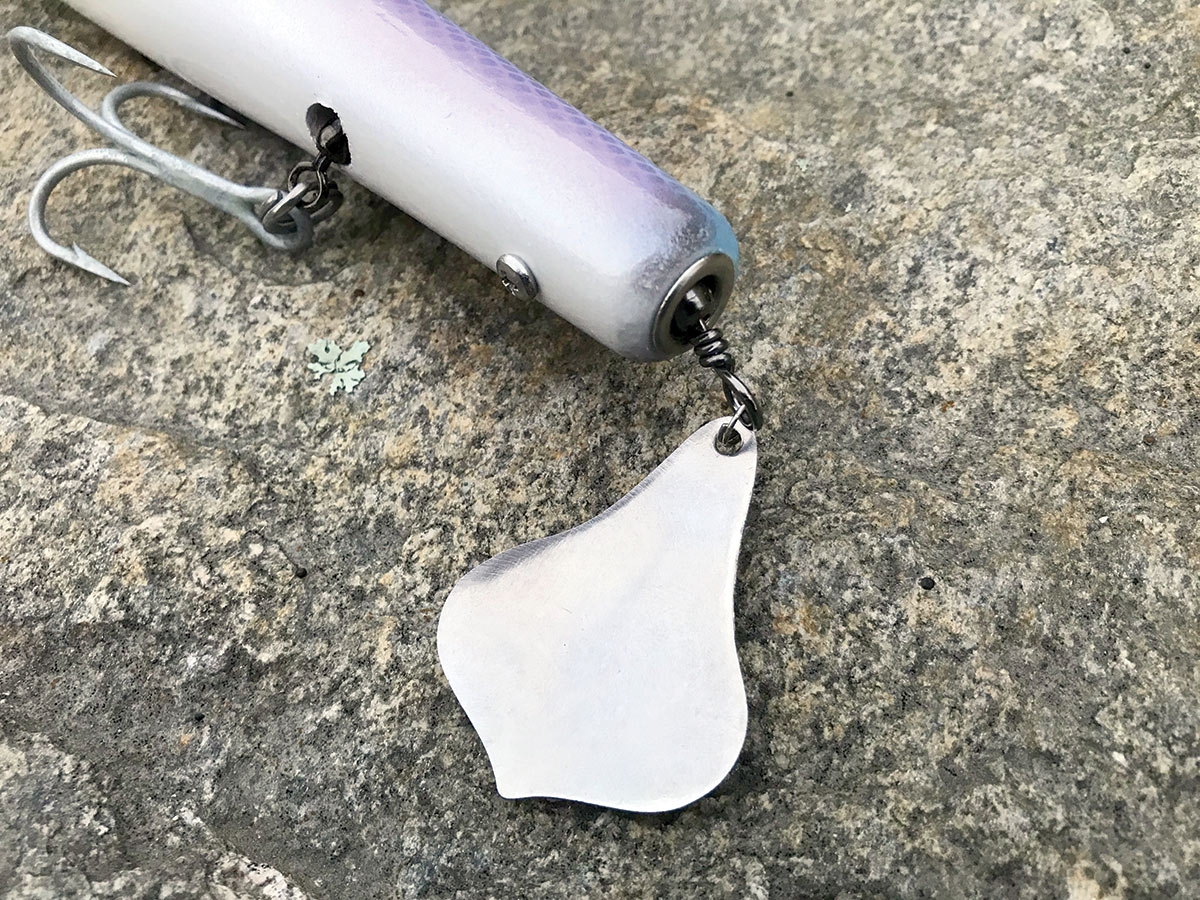
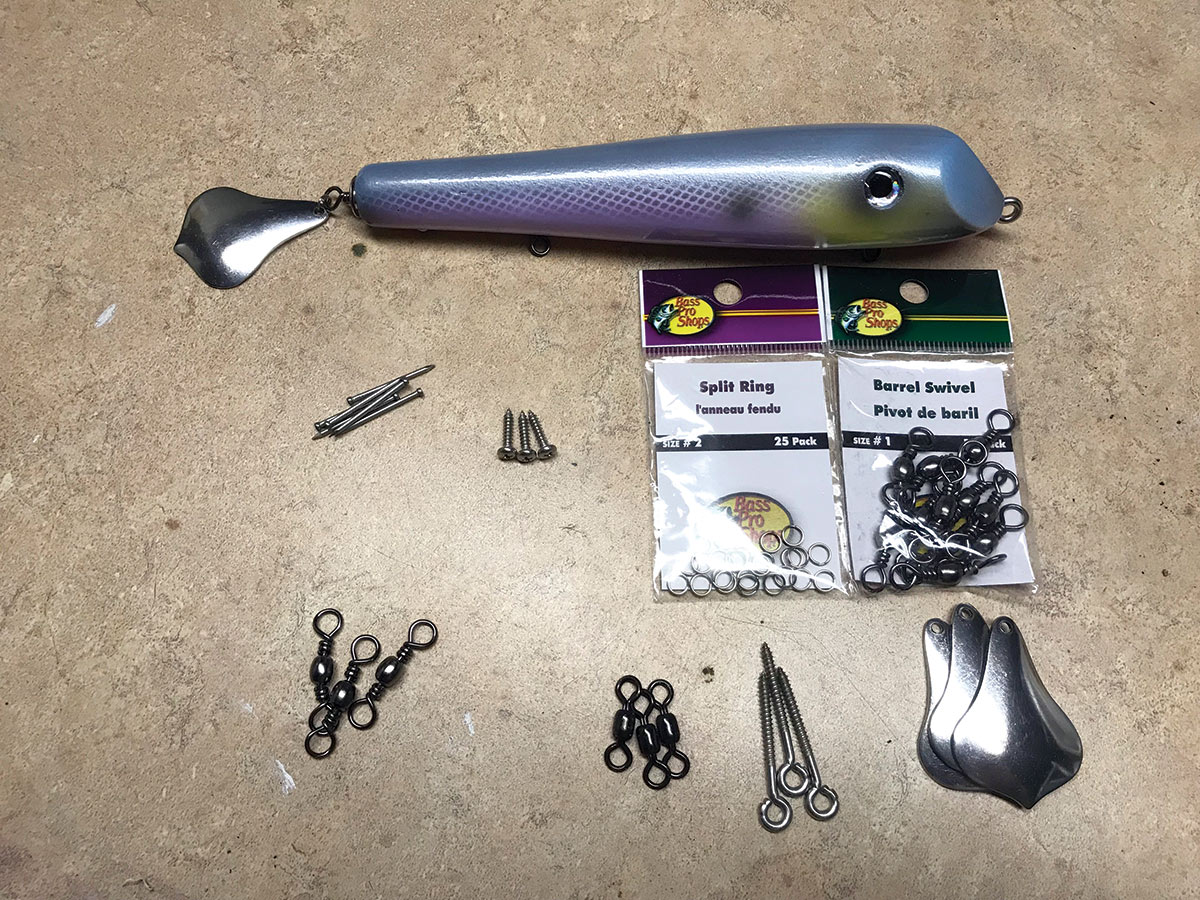
You’re going to need some special items to finish this plug. You’ll need some #1 ‘old school’ barrel swivels (Bass Pro) some #2 split rings (Bass Pro) some flaptail blades (www.mooreslures.com or www.saltybugger.com) and some 1/2-inch stainless screws. Use the split rings to attach the blade to one end of the barrel swivel and then slide the swivel into the hole in the tail. Now tighten a stainless screw into the hole in the belly and make sure it threads the other loop of the barrel swivel to hold it in place. (For a more finished look add a small belly grommet to the hole drilled in the tail.) A pair of 4/0 VMC treble hooks completes the job.
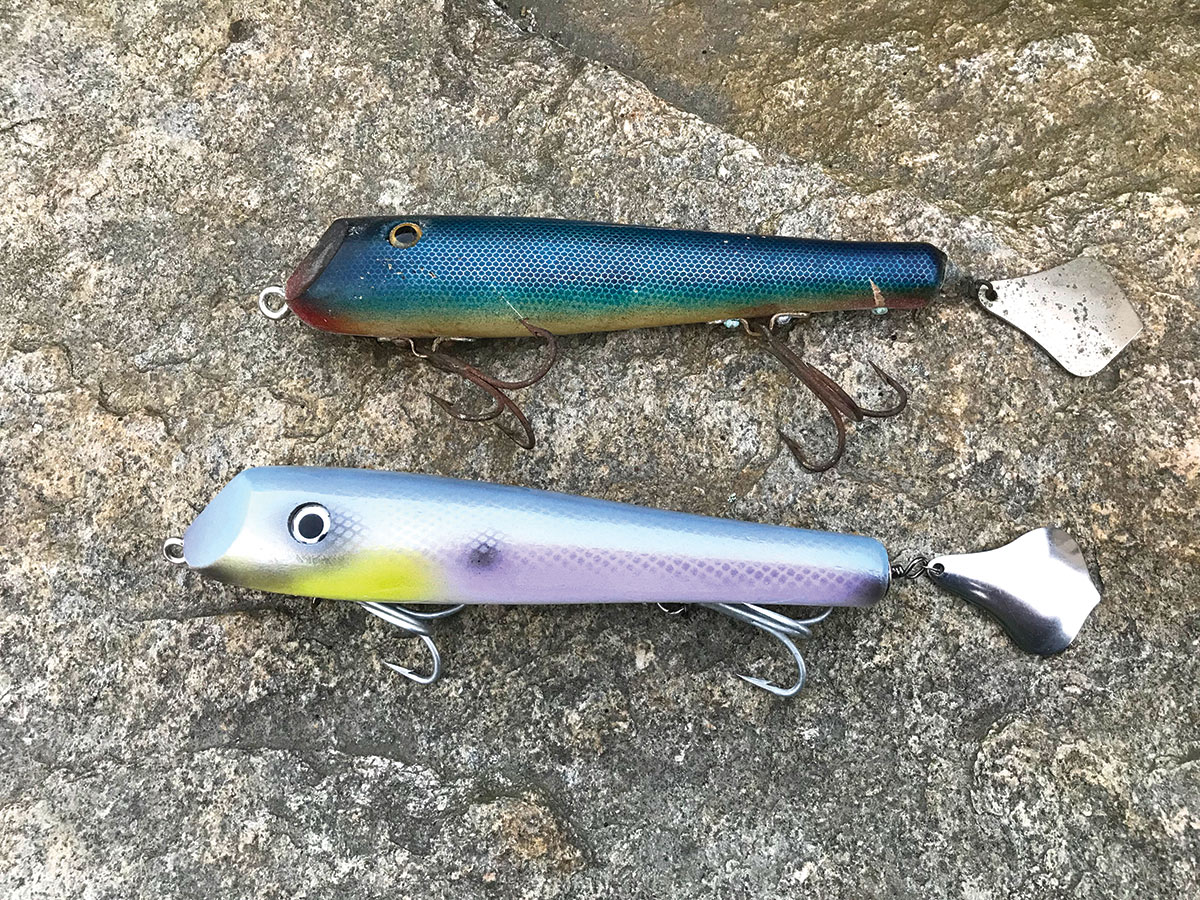
When I started this project, I thought it would be fairly simple, but this build is not easy. However, I found it to be a really fun build and quite satisfying at the end. I also really like resurrecting defunct designs; just about no one makes a Flaptail for saltwater these days, and I can tell you from experience that the hits on a Flaptail are heart-stopping. Enjoy!!