A modern take on a Rhode Island classic that has been producing large striped bass for years.
It was a warm November day, I was working an afternoon shift at the Saltwater Edge when my colleague, Captain Christian Awe placed a plug in my hand. “Have you ever seen one of these?” he inquired, “My neighbor gave it to me and said he’d caught a ton of fish on it over the years.” The plug was a Point Jude Cutlass, a peculiar wooden swimmer with a very unique metal lip. It falls somewhere between Maverick and Red Fin; it’s turned off-center with a weird little scooped metal lip screwed onto its chin. Immediately I knew I wanted to figure out how to build this plug and then write about it. Christian graciously allowed me to take it home where it would stay for more than four months!
I was not able to turn up a whole heck of a lot on the history of Point Jude Lures; basically the company started in Narragansett, Rhode Island and the lures were made by Joe and Rose Tartorie. Then, some 30 years later, the company relocated to East Greenwich; it’s not clear whether the company was sold or just moved, but the lure lineup changed immensely and one of those new lures was the Cutlass. (Special thanks to the Saltwater Lure Collector’s Club [www.swlcc.com], of which I am a member, for providing what little history I was able to dig up, in their member library.)
Trouble Ahead
Upon looking more closely at this plug, it became quickly apparent that I had chosen a real doozy, and as I dug deeper, I came to the unfortunate realization that I really wouldn’t be able to describe the process and still make word count, so I switched gears. I set my sights instead on modernizing this very cool design; I justified it by the fact that I could teach you some new techniques… and by the fact that it swims awesome! I’m sure Joe and Rose have passed on to that great wood shop in the sky, but I hope they would feel that I have done them proud.

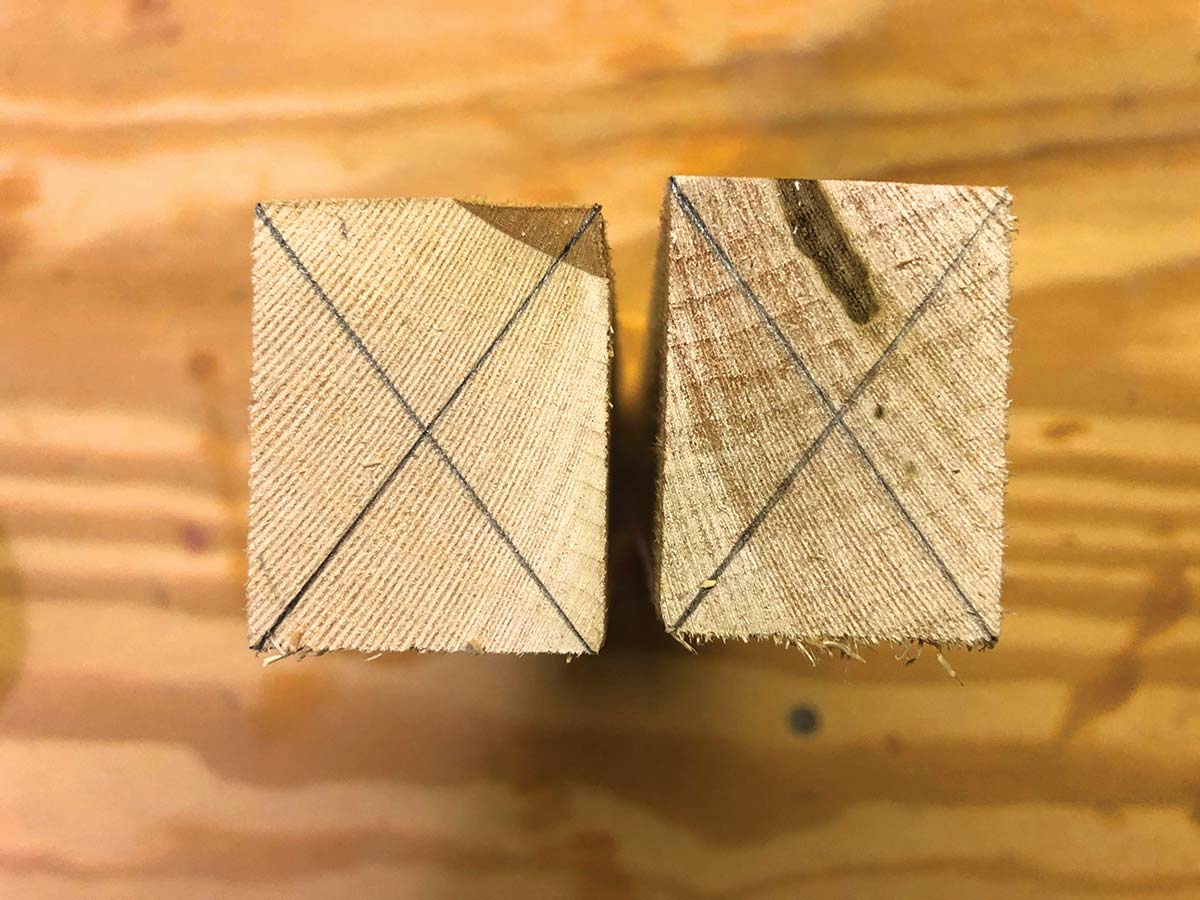
One of the most daunting things about describing the build was sending you off to your lathe with my written directions to try off-center turning for the first time in your life, I just couldn’t live with that responsibility. So I elected instead to go with what I like to call a ‘slab-sided’ turn. This means you’re working with a rectangular piece of wood, which leaves a little bit of two sides of the plug flat—these will be the flanks of your swimmer. The originals were made from red cedar, which is a very light wood, you can use pine or any other light wood. Rip some stock at 1-1/2 by 1-3/16 and cut your blanks to 7-1/2 inches in length, find the center at both ends and get them in the lathe.
Raging Slab
It may seem a little scary at first, but trust me, you can put a chisel to the wood; it won’t hurt you. As per usual, start with a gouge and rough out the middle of the blank—leaving a half inch at each end square. Now grab your trusty skew and start by working it down to 1-3/8 diameter then shut off the lathe and lay out your reference marks. Start by making two marks 6-1/8 inches apart for the nose and tail, then make a mark 2-1/4 inches back from the nose, this will be your widest point. Then make one at 1-1/2 and another at 4 inches back from the nose, turn the lathe back on and touch each mark with your pencil to make them easier to see while you’re working. These marks should be refreshed as needed and turned down to the following diameters.
Head Mark: 1/2 inch
1-1/2 inch mark 1-1/4 inches
2-1/4-inch mark: 1-3/8 inches
4-inch mark: 1-1/4 inches
Tail mark: 1/2-inch
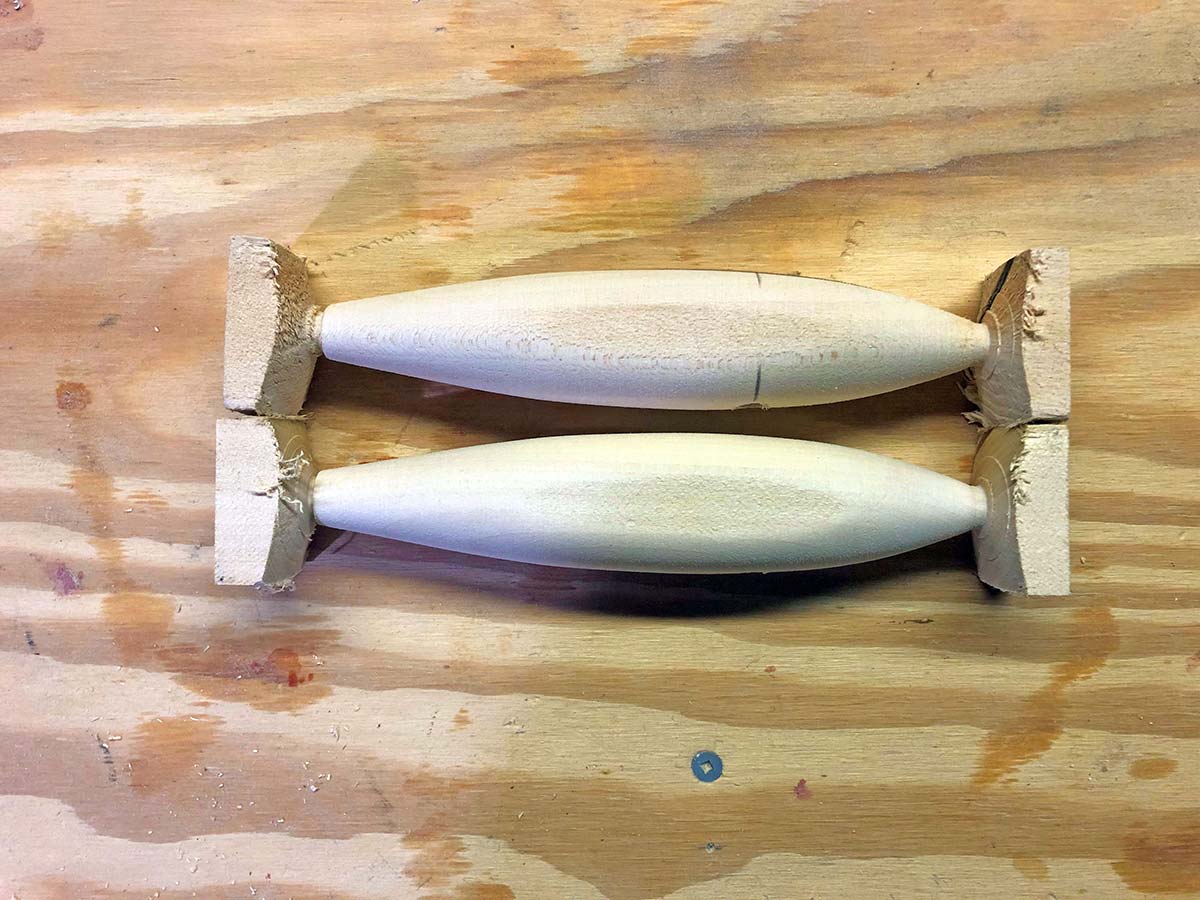
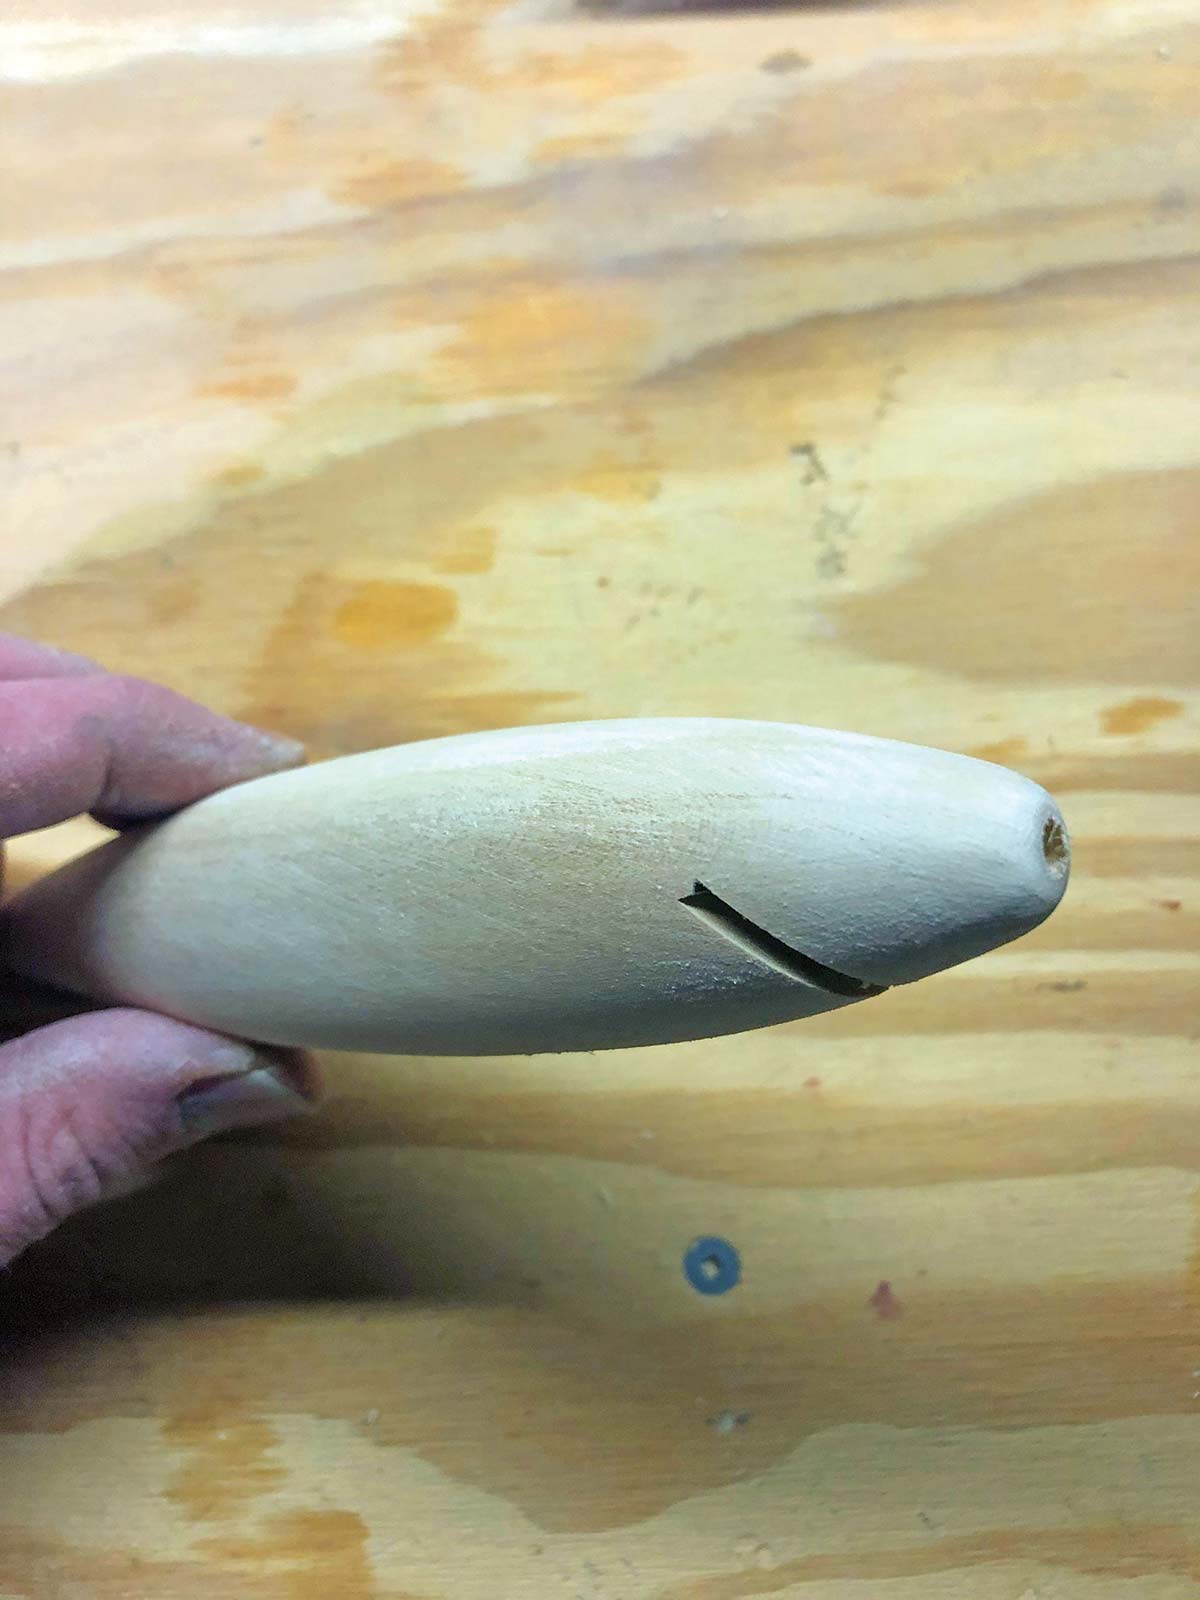
The shape is a very typical lure shape: a flowing, elongated curve. You should be able to do the whole thing with a skew chisel, then use a parting chisel to put a nice edge on the tail (and nose too if you’d like.) Once you have the shape about right, sand the plug on the lathe using strips of 150 grit sandpaper and pull it off the machine.
Elbow Grease
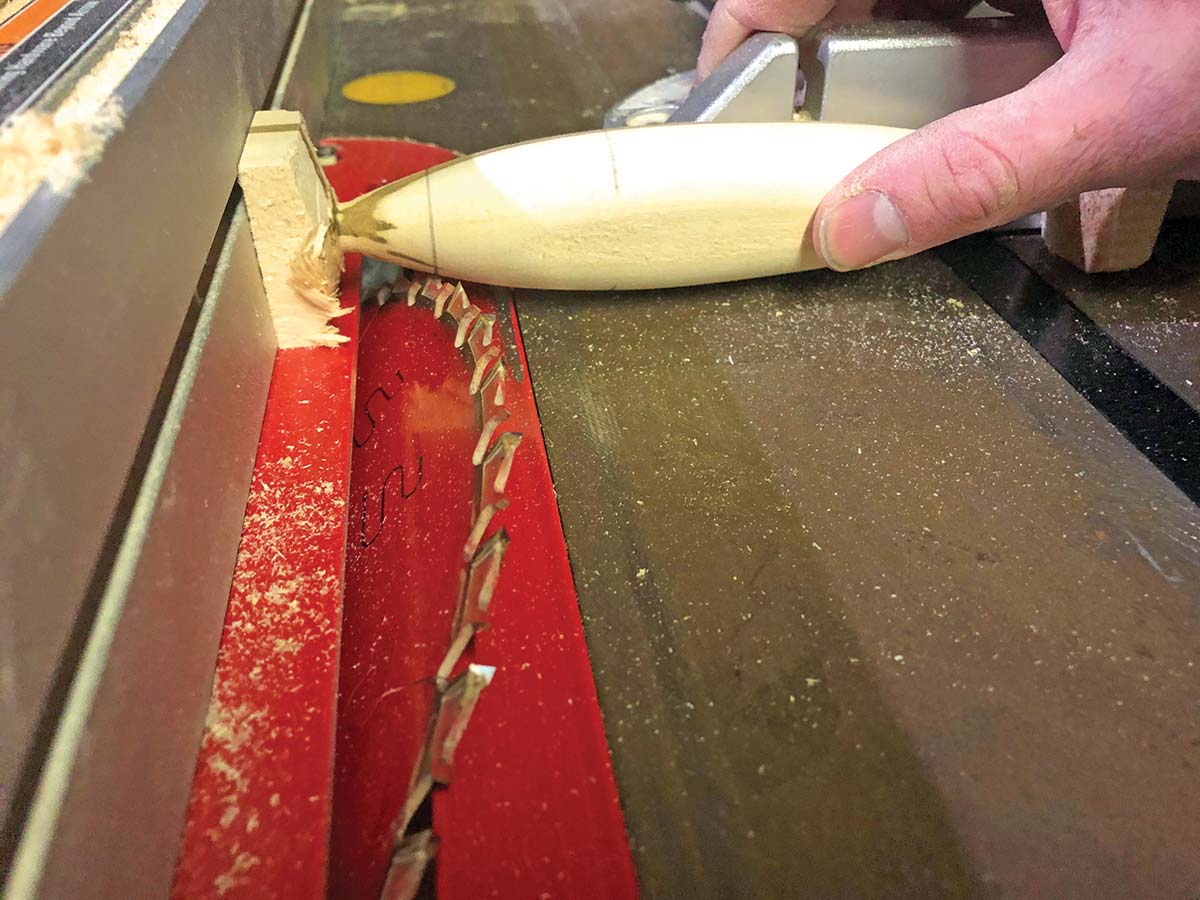
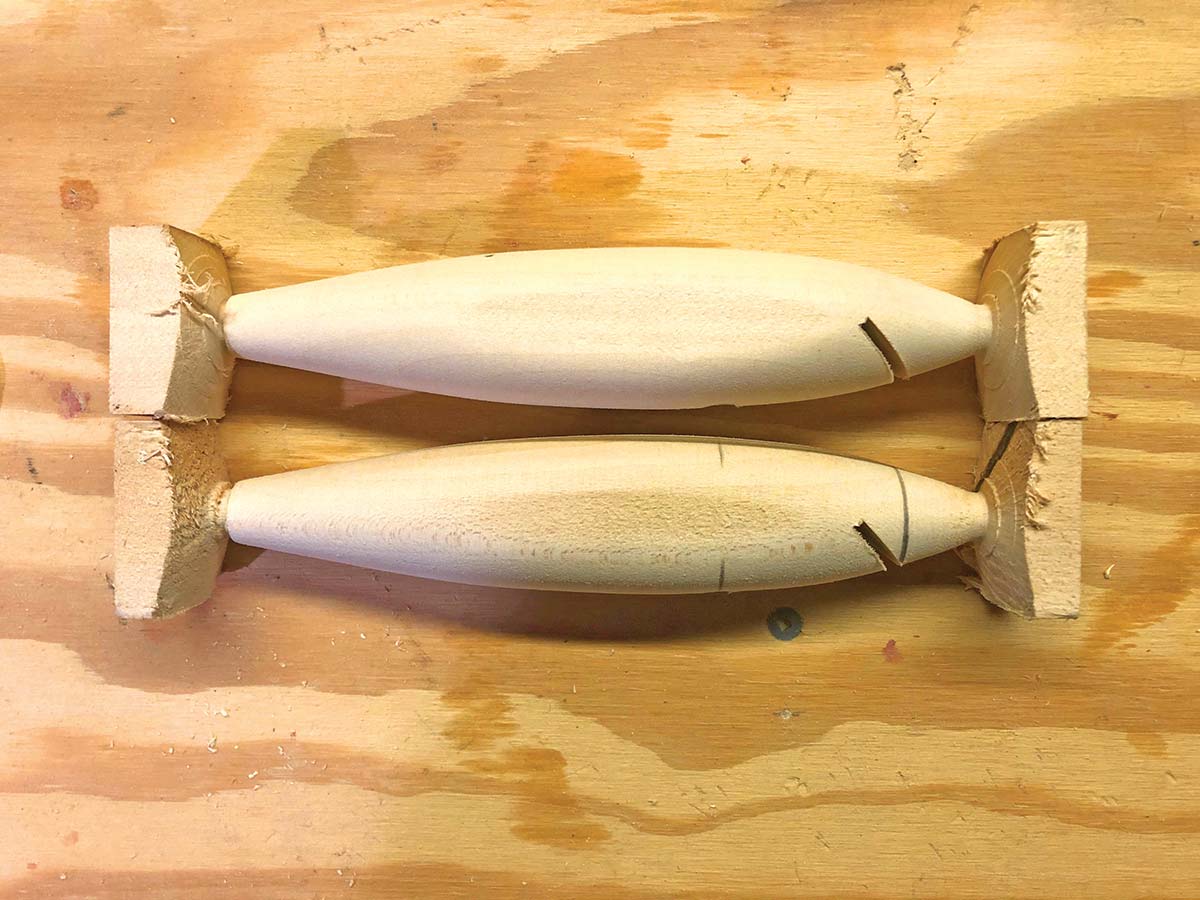
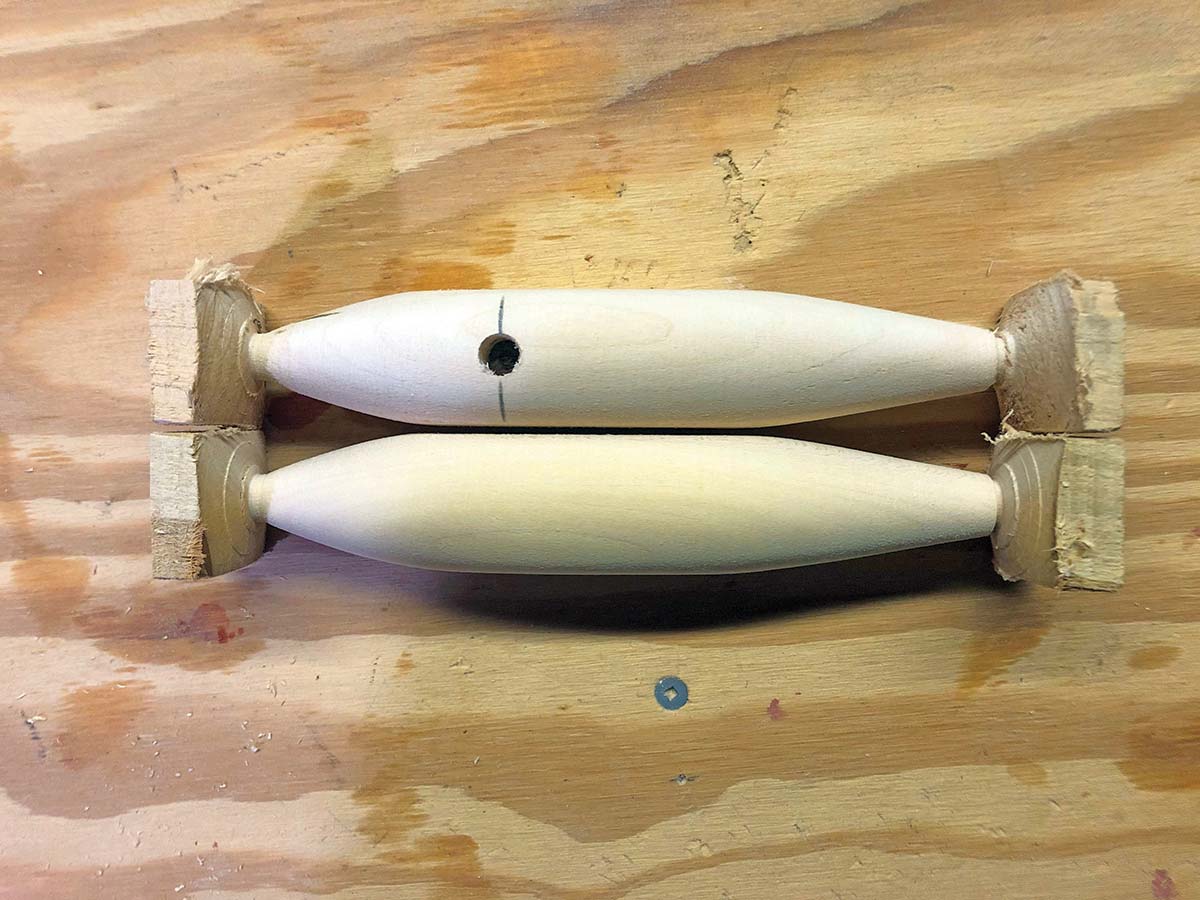
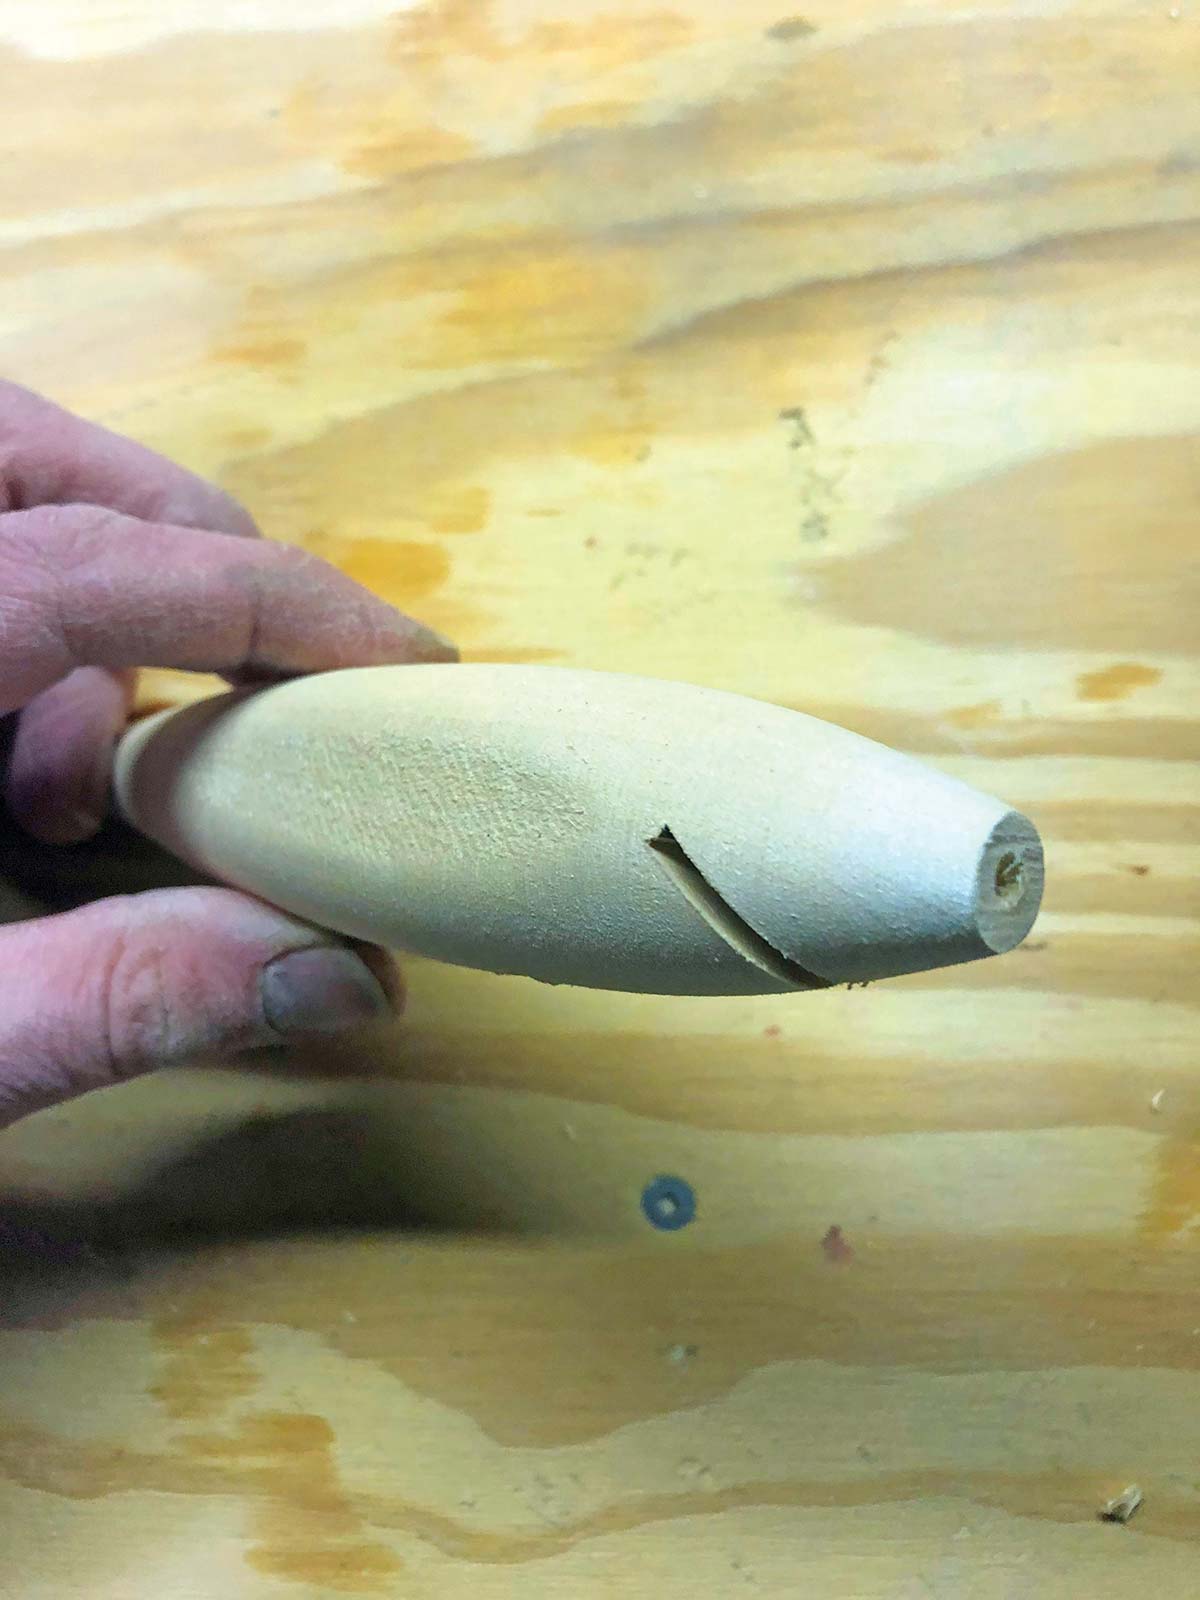
Now it’s time to cut the lip slot. Set your table saw blade to a 45-degree angle and set the height to just about halfway through. The front of the lip slot needs to be 5/8-inch from the nose, use your mitre gauge and fence to make the cut. Then head for the drill press and drill an 11/32-inch diameter hole at 2 inches back from the nose, about 7/8-inch deep. After that, thru-drill the plug with a 3/16-inch diameter bit and cut the squares off both ends.
Now you’re going to have to put in some good, old-fashioned mechanical effort. Get yourself a fresh piece of 100 grit sandpaper and start sanding the shoulders off of the flat spots, all the way around and on both sides—do your best to be consistent with how much you remove from each side. When you’ve taken the shoulder down, look at the plug from the top and look for a shoulder at the start and end of the flat spot and sand those off too. Then look at the horizontal shoulders again and give them another heavy sanding. After a while, you should start to lose the edges altogether and it should start looking nicely rounded and lacking any truly flat sections on the sides. When you’re satisfied with the sleekness of the lines, smooth it all out with some 180 grit and round the nose down too, so it tapers to the thru-wire hole. Throw the plug into some sealer and hang it up to dry.
The Lip
I tried a bunch of different ways to make this lip out of metal but nothing I did was easy enough to describe in print—I tried Colorado blades, cutting sheet metal with snips… I even had a machinist friend make me some, but bending them properly provided a special kind of frustration that I’m not sure I’ve ever experienced before. So I decided to go modern with a clear Lexan lip. There might be a commercially-available lip that’s ‘close enough’ in the Moore’s Lures catalog or something like that, but I figured you could benefit from learning to make your own. Start by making a pattern from some thin cardboard, I used a Dove soap box. Pull a quarter out of your pocket and trace it onto the cardboard. Draw a 1-1/2 inch long bisecting line that begins and the outside edge of the quarter. Now draw a line across the protruding end of the bisecting line, centered on and perpendicular to the bisecting line, this line should be 7/8-inch long. Now connect each leg of that line to the outermost edges of the circle you traced and cut out that shape. Trace the shape onto your Lexan and cut it out—cut a small notch in the top of the lip to allow the wire to pass, (see photo). You might be wondering if Plexiglas could make a suitable lip—the answer is technically yes, but Plexi is far more likely to break during use. Sand the edges of the lip smooth and then use some 100 grit to rough up the top portion of the lip on both sides, this is just to help the epoxy to grab onto it. Mix up some epoxy, slather it onto the lip and slide it into place—take special care to ensure that the lip is centered in the slot and allow it to cure.
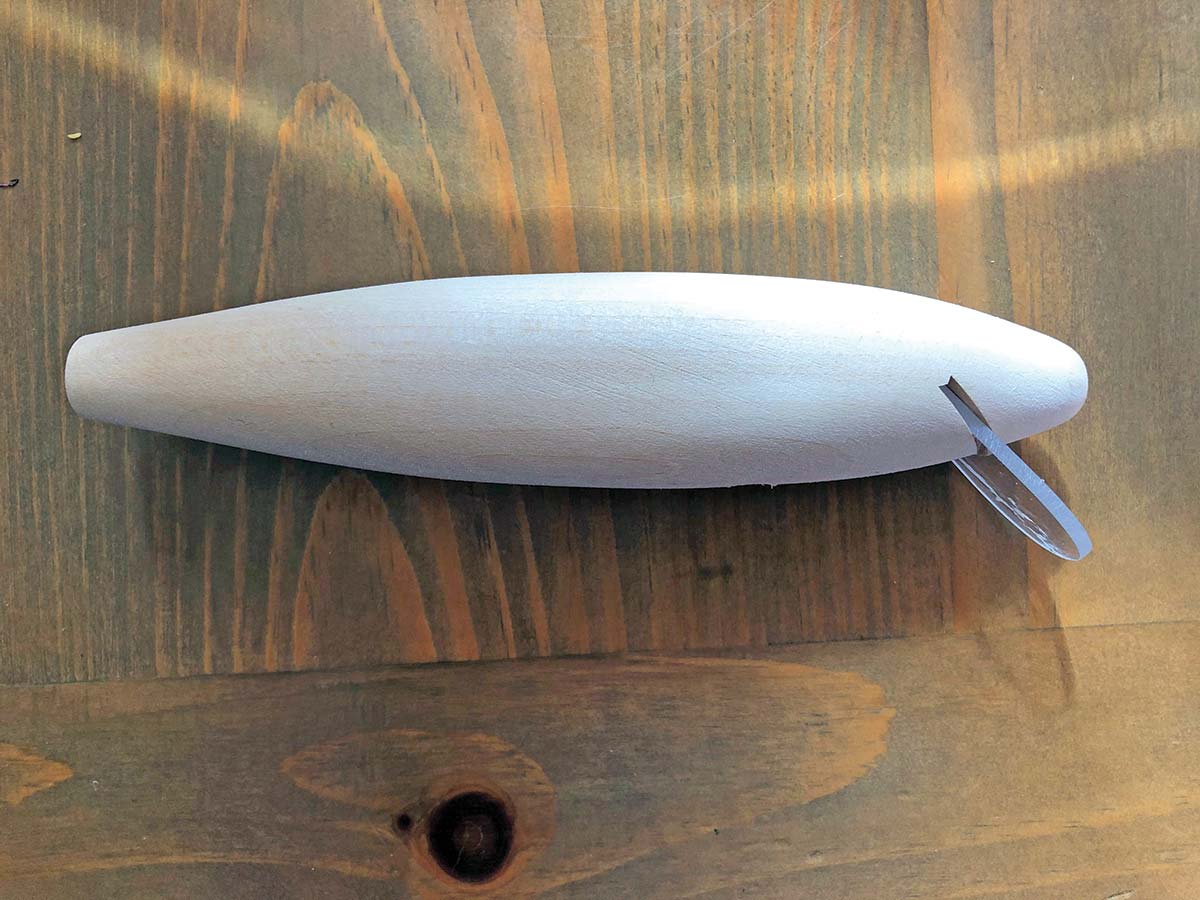
If you’re especially particular, like I am, you may want to fill in the edges of the lip slot, you can do this with Bondo and then sand it smooth when it’s almost fully hardened. Now wrap the lip with masking tape and paint the plug in any color you like and stick on some flat sticker eyes, or you could paint them on if you’re feeling extra ambitious. I like a 3/8-inch diameter eye stuck on just in front of the lip. Now give the plug a coat or two of cleat coat and it’s time for final assembly.
To wire this plug you’ll need some 12-inch thru-wires, size 1 Krok swivels, small tail grommets and some nose grommets as well. Drop a swivel into the belly hole, slide a nose grommet onto the wire and send it through the plug—threading the swivel on the way—add a tail grommet and then wrap a loop with tight coils to finish. Attach a pair of 4/0 VMC treble hooks or some 7/0 inline hooks and you’re ready to fish.
These plugs have a very lively wiggle and swim to max depth of about 3 feet. I was amazed by how well they hold in current. This little modernized Cutlass is a good bet for replicating any medium-sized baitfish with a wide body—mullet, peanut bunker, small mackerel, baby blackfish and many others. It should make a phenomenal search tool in shallow boulder fields, along open beaches or anywhere with a moderate to heavy sweep. Make a few before the bass get here, and I think you’ll see why I called it the Cutlass Supreme.