As much as many Fisherman readers dread putting their boats away for the winter since it marks the official “end of the boating season” and the arrival of the cold and dark winter months, doing a thorough winterization on your ride typically insures a smooth start-up come springtime. While many readers travel the path of giving this decommissioning responsibility to their local marina or mechanic shop, winterizing your boat is a perfect DIY project for those who enjoy the hands-on experience and learning more about the mechanical operations of their fishing machine. This month’s Boat Sense column will focus on some tips and tricks for winterizing your boat’s major systems.
Fuel Tank
 Much has been written about how to store the gasoline in your vessel’s fuel tank for the winter months, with apparent contradictions. Some experts advise to drain the tank to practically nothing, to avoid the breakdown of the fragile E-10 gas over the winter layoff period that averages four to six months for most Northeast boaters. While this move might be great for the fuel part of the equation, it doesn’t do any favors for the internals of your aluminum fuel tank (not applicable to poly tanks). The exposed aluminum on the tank’s interior walls can become a victim to corrosion due to its exposure to air and the extreme temperature variations (+/- 60 degrees or more) that can occur from November to April in Northeast and mid-Atlantic states. Moisture (due to condensation) can build up on the tank’s inner walls and accelerate the corrosion process even more. The water droplets that form can then drop down into whatever fuel is remaining in the tank and cause dreaded “phase separation,” which is a condition where the water pulls the ethanol component in the E-10 gasoline out of the petroleum mix and settles to the bottom of the tank near the fuel line pick-ups. This witch’s brew of water and ethanol is poison for your two-stroke or four-stroke and a primary culprit for outboard engine failures and is typically not covered by your manufacturer’s warranty (read the fine print). There is a movement afoot by the Midwest farming lobby to force E-15 gasoline on us, but it is being fought by the boating lobby in Washington, since most outboards can’t digest this version of petrol.
 I prepped my EdgeWater’s fuel tank using this “minimal fuel” method last season, having some potential concerns for the aforementioned problems, but didn’t have any hiccups when I dropped her in the water for the 2017 season. To minimize the potential phase separation part of the equation, I added 8 ounce of ValvTect E-10 fuel treatment to the approximately 20-gallons of fuel that was remaining in my tank (about 4x the recommended ratio of 1 ounce for every 10gallons), which includes a special chemical formulation that fights against phase separation. The results for this season’s operations were fine, with no fuel-related problems.
In contrast to the “minimal fuel” approach to winterizing your boat’s gas tank described above, the classic winterization method requires that you fill up your tank with fresh fuel up to 95% of its capacity, leaving 5% of breathing space inside for expansion and contraction of the fuel during temperature extremes. Add the appropriate amount of stabilizer and/or a little bit more if you are concerned about phase separation and that’s it…put it to sleep and see ‘ya in the spring. I spoke to ValvTect’s Dave Grochocki about their latest gasoline treatment product ValvTect XP+, which offers extended protection for gasoline systems, helping to prevent ethanol related problems, stabilizing fuel for one year or longer, with enhanced moisture control and corrosion protection. I have used this product on my latest two current MarCeeJays (equipped with two four-strokes and one two-stroke respectively) with excellent results and have experienced zero fuel related problems. Similar gas treatment products are also offered by Starbrite (Star-Tron), CRC Marine (Stor& Go), MDR, Sta-Bil and others.
Fuel Filters
Fuel filters can be broken down into two groups. The primary fuel filter is usually a large canister and mount assembly located between the engine and the tank, either in the bilge area, in the outboard well, or somewhere else onboard that’s out from underfoot. The majority of these use a replaceable sealed 10-micron spin on canister as the main filtration agent as fuel flows from the tank to the engine(s). The second group of fuel filters are located on the outboard under the cowling and depending on your make and model, you might have an additional 1-to-3 filters installed in the fuel lines and vapor separators under the hood.
These secondary and tertiary filters might be in plain sight with easy access, or hidden behind mechanical obstructions or in the engine’s internals, requiring special tools and knowledge for a successful swap-out. Be sure to talk to your dealer and refer to your outboard’s operations manual to understand the whereabouts of all of these additional onboard fuel filters, the degree of difficulty in replacing them and the frequency of when they need to be inspected and changed. Whereas a generic primary 10-micron canister fuel filter will cost under $10 at most marine outlets, a manufacturer-specific onboard fuel filter can cost, $30, $40 or more, so be advised.
I like to remove my old fuel filter at season’s end and pour the contents into a small bucket to ascertain if there was an inordinate amount of dirt, tank scuz or water in the can. After disposing of the old fuel properly, I will then spin on a new filter element to close the fuel circuit. However, before commissioning in the springtime, I will take the canister off again and fill it up to the brim with fresh 93-octane gasoline to insure a quick start using the high-test fuel. Some fuel filters, like many in the Racor lineup, feature clear polycarbonate bowls with locking spigots on the bottom that allow the operator to drain out any water that visually appears in the bowl, preventing larger problems before they happen. When changing these two-part filters, the replaceable part is the center metal canister section, to which the lower clear bowl spins on and off to close the fuel loop.
I have upgraded the standard cast aluminum fuel filter mounts on my boats over to stainless steel. The painted aluminum frames typically last about 2-to-3 years before corrosion sets in due to the saltwater environment. I have had excellent luck with Sierra’s stainless steel replacement mount and have used that on my last three MarCeeJays with 100% results.
Engine Flushing
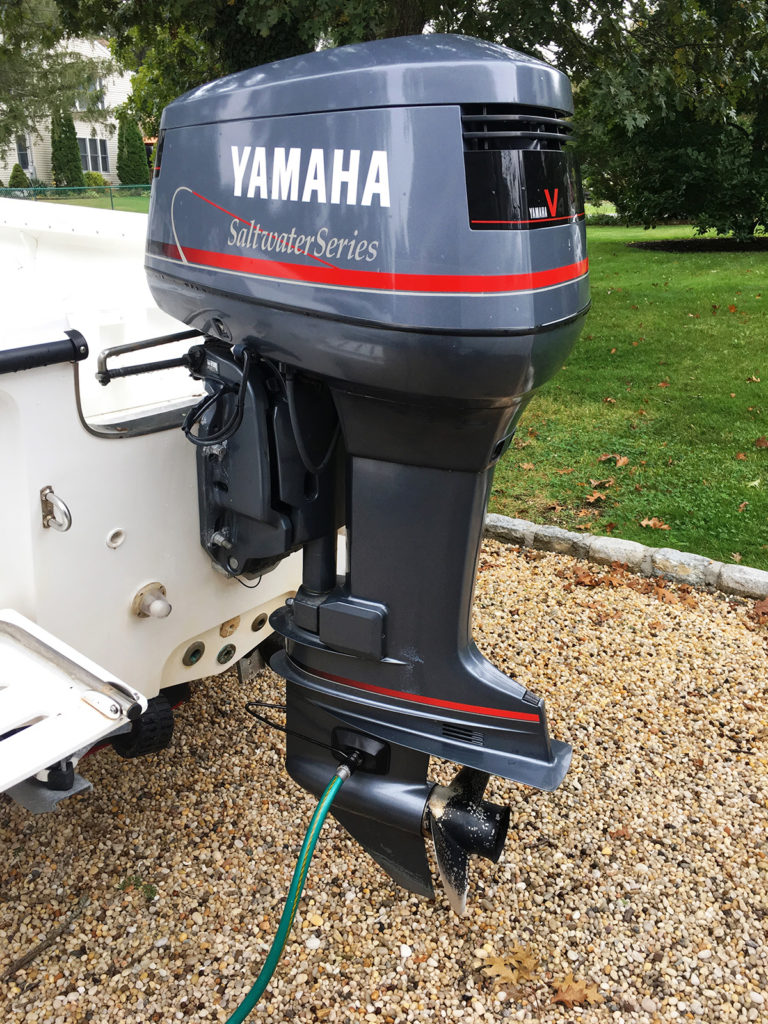 Most mid-sized and high horsepower outboards manufactured after 1999 feature a convenient freshwater flushing port that is either located on the side of the engine’s mid-section, or just under the motor pan. While this is a convenient fitting for flushing the motor either at dockside or when your boat is on a trailer, many manufacturers recommend that this flushing port not be used when the engine is running. Following this advice, a pair of single-feed or twin-feed ear muffs will do the job and will inject cooling water at the bottom of the motor in the skeg intakes, allowing it to flow over the impeller and up into the powerhead. When running your outboard when it’s high and dry, be sure to look for the telltale stream of water squirting out from under the engine pan to confirm that it’s getting enough flow. Five minutes of either flushing the engine (off) with freshwater via the port, or running it at idle speed with the muffs attached should do the job. Be sure to let all of the water drain out of the engine in the down/lowered position before tilting it up, to insure that you won’t have any freezing problems in the cooling system path.
Engine Fogging
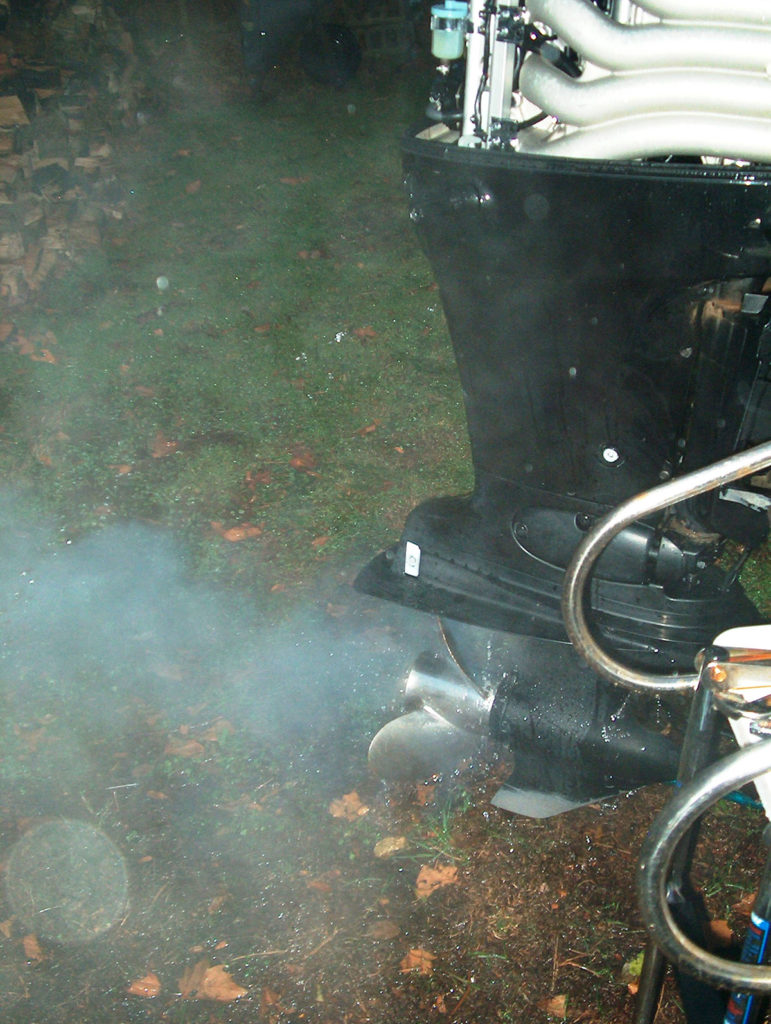 All internal combustion engines can benefit from fogging out the cylinders prior to the winter layover. Two-stroke, four-stroke, inboard, outboard, whatever…the fogging process will protect the cylinders’ internals like pistons, piston rings, the combustion chamber walls, valves, etc. from the ravages of corrosion, sticking and startup friction. One method of “fogging” your engine is to spray a can of fogging oil like CRC’s Engine Stor into your engine’s fuel intake system while it is operating at idle speed, so that it works its way down into the cylinders and causes a blue-gray cloud of smoke to exit via the exhaust. This upper cylinder lubricant will leave a slick surface on the aforementioned internal cylinder components that will prevent corrosion, sticking or binding up over the cold winter months.
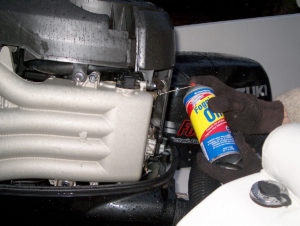 Yet another way to accomplish the same engine fogging task is to winterize your fuel system and your engine simultaneously using a separate dedicated 6-gallon fuel tank, which is the method that I prefer. I fill up a plastic outboard fuel tank with 2-gallons of 93-octane petrol, add double doses of both Marvel Mystery Oil and fuel stabilizer to the mix and then remove the engine’s fuel line from the primary fuel filter and feed it directly from the portable tank. Running the engine at idle and slow-trolling speeds (700-1500 rpm) will eventually generate a similar blue cloud of foggy smoke as the oil is distributed in the upper cylinders and burns off during the combustion process. Some DIY boater’s like to go the extra yard and remove the spark plugs to add an extra squirt of the engine fogging or Marvel Mystery Oil to each cylinder before replacing the plugs. Be sure to follow the do’s and don’ts for engine flushing when running your outboard out of the water.
Engine Oil Changes
Now that your engine is warmed-up from the fogging process, if it’s a four-stroke outboard (or inboard), it’s time to change your engine oil and filter. After setting up the appropriate oil pan to catch the drippings and some absorbent paper towels to clean up any mess, drain the oil from the engine and once that is done, then remove and replace the oil filter. After reinstalling the oil drain plug, refill the crankcase with the appropriate quantity of fresh 10W-30 or 25W-40 marine grade four-stroke oil (check your engine manual for more specifics), put all the parts back in place that were removed to access the filter and drain plug and you are done. Be sure to dispose of the used oil properly.
Lower Unit Oil Changes
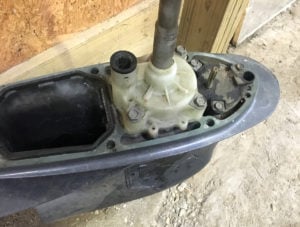
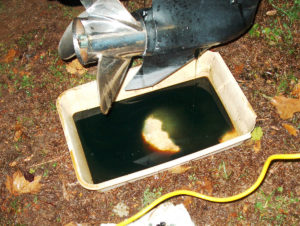 Whether you own a two-stroke outboard, four-stroke outboard, or inboard-outboard stern drive, good practice requires that you change the lower unit oil as part of the complete winterization process. Once again, use the same oil pan that was employed during the engine oil change process to catch the used lower unit oil, which will begin to flow freely once you tilt the engine drive into the down position and remove the upper and lower drain plugs. The quantity of gear oil in the skeg’s internals will typically range from 10to32 ounces, depending on the make and model of your outboard or outdrive.
Once the old oil is drained out, check the color, which is a helpful indicator of your lower unit’s condition. A consistent brown or charcoal color is good and signifies normal wear. If you have a milky or white color in your oil, that’s typically a sign of water getting in from somewhere and it might be time to consult your local marine mechanic to pressure test your lower unit for leaky seals. Also check the magnetic tip on the lower engine oil drain plug for excessive metal parts. Too much might be a sign of advanced gear wear.
To refill the gearcase, plug in the appropriate connector into the skeg’s lower threaded opening, attached to a clear hose and a 1-quart oil bottle equipped with a hand pump. Push down on the pump to inject oil into the lower unit. When it starts to flow out of the upper drain hole you are done, so reinsert the drain plug, remove the pump apparatus and then reinsert the lower magnetic drain plug. Be sure to dispose of the old lower unit oil properly.
Battery Maintenance
If you can remove your marine batteries without too much difficulty, it’s always a good idea to clean and degrease the terminals (I use CRC’s Battery Terminal Cleaner spray), give them a full slow charge, refill any battery cells with distilled water if necessary and put them in a cool dry place sitting atop wood blocks (like short sections of 2x4s) to minimize any potential for discharge. If it’s a PITA to remove them from the boat, then clean and remove the terminals, give them a slow charge, and then cover the end caps to protect against potential shorts from any cross connections.
Cleaning & Waxing
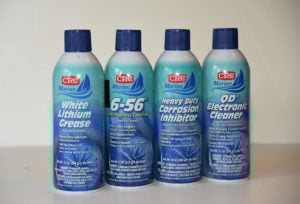
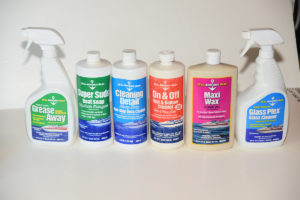
 I’m not a huge fan of cleaning and waxing the boat for winter storage, only to have to clean and wax the boat again in the spring. It’s advisable to give it a quick wash and clean off some stubborn stains and spots with something like 409, Purple Power, etc. (Marykate makes a great lineup of cleaning products). Detailing agents that clean and shine at the same time are always energy-savers. I also like to power-wash the boat’s bottom to remove any algae, marine growth or loose bottom paint flakes, but be advised, the rules for doing this have changed depending on where you call home port, due to environmental concerns. Before I put my ride away for the winter, I like to spray the backside of my center console’s electronics panel and the onboard engine connections with a de-moisturizing agent like WD-40, or CRC’s 6-56. CRC’s Heavy Duty Corrosion Inhibitor is a great upgrade product that leaves a thin invisible film of long term protection over your electrical connections to minimize and saltwater corrosion.
 Depending on how much free time you have on your hands, your tool kit and skill set, there’s a lot more that you can do to amuse yourself over the winter and take care of your pride and joy. These include changing out spark plugs, swapping out the impeller and water pump housing in your lower unit, installing new electrical panels and much more, all of which we will cover in future Boat Sense Articles. If you have any questions about winterizing your boat, give me a shout at www.marceejay.com.