Photos by Steven Levy
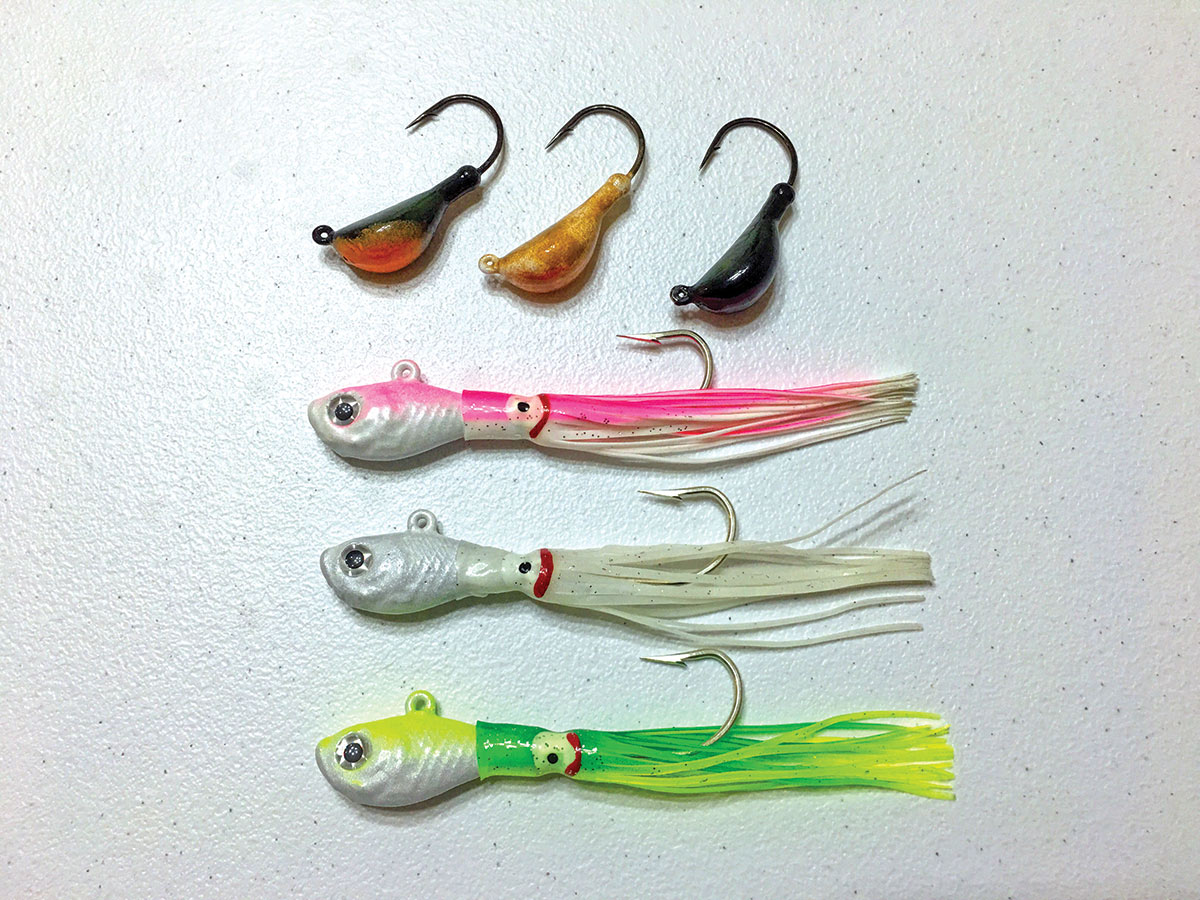
Here’s an economical way to build a good inventory of custom finished jig heads.
It is no secret that trophy fluke, blackfish and striped bass here in the Northeast choose the stickiest spots to call home. Fishing these reefs, wrecks and rock piles leads to hang-ups and lots of lost tackle. Powder coating your own bucktails and blackfish jigs prepares you to fish these haunts and also allows you to color match the natural forage. Many local outlets sell bare jigs so you can avoid melting lead if you choose. These can be customized and painted fairly easily.
Many of the jigs on the market today are powder painted, some with multiple colors, to give that durable and shiny finish. This process is simple and can be achieved by heating the jig with a heat gun and then quickly swishing it around in powder paint. Following these simple steps allows you to start painting your own jigs in patterns that match the hatch.
 1
1
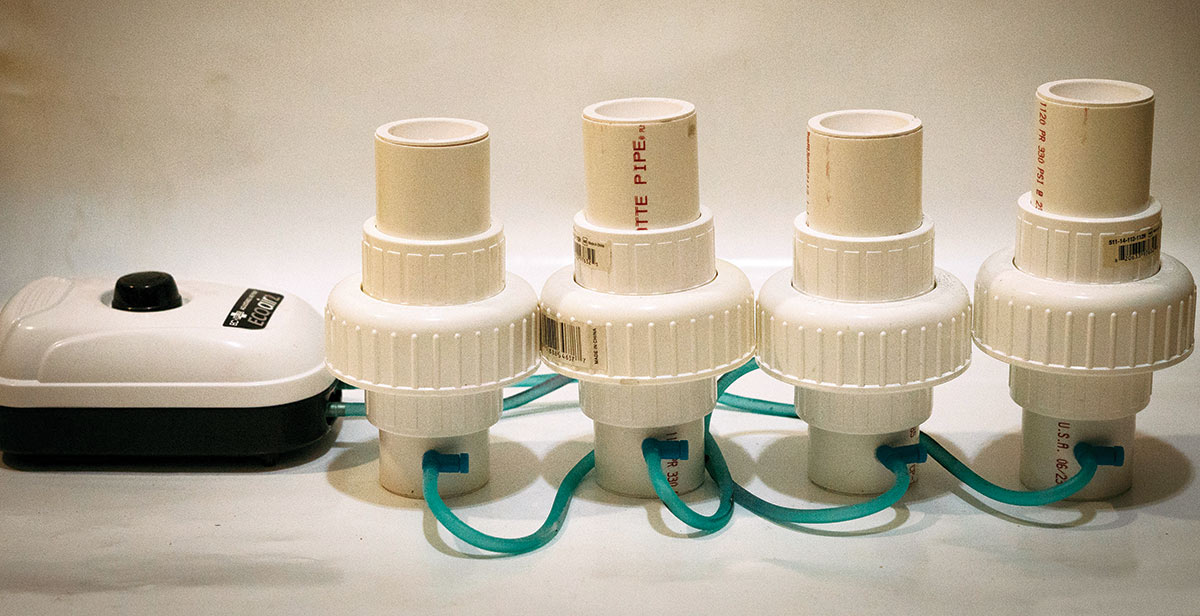
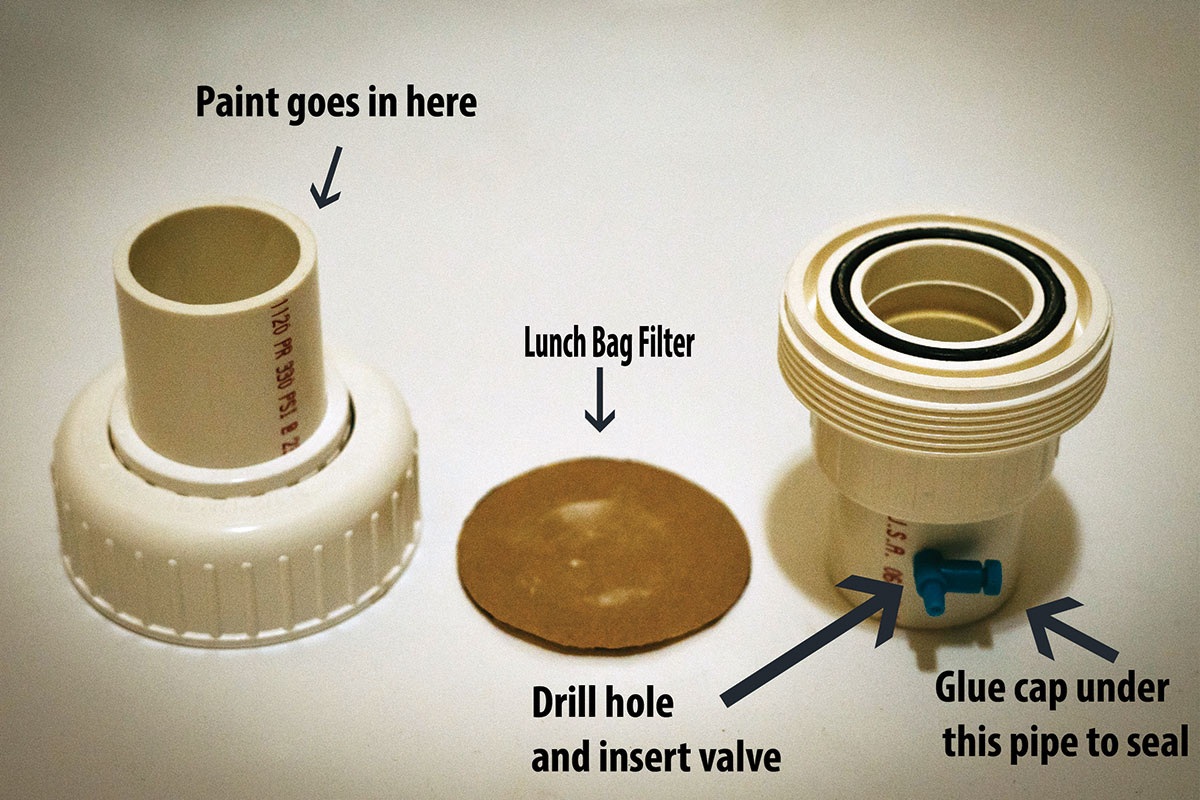
Start by making a fluid bed, which will evenly and lightly apply the powder paint to the jig. A fluid bed is a tube that the powder paint sits in, which is circulated by air and separated by a filter. The body of the fluid bed can be made out of PVC pipe, a union and a test cap. All of these materials can be bought at a hardware store or plumbing supply. The paint sits above the filter (brown lunch bag) and the air comes from below it. A fish tank pump can be piped and tapped in below the filter, into the bottom pipe, which is sealed off by a test cap. This is the air supply. The air is controlled by a small plastic valve and allows the paint to flow evenly. The pump, valves and lines can all be purchased at a pet store or online. Powder painting can be done without the fluid bed, just be sure to stir the paint often to keep it light and airy.
 2
2
 2
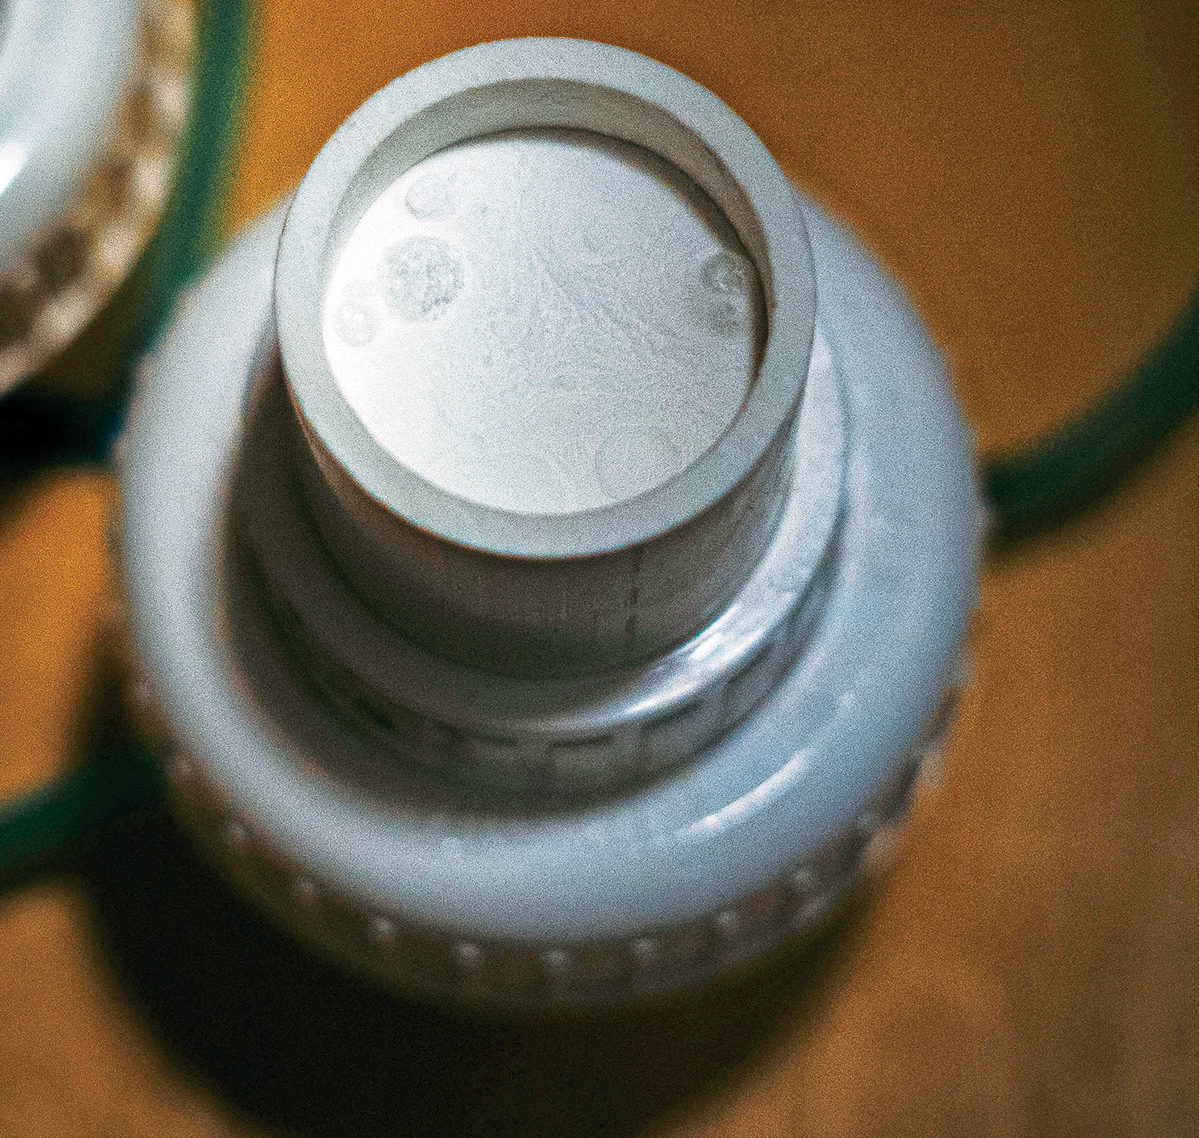
2Different color paints have different consistencies, and the flow will vary in the fluid bed. This may require some tweaking to the filters and to the amount of airflow for each color. You have it working correctly when you achieve the boiling effect. This is when the paint is flowing very lightly and evenly in the fluid bed and looks like boiling water. Some options for filters include brown paper lunch bags, printer paper, coffee filters, and Tyvek paper.
 3
3
 3
3Now that the paint is flowing in your fluid bed or you have stirred the paint in its container, it is time to heat your jig. Any electric heat gun will work. I use one I bought from Harbor Freight. I prefer propping it up in a vice or laying it on its side in a comfortable position to do multiple jigs. Place the jig a few inches away from the heat gun and rotate it slowly so that it heats evenly. The larger 3- to 4-ounce jigs will take 10 to 15 seconds longer to get to the right temperature.
 4
4
 4
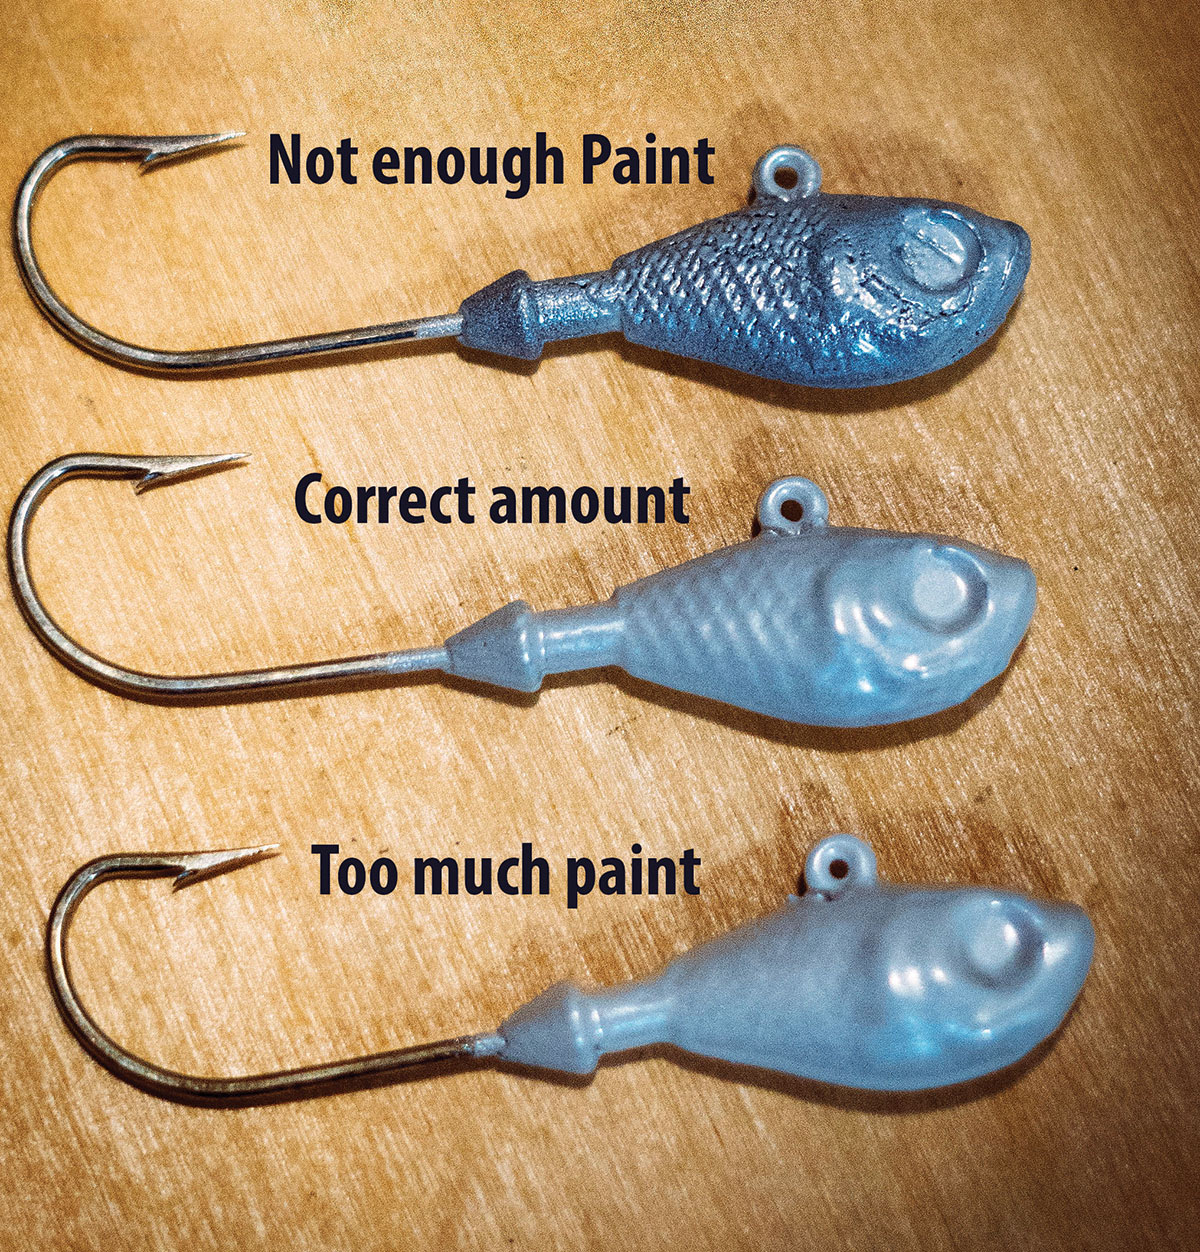
4After 10 to 15 seconds in front of the heat gun, quickly swish them around in the powder paint and knock off any excess paint. If you heated the jig correctly you will see an even coat of paint and a shiny finish. Finish the jig off by placing it in front of the heat gun again for a few seconds until all the paint looks shiny and uniform.
 5
5
 5
5To add multiple colors, just reheat the jig and repeat the process. This works well for two-toned jigs (orange belly blackfish jigs) which can just be re-dipped into another color after they are heated up.
 6
6
 6
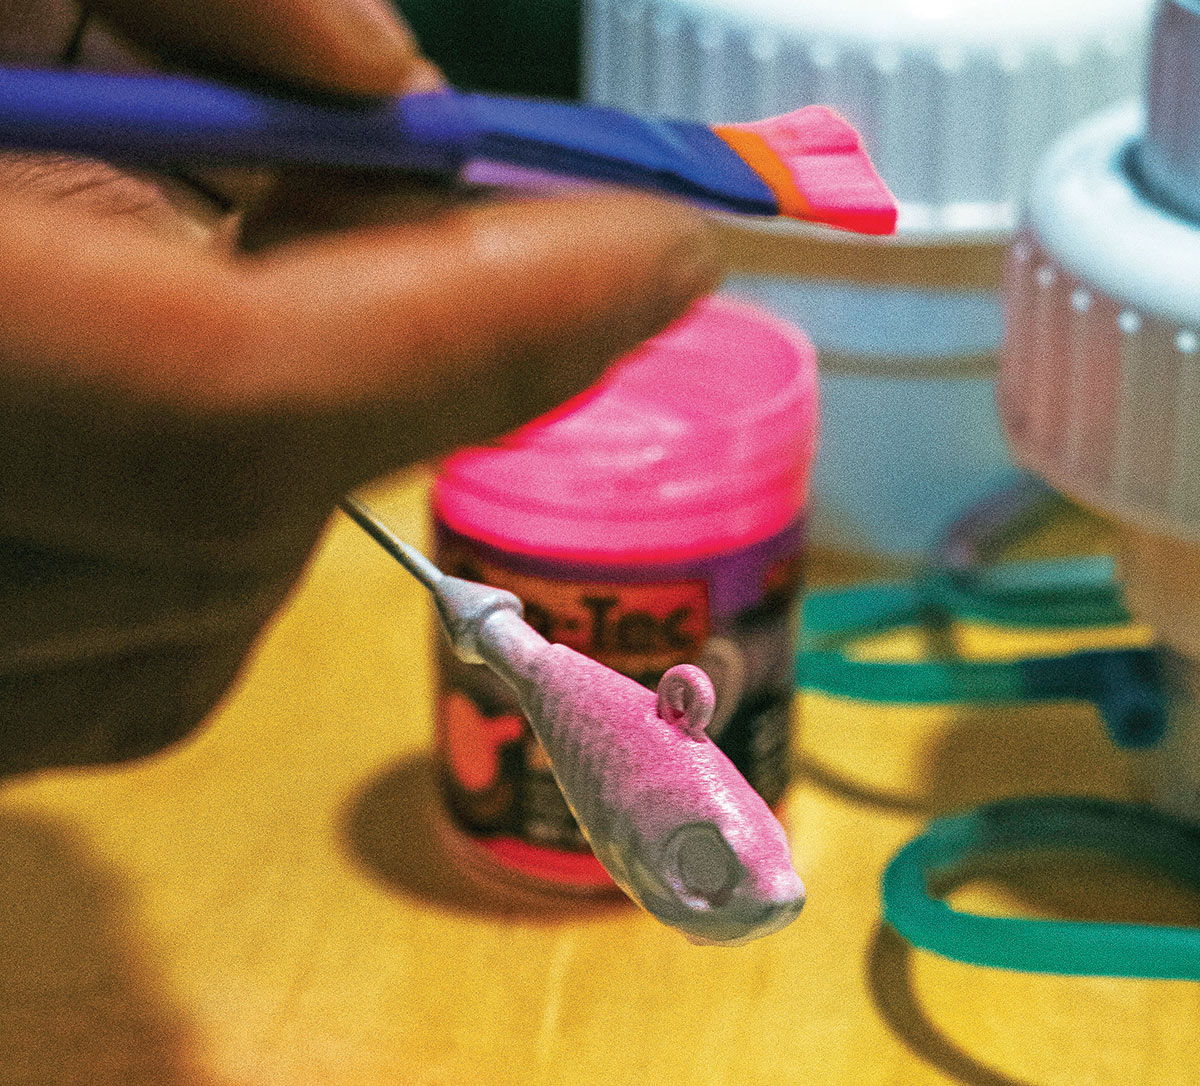
6Another way to add other colors is to load up a paintbrush with some powder paint and tap it lightly onto the jig. Experiment with different brushes and varying heights between the paintbrush and jig to change the effect of the second color. Try different colors and amounts of paint on the brush to achieve a sprinkled effect.
 7
7
 7
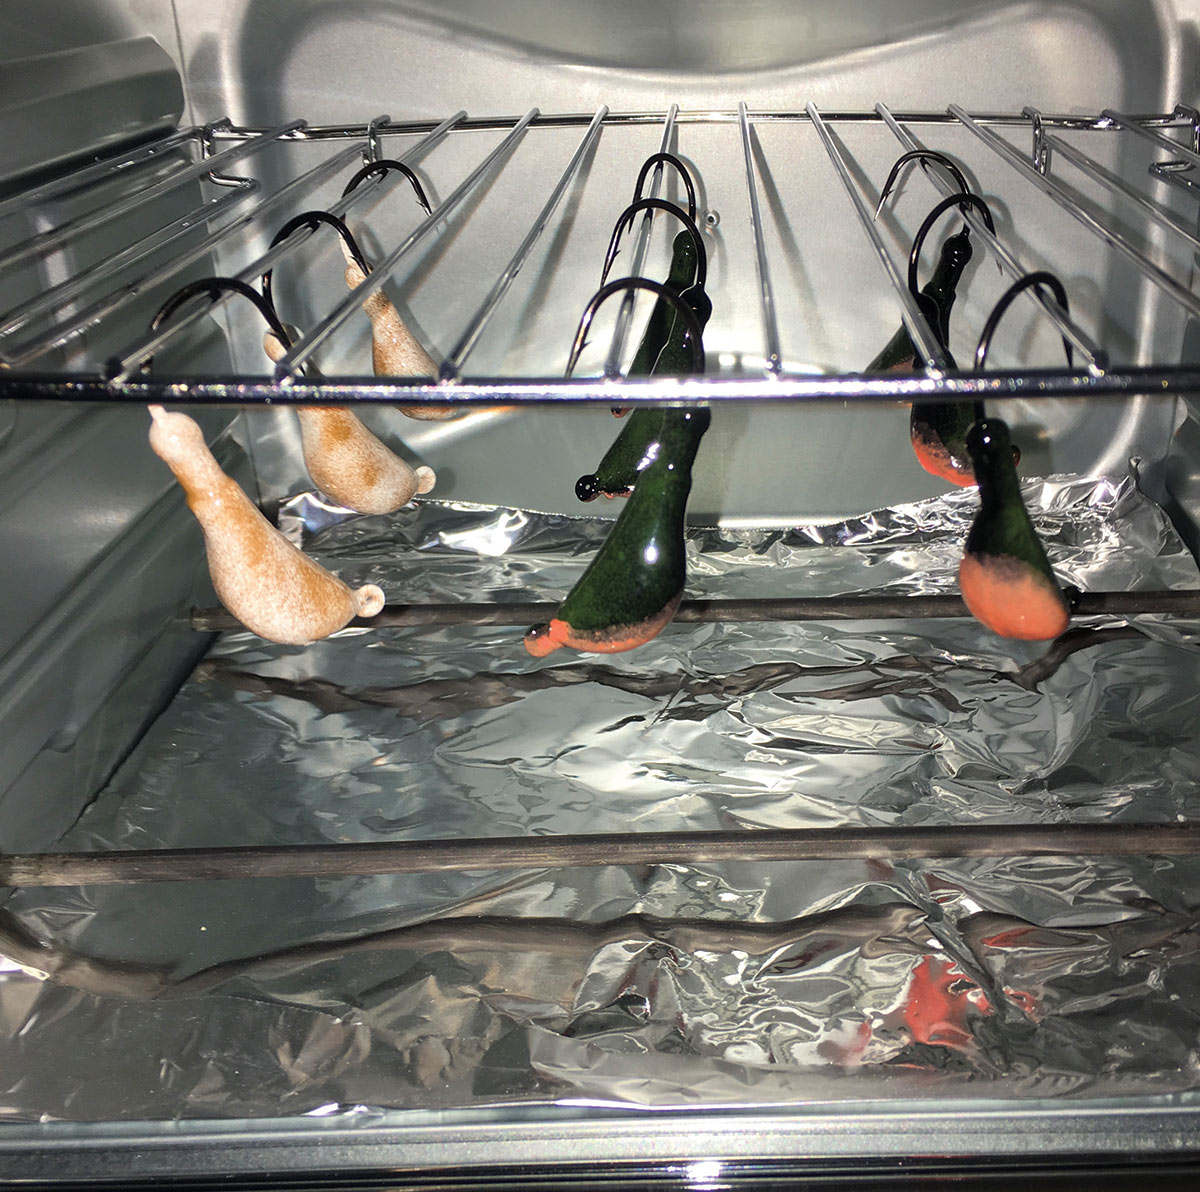
7After you are satisfied with the colors of your new jigs, it is time to cure them. This will give them a hard durable finish. I recommended baking them in an old toaster oven that is dedicated to the jigs (Do not cook food in this after baking jigs.). Start out at 350 degrees for 10 to 15 minutes. If you notice the paint starts to drip while in the oven, you may be putting on too much paint or your oven is getting too hot. Tinker with these settings until you are comfortable with the results.
 8
8
 8
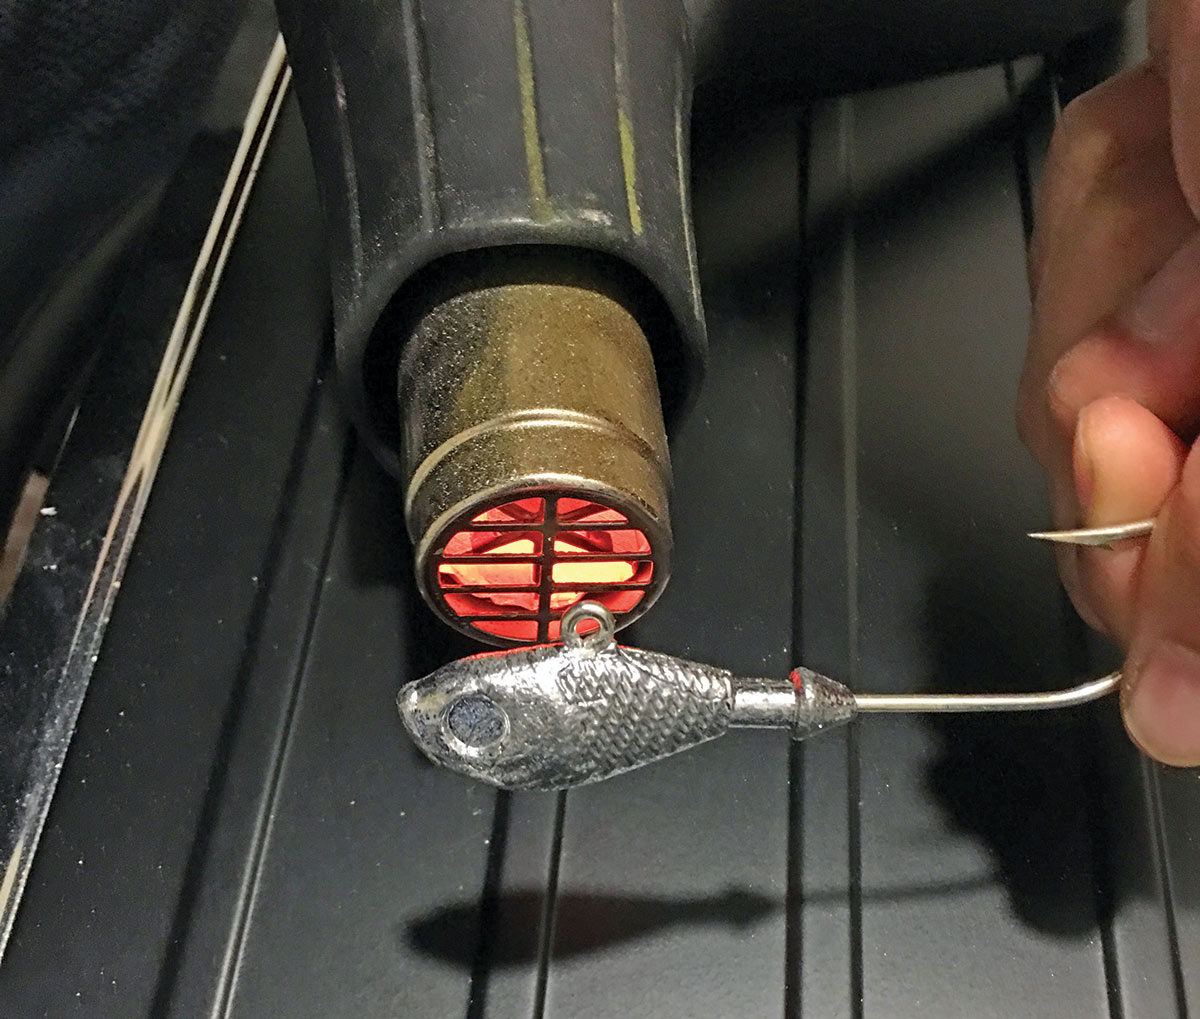
8If you notice the eye of the hook gets covered over with the paint, there is a simple solution. Heat up a piece of wire or old hook with your heat gun and simply press it through. This will clean it up nicely and have you ready to fish your new, homemade custom jigs. I think you will discover that catching fish on something you created is far more rewarding than catching them on someone else’s creation.