Modernizing a unique and ingenious wooden bunker plug.
If you’re a surfcaster then Jack Frech should be your hero. The legacy that Jack left on these pages is something really special, and I don’t think people fully realize that. This guy wasn’t making stuff that had already been made—he was using his unique skill set to engineer plugs that fit his needs and then he selflessly gave them to anyone that wanted to try making them. The fact that his designs are still being made more than 40 years later says a lot about their quality.
If you don’t know the back story that goes with the Banana Plug, there were a couple tin boat guys that always seemed to show up within speaking distance of the rocks Jack used to like to fish. Basically Jack would be catching teens, and these guys would motor over and pull 30-pounders on live bunker. He got tired of it and set his mind to designing a suitable replacement. After several failed attempts with plugs that looked like whole fish, a piece of paper fell across a drawing of a bunker and he realized he could carve just the bottom half and have a much easier time getting it to swim.
Something that needs to be said is that I am not trying to pawn my version off as a better one; it’s just another way to arrive at the same place, using the plug building supplies we have available today. The changes I made are strategic; a thru-wired plug is tougher, an epoxy seal is more reliable and keeping more weight below the center line accentuates the action. Hopefully you all will be satisfied with the final product.

The Build
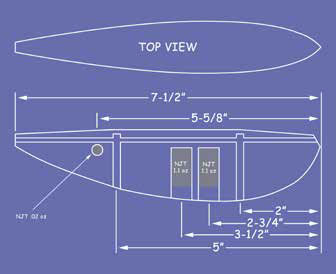
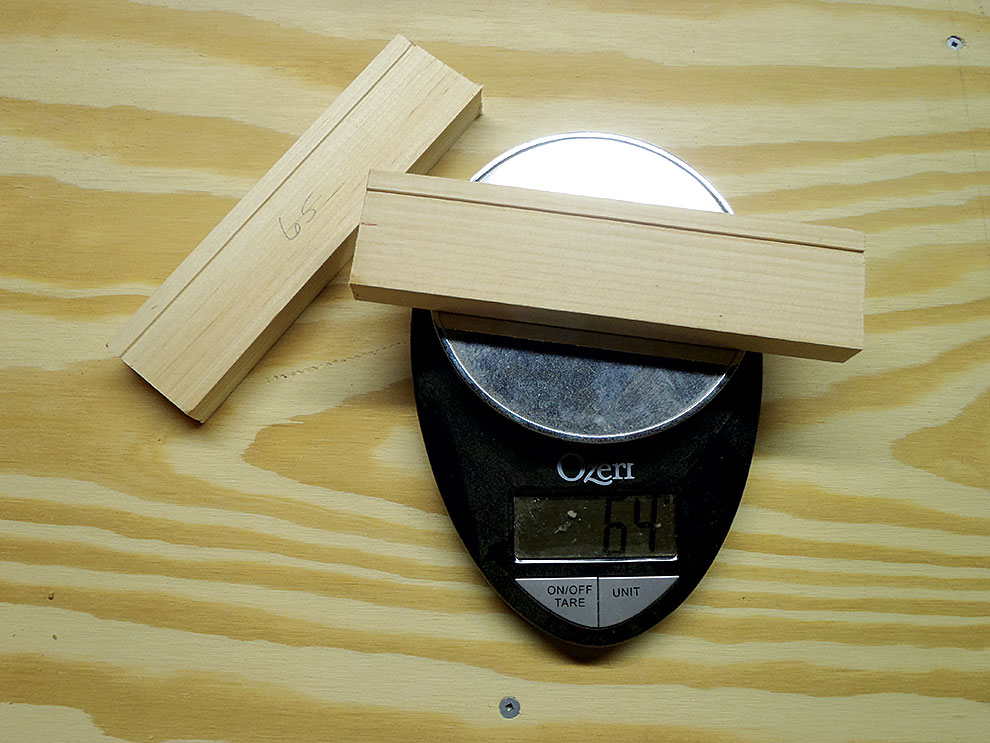
Everything about this build relies on having a static center line to reference throughout the build, and this is no easy task; my solution is to use two pieces of wood. I suggest using 1x4s made from clear white pine. I also recommend making three or four at a time; your bananas will come out better if both sides weigh about the same, so after cutting out six or eight pieces, weigh them all in grams and pair them up based on their weight—then number the pairs. (Step 1) The sizes of each piece should be 7-1/2 inches by 2 inches.
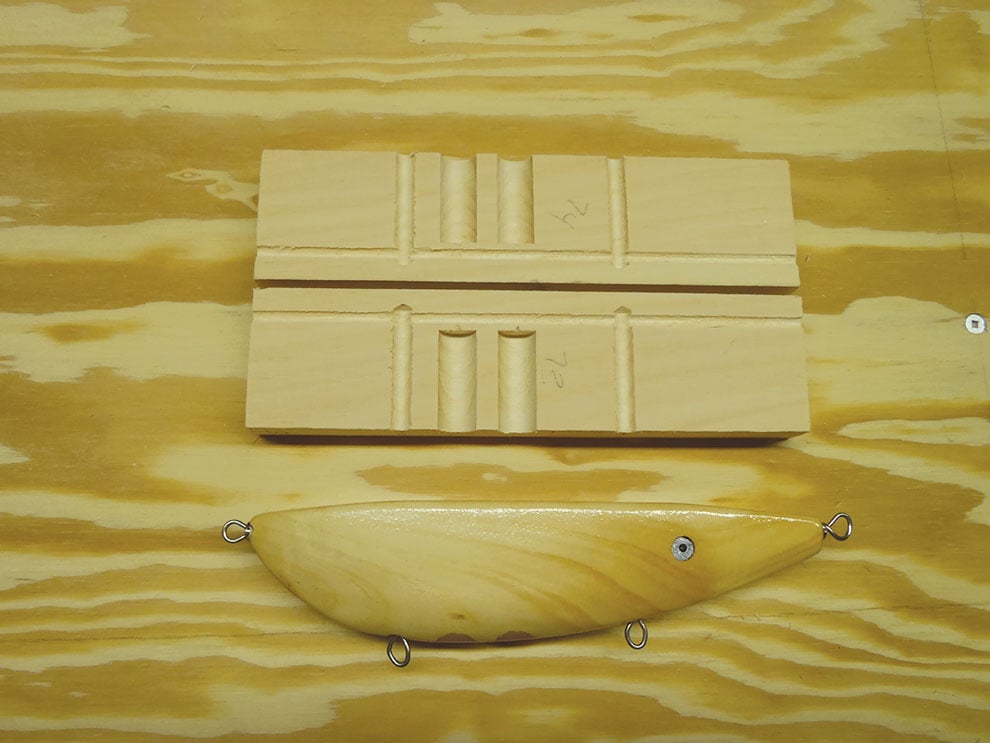
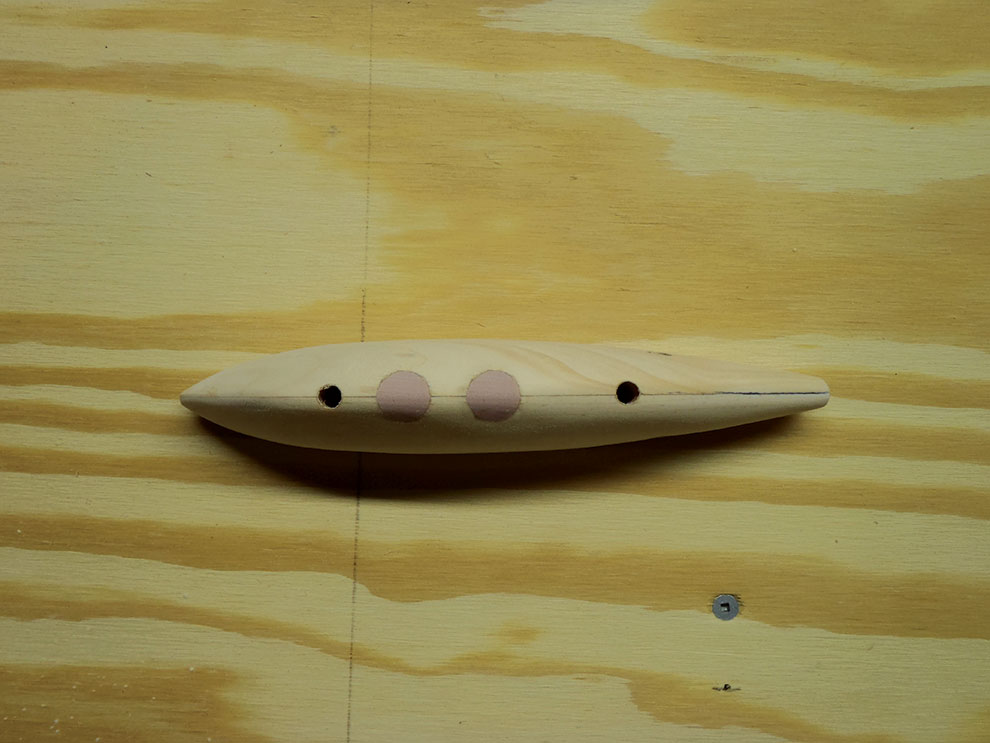
Once you have your pairs, you’ll need to cut a shallow groove in each side. This groove should be about 3/8-inch down from what will be the top of your plug and should be cut about 1/16-inch deep—this groove will guide your thru wire hole. Now clamp your pairs together and be sure to match the grooves. Make marks on the belly at 2, 2-3/4, 3-1/2 and 5 inches back from the nose end. Using a 1/4-inch bit, drill holes on the 2- and 5-inch marks, using the seam between the two halves as your center line, drill these holes 1-3/4 inches deep. Switch to a 1/2-inch forstner bit and drill a centered hole on the 2-3/4 and 3-1/2 marks at a depth of 1-3/8 inches. Finally, thru-drill the plug body, following the groove (Step 2.)
Super Seal
When you have all of your blanks drilled, unclamp them and clean any sawdust out of the grooves. Mix up a small batch of epoxy that has at least 30-minutes of open time and using a cheap chip brush, brush the epoxy into all of the grooves generously—this will seal the holes against water intrusion (Step 3.) Now you’ll want to drop a 1-ounce NJTackle tail weight into the two larger grooves and dab some epoxy on top of them. Then generously brush epoxy onto the entire surface of one side of each matched pair and clamp them back together.

After a day or two for curing, run a long 1/8-inch bit through the thru-wire hole to make sure it’s not clogged with epoxy. Now to cover the weights; mix a small amount of Bondo and shovel it into a small freezer bag, cut the tip off one corner and pipe the filler into the hole like you’re frosting a cake. Press it in using a putty knife and then allow it to cure for 15 to 30 minutes—give the Bondo a rough sand on a belt sander so that the blank will lay flat. Finally, measure back 5-5/8 from the nose and a half inch down from the top and drill a 5/16-inch hole straight through—this hole will hold the counterweight.
Shape Up
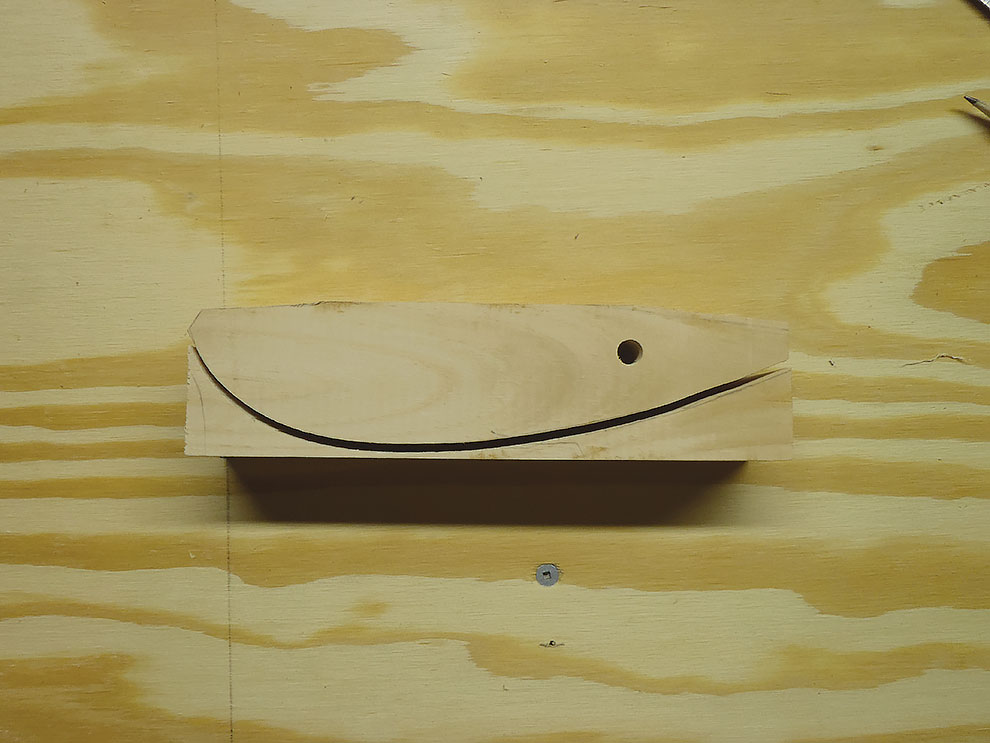
Now, produce a pattern based on the diagrams given and trace them onto the blank—make sure the top profile is centered and the side profile is butted to the top edge. Using a band saw cut the side profile first—it’s important that the part you cut away from the bottom comes off in one piece because it will be your cradle when cutting the top profile (Step 4.) Drop the cut into the cradle and cut the top profile. Sand all cut edges.
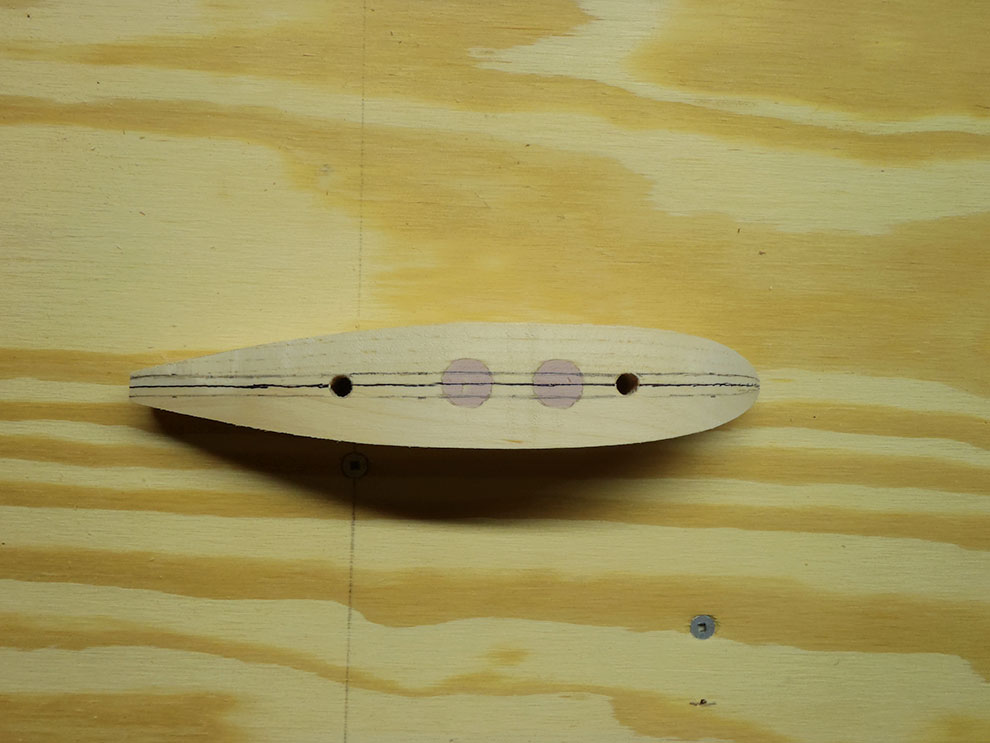
Next, measure back 2 inches from the nose and make a mark 1/2-inch down from the top. Then make marks 1/8-inch down from the points at the nose and tail, connect these three marks using a flexible ruler and a pencil—repeat on the other side. Then take a Sharpie Marker and trace the center line along the belly of the plug (Steps 5 & 6.) These guidelines should not be removed by the shaping of the body—if you keep them intact your shape should be correct.

You can shape the body using several methods, you could use a spokeshave or a draw knife, and you could even use a sharp pocket knife (Steps 7 & 7b.) I use a belt sander and some sandpaper. I have found that the best way to get the shape right is to use the belt sander to sand off enough wood to connect an imaginary convex line between the pencil line and 1/8-inch away from the Sharpie line. It takes some time and watch your fingers! Don’t try to be too fine with the rough shaping, get it close and then start sanding by hand—the hand sanding will reveal any areas that need more attention with the belt. The result should look something like the hull of a boat. Sand the body down to 150-grit and then give the whole thing a coat of epoxy; this will lock moisture out. At this time, you should also epoxy the counterweight in place, use an NJTackle .20-ounce tail weight, you may need to trim it down a touch with a hacksaw—cover with Bondo when the epoxy is hard.

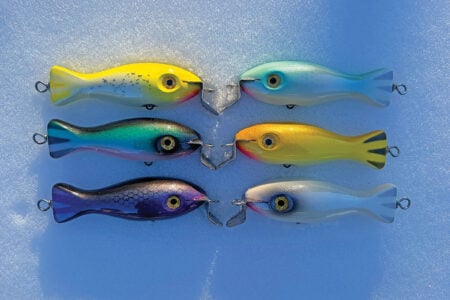
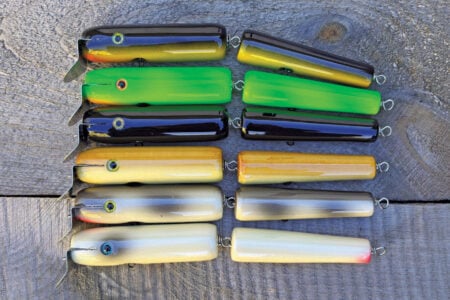
Sand the whole deal and prime and paint. Frech’s versions did not have eyes; some other versions I’ve seen have those vintage yellow sticker eyes (Saltybugger.com has those.). If you’re going to add eyes, I recommend adding them before you clearcoat.
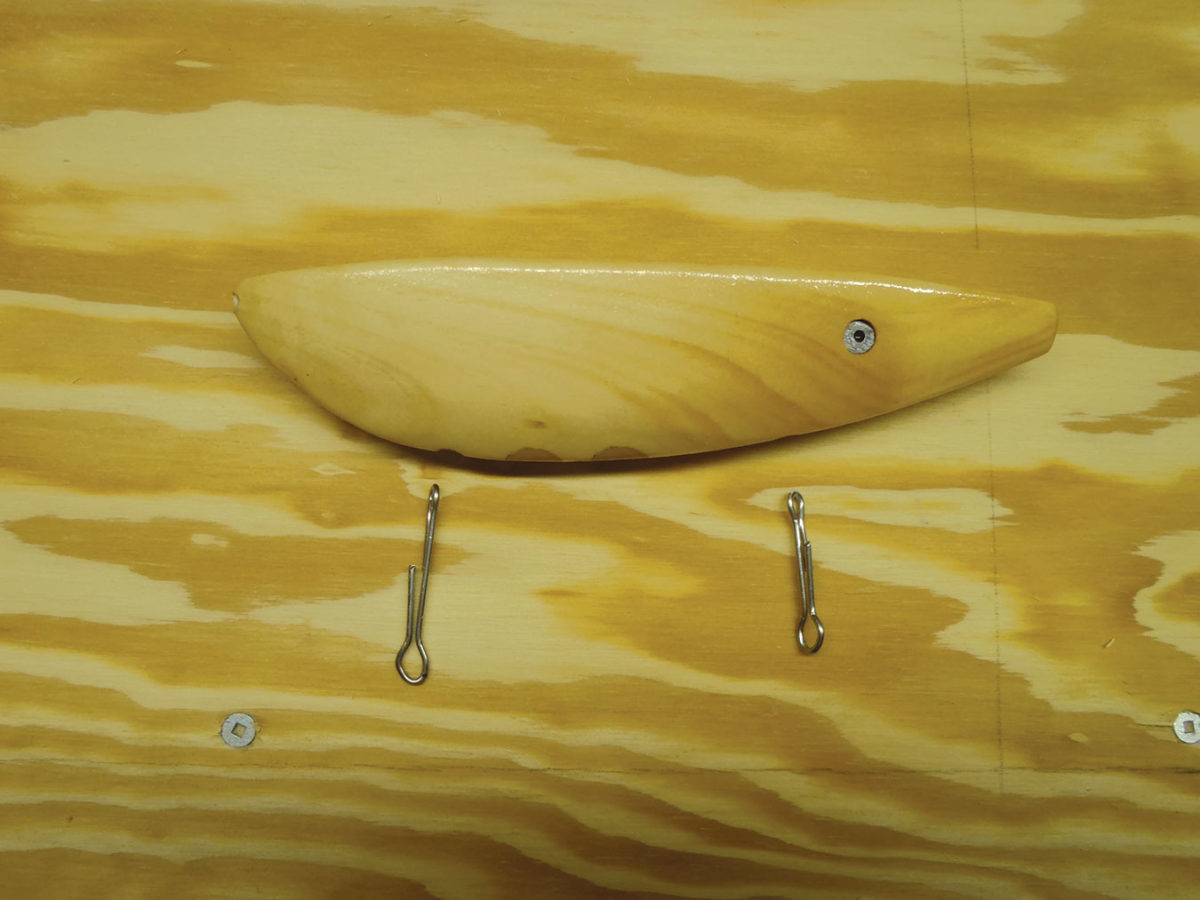
Swivels are too short to use as hook hangers so you’ll need to make some out of stainless wire (Step 8.) For the end that will be inside the plug, wrap the loop around a 1/8-inch drill bit and make it tight. Slide them into place and make a mark with a Sharpie about 3/8-inch outside the body of the plug, remove the hanger and bend a loop around that mark using a 3/16-inch drill bit. Then wire the plug as you would any other and add a pair of 4/0 VMC trebles and a sparse hackle flag on the tail.
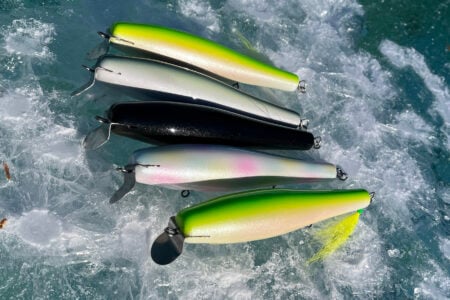
The Banana can be fished in many ways. It’s kind of a cross between a spook, a glidebait and, in some ways, a darter. With short pops of the rod tip it will dip and walk. On a steady retrieve, you can get it to veer and swim below the surface.
If you rip it you can get a tight, vibrating swim. It’s a versatile plug that was designed years ahead of its time. I think you need to make one.
|
When your Banana has been shaped and sealed, I highly recommend conducting a float test. You’ll need to wire the body and add hooks. Float the plug in a bucket of water; it should rest in a level position with the flat part of the back just skimming the surface. If it sinks, drill some lead out of the second belly weight until you get the right float. If it floats too high, you’ll need to add more lead. |
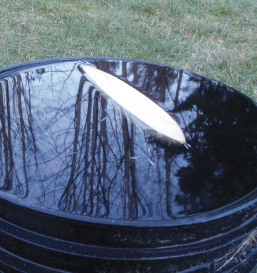 THE FLOAT TEST