It has been said that the Gramercy Surf Anglers lead the charge on surfcasting ingenuity. One might argue that they were the “Campo Crew” of the 40s and 50s. And if they were the crew then Charlie Russo might have been the man. He had his hands in several lure companies between 1945 and 1952 and had quite an eye for airbrush work. Snook Bait Co. was officially owned and operated by Joe Evola, but interviews conducted by Frank Pintauro uncovered the fact that Russo was a silent partner in this venture and it’s probably a safe bet that he was a major player in the look and design of the plugs.
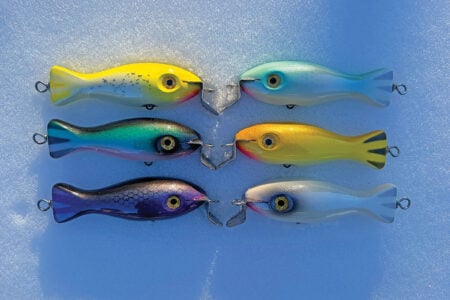
In the Pintauro story, written for the Saltwater Lure Collector’s Club (www.swlcc.com), Frank refers to the Snook Bait Co Weasel as, “the Cadillac of saltwater lures…” They are some of the most eye-catching and unusual baits designed for the surf. And the large version is extremely rare; there may be as few as eight known to exist today!
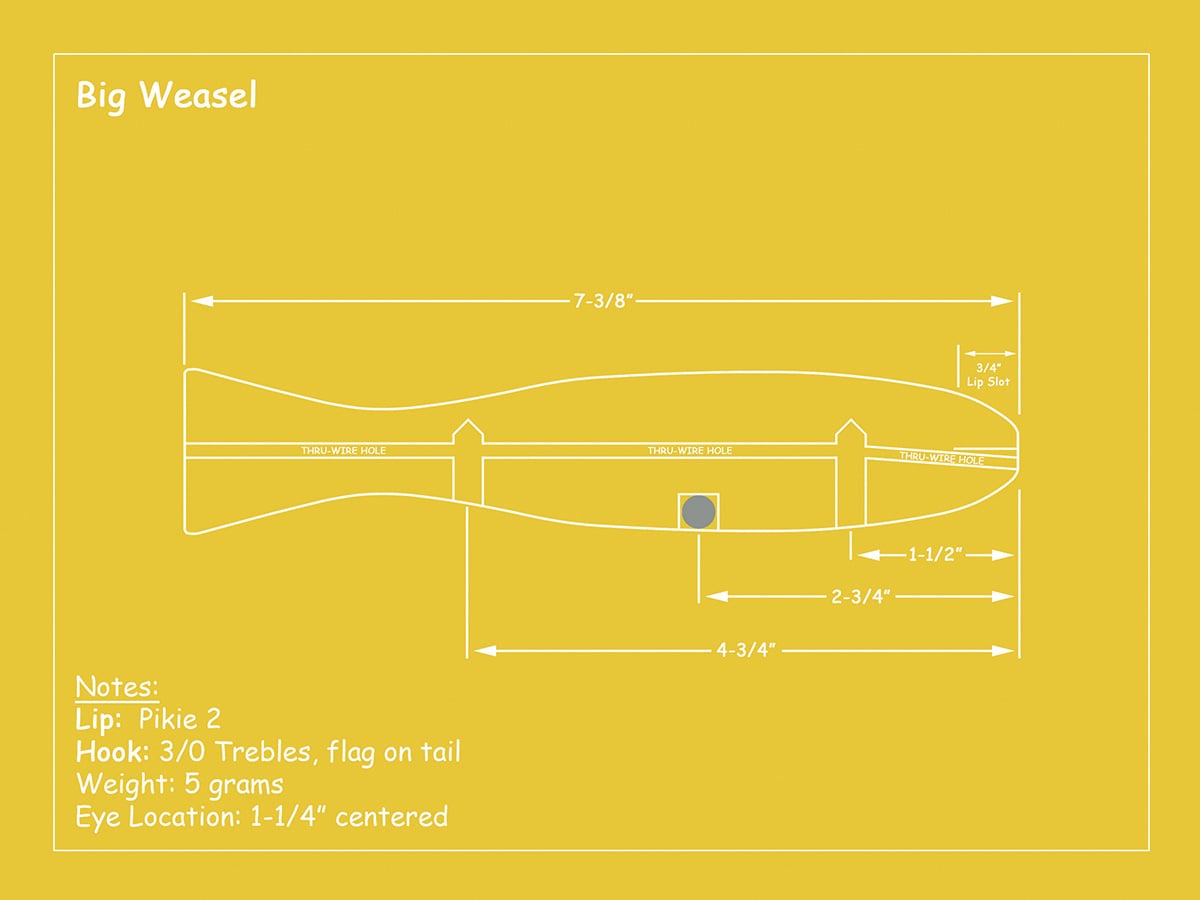
I have admired this design for more than a decade; the first ones I saw were made by Dave “MAC” MacLeod sometime around 2006, but I never attempted the build myself. Because of their scarcity, swimming an original is completely out of the question, so that leaves me to make my best guesses through prototyping. Furthermore there are conflicting reports on size, so I averaged the specs I read and settled on 7-3/8 inches.
An Advanced Build
Shaping the tail on these baits requires patience and a good eye for symmetry, if the tail is not made on-center, I would imagine it would dramatically affect the swimming action. I have developed a trick that will make it easier to shape the tail without losing sight of center, but it will require that your blanks are cut a little longer than usual, and PERFECTLY SQUARE. So let’s dive right in.

I found the best results with lighter woods like pine or red cedar. The finished bait measures 7-3/8 inches and with the trick for the tail and leaving the ends square we will need to add 1-1/2 inches to the block length, I round up to an even 9 inches of 1-1/2-by-1-1/2 inch square stock. The first thing you’ll need to do is drill a 3/8-inch reference hole about 3/4-inch from the tail of the blank. Care should be taken to center this hole perfectly and the hole should be drilled all the way through. Then you should cut the lip slot on the band saw, cutting the slot while the blank is square makes it easier to cut straight and keep it on center.
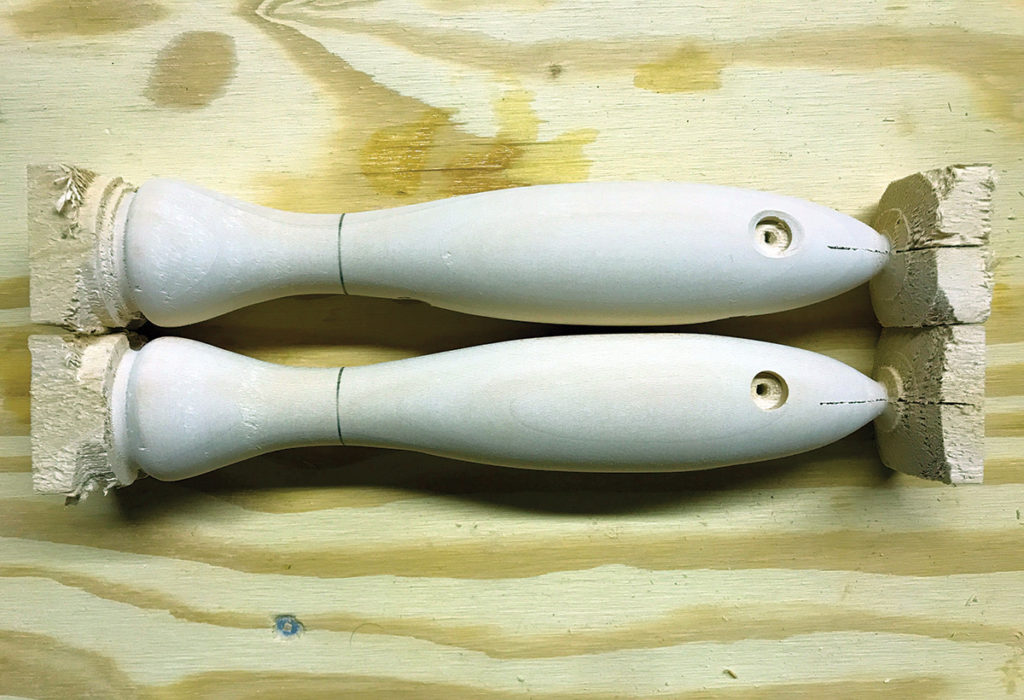
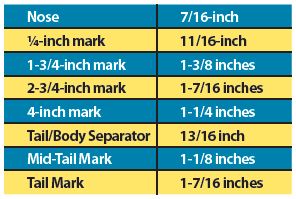
Now find the center at both ends and set the blank spinning in the lathe. Use a gouge to round off the corners, leaving about 1/2-inch of each end square. Shut the lathe off and lay out your reference marks using a ruler and pencil. Make the tail mark at the inside edge of the reference hole. Then make another mark 7-3/8 inches from the tail mark to represent the nose. Now make a mark 1-3/4 inches in from the tail, this is the dividing line between the body and tail.
For the body section you’ll need to make marks (measuring back from the nose) at 1/4-inch, 1-3/4, 2-3/4 and 4 inches. Then make a mark 1-inch in from the tail mark. Fire up the lathe and touch each mark with your pencil, make sure to refresh these marks as you remove wood so you don’t lose your grip on the shape. Basically what you’re going for is an elliptical body and a bell-shaped tail. Your target diameters are as follows.
Most of the shaping can be done with a skew chisel, the smaller the better. The inside curves in the transition between the body and tail will require a round-nosed chisel to work that radius properly. This is one build where having several sets of calipers will be particularly valuable; you can preset them and work down to the target diameters without having to keep reaching for the ruler. Keep in mind that this plug is a continuous curve, there are no straight lines and the perfect shape will look very fishy and natural. When you have something the looks like the diagram, sand everything smooth using strips of fine sandpaper—I use 180 grit.
More Power Tools
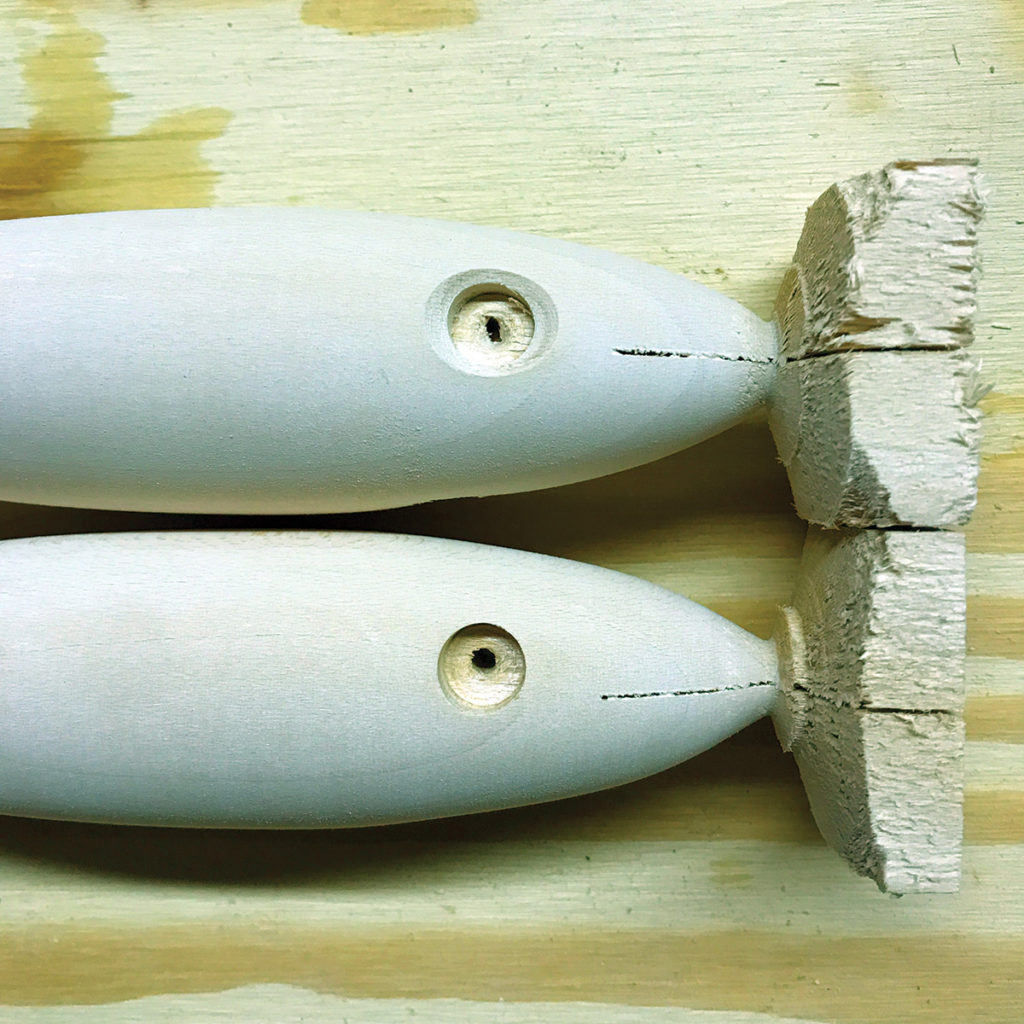
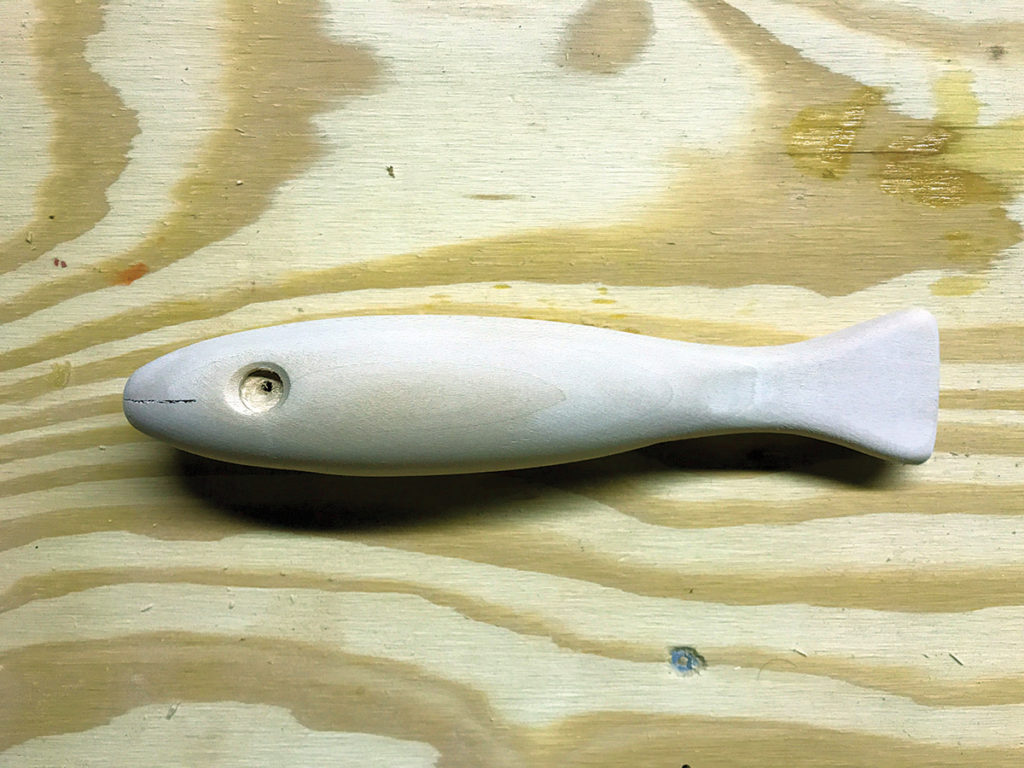
Now bring your bait over to the drill press and clamp an 11/32-inch bit in the chuck. Drill two centered holes in the belly, just past halfway through, one at 1-1/2 inches and another at 4-3/4 inches back from the nose. Now swap that bit out for a 3/8-inch forstner bit and drill a centered hole in the belly at 2-3/4 inches back from the nose for the belly weight, drill this hole about 1/2-inch deep. Now roll the plug on its side and drill the eye sockets at 1-1/4 inches back from the nose, the originals had theirs centered, I put mine 1/8-inch above center because I liked the way it looked. Drill these about 1/4-inch deep and then you’ll need a round grinding stone to recess the sockets. At this point you can thru-drill the plug from the tail into the forward hook hole. And now the fun begins.
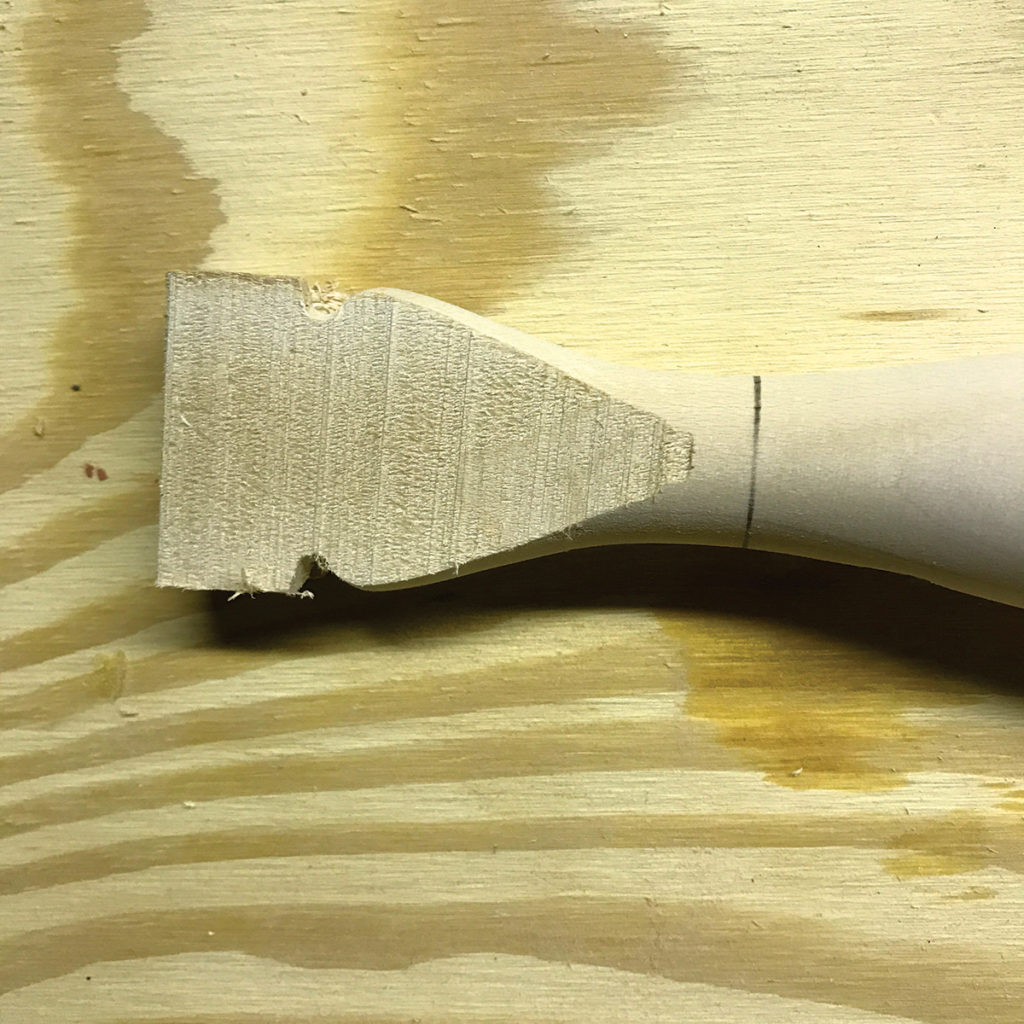
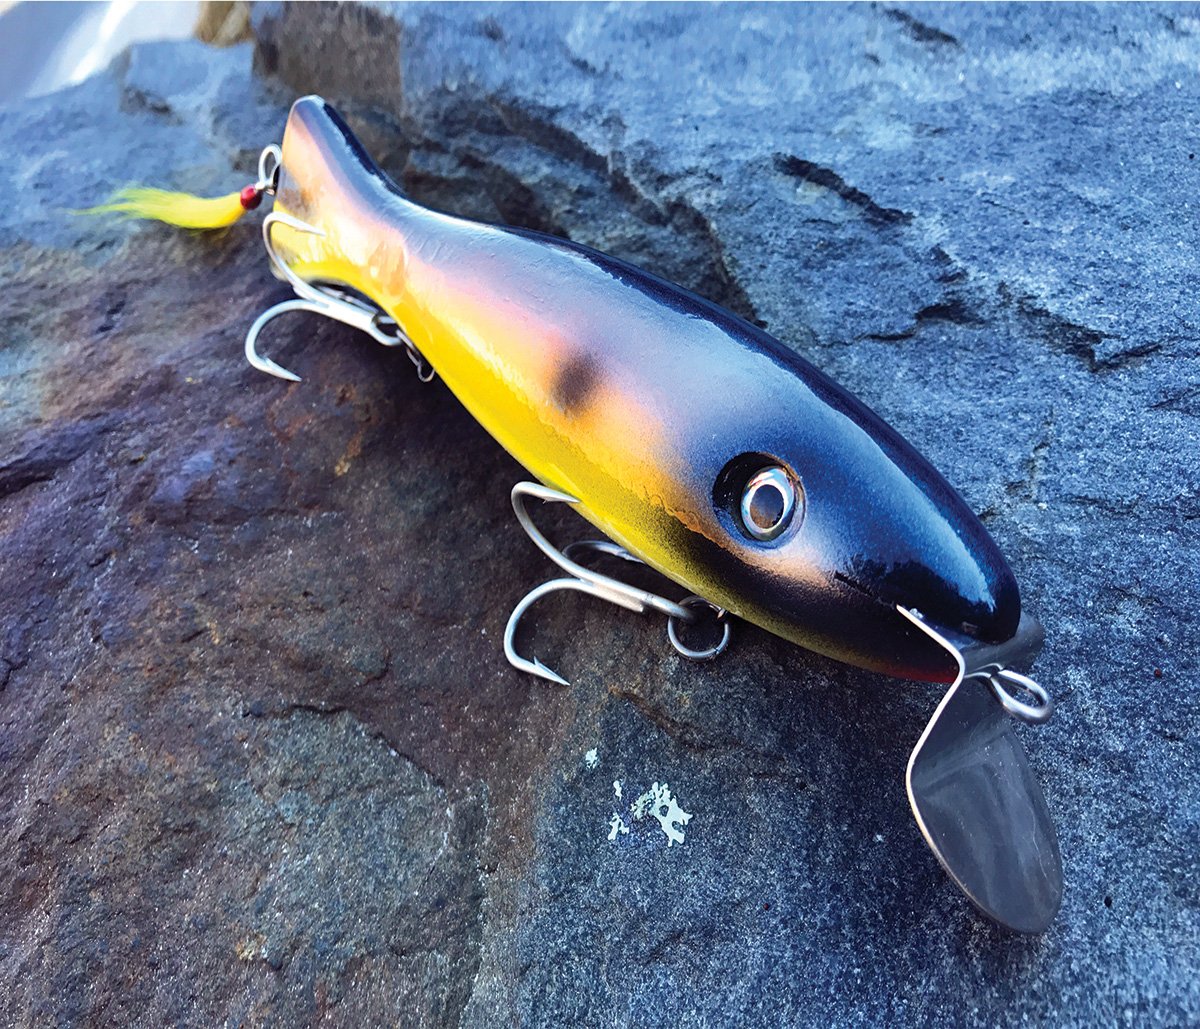
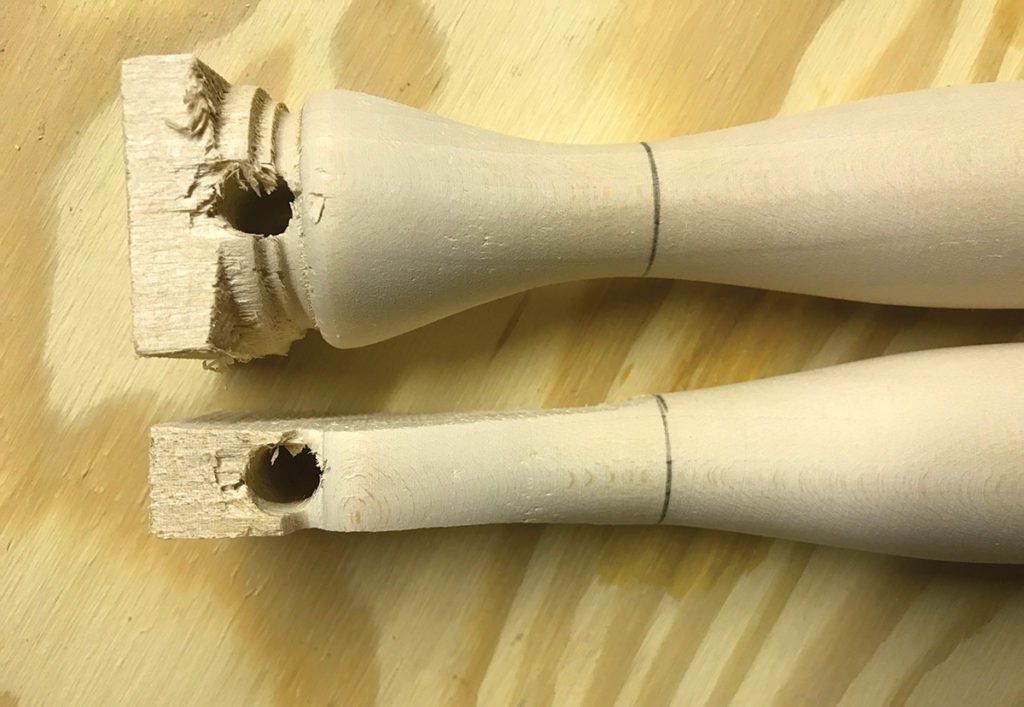
Let’s face it, the tail is what makes this plug so intriguing and it’s also the part that’s likely to give you the most fits. Start by rough cutting two (relatively) straight lines on the band saw. Leave some breathing room next to the reference hole we drilled at the beginning of the build and try to make the cut come out a little short of the narrowest point on the tail. And now you’ll need a belt sander to finish the job. That reference hole is your everything now. It’s your reference point for thickness and for keeping things straight. A perfectly-made Weasel would have the tail sanded down in a way that terminates the flat sides of the tail at the narrowest point of the wrist of the tail—mine is not perfect, but that’s okay. (And I totally botched my second one!) The trick is to just barely sand through the sides of the reference hole, this will give you the desired tail thickness of 3/8-inch. Do that on both sides and clean things up on the band saw—your Weasel should really be taking shape now. Drop a 0.17-ounce NJTackle belly weight into the hole, epoxy it into place and cover it with filler. When the filler is dry, give the whole deal a good sand with 220-grit paper, sanding the filler flush, rounding off all edges, softening the eye sockets, etc. Then slide a lip into the slot, mark the hole and finish the thru-hole with a hand drill.
Liquid Love
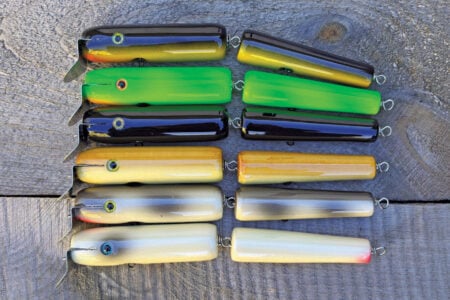
A bath in a 60/40 mix of high-gloss oil-based polyurethane and mineral spirits is next to seal the wood. Wipe them well and hang them to dry for a few days, when sanding produces fine, white dust, you’re ready for primer. A couple coats of Painter’s Touch All Purpose Primer and your Weasel is ready for your finest Charlie Russo imitation. If you Google ‘Snook Bait Co. Weasels’ you’ll see that they came in 12 standard colors, emulating those might be a lot of fun or just get crazy with the spray paint. When your creation is dry, glue the eyes into place and a couple coats of protective clear coat will finish the job.
When the clear has firmed up, wire your Weasels like any other plug, use size 1 Krok swivels for the belly hangers and a Pikie 2 lip; I add a drop of Super Glue under the lip to keep it in place. The originals were sold with three trebles, but I don’t like the look of the treble on that tail, it seems like an invitation for fouling and breakage, so I add a sparse hackle flag in its place with two 3/0 belly trebles.
The Weasel is a shallow swimmer, and really seems to like swimming right on top. The tail really makes it look more alive in the water as it swings to-and-fro sending little sprays of water in both directions as it wobbles along the surface. They will be a killer around the herring runs this spring or during the mullet run this fall. And as my fishing partner pointed out, they’d probably make a great largemouth bass lure as well. That’s it for the 2018 plug building class, see you next year!